Table of Contents
Advertisement
Advertisement
Table of Contents

Related Manuals for Bissell 1623 SERIES 1623 SERIES


Summary of Contents for Bissell 1623 SERIES 1623 SERIES
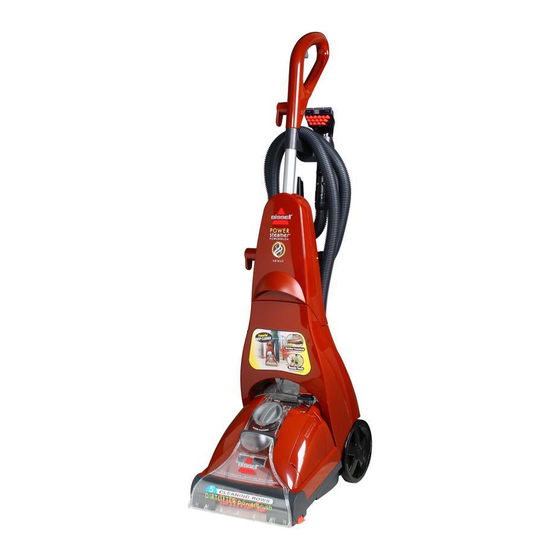
- Page 1 PowerSteamer Powerbrush Select U S E R ’ S G U I D E 1623 SERIES Safety Instructions Product View Assembly Special Features Operation 7-11 Maintenance and Care Troubleshooting Consumer Services Replacement Parts Additional Accessories Warranty ®...
- Page 2 BISSELL deep cleaner We’re glad you purchased a BISSELL deep cleaner. Everything we know about floor care went into the design and construction of this complete, high-tech home cleaning system. By purchasing this product you are helping BISSELL with our commitment to reducing our impact on the environment through an expand- ing range of sustainable design efforts.
-
Page 3: Important Safety Instructions
■ Do not unplug by pulling on the cord. ■ Use only manufacturer’s recommended attachments. ■ Use only cleaning products formulated by BISSELL for use in this appliance to prevent internal component damage. See the cleaning fluid section of this guide. -
Page 4: Product View
Cleaning fluid Keep plenty of genuine BISSELL 2X Fiber Cleansing Formula on hand so you can clean and protect whenever it fits your schedule. Always use genuine BISSELL deep cleaning formulas. Non-BISSELL cleaning solutions may harm the machine and will void the warranty. - Page 5 ssembly Your deep cleaner comes in five easy to assemble components: • Handle assembly • Upper body assembly • Upper hose rack • Lower body assembly • Lower hose rack Three Phillips head screws are included and can be found taped to the handle assembly. The only tool you will need to assemble your cleaner is a Phillips head screwdriver.
-
Page 6: Measuring Cup
BISSELL deep cleaner Your BISSELL deep cleaner is a home cleaning system that uses a combination of hot tap water, BISSELL advanced cleaning formula, brush agitation and suction to safely clean carpets. DirtLifter PowerBrush ® The DirtLifter PowerBrush is designed to enhance cleaning performance. -
Page 7: Operation
5. Pretreating (optional) Pretreating is recommended to improve cleaning effectiveness for heavily soiled carpet in high traffic areas such as entry ways and hallways. To pretreat: A. Using the BISSELL Tough Stain Pre-cleaner, generously spray evenly over soiled area, do not overwet. B. Wait 3-5 minutes before deep cleaning. C. Clean as normal using your BISSELL deep cleaner, following the instructions below. Fill the 2-in-1 water tank 1. Remove the tank from the base of the machine... - Page 8 Handle Release Power Switch WARNING: To reduce the risk of fire and electric shock due to internal component damage, use only BISSELL cleaning fluids intended for use with the deep cleaner. Non-BISSELL cleaning solutions may harm the machine and void the warranty.
- Page 9 peration Empty the 2-in-1 water tank/ clean removable nozzle 1. Turn power switch OFF. Remove the 2-in-1 water tank from the base using the tank carry handle. Carry the tank like a bucket to a utility sink or outside where you will dispose of the collection water. Remove the top of the tank by rotating the handle forward to unlatch lid and lifting lid off tank. 2. Empty collection water from bottom of tank. 3. After each use, remove and rinse the lint screen located on the tank lid. 4. If nozzle needs to be cleaned: remove by grasping handle at the top and pulling forward. Clean removable nozzle by rinsing under running water. 5. When finished, replace nozzle by slightly raising front of machine to line up slots on the base with the hooks on nozzle. Attach at base first and then click nozzle into place. NOTE: If nozzle is not attached properly loss of suction will occur. 6. To continue carpet cleaning, refer back to pages 7 through 8, beginning with “Fill the 2-in-1 water tank” on page 7.
- Page 10 peration Ready Tools™ 5. Vacuum thoroughly to pick up loose debris and pet hair. Use a vacuum with a brush attachment and a crevice tool to clean in fabric folds and tufts. 6. To begin cleaning with attachments, follow the instructions on pages 7-8 for filling the 2-in-1 water tank. 7. Set the ReadyTools dial to the TOOLS setting. This will allow spray and suction from the hose. 8. Attach the cleaning tool to the end of the hose. 9. Clean by pressing the trigger to spray solution onto the area to be cleaned. Slowly move the tool back and forth over the soiled surface. Release the trigger to suction dirty water. Continue to clean in the area, working in small sections, until dirt is removed. Caution: Do Not Overwet. 10. When finished cleaning, remove and rinse tool(s) in clean, running water. 11. It is recommended that you suction clean water from a bowl to rinse out the hose. 12. Before wrapping hose onto tool rack, lift end of hose and stretch out to ensure all water is cleared from hose. 13. Wrap flex hose around tool rack. 14. Empty 2-in-1 water tank and rinse out, following instructions on page 9.
-
Page 11: Hard Floor Cleaning
Caution: Do not use on unsealed hardwood floors. 1. Thoroughly vacuum or sweep floor to pick up any debris. NOTE: Prior to filling with formula and water, be sure all carpet cleaning formula is thoroughly rinsed from tank. 2. Fill BISSELL 2X Hard Floor Solutions Formula to the indicated fill line in the built in measuring cup and pour into mouth of bladder. 3. Fill the bladder with clean hot tap water and set aside. 4. Attach the hard floor tool to the bottom of... -
Page 12: Machine Storage
aintenance and care Machine care For best results, a few simple steps can assure your machine is well maintained after your cleaning is complete. 1. Turn power switch OFF. Unplug the machine and wrap the power cord. 2. After emptying the 2-in-1 water tank, rinse it with running hot tap water, taking care to clean underneath and around the heavy duty bladder. Clean out red lint screen. Removable nozzle may be rinsed if necessary. Refer to page 9. 3. Replace the 2-in-1 water tank on the machine. 4. Any loose hair or debris can be pulled from the brush roll and thrown away. 5. To clean attachments, remove from hose and rinse in clean, running water. Dry before storing. -
Page 13: Troubleshooting
Please do not return this product to the store For any questions or concerns, BISSELL is happy to be of service. Contact us directly at 1-800-237-7691. w w w . b i s s e l l . c o m... -
Page 14: Replacement Parts
ISSELL Consumer Services for information about repairs or replacement parts, or questions about your warranty, call: Or visit the BISSELL website - www.bissell.com or www.2Xbissell.com When contacting BISSELL, have model number of unit available. Please record your model number: ___________________ Please record your Purchase Date: ___________________ NOTE: Please keep your original sales receipt. -
Page 15: Additional Accessories
These items are available for purchase as accessories for your BISSELL PowerSteamer Select: To purchase call 1-800-237-7691 or visit www.bissell.com. Item Part No. 203-5641 203-6651 203-6653 203-6654 203-6652 203-0116 203-6655 210-3040 62E5 99K5 89Q5 83P3 34B5 78h6 56L9... - Page 16 BISSELL homECARE, InC. IS noT LIABLE foR InCIDEnTAL oR ConSEQUEnTIAL DAmAGES of Any nATURE ASSoCIATED WITh ThE USE of ThIS PRoDUCT. BISSELL’S LIABILITy WILL noT EXCEED ThE PURChASE PRICE of ThE PRoDUCT. Some states do not allow the exclusion or limitation of incidental or consequential damages, so the above limitation or exclusion may not apply to you.