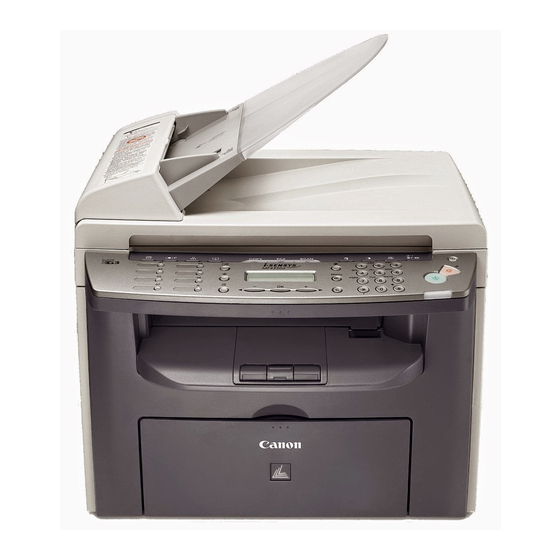
Canon imageCLASS MF4100 Series Starter Manual
Imageclass mf4100 series
Hide thumbs
Also See for imageCLASS MF4100 Series:
- Starter manual (19 pages) ,
- Basic manual (165 pages) ,
- Service manual (140 pages)
Summary of Contents for Canon imageCLASS MF4100 Series
- Page 1 Series Starter Guide Please read this guide before operating this product. After you finish reading this guide, store it in a safe place for future reference.
-
Page 2: Set Up The Machine
Set Up the Machine Unless otherwise mentioned, the illustrations used in this manual are those taken when no optional equipment is attached to the MF4150, and also the menus described in this manual are based on the MF4150. Unpacking the Machine ●... -
Page 3: Do You Have Everything
Do You Have Everything? ●Dust Cover (enclosed in the machine) ●Machine ●Handset (optional)* ●Handset Cradle (optional)* Manuals for the Machine ● Starter Guide (This Document): Machine set-up and software installation ● Basic Guide : Basic features, maintenance, machine settings, and specifications ●... -
Page 4: Install Toner Cartridge
(B). CAUTION – Be careful not to get your fingers caught. – If you cannot close the printer cover, do not force it to close. Open the cover and make sure the toner cartridge is properly set in the machine. - Page 5 Set Up the Paper Trays and Load Paper Open the paper feeding tray. Take out the dust cover from inside the machine. Load the paper into the paper feeding tray with Adjust the paper guide rail to match the size of the print side up.
-
Page 6: Connect Telephone Cables
Connect Telephone Cables and Install Handset Connect Telephone Cables Connect the optional handset to the handset jack (A). Connect your external telephone to the external device jack (B) if required. Connect the supplied telephone cable to the telephone line jack (C) and the wall jack. Insert the plugs (with the cradle) into the holes Carefully push the pins into the plugs as far as on the machine. -
Page 7: Connect Power Cord
What if... ● <CLOSE COVER/PRINTER COVER> is displayed: Make sure that the printer cover and scanning platform are closed properly. (See “Install Toner Cartridge,” on p. ● <TONER IS NOT SET/INSERT TONER> is displayed: Make sure that the toner cartridge is installed properly. (See “Install Toner Cartridge,” on p. 5.) ●... - Page 8 Set the Date and Time (MF4140/MF4150 Only) Numeric Keys [Stop/Reset] [Additional Functions] [OK] ● Entering Information Press [Additional – Numeric keys: Enters numbers. Functions]. – [ ] or [ ]: Moves the cursor position. – [OK]: Confirms the entry. Use the numeric keys to enter the time (in 24- hour format) and date (day/month/year), then...
-
Page 9: Guidelines For Entering Information
Set the Machine for Sending Faxes Guidelines for Entering Information The sender information you register in the machine appears in the header of each page received by your recipient. Fax/telephone number Job Number Date and time Unit name NOTE Before sending a fax, you MUST register your fax number, unit name, and the current date and time in the machine. Entering Information Use the following keys to enter information in the machine. -
Page 10: Register Sender Information
Register Sender Information Press [Additional Use [ ] or [ ] to Functions]. select <5 FAX SETTINGS>, then press [OK]. Use [ ] or [ ] to Use the numeric keys to select <2 UNIT NAME>, enter the unit name (up then press [OK]. -
Page 11: Select The Receive Mode That Suits Your Needs
Set the Machine for Receiving Faxes Select the Receive Mode that Suits Your Needs Follow the chart below to determine the correct receive mode for your needs. Do you intend to use the machine to receive voice calls? Do you intend to use an answering machine with the machine? Do you intend to receive faxes automatically? -
Page 12: Installing/Uninstalling Software
Installing/Uninstalling Software Installation Procedure Before Installation: • Do not connect the USB cable before installing the software. If you connect the USB cable before installing the software and the Found New Hardware Wizard screen appears, click [Cancel] and disconnect the USB cable. •... -
Page 13: Uninstallation Procedure
You have now completed installation. Uninstalling the MF Toolbox Click [start] on the Windows task bar → [(All) Programs] → [Canon] → [MF Toolbox 4.9] → [Toolbox Uninstall]. Click [Delete]. Click [Yes]. Uninstallation proceeds automatically and next dialog box appears. - Page 14 Bundled Programs on the User Software CD To install the following programs, load the User Software CD into a computer, then follow the instructions on the CD-ROM Setup (Software programs) screen. If the screen is not displayed, click [Start] on the Windows →...
-
Page 15: Using Help
Using Help The user software CD includes programs (driver software and application software) which the supplied instruction guides do not cover. When you utilize such programs, refer to online help and context sensitive help following the instructions below. Online Help You can locate additional help in the online help file provided with the driver software. - Page 16 The targeted products are office equipment, Copyright such as computers, displays, printers, facsimi- Copyright © 2006 by Canon Inc. All rights reserved. No part of this les, and copiers. The standards and logos are publication may be reproduced, transmitted, transcribed, stored in a uniform among participating nations.
- Page 17 A Tip for Saving Paper The machine comes with useful features that can be combined to reduce the volume of paper used when copying. Copying regularly Copying with features combined ■ Collate Copying (See the Advanced Guide.) AAAA AAAA BBBB AAAA BBBB CCCC...
- Page 18 CANON INC. 30-2, Shimomaruko 3-chome, Ohta-ku, Tokyo 146-8501, Japan CANON U.S.A., INC. One Canon Plaza, Lake Success, NY 11042, U.S.A. CANON CANADA INC. 6390 Dixie Road Mississauga, Ontario L5T 1P7, Canada CANON EUROPA N.V. Bovenkerkerweg 59-61 1185 XB Amstelveen, The Netherlands CANON FRANCE S.A.S.


