Asus WL-520G User Manual
Asustek wireless router user manual
Hide thumbs
Also See for WL-520G:
- User manual (32 pages) ,
- Quick start manual (136 pages) ,
- Quick start manual (8 pages)
Table of Contents
Advertisement
Advertisement
Table of Contents

Related Manuals for Asus WL-520G


Summary of Contents for Asus WL-520G
- Page 1 ® WL-520g Wireless Router User Manual...
-
Page 2: Table Of Contents
2) Status Indicators ...3 3) Wall Mounting Option ...4 3. Configuring the Wireless Router ...5 1) ASUS Wireless Router Wired Connection ...5 2) Setting IP address for Wired or Wireless Connection ...5 3) Configuring the Wireless Router ...6 4) Quick Setup ...7 4. -
Page 3: Package Contents
WL-520g Wireless Router User Manual 1. Package Contents • WL-520g wireless router*1 • Power adaptor*1 • External antenna*1 • Utility CD*1 • RJ45 cable*1 • Quick Start Guide*1 Manufacturer Contact Information ASUSTeK COMPUTER INC. (Asia-Pacific) Company address: 15 Li-Te Road, Beitou, Taipei 11259... -
Page 4: Connecting Adsl Modem And Wireless Router
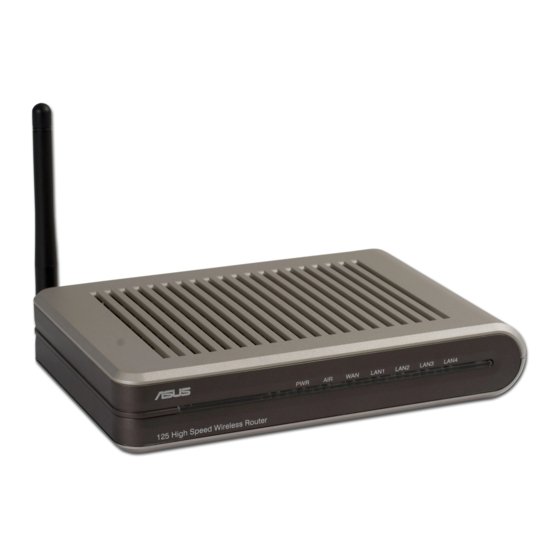
Transmitting or receiving data (through Ethernet wire) LAN 1-4 (Local Area Network) No power or no physical connection Has physical connection to an Ethernet network Flashing Transmitting or receiving data (through Ethernet wire) WL-520g Wireless Router User Manual Modem Phone Modem ASUS Wireless Router LAN4... -
Page 5: Wall Mounting Option
WL-520g Wireless Router User Manual 3) Wall Mounting Option Out of the box, the ASUS Wireless Router is designed to sit on a raised flat surface like a file cabinet or book shelf. The unit may also be converted for mounting to a wall or ceiling. -
Page 6: Configuring The Wireless Router
ASUS Wireless Router so you can use either straight-through or crossover Ethernet cable. Plug one end of the cable into the WAN port on the rear of the ASUS Wireless Router and the other end into the Ethernet port of your ADSL or Cable modem. -
Page 7: Configuring The Wireless Router
WL-520g Wireless Router User Manual Note: Before rebooting your PC, the ASUS Wireless Router should be switched ON and in ready state. Setting IP Manually If you want to set your IP address manually, the following default settings of the ASUS Wireless Router should be known: •... -
Page 8: Quick Setup
Select your time zone or the closest region. Click Next to continue. ASUS wireless router WL520g supports five types of ISP services— cable, ADSL (PPPoE, PPTP, static IP address), and Telstra BigPond. Since each service has its own protocols and standards, therefore, during the setup process, there are different identity settings demanded by WL-520g. - Page 9 WL-520g Wireless Router User Manual PPPoE User If you are PPPoE service user, pleae select the second line. You would be required to input the username and password provided by your ISP. PPTP User If you are using PPTP services, you would be asked to input the username, password, as well as IP address provided by your ISP.
- Page 10 Next we are to setup encrypted wireless connection for wireless router and wireless client. If you have installed ASUS wireless adaptor as well as the utility, click Start -> Programes -> ASUS Utility -> WLAN Card -> One Touch Wizard to open the connection setup utility on the client end.
- Page 11 Next to continue. The setup wizard then asks for encryption setup. Set Key Length as 64 bits (10digits) as we have previously set on WL-520g, then select Automatic Generation and input 11111 into the Passphrase box. Note: The encryption mode on your client must be the same with that on your wireless router.
- Page 12 Connect to complete connection. To adjust other settings, click on items on the menu to reveal a submenu and follow the instructions to setup the ASUS Wireless Router. Tips are given when you move your cursor over each item. WL-520g Wireless Router User Manual...
-
Page 13: Commonly Used Advanced Features
1) How to Setup Encryption WL-520g Encryption Setup Please refer to P.7 for encryption setup information or to use ASUS EZSetup features which enable a quick encryption setup through several clicks (Page 25-26). 2) Setting up a Server in Your LAN Virtual Server is a kind of technology which enables a computer to receive specialized packets from network. -
Page 14: Setting Up Switching Hub & Pure Ap (Non Ip Share Nat)
Please use it carefully. First we are to get the IP address of the host. Open the Windows® Start menu and select My Network Places. WL-520g Wireless Router User Manual DSL or Cable Modem LAN4 LAN2 LAN1... - Page 15 WL-520g Wireless Router User Manual Click View network connections. Right click Local Area Connection and select Properties. Double-click Internet Protocol (TCP/IP). Get the current TCP/IP settings. Click Virtual DMZ in the NAT Settings menu. Enter the IP address of the host and click Finish.
-
Page 16: Setting Up Ddns
Dynamic DNS (DDNS) allows user to export host name to Internet through DDNS service provider. Each time the ASUS Wireless Router connect to Internet and get an IP address from ISP, this function will update your IP address to DDNS service provider automatically, so that any user on Internet can access the wireless network or servers behind it through a predefined name registered in DDNS service provider. - Page 17 WL-520g Wireless Router User Manual Open your e-mail to find the activation letter. Click the hyperlink to activate your account. Then press login. Enter your user name and password you have set when you were applying for the account. After logging in, you would see the welcome message.
-
Page 18: Setting Up Wds
WDS system is allowed, that is AP1 in this example. Access Point A SSID WL520g LAN IP Address 192.168.1.1 Encryption NONE Wireless Bridge Hybrid Mode MAC Address 000ea6a13f6e Allow Anonymous WL-520g Wireless Router User Manual Access Point B WL520g 192.168.1.2 NONE Hybrid Mode 000ea6a13f87... - Page 19 WL-520g Wireless Router User Manual First, we are to set up AP1. Choose Bridge in the Wireless folder. Set the SSID as WL520g and WEP Encryption as None. We suggest AP1 and AP2 using the same SSID. Select WAN & LAN in the IP Config folder.
- Page 20 LAN. Enter the DHCP Server page in IP Config folder. Choose No to disable DHCP Server and press Apply botton. Repeat step 5-10. Then enter the MAC address of AP1, i.e., 000ea6a13f6e. Repeat step 11-12. After reboot, WDS would work. WL-520g Wireless Router User Manual...
-
Page 21: Trouble Shooting
WL-520g Wireless Router User Manual 5. Trouble Shooting 1. Cannot access to web browser for router configuration 1. Open a web browser and open "Internet Options" dialog box. 2. Cannot Establish Connection via Wireless Out of Range: Put the router closer to the client. -
Page 22: Setup
The following are factory default values. These values will be present when you first receive your ASUS Wireless Router, if you push the restore button on the back of the ASUS Wireless Router over 5 seconds, or if you click the “Restore” button on the “... -
Page 23: Additional Information: Router & Client Wireless Connection Setup
WL-520g Wireless Router User Manual 6. Additional Information: Router and Client Wireless Connection Setup 1) Utility Installation for WL-520g 1. Click the first line Install ASUS Wireless Router Utilities to run the setup installation program. 3. Click Next to confirm the designated location for installation. -
Page 24: Ezsetup (Default)
PWR indicator will flash and Internet connections will pause for a short period but will then return to normal operation without change. 2) You must have ASUS wireless clients such as WL-100gE, WL-100g Deluxe and WL-167g to use WL-520g EZSetup. - Page 25 WL-520g Wireless Router User Manual Select the connection type (Cable or ADSL) you use.(Example: Cable modem or other connection type that gets IP automatically ) Depending on the connection type you selected, you may require additional information from your ISP. Some fields are optional and may be left blank.
-
Page 26: Ezsetup (Customized)
You must enter a name if unchecked. You can choose to use automatic or manual security key. If all your clients are using ASUS WPA capable wireless network adapters, you can select WPA for extra strength security. (This selection will only be available for ASUS WPA adapters.) - Page 27 WL-520g Wireless Router User Manual If you chose “Manually assign” and selected the WPA check box , enter a WPA (Wi-Fi Protected Access) key following the guideline as shown. Security-enabled wireless LAN environment is built now.You can print your key and your other network settings for your reference.
-
Page 28: Appendix
20cm between the radiator and your body. Use on the supplied antenna. Declaration of Conformity for R&TTE directive 1999/5/EC Essential requirements – Article 3 Protection requirements for health and safety – Article 3.1a WL-520g Wireless Router User Manual... -
Page 29: Ce Mark Warning
WL-520g Wireless Router User Manual Testing for electric safety according to EN 60950-1 has been conducted. These are considered relevant and sufficient. Protection requirements for electromagnetic compatibility – Article 3.1b Testing for electromagnetic compatibility according to EN 301 489-1 and EN 301 489-17 has been conducted. - Page 30 WL-520g Wireless Router User Manual...
- Page 31 WL-520g Wireless Router User Manual...