Table of Contents
Advertisement
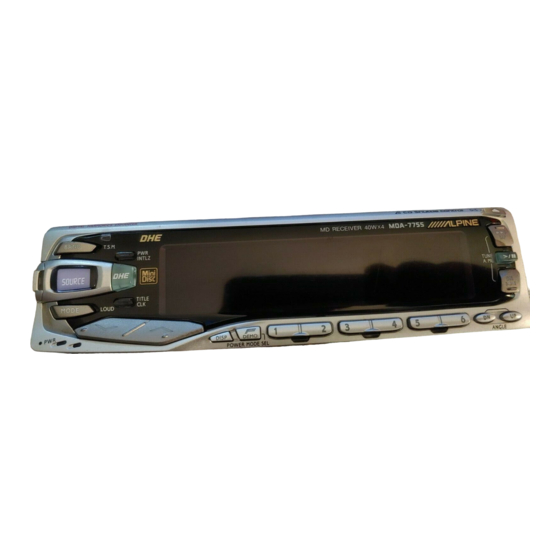
MDA-7755
MD Receiver
OWNER'S MANUAL
Please read this manual to maximize your enjoy-
ment of the outstanding performance and feature
capabilities of the equipment, then retain the
manual for future reference.
MODE D'EMPLOI
Veuillez lire ce mode d'emploi pour tirer pleinement
profit des excellentes performances et fonctions
de cet appareil, et conservez-le pour toute référen-
ce future.
MANUAL DE OPERACIÓN
Lea este manual, por favor, para disfrutar al máxi-
mo de las excepcionales prestaciones y posibilida-
des funcionales que ofrece el equipo, luego
guarde el manual para usarlo como referencia en
el futuro.
R
Advertisement
Table of Contents

Related Manuals for Alpine MDA-7755


Summary of Contents for Alpine MDA-7755
- Page 1 MDA-7755 MD Receiver OWNER'S MANUAL Please read this manual to maximize your enjoy- ment of the outstanding performance and feature capabilities of the equipment, then retain the manual for future reference. MODE D'EMPLOI Veuillez lire ce mode d'emploi pour tirer pleinement profit des excellentes performances et fonctions de cet appareil, et conservez-le pour toute référen-...
- Page 2 WARNING The exclamation point within an equilateral triangle and "WAR- NING" are intended to alert the user to the presence of important operating instructions. Failure to heed the instructions will result in severe injury or death. DO NOT DISASSEMBLE OR ALTER. Doing so may lead to accident, fire or electric shock.
- Page 3 WARNING English HALT USE IMMEDIATELY IF A PROB- LEM APPEARS. When problems occur such as a lack of sound or video, foreign objects inside the unit, smoke coming out, or noxious odors, stop use immediately and contact the dealer where you bought the equip- ment.
- Page 4 WARNING DO NOT USE THIS EQUIPMENT FOR PURPOSES OTHER THAN STATED FOR THE VEHICLE. Failure to do so may result in electric shock or injury. DO NOT PLACE FOREIGN OBJECTS IN INSERTION SLOTS OR GAPS. Do not insert hands, fingers or foreign objects in the disc or cassette inser- tion slots, or in gaps during monitor startup/storage.
- Page 5 CAUTION English The exclamation point within an equilateral triangle and "CAUTION" are intended to alert the user to the presence of important operating instructions. Failure to heed the instructions can result in injury or material damage. DO NOT BLOCK VENTS OR RADIA- TOR PANELS.
-
Page 6: Table Of Contents
Precautions ... 9 Basic Operation Detaching the Front Panel ... 12 Attaching the Front Panel ... 13 Initial System Start-Up ... 14 Turning Power On and Off ... 15 Adjusting Volume/Bass/Treble/Balance (Between Left and Right)/Fader (Between Front and Rear) ... 16 Non Fading Pre-Out (N.F.P.) On and Off ... - Page 7 Précautions ... 9 Fonctionnement de base Retrait du panneau avant ... 12 Pose du panneau avant ... 13 Mise en service de l'appareil ... 14 Mise sous et hors tension ... 15 Réglage du volume/graves/aigus/balance droite-gauche/balance avant-arrière ... 16 Mise en et hors service de sortie préampli sans fader (N.F.P.) ...
- Page 8 Precauciones ... 9 Operación básica Extracción del panel frontal ... 12 Fijación del panel frontal ... 13 Puesta en funcionamiento inicial del sistema ... 14 Conexión y desconexión de la alimentación ... 15 Ajuste del volumen/los graves/los agudos/el equilibrio entre los altavoces derechos e izquierdos/el equilibrio entre los altavoces delanteros y traseros ...
-
Page 9: Precautions
Mantenimiento Si tiene problemas, no intente reparar la unidad por sí mismo. Devuélvala a su proveedor Alpine o a la estación de servicio Alpine para que se la reparen. Reemplazo de fusibles Cuando reemplace fusibles, los nuevos deberán ser del mismo amperaje que el... - Page 10 Precautions New Discs Before inserting an MD Never install warped or irregular shaped MD into this unit. Use your finger to feel around the outer edge of the MD to make sure there are no irregularities. Inserting defective or damaged MD could severely damage the mechanism.
-
Page 11: Emplacement De Montage
Playing an MD while driving on a very bumpy road may result in skips, but this will not damage the player. Installation Location Make sure the MDA-7755 will not be exposed to: Direct sun and heat High humidity Excessive dust... -
Page 12: Detaching The Front Panel
Detaching the Front Panel Press the PWR (Power) button to turn off the power. Press the Release button at center left side until the front panel pops out. Grasp the left side of the front panel and pull it out. Notes: The front panel may become hot with normal use (especially the... -
Page 13: Attaching The Front Panel
Attaching the Front Panel 1. First, insert the right side of the front panel into the main unit. Align the groove on the front panel with the projections on the main unit. 2. Push the left side of the front panel until it locks firmly into the main unit. -
Page 14: Initial System Start-Up
Initial System Start-Up Immediately after installing or applying power to the unit, it should be initialized. Press the RESET button at lower left corner of the front panel. English Mise en service de l'appareil Immédiatement après l'installation ou la mise sous tension, l'appareil doit être initialisé. -
Page 15: Turning Power On And Off
Turning Power On and Off Press the PWR (Power) button to turn on the unit. Note: The unit can be turned on by pressing any other button except the Release and O/C (c) buttons. The volume level gradually increases to the previous level you were listening to before the unit was turned off. -
Page 16: Adjusting Volume/Bass/Treble/Balance (Between Left And Right)/Fader (Between Front And Rear)
Adjusting Volume/Bass/Treble/ Balance (Between Left and Right)/Fader (Between Front and Rear) Press the MODE button repeatedly to choose the desired mode. Each press changes the modes as follows: VOLUME BASS FADER BALANCE Note: If the MODE button is not pressed within 5 seconds after selecting the BASS, TREBLE, BALANCE, or FADER mode, the unit automatically... -
Page 17: Non Fading Pre-Out (N.f.p.) On And Off
Non Fading Pre-Out (N.F.P .) On and Off Use the N.F.P. On mode when a non- fading signal would be most effective. For example, to drive an amplifier with a low-pass filter for the subwoofer. Press and hold the INTLZ button for more than 3 seconds. - Page 18 Press the TUNE button to toggle mode between NFP ON and NFP OFF. N.F.P. ON: In this position, the Front Pre- Output will not be affected by the fader. This is ideal for driving a subwoofer amplifier. N.F.P. OFF: Returns to normal fader mode.
-
Page 19: Subwoofer On And Off
Subwoofer On and Off If an Ai-NET compatible processor with Subwoofer output is connected, its settings can be changed from the MDA-7755. Press and hold the INTLZ button for more than 3 seconds. Press the f UP button repeatedly to select "SUBWOOFER."... - Page 20 Press the INTLZ button after setting the subwoofer ON. Press the MODE button repeatedly to select the subwoofer mode. VOLUME Subwoofer Press the K or L button to adjust the subwoofer output level. The setting is displayed for 5 seconds and then memorized.
-
Page 21: Turning Loudness On/Off
Turning Loudness On/ Loudness introduces a special low- and high-frequency emphasis at low listening levels. This compensate for the ear's decreased sensitivity to bass and treble sound at these low listening levels. Press and hold the LOUD button for at least 3 seconds to activate or deactivate the loudness mode. -
Page 22: Sound (Beep) Guide Function
Sound (Beep) Guide Function This function will give audible feedback with varying tones depending upon the button pressed. Press and hold the INTLZ button for more than 3 seconds. Press the f UP button repeatedly to select "BEEP." Each press of the f UP button changes the modes as shown: Note: If you press the DN g button the display scrolls in reverse sequence. -
Page 23: Dimmer Control
Dimmer Control Set the DIMMER control to AUTO to decrease the illumination brightness of the unit with the head lights of the vehicle ON. This mode is useful if you feel the unit's backlighting is too bright at night. Press and hold the INTLZ button for more than 3 seconds. -
Page 24: Turning Mute Mode On/Off
Turning Mute Mode On/Off If a device having the interrupt feature is connected, audio will be automatically muted whenever the interrupt signal is received from the device. This function can be turned ON or OFF from the head unit by following procedure below. Press and hold the INTLZ button for at least 3 seconds. -
Page 25: Adjusting Display Contrast
Adjusting Display Con- trast You can adjust the display contrast for better visibility. Press and hold the INTLZ button for at least 3 seconds. Press the f UP button repeatedly to select "CONTRAST". Each press of the f UP button changes the modes as shown: DIMMER BEEP... -
Page 26: Md Text Scroll Setting
MD Text Scroll Setting The MD player has the ability to scroll the disc and track names greater than 16 characters. This scrolling feature will only work with discs that have been prere- corded with the titles. Press and hold the INTLZ button for at least 3 seconds. - Page 27 Press the TUNE button to toggle mode between SCROLL AUTO and MANUAL. SCROLL AUTO: the display of MD text is scrolled continuously. SCROLL MANUAL: the display is scrolled only when a disc is loaded or when a track is changed and the text information exceeds 16 digits.
-
Page 28: Demonstration
Demonstration This unit has the Demonstration feature which simulates the display functions on the display panel. Press and hold the DEMO button for at least 3 seconds. The Demonstration mode activates and starts the display simulation automatically. To end the DEMO mode, press and hold the DEMO button for at least 3 seconds. -
Page 29: Display Angle Adjustment
Display Angle Adjust- ment The movable display may be adjusted to 3 different angles depending upon user preference. Press the button to adjust the angle of the movable display. Notes: The display will close a half minute after the ignition key is turned to the OFF position. -
Page 30: Switching The Display Modes
Switching the Display Modes Press the DISP (DISPLAY) button to select the desired Display pattern mode. Each press changes the display patterns as shown in page 31. English Commutation des modes d'affichage Appuyez sur la touche DISP (affichage) pour sélectionner le mode de courbe d'affichage désiré. A chaque pression sur la touche la courbe d'affichage change comme montré... - Page 31 Pattern/ Display/Affichage/ Courbe/ Visualizador Patrón Description Normal Pattern (Upward) Courbe normal (Haut) Peak Value Increasing Courbe d'augmentation de Pattern la valeur crête Normal Pattern (Downward) Courbe normal (Bas) Peak Decreasing Pattern Motif décroissant de crêtes Mirror Pattern Courbe de spectre double (Up-downward) superposé...
-
Page 32: Displaying Time
Displaying Time Press the CLK (Clock) button repeatedly until the clock time is displayed. Each press changes the modes as follows: In the MD mode Normal DISC TEXT mode mode In the Radio mode Clock Priority Station Title mode mode Note: Selecting any tuner or MD function while in the clock priority mode will interrupt the time display momenta-... -
Page 33: Setting Time
Setting Time Press and hold the CLK (Clock) button for at least 3 seconds while the time is displayed. The time indication will begin to blink. Press the DN g or f UP button to adjust the hours while the time indication is blinking. -
Page 34: Selecting Dhe Mode
Selecting DHE Mode Using digital signal processing technol- ogy, DHE (Digital Harmonics Enhancer) operates on harmonic components which determine tone and coloration of the musical instruments. The process operates independently on individual frequency bands, so each instrument or vocal will be distinct. Play back clarity is enhanced to compensate for road noises which would normally detract from the listener's enjoyment. - Page 35 CDA-5755G fonctionnera. Remarques à utiliser après que le CDA- 5755G a été raccordé Le mode DHE n’est pas annulé lorsqu’il est activé depuis le MDA-7755. Pour l’annuler, tenez la touche DHE enfoncée pendant au moins 2 secondes. Phase MIX (DHE4) (DHE5) Español...
-
Page 36: Dhe Power Mode
DHE Power Mode indicator/ Témoin de mode puissant DHE/ Indicador de modo potente DHE DHE Power Mode Any of the DHE effects can be modified using the Power Mode. Enhanced bass and high frequencies will be added to the selected DHE effect. Press the DHE button to select the DHE effect you want to change. -
Page 37: Manual Tuning
Manual Tuning Press the SOURCE button until a radio frequency appears in the display. Press the BAND button repeatedly until the desired radio band is displayed. Each press changes the band: Press the TUNE button repeatedly until "DX SEEK" and "SEEK" disappear from the display. -
Page 38: Automatic Seek Tuning
Automatic Seek Tuning Accord par recherche Press the SOURCE button until a radio frequency appears in the display. Press the BAND button repeatedly until the desired radio band is displayed. Each press changes the band: Press the TUNE button to illuminate the DX and SEEK indicators in the display. -
Page 39: Manual Storing Of Station Presets
Manual Storing of Station Presets Select the radio band and tune in a desired radio station you wish to store in the preset memory. Press and hold any one of the preset buttons (1 through 6) for at least 2 seconds until the station frequency on the display blinks. -
Page 40: Automatic Memory Of Station Presets
Automatic Memory of Station Presets Press the SOURCE button to select the radio mode. Press the BAND button repeatedly until the desired radio band is displayed. Press and hold the A.ME button for at least 2 seconds. The display shows "AUTO MEMORY."... -
Page 41: Storing Into Direct Access Preset (D.a.p.) Band
Storing into Direct Access Preset (D.A.P.) Band A combination of radio stations in any band (up to 6 stations) can be manually preset into the D.A.P. band. Press the "F" button to illuminate the "FUNC" (Function) indicator. Press the D.A.P. button (preset 1) until the D.A.P. -
Page 42: Tuning To Preset Stations
Tuning to Preset Stations Press the SOURCE button to select the radio mode. Press the BAND button repeatedly until the desired band is displayed. To select the D.A.P. band, press the D.A.P. button (preset 1) until the D.A.P. indicator appears in the display. (See page 41.) Press the station preset button that has your desired radio station in memory. -
Page 43: Mono/Stereo Switching
Mono/Stereo Switching Press the "F" button to illuminate the "FUNC" indicator. "ST" indicator appears when a stereo FM station is tuned in. Press the MONO button (preset 2) to switch from stereo to monaural FM reception. This will help in reducing the noise of weak FM Stereo broadcasts. -
Page 44: Displaying The Title
Displaying the Title The titles for certain stations can be displayed if they were previously input. For details on inputting titles, see Titling Stations (page 45). Press the TITLE button while in the TUNER mode. The display mode changes every time the button is pressed. -
Page 45: Titling Stations
Titling Stations It is possible to title your favorite radio stations. Tune in a station to be titled. Press the TITLE button and select the title display mode. For details, see Displaying the Title (page 44). Press and hold the TITLE button for at least 3 seconds. - Page 46 Press the TUNE button to store the first character. The first character will stop blinking and the display will automatically advance to the next character. When that character begins to blink, you may choose the next letter or symbol of your title. Repeat the steps 4 to 6 above to complete the titling.
-
Page 47: Opening And Closing The Movable Display
Opening and Closing the Movable display Press the O/C (c) button. The movable display will open. To close the movable display, press the O/C (c) button again. The movable display will close. Notes: Do not apply shock to the movable display when it is open as it may result in malfunction of the unit. - Page 48 Caution: Keep hands (or any other object) away from the display while it is opening or closing to avoid damage or injury. The back of the movable display will get very warm under normal operating condi- tions. This is not a malfunction. Do not touch.
-
Page 49: Normal Play And Pause
Normal Play and Pause Open the movable display and insert an MD. The movable display automatically closes and the playback starts. When an MD is already inserted, press the SOURCE button to set the mode to MD. The mode will change each time the button is pressed. -
Page 50: Music Sensor (Skip)
Music Sensor (Skip) Momentarily press the DN g button once to return to the beginning of the current track. If you wish to access a track further back, repeatedly press until you reach the desired track. Press the f UP button once to advance to the beginning of the next track. -
Page 51: Repeat Play
Repeat Play Press the RPT button (preset 5) to play back repeatedly the track being played. The RPT indicator appears and the track will be played repeatedly. - RPT RPT (OFF) Press the RPT button (preset 5) again to deactivate the repeat play. English Lecture répétée Appuyez sur la touche RPT (préréglage 5) -
Page 52: Random Play)
M.I.X. (Random Play) Press the M.I.X. button (preset 4) in the play or pause mode. The M.I.X. indicator will illuminate and the tracks on the disc will be played back in a random sequence. After all the tracks on the disc have been played back once, the player will begin a new random sequence play until the M.I.X. -
Page 53: Scanning Programs
Scanning Programs Press the SCAN button (preset 6) to activate the Scan mode. The first 10 seconds of each track will be played back in succession. To stop scanning, press the SCAN button (preset 6) to deactivate the Scan mode. English Balayage des plages Appuyez sur la touche... -
Page 54: To Display Md Text
Lorsqu’un lecteur/changeur CD compatible avec le système CD-Text est raccordé, les informations concer- nant les CD seront affichées. S'il ya un CDA-5755G connecté: Le MDA-7755 indique: TEXT DISPLAY (DISC name) TEXT DISPLAY (TRACK name) Le CDA-5755G indique: TRACK No. and ELAPSED TIME TRACK No. - Page 55 For text displays exceeding 16 characters, press the SCROLL button (preset 3). This applies when the scroll setting is in the manual mode. The text is scrolled one line at a time. After the scrolling is completed, the unit returns to the normal mode.
-
Page 56: Controlling Cd/Cd Shuttle (Optional)
Shuttle (Optional) An optional 6-disc, 12-disc CD Shuttle or add-on CD player (CDA-5755G etc.) may be connected to the MDA-7755 if it is Ai-NET compatible. With a CD Shuttle or add-on CD player (CDA-5755G etc.) properly connected, the MDA-7755 will control their functions. - Page 57 English Note: If the FUNC indicator is illuminated the Disc Select buttons become nonfunctional. When a 12-disc CD Shuttle is connected: To select discs numbered from 1 to 6, the procedure is the same as for the 6-disc CD Shuttle. To select discs numbered from 7 to 12, first press the "F"...
- Page 58 Music Sensor (Skip) Momentarily press the DN g button once during CD play to return to the beginning of the current track. If you wish to access a track further back, repeatedly press until you reach the desired track. Press the f UP button once to advance to the beginning of the next track.
- Page 59 Repeat Play When the "FUNC" indicator is illuminated, press the RPT button (preset 5) to repeatedly play back the current track. The RPT indicator will illuminate. Press the RPT button (preset 5) again and select OFF to deactivate the repeat play. Note: If a CD Shuttle is connected and the RPT A mode is selected, the unit repeatedly plays back all tracks on...
- Page 60 M.I.X. (Random Play) When the "FUNC" indicator is illuminated, press the M.I.X. button (preset 4) in the play or pause mode. The M.I.X. indicator will illuminate and the tracks on the disc will be played back in a random sequence. After all the tracks on the disc have been played back once, the player will begin a new random sequence play until the M.I.X.
- Page 61 English Notes: In case a add-on CD player or 6-disc CD Shuttle is connected: Press the "F" button to illuminate the "FUNC" (Function) indicator and go to step 1. In case a 12-disc CD Shuttle is con- nected: Press the "F" button twice to illuminate the "FUNC"...
- Page 62 Scanning Programs When the "FUNC" indicator is illuminated press the SCAN button (preset 6) to activate the Scan mode. The first 10 seconds of each track will be played back in succession. To stop scanning, press the SCAN button (preset 6) to deactivate the Scan mode. Notes: In case a add-on CD player or 6-disc CD Shuttle is connected:...
- Page 63 Displaying the Title/Text It is possible to display the CD title if the title has been previously inputted. For details, see Titling Disc (page 65). Text information, such as the disc name and the track name, will be displayed if a CD text compatible CD Shuttle or add-on CD player is connected.
- Page 64 ELAPSED TIME DISPLAY TEXT DISPLAY (DISC NAME)* TEXT DISPLAY (TRACK NAME)* TITLE DISPLAY* CLOCK DISPLAY Sample display when connected to CD Shuttle mode of text compatible CD For text displays exceeding 16 characters, press the SCROLL button (preset 3). This applies when the scroll setting is in the manual mode.
-
Page 65: Titling Disc
Titling Disc (CD Shuttle only) It is possible to title your favorite CDs. Play the CD you want to title. Press the TITLE button and select the title display mode. For details, see Displaying the Title/Text (page 63). Press and hold the TITLE button for at least 3 seconds. - Page 66 Press the TUNE button to store the first character. The first character will stop blinking and the display will automatically advance to the next character. When that character begins to blink, you may choose the next letter or symbol of your title. Repeat the steps 4 to 6 above to complete the titling.
- Page 67 English Notes: If you try to store beyond the limit, the display will show "Full Data." At this point, no more titles can be stored. The CD Shuttle title length or memory capacity varies depending upon the model being used. Removing power from the unit may delete these titles.
-
Page 68: Erasing Disc Title
Erasing Disc Title (CD Shuttle only) Press the TITLE button to select the disc titling mode. Then, press and hold for at least 3 seconds. Press and hold the TUNE button for at least 2 seconds to activate the title scanning mode. - Page 69 Searching for Titled Discs (CD Shuttle only) You can search for CDs with their titles if they are titled. (To title CDs, refer to "Titling Discs" on page 65.) Press and hold the T.S.M. button for at least 2 seconds while a CD title is dis- played.
- Page 70 Alternatively, press the SOURCE button on the Remote Control (RUE-4185) to activate the CD Shuttle mode. Proceed to Step 3 below to select the desired CD Shuttle. Press the BAND button on the MDA-7755 or the RUE-4185 to activate the CD Shuttle Selection mode. English Sélection du multi-...
- Page 71 The CD Shuttle Selection mode remains active for 3 seconds after Step 2 is performed. Press the BAND button until the desired CD Shuttle indicator appears on the display. Note: If the selected CD Shuttle is not connected, the display will show "NO Changer-X."...
-
Page 72: Controls On Remote Control
Controls on Remote Control 1 Mute Button Press the button to lower the volume by 20 dB instantly. Press the button again to cancel. 2 Power Switch Press the switch to turn the power on/off. 3 -/J Button Press the button to switch between the Play and Pause modes for CD and MD. - Page 73 7 8 Button Radio mode: Pressing the button will select, in ascending order, stations programmed into the radio's presets as shown below. 1 2...6 CD Shuttle mode: DISC Select (UP) Button Press the button to select a disc in ascending order. 8 g Button Radio mode: SEEK (DN) Button MD/CD mode: Press the button to go back to the...
- Page 74 ! 9 Button Radio mode: Pressing the button will select, in descending order, stations programmed into the radio's presets as shown below. 6 5...1 CD Shuttle mode: DISC Select (DN) Button Press the button to select a disc in descending order. "...
-
Page 75: Battery Replacement
Battery Replacement Applicable battery: Use two "AAA" sized dry batteries or equivalent. Opening the battery cover Slide out the battery cover while firmly pressing outward. Replacing the battery Put the batteries in the case observing the polarities as illustrated. Closing the cover Push the cover as illustrated until a click is heard. -
Page 76: What Is An Md
What is an MD The small, compact cartridge containing a 64mm diameter disc is very easy to handle. The signals on the disc are digital and are read without touching the disc, so the quality of the sound remains unchanged upon playback (unlike cassette). - Page 77 English Handling The MD is enclosed in a plastic cartridge. It can be handled without worrying about dust or fingerprints. However, dust can still enter from the small gaps in the cartridge or mishandling the MD could damage the MD. Please follow the instructions below when using the MD.
-
Page 78: In Case Of Difficulty
Ce guide devrait vous aider à résoudre tout problème provenant de l'appareil. Sinon, vérifiez les connexions du reste du système ou consultez un revendeur Alpine autorisé. Fonctions inopérantes ou pas d'affichage. La clé de contact du véhicule est sur la position d'arrêt. - Page 79 In Case of Difficulty English Unable to receive stations. No antenna or open connection in cable. – Make sure the antenna is properly connected; replace the antenna or cable if necessary. Unable to tune stations in the seek mode. You are in a weak signal area. –...
- Page 80 In Case of Difficulty Broadcast is noisy. The antenna is not the proper length. – Extend the antenna fully; replace it if it is broken. The antenna is poorly grounded. – Make sure the antenna is grounded properly at its mounting location. MD Mode The MD could not be inserted.
- Page 81 In Case of Difficulty English The play back won't start. Dirty or scratched MD. Bad recording condition. A non-recorded MD. Not a music MD. – Change the MD. Dew condensation. – Wait for a while before using. The power turns on but the playback won't start.
- Page 82 In Case of Difficulty Unable to fast forward or back- ward the CD. The CD has been damaged. – Eject the CD and discard it; using a damaged CD in your unit can cause damage to the mechanism. CD playback sound skips due to vibration.
- Page 83 – Wait a while. Mechanism error. 1. Press the O/C button and eject the MD. If not ejecting, consult your Alpine dealer. 2. When the error indication remains after ejecting, press the O/C button again. If the error indication still does not turn off after pressing the O/C button for a few times, consult your Alpine dealer.
- Page 84 In Case of Difficulty Indication No recording on disc (Blank disk) – Load disc after recording. Protective circuit is activated due to high temperature. – The indicator will disappear when the temperature returns to within operation range. En cas de problème English Indication BLANK DISC...
- Page 85 In Case of Difficulty English Indication for CD Shuttle Protective circuit is activated due to high temperature. – The indicator will disappear when the temperature returns to within operation range. No magazine is loaded into the CD Shuttle. – Insert a magazine. No indicated disc.
- Page 86 Indicaciones para el cambiador de discos compactos Mal funcionamiento del cambiador de discos compactos. – Consulte a su proveedor Alpine. Presione el botón de expulsión del cargador y extraiga éste. Compruebe la indicación. Vuelva a insertar el cargador. Si no puede extraer el cargador, consulte a su proveedor Alpine.
-
Page 87: Specifications
FM TUNER SECTION Tuning Range ... 87.7 – 107.9 MHz Mono Usable Sensitivity ... 9.3 dBf (0.8 µV/75 ohms) 50 dB Quieting Sensitivity ... 13.5 dBf (1.3 µV/75 ohms) Alternative Channel Selectivity ... 80 dB Signal-to-Noise Ratio ... 70 dB Stereo Separation ... -
Page 88: Spécifications
SECTION TUNER FM Plage d'accord ... 87,7 – 107,9 MHz Sensibilité mono utilisable ... 9,3 dBf (0,8 µV/75 ohms) Seuil de sensibilité 50 dB ... 13,5 dBf (1,3 µV/75 ohms) Sélectivité de canal alternatif ... 80 dB Rapport signal sur bruit ... 70 dB Séparation stéréo ... -
Page 89: Especificaciones
SECCIÓN DEL SINTONIZADOR DE FM Gama de sintonía ... 87,7 – 107,9 MHz Sensibilidad útil en modo monoaural ... 9,3 dBf (0,8 µV/75 ohmios) Sensibilidad con un silenciamiento de 50 dB ... 13,5 dBf (1,3 µV/75 ohmios) Selectividad de canal alternativo ... 80 dB Relación señal-ruido ... -
Page 90: Index
A - C Adjusting Display Contrast ... 25 Adjusting Volume/Bass/Treble/Balance (Between Left and Right)/Fader (Between Front and Rear) ... 16 Attaching the Front Panel ... 13 Automatic Memory of Station Presets ... 40 Automatic Seek Tuning ... 38 Controlling CD/CD Shuttle (Optional) ... 56 Controls on Remote Control ... -
Page 91: Index
A - C Accord d'une station préréglée ... 42 Accord manuel ... 37 Accord par recherche automatique ... 38 Activation/annulation de la correction physiologique ... 21 Affichage de l'heure ... 32 Affichage du nom de la station ... 44 Attribution d'un nom à une station ... 45 Balayage des plages ... -
Page 92: Reproducción Y Pause Normales
A - B Activación y desactivación de la no difuminación en la salida de preamplificación (N.F.P.) ... 17 Activación y desactivación del altavoz de subgraves ... 19 Activación/desactivación del efecto de sonoridad ... 21 Activación/desactivación del modo de silenciamiento ... 24 Ajuste de la hora ... - Page 96 Tel.: 1-800-ALPINE-1 (1-800-257-4631) ALPINE ELECTRONICS OF CANADA, INC. Suite 203, 7300 Warden Ave. Markham, Ontario L3R 9Z6, Canada Tel.: 1-800-ALPINE-1 (1-800-257-4631) ALPINE ELECTRONICS OF AUSTRALIA PTY. LTD. 6-8 Fiveways Boulevarde Keysborough, Victoria 3173, Australia Tel.: (03) 9769-0000 ALPINE ELECTRONICS GmbH...