Table of Contents
Advertisement
Advertisement
Table of Contents

Related Manuals for Canon BJ-200e


Summary of Contents for Canon BJ-200e
- Page 1 BJ-200e USER’S MANUAL Canon...
-
Page 2: Table Of Contents
Features and Benefits Using This Manual Customer Support Servicing the Printer Chapter 2 Setting Up the Printer Unpacking the Printer Choosing a Location for Your Printer Examining the Printer Assembling the Printer Chapter 3 Loading Paper Automatically Feeding Paper Printing On Envelopes... -
Page 3: Introduction
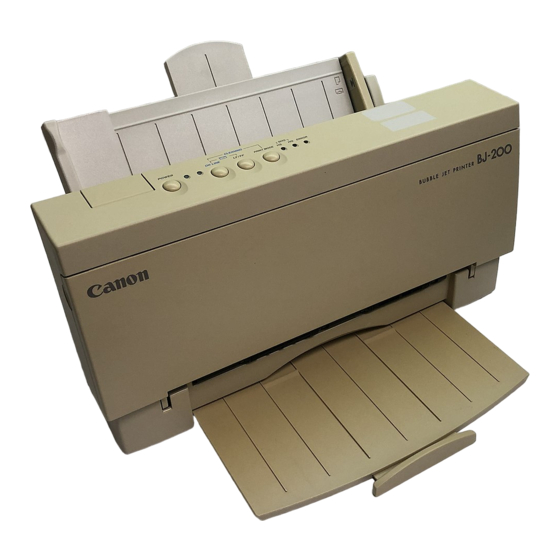
Chapter 1 Introduction Congratulations on your purchase of the Canon Bubble Jet Printer BJ- 200e. We appreciate your choosing this printer to meet your printing needs. It offers exceptional print quality, fast printing speeds, and trouble-free operation with the convenience of compact size and low cost. -
Page 4: Using This Manual
A detailed On-Line Guide makes learning about the printer easy and fast on your computer screen. TrueType Fonts The Canon TrueType Font Pack enhances your font capability and improves your print quality. Using This Manual You can use this manual to set up and operate your printer. It provides detailed information on all the features of the Bubble Jet Printer BJ- 200e. - Page 5 If you set up the printer using the Quick Start Guide, you can read this manual for more detailed information on how to operate the printer. Once you are familiar with the printer, you'll find the On-Line Guide helpful for finding quick answers to any questions you may have about basic operational functions.
-
Page 6: Customer Support
The Canon Bubble Jet Printer BJ-200e Programmer's Manual is available for software designers, advanced programmers, and users interested in using a programming language to send commands to the printer. To order a copy of this manual, call the Canon help desk at 1-800-423- 2366. Conventions... -
Page 7: Servicing The Printer
The protocol for the BBS is up to 14,400 bps, eight data bits, one stop bit, and no parity. If you use CompuServe®, you can access the Canon Peripherals Forum. This allows you to talk with other users or send a message to Canon. Just type GO CANON at any CompuServe prompt. Canada Customer support for Canadian residents is available at 1-905-795-2083 from 9 A.M. - Page 8 Canon dealers may offer such programs for a fee. If you are interested in an extended warranty, contact your Canon Authorized Service Facility to see if it offers such a service.
-
Page 9: Setting Up The Printer
If you have already set up your printer using the Quick Start Guide, you may want to scan this chapter for the additional information it supplies. - Page 10 As you unpack the printer, save the carton and packing materials in case you want to move or ship the printer in the future. Remove all the shipping tape and any Styrofoam packing material used to protect the printer during shipping.
-
Page 11: Choosing A Location For Your Printer
NOTE: Be sure to fill out your Registration card and send it to Canon Computer Systems, Inc. Also, save our sales receipt for proof of purchase. Choosing a Location for Your Printer Whether at home or in the office, you need to find a comfortable and convenient location for the printer. - Page 12 NOTE: Use only the power cord that came with your printer. Using a longer cord or an extension cord may result in reduced voltage or malfunctions. Keep the printer and your computer away from potential sources of electromagnetic interference such as loudspeakers or the base units of cordless telephones.
-
Page 13: Examining The Printer
NOTE: While the Bubble Jet Printer BJ-200e is small and compact, it is not designed for mobile printing. Examining the Printer Before setting up your printer, you should become familiar with its components and understand their functions. From the Front... -
Page 14: From The Back
(Leave this lever in the back position when loading stacks of normal paper.) Front cover Allows access to the inside of the printer when you are installing the ink cartridge or adjusting the paper thickness lever. Paper exit support Provides support when outputting letter-size sheets of paper. -
Page 15: Inside The Printer
AC power receptacle Allows you to attach the printer's power cord. Parallel interface port Allows you to attach the printer's interface cable. Inside the Printer Paper thickness lever Identifies the thickness of your paper. The setting you choose adjusts the distance between the print head and the paper. -
Page 16: Assembling The Printer
NOTE: Canon makes numerous ink cartridges; the BC-02 is designed specifically for the Bubble Jet Printer BJ-200e and is the only one you should use. Using the BC-01 cartridge will result in decreased print quality. - Page 17 CAUTION: Keep the ink cartridge out of children's reach; the ink contains isopropyl alcohol 67-63-0. To install the ink cartridge, follow these steps: 1. Grasp the sides of the front cover and open it so you can access the cartridge holder. 2.
- Page 18 4. Locate the cartridge holder on the right side of the printer. CAUTION: Avoid touching the yellow mounting base on which you place the cartridge-especially the circuit board on the side of the mounting base and the film cable that extends from the cartridge holder.
- Page 19 6. Fit the ink cartridge over the yellow mounting base with the print head facing down. (When installed correctly, the label on the cartridge will appear upside down.) 7. Push the lock lever down until it snaps into place. Make sure there is no resistance when you press on the lock lever, and be sure no gap exists between the ink cartridge and cartridge holder.
-
Page 20: Loading Paper
This chapter describes how to load paper, envelopes, thick paper, and transparencies in the printer. To ensure the best performance of your printer, you want to select the best paper and load it correctly. You can stack paper in the sheet feeder to load it automatically, or you can manually feed one sheet at a time. - Page 21 3. Fan the paper before stacking it in the sheet feeder. Always fan a stack of paper along the edge that will feed into the printer first.
- Page 22 Do not force the paper into the printer. Make sure the stack of paper does not exceed the paper limit mark or the tab on the right side of the sheet feeder.
-
Page 23: Printing On Envelopes
7. Make sure the printer is on-line and start your print operation. NOTE: Do not leave paper stacked in the printer for long periods of time; longer sheets of paper may become bent or curled over time. This may cause the paper to misfeed or jam. - Page 24 Press ON LINE to set the printer back on-line. NOTE: Selecting envelope mode cancels reduction mode (if set). 3. Set the green paper thickness lever on the inside of the printer to the right. Then close the front cover.
- Page 25 5. Arrange the stack of envelopes on a firm surface and press down firmly on the edges to make the folds crisp. Press all the way around the envelopes to remove any curls and expel air from inside the envelopes. Also, press firmly on the area that corresponds to the edges of the flap.
- Page 26 7. Adjust the paper guide to the stack of envelopes.
-
Page 27: Manually Feeding Thick Paper Or Transparencies
After printing on transparencies, feed at least two sheets of paper through the printer to clean the rollers. Do not use Canon's CF-101 or CF-102 transparency film with this printer; these transparencies are designed for use with our color printers only. - Page 28 3. If you are printing on thick paper, open the front cover and make sure the green paper thickness lever (inside the printer) is set to the right. 4. Align the sheet of paper or transparency with the right edge of the...
- Page 29 6. Start your print operation. NOTE: After printing on thick paper or envelopes, set the paper thickness lever (inside the printer) back to the left position before printing on normal paper. Also, set the paper selection lever to the back position.
-
Page 30: Using The Operator Panel
Turning On the Printer Press the POWER button to turn on the printer. The POWER light will come on. When the printer is ready to print, the ON LINE light will come on. Pausing a Print Operation... -
Page 31: Feeding Paper
Feeding Paper When the printer is off-line, you can use the LF/FF button to advance the paper in the printer. You can perform a line feed or a form feed, or you can eject a sheet of paper. Form feeding If you are loading paper, make sure the printer is off-line. -
Page 32: Using The Reduction Modes
NOTE: The print mode may be overridden by your software application. Select your print mode as follows: Use HQ mode for most of your printing needs. The printer automatically prints in HQ mode unless you change the mode with the PRINT MODE button. - Page 33 In the example above, you would specify a paper size of 11.75 x 16.5 inches in your application. Be sure to account for your margins. One-half Reduction Mode In one-half reduction mode, the printer automatically sets the print dimensions as follows: Top margin: Left margin: Print width (max.):...
-
Page 34: Printing The Test Prints
NOTE: Selecting reduction mode cancels envelope mode (if set), and selecting envelope mode cancels reduction mode (if set). Printing the Test Prints The printer includes three test prints: the self test, the font list, and the demo print. Use these test prints to check the operation of the printer. -
Page 35: Self Test
The test prints are not available when you are manually feeding paper. Self Test You can print the self test in both printer control modes: BJ-10 mode or Epson LQ mode. The printer prints a repeating pattern of characters in the default print mode and pitch. -
Page 36: Font List
In Epson LQ mode, the self test looks like this: Font List You can print this sample in both printer control modes: BJ-10 mode or Epson LQ mode. The printer prints all characters in the available print styles and pitches. - Page 37 To stop printing the font list, press and hold the ON LINE button for one second. The printer stops printing, ejects the current sheet of paper, and goes back on-line. In BJ-10 mode, the font list looks like this: In Epson LQ mode, the pattern looks like this:...
-
Page 38: Performing Automatic Line Feeds
The demo print looks like this: Performing Automatic Line Feeds You can set the printer so that it performs an automatic line feed each time it receives a carriage return. Then, when the printer receives a carriage return code from the computer, it moves to the beginning of the... - Page 39 2. Press and hold the ON LINE, LF/FF, and PRINT MODE buttons, and then press the POWER button until the beeper sounds. If you notice an extra blank line between each line printed, be sure to cancel this function. To cancel the automatic line feed function, turn off the printer.
-
Page 40: Using The Printer With Your Software
Installing the Windows Printer Driver This section describes how to install the Windows printer driver for the BJ-200e. The Windows Driver and On-Line Guide diskettes contain a setup program called SETUP.EXE. This program automatically installs both the Windows driver and the On-Line Guide. You can choose to... -
Page 41: Printer Setup Within Windows
If you choose to install the On-Line Guide, the SETUP program creates an icon in the Program Manager. Whenever you need information about the BJ-200e, you can open the icon and look up the desired information. NOTE: For faster printing operations in Windows, do not use the Windows Print Manager. - Page 42 From this screen, you can select the paper size, media type, paper source, print selection, print quality, and orientation. Click on the drop-down arrow next to the Paper Size setting to select one of the following: Letter (8 1/2 x 11 in), which is the default Legal (8 1/2 x 14 in) A4 (210 x 297 mm) B5 (182 x 257 mm)
- Page 43 Click on About to display copyright information regarding the Canon BJ-200e driver and its version number. Click on Help to enter the BJ-200e Help program, which displays information that will help you specify your printer settings.
- Page 44 Options As part of your printer setup, you can specify certain options that control the half-toning and intensity of your printed graphics and text. From this screen you can select Halftone options and an Intensity level: Click on the drop-down arrow next to the Halftone setting to...
-
Page 45: Printing A Document
1. Start the program you used to create the document, and open the document you want to print. 2. Choose Printer Setup from the File menu. 3. Select the Canon BJ-200e as your printer, and select Setup. 4. Make any adjustments as appropriate for printing your document, and select OK. -
Page 46: Setting Up Wordperfect For Your Printer
8. At the additional Printers menu, highlight the BJ-200e driver and press Enter. NOTE: If you select the BJ-200e LQ driver, make sure you set DIP switch 11 to ON for Epson LQ mode. See Chapter 8, Customizing the Printer, for details. -
Page 47: Setting Up Other Software Applications
Canon BJ-200e driver, call your software application's technical support line and ask if a BJ-200e driver is available. If they are unable to assist you, call the Canon help desk to see if a driver is available. -
Page 48: Selecting A Printer Control Mode
Your printer has two resident printer control modes: BJ-10 mode and Epson LQ mode. BJ-10 mode is the default. If you were able to select a Canon BJ printer or the IBM Proprinter X24E through your application program, you will want to use the printer in BJ-10 mode. - Page 49 NOTE: If you will be printing in Windows, use the BJ-200e printer driver for all your printing operations (text and graphics). The BJ-200e Window driver prints all text graphically. The following table lists the fonts and pitches that are available in each printer control mode.
-
Page 50: Software And Printer Compatibility
Canon's toll-free fax retrieval system. Call the Canon help desk at 1-800-423-2366 and ask for the fax retrieval system. Then request the BJ-200e Printer Command Summary. How you enter the control codes and ESCape sequences depends on your application software. -
Page 51: Maintaining The Printer
This chapter covers the care and maintenance of your Canon Bubble Jet Printer BJ-200e. This includes guidelines, cleaning the printer, replacing the ink cartridge, and transporting the printer. Printer Guidelines Follow these guidelines to avoid damage to your printer and harm to you or others: Set the printer on a stable surface. -
Page 52: Replacing The Ink Cartridge
Do not submerge the printer in water. Be very careful when cleaning the printer. Follow these steps: 1. Clean the inside of the printer using compressed air pressure or a soft cloth to remove any ink mist or paper debris. Clean especially well around the platen area. -
Page 53: Installing The Ink Cartridge
Installing the Ink Cartridge CAUTION: Canon makes numerous ink cartridges; the BC-02 is designed specifically for the Bubble Jet Printer BJ-200e and is the only one you should use. Using the BC-01 cartridge will result in decreased print quality. - Page 54 Do not attempt to disassemble the cartridge. Do not vigorously shake the cartridge while handling it. Remove the ink cartridge from the printer only when necessary. CAUTION: Keep the ink cartridge out of children's reach; the ink contains isopropyl alcohol 67-63-0.
- Page 55 4. Take the new ink cartridge out of its protective packaging. Slide off the orange protective cap from the print head and then remove the orange tape. NOTE: Install the ink cartridge immediately after removing it from its protective packaging. 5.
- Page 56 CAUTION: Avoid touching the yellow mounting base on which you place the cartridge--especially the circuit board on the side of the mounting base and the film cable that extends from the cartridge holder. 6. Push the lock lever down until it snaps into place. Make sure there is no resistance when you press on the lock lever, and be sure no gap exists between the ink cartridge and cartridge holder.
-
Page 57: Cleaning The Print Head
7. Close the front cover. When you are not using the printer, make sure the ink cartridge is in its home position, which is on the right side of the printer. NOTE: Always use the POWER button to turn off the printer. This ensures that the printer moves the print head to the home position and caps it. -
Page 58: Transporting The Printer
Transporting the Printer NOTE: While the Bubble Jet Printer BJ-200e is small and compact, it is not a portable printer and you need to take care when transporting it. The printer's components, such as the sheet feeder, may become damaged if subjected to severe vibration during transportation. - Page 59 7. Repack the printer in its original packing materials. NOTE: Do not remove the ink cartridge from the printer or ship an ink cartridge from which you have removed the protective cap. An opened ink cartridge that is not installed in the printer may leak, and the print head may dry out.
-
Page 60: Troubleshooting
Many printing problems are related to how your software interacts with the printer. If your printer is not operating properly, try the suggestions in this chapter. The following list shows the problems covered here. Operational Problems... -
Page 61: Operational Problems
Canon help desk at 1-800-423-2366 (U.S.A.) or 1-905-795-2083 (Canada). The staff at the help desk is trained in the technical support of Canon's products and should be able to help you with your problem. If your printer requires service, the staff at the help desk can provide you with the telephone number of your local Canon Authorized Service Facility (ASF). - Page 62 Canon help desk. Indicators Light, Printer Does Not Print If the printer is getting power, but still does not print, there may be a problem with the printer or its communication with your computer. Follow these steps to determine the problem: 1.
-
Page 63: Paper Loading Problems
If you turn on the printer and the ON LINE, HS, and HQ indicators are blinking, a RAM/ROM error has probably occurred. Try these steps to clear the problem: 1. Press the POWER button to turn off the printer. 2. Wait 15 seconds, and press the POWER button again to turn on the printer. - Page 64 1. Make sure the paper is not sticking together. Fan the stack of paper before placing in in the sheet feeder. Always fan a stack of paper along the edge that will feed into the printer first. 2. Check that the paper rest is extended and the paper selection lever is in the back position for automatic loading of paper.
- Page 65 Envelopes Do Not Load 1. Set the paper selection lever to the front position. 2. Make sure the envelope is loaded properly: The flap is toward the sheet feeder. The right side of the envelope is aligned against the right side of the sheet feeder.
-
Page 66: Print Quality Problems
2. Gently pull out the sheet of paper with one hand while holding down the printer body with your other hand. 3. If the paper tears leaving part of the sheet inside the printer, open the front cover and remove the paper from inside the printer. - Page 67 BC-02. Smudges on Back of Printed Page If ink happens to get on the printer's platen, the back side of the printed page will have smudge marks. If this occurs, clean the platen by feeding a few sheets of paper through the printer.
- Page 68 If your ink cartridge seem to run out of ink before you think they should, follow these steps: 1. Make sure you turn off the printer only when the ink cartridge is in the home position. 2. Only transport the printer when the ink cartridge is in the home position.
-
Page 69: Printing Problems
DIP switches. If you would like to receive a printout for the character sets available in BJ-10 mode and Epson LQ mode, you can use Canon's toll-free fax retrieval system. Call the Canon help desk at 1-800-423-2366 and ask for the fax retrieval system. - Page 70 Printing Incorrect Number of Lines on Page If the printer is not printing the number of lines you expect on a page, follow these steps. 1. Check the setting of DIP switch 3. This DIP switch determines the...
-
Page 71: Customizing The Printer
You will find that the factory default settings provide features to meet most of your printing needs. With these settings, your printer emulates any Canon BJ printer and the IBM Proprinter X24E. This means you can use the printer with any software application that supports these printers. - Page 72 OFF, the printer is in BJ-10 mode. When DIP switch 11 is ON, the printer is in Epson LQ mode. BJ-10 Mode When the printer is in BJ-10 mode (DIP switch 11 is OFF), you can set the DIP switches to control the following functions: Left margin = 0...
-
Page 73: Dip Switch Setting
If you are using a software application that assumes 66 lines will fit on each page, set this switch to ON. The printer will reduce the line spacing by a factor of 14/15, which is from 62 lines per page to 66 lines per page if line spacing is set to 6 lines per inch (lpi). - Page 74 865 ON To see the samples of the character sets available with each code page table, use Canon's toll-free fax retrieval system. Call the Canon help desk and request the fax retrieval system; then request the BJ-200e Printer Command Summary.
-
Page 75: Epson Lq Mode
11 (OFF selects BJ-10 mode, ON selects Epson LQ mode). Automatic emulation mode is applicable for MS-DOS applications only. When you are using Windows, the BJ-200e printer driver for Windows selects the appropriate control mode regardless of the settings of DIP switches 11 and 12. - Page 76 437 (this character set includes symbols, lines, corners, and European characters). To see samples of the character sets available in Epson LQ mode, use Canon's toll-free fax retrieval system. Call the Canon help desk and request the fax retrieval system; then request the BJ-200e Printer Command Summary.
-
Page 77: Changing A Dip Switch Setting
Orator Orator-S ON DIP switch 11 When this switch is OFF, the printer is in BJ-10 mode. When this switch is ON, the printer is in Epson LQ mode. DIP switch 12 This switch enables or disables automatic emulation switching mode. - Page 78 4. Close the DIP switch cover after making your selections. The new DIP switch settings take effect when you turn on the printer. If you turn off or reset the printer, or if the printer receives the Set Initial Conditions command from a software program, the printer resets its...
-
Page 79: Printer Specifications
220 x 110 mm (European DL-size) Paper Type Plain paper Envelopes (Commercial number 10 or European DL-size) Transparency film (Canon #Q07-0001-M1 or 3M CG-3480) available with manual feed Paper Weight 17 to 24 lb (64 to 90 g/m ) with automatic feed... - Page 80 Horizontal a 8.3 to 8.5 inches (210 to 216 mm) b 0.25 inch (6.4 mm) -- Letter-size paper 3.4 mm (0.13 mm) -- A4-size paper Vertical c 11 to 14 inches (279 to 356 mm) d 0.125 inch (3.18 mm) e 0.3 inch (7.6 mm) Envelopes:...
- Page 81 Commercial number 10 Horizontal a 9.5 inches b 0.25 inch c 1.2 inches Vertical d 4.1 inches e 0.67 inch f 1.0 inch Reduction Mode U.S. Paper sizes: DL-size 220 mm 6.4 mm 10.4 mm 110 mm 17.0 mm 25.4 mm...
- Page 82 European paper sizes:...
- Page 83 Bi-directional in text (both in MS-DOS and Windows) Unidirectional in graphics Printing Width Maximum 8 inches (200 mm) Line Feed Speed 100 ms/line at 1/6-inch line Resident Printer Control Modes IBM Proprinter X24E BJ-10 mode: emulation Epson LQ Epson LQ-510 emulation...
- Page 84 Cell Composition: 36 (h) x 48 (v) dot matrix in HQ mode 18 out of 36 (h) x 48 (v) dot matrix in HS mode Character Set: BJ-10 mode IBM Character Sets 1 and 2 and All Characters Chart (Code Page 437, 850, 860, 863, and 865) Epson LQ Italics character set and Graphics...
- Page 85 Interface 8-bit To receive information regarding the interface parallel specifications, use Canon's toll-free fax retrieval system. Call the Canon help desk at 1- 800-423-2366 and ask for the fax retrieval system. Then request the BJ-200e Interface Specifications. Ink Cartridge Type:...
- Page 86 Operating Environment Temperature: 41º F to 95º F (5º C to 35º C) Humidity: 10% to 90% RH (no condensation) Storing Environment Temperature: 32º F to 95º F (5º C to 35º C) Humidity: 5% to 95% RH (no condensation) Power Source USA/Canada AC 120V, 60Hz UK/Australia AC 240V, 50Hz...