Canon Rebel T2i EOS 550D Instruction Manual
Canon digital camera user manual
Hide thumbs
Also See for Rebel T2i EOS 550D:
- Instruction manual (112 pages) ,
- Quick reference manual (2 pages) ,
- Instruction manual (102 pages)

Related Manuals for Canon Rebel T2i EOS 550D


Summary of Contents for Canon Rebel T2i EOS 550D
- Page 1 INSTRUCTION The “Quick Reference Guide” and “Software Start Guide” are MANUAL provided at end of this manual.
-
Page 2: Introduction
After shooting, playback and check whether the images have been properly recorded. If the camera or memory card is faulty and the images cannot be recorded or downloaded to a computer, Canon cannot be held liable for any loss or inconvenience caused. -
Page 3: Item Check List
Item Check List Before starting, check that all the following items have been included with your camera. If anything is missing, contact your dealer. Camera (with eyecup and body cap) Wide Strap EW-100DB III EOS DIGITAL Solution Disk (Software) * Battery Charger LC-E8 or LC-E8E is provided. (The LC-E8E comes with a power cord.) If you purchased a Lens Kit, check that the lens is included. -
Page 4: Conventions Used In This Manual
Conventions Used in this Manual Icons in this Manual <6> : Indicates the Main Dial. <V> <U> : Indicates the <S> cross keys. <0> : Indicates the setting button. 0, 9, 7, 8 : Indicates that the respective function remains * In this manual, the icons and markings indicating the camera’s buttons, dials, and settings correspond to the icons and markings on the camera and on the LCD monitor. -
Page 5: Chapters
Chapters For first-time DSLR users, Chapters 1 and 2 explain the camera’s basic operations and shooting procedures. Introduction Camera basics. Getting Started Basic Shooting and Image Playback Fully automatic shooting for different subjects. Creative Shooting Basic shooting features for specific types of subjects. Advanced Shooting Advanced shooting features. -
Page 6: Table Of Contents
Contents Introduction Item Check List... 3 Conventions Used in this Manual ... 4 Chapters ... 5 Contents at a Glance... 10 Handling Precautions ... 12 Quick Start Guide ... 14 Nomenclature ... 16 Getting Started Charging the Battery ... 24 Installing and Removing the Battery... - Page 7 Creative Shooting d: Program AE...60 Z: Changing the ISO Speed ...62 D Using the Built-in Flash ...64 E: Changing the AF Mode ...66 S Selecting the AF Point ...68 MF: Manual Focusing ...69 i Continuous Shooting ...70 j Using the Self-timer ...71 Setting the Image-recording Quality...72 A Selecting a Picture Style ...75 Advanced Shooting...
- Page 8 Contents Shooting with the LCD Monitor (Live View Shooting) A Shooting with the LCD Monitor ... 108 Shooting Function Settings ... 111 Using AF to Focus ... 113 Focusing Manually... 120 Shooting Movies k Shooting Movies... 124 Shooting Function Settings ... 130 Handy Features Handy Features ...
- Page 9 Slide Show (Auto Playback)...165 Viewing the Images on TV ...167 K Protecting Images ...170 L Erasing Images ...171 B Shooting Information Display ...173 Printing Images Preparing to Print ...176 wPrinting...178 Trimming the Image ...183 W Digital Print Order Format (DPOF) ...185 Direct Printing with DPOF ...188 Customizing the Camera Setting Custom Functions ...190...
-
Page 10: Contents At A Glance
Contents at a Glance Shooting Shoot automatically Shoot continuously Take a picture of yourself in a group Freeze the action Blur the action Blur the background Keep the background in sharp focus Adjust the image brightness (exposure) Shoot in low light Shoot without flash Photograph fireworks at night Shoot while viewing the LCD monitor... - Page 11 Make a large-size print of the picture Take many pictures Focusing Change the point of focus Shoot a moving subject Playback View the images with the camera Search for pictures quickly Prevent important images from accidental deletion Delete unnecessary images View the images on a TV set Set the LCD brightness Printing...
-
Page 12: Handling Precautions
The camera is not waterproof and cannot be used underwater. If you accidentally drop the camera into water, promptly consult your nearest Canon Service Center. Wipe off any water droplets with a dry cloth. If the camera has been exposed to salty air, wipe it with a well-wrung wet cloth. -
Page 13: Lcd Monitor
Besides dust entering the camera from outside, in rare cases lubricant from the camera’s internal parts may adhere to the front of the sensor. In case visible spots still remain after the automatic sensor cleaning, having the sensor cleaned by a Canon Service Center is recommended. Handling Precautions Contacts... -
Page 14: Quick Start Guide
Quick Start Guide White index Insert the battery. To charge the battery, see page 24. Attach the lens. Red index Align the lens’ white or red index with the camera’s index in the matching color. Set the lens focus mode switch to <AF>. - Page 15 The shooting settings displayed on the LCD monitor will turn off when your eye nears the viewfinder eyepiece. To shoot while looking at the LCD monitor, see page 107. To delete an image, see “Erasing Images” (p.171). Set the Mode Dial to <1> (Full Auto).
-
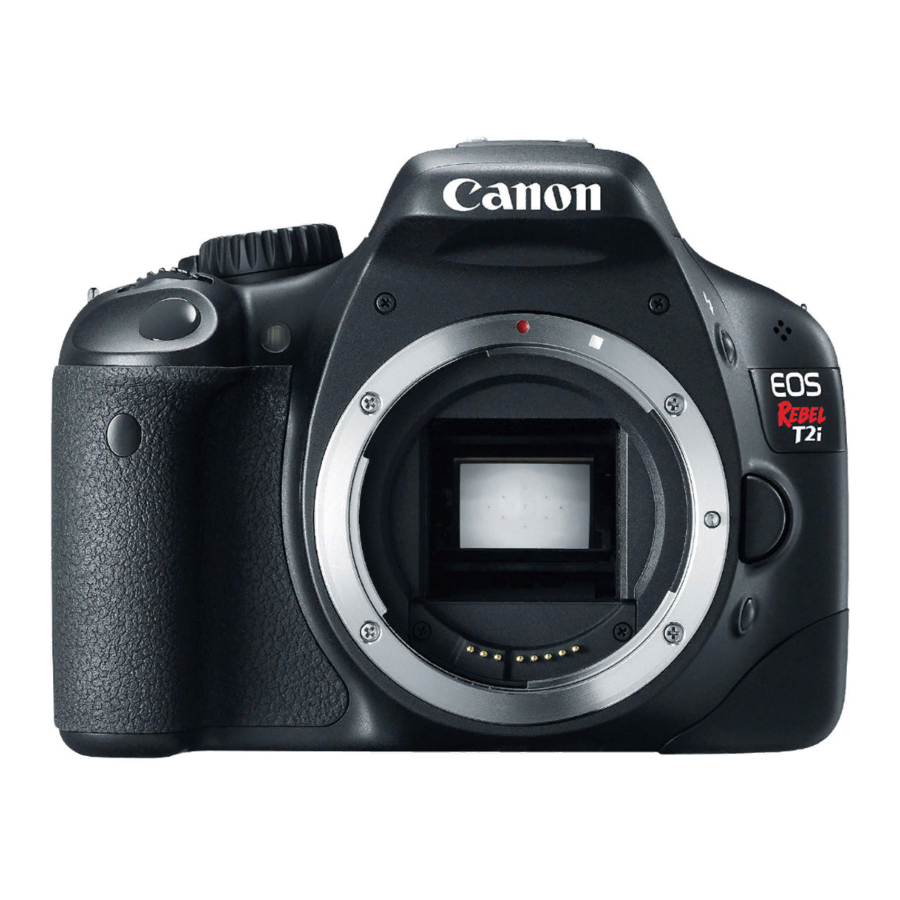
Page 16: Nomenclature
Nomenclature The names in bold indicate the parts mentioned up until the “Basic Shooting and Image Playback” section. Mode Dial (p.20) Power switch (p.27) <Z> ISO speed setting button (p.62) Main Dial <6> (p.4) Shutter button (p.37) Red-eye reduction/ Self-timer lamp (p.65/71) Remote control sensor... - Page 17 Eyecup (p.205) Viewfinder eyepiece Display-off sensor (p.146) Shooting <B> settings display button (p.44,110,126, 143,173) Menu <M> button (p.40) LCD monitor (p.40,139) <O> Aperture/ Exposure compensation button (p.83/87) Tripod socket Quick Control button/ <Q/l> Direct print button (p.38/181) Playback button <x> <0>...
- Page 18 Nomenclature Shooting Settings Display Exposure level indicator Exposure compensation amount (p.87) AEB range (p.89) Shutter speed Picture Style (p.75) Shooting mode Image-recording quality (p.72) Large/Fine Large/Normal Medium/Fine Medium/Normal Small/Fine Small/Normal 1+73 RAW+Large/Fine Quick Control icon (p.38) White balance (p.99) Auto W Daylight E Shade R Cloudy...
-
Page 19: Viewfinder Information
Viewfinder Information Spot metering circle Focusing screen <A> AE lock/ AEB in-progress Flash-ready <D> Improper FE lock warning <e> High-speed sync (FP flash) <d> FE lock/ FEB in-progress <y> Flash exposure compensation Shutter speed FE lock (FEL) Busy (buSY) Built-in flash recycling The display will show only the settings currently applied. - Page 20 Nomenclature Mode Dial The Mode Dial includes the Basic Zone modes, Creative Zone modes, and Movie shooting mode. Creative Zone These modes give you more control for shooting various subjects. : Program AE (p.60) s : Shutter-priority AE (p.78) f : Aperture-priority AE (p.80) : Manual exposure (p.83) 8: Automatic depth-of-field AE (p.85)
- Page 21 Lens Lens without a distance scale Focusing ring (p.69,120) Hood mount (p.231) Filter thread (front of lens) (p.231) Image Stabilizer switch Lens mount index Lens with a distance scale Hood mount (p.231) Filter thread (front of lens) (p.231) Zoom ring (p.34) Focusing ring (p.69,120) Image Stabilizer switch...
- Page 22 Nomenclature Battery Charger LC-E8 Charger for Battery Pack LP-E8 (p.24). Battery pack slot Charge lamp Full-charge lamp This power unit is intended to be correctly orientated in a vertical or floor mount position. IMPORTANT SAFETY INSTRUCTIONS-SAVE THESE INSTRUCTIONS. DANGER-TO REDUCE THE RISK OF FIRE OR ELECTRIC SHOCK, CAREFULLY FOLLOW THESE INSTRUCTIONS.
-
Page 23: Getting Started
Getting Started This chapter explains preparatory steps before you start shooting and basic camera operations. Attaching the Strap Pass the end of the strap through the camera’s strap mount eyelet from the bottom. Then pass it through the strap’s buckle as shown in the illustration. -
Page 24: Charging The Battery
Charging the Battery LC-E8 LC-E8E It takes approx. 2 hours to fully recharge a completely exhausted battery at 23°C / 73°F. The time required to recharge the battery depends on the ambient temperature and battery’s charge level. For safety reasons, recharging in low temperatures (6°C - 10°C / 43°F - 50°F) will take a longer time (up to 4 hours). - Page 25 Purchase a new battery. Do not charge any battery other than the Battery Pack LP-E8. The Battery Pack LP-E8 is dedicated to Canon products only. Using it with an incompatible battery charger or product may result in malfunction or accidents for which Canon cannot be held liable.
-
Page 26: Installing And Removing The Battery
Installing and Removing the Battery Installing the Battery Load a fully charged Battery Pack LP-E8 into the camera. Removing the Battery After opening the battery compartment cover, be careful not to swing it back further. Otherwise, the hinge might break. Open the battery compartment cover. -
Page 27: Turning On The Power
Turning on the Power If the date/time setting screen appears when you turn on the power switch, see page 29 to set the date/time. About the Automatic Self-Cleaning Sensor Whenever you set the power switch to <1> or <2>, the sensor cleaning will be executed automatically. -
Page 28: Checking The Battery Level
Turning on the Power Checking the Battery Level When the power switch is set to <1>, the battery level will be indicated in one of four levels: Battery Life Temperature No Flash 50% Flash Use The figures above are based on a fully-charged Battery Pack LP-E8, no Live View shooting, and CIPA (Camera &... -
Page 29: Setting The Date And Time
Setting the Date and Time When you turn on the power for the first time or if the date/time has been reset, the Date/Time setting screen will appear. Follow steps 3 and 4 to set the date/time. Note that the date/time appended to recorded images will be based on this date/time setting. -
Page 30: Selecting The Interface Language
Selecting the Interface Language Display the menu. Press the <M> button to display the menu. Under the [6] tab, select [LanguageK]. Press the <U> key to select the [6] tab. Press the <V> key to select [Language the top), then press <0>. Set the desired language. -
Page 31: Installing And Removing The Sd Card
Installing and Removing the SD Card The captured images are recorded onto the card (sold separately). Make sure the card’s write protect switch is set upward to enable writing/erasing. Installing the Card Write protect switch Possible shots The number of possible shots depends on the remaining capacity of the card, image-recording quality, ISO speed, etc. -
Page 32: Removing The Card
Installing and Removing the SD Card Removing the Card Access lamp When the access lamp is lit or blinking, it indicates that the images are being written to or read by the card, being erased, or data is being transferred. While the access lamp is lit or blinking, never do any of the following. -
Page 33: Attaching And Detaching A Lens
Attaching and Detaching a Lens Attaching a Lens White index Red index Minimizing Dust When changing lenses, do it in a place with minimal dust. When storing the camera without a lens attached, be sure to attach the body cap to the camera. Remove dust on the body cap before attaching it. -
Page 34: Detaching The Lens
Attaching and Detaching a Lens About Zooming Detaching the Lens Do not look at the sun directly through any lens. Doing so may cause loss of vision. If the front part (focusing ring) of the lens rotates during autofocusing, do not touch the rotating part. -
Page 35: About The Lens Image Stabilizer
About the Lens Image Stabilizer When you use the IS lens’ built-in Image Stabilizer, camera shake is corrected to obtain a less blurred shot. The procedure explained here is based on the EF-S18-55mm f/3.5-5.6 IS lens as an example. * IS stands for Image Stabilizer. The Image Stabilizer may not be effective if the subject moves at the time of exposure. -
Page 36: Basic Operation
Basic Operation Adjusting the Viewfinder Clarity If the camera’s dioptric adjustment still cannot provide a sharp viewfinder image, using Dioptric Adjustment Lens E (10 types, sold separately) is recommended. Holding the Camera To obtain sharp images, hold the camera still to minimize camera shake. -
Page 37: Shutter Button
Shutter Button The shutter button has two steps. You can press the shutter button halfway. Then you can further press the shutter button completely. Preventing Camera Shake Hand-held camera movement during the moment of exposure is called camera shake. It can cause blurred pictures. To prevent camera shake, note the following: •... -
Page 38: Q Using The Quick Control Screen
Q Using the Quick Control Screen You can directly select and set the shooting functions displayed on the LCD monitor. This is called the Quick Control screen. Basic Zone modes Creative Zone modes Display the Quick Control screen. When the shooting settings are displayed, press the <Q>... - Page 39 Quick Control Screen Nomenclature Aperture (p.80) Shutter speed (p.78) Exposure compensation/ AEB setting (p.89) Shooting mode* (p.20) Image-recording quality (p.72) Picture Style (p.75) White balance (p.99) Asterisked functions cannot be set with the Quick Control screen. Function Setting Display <0> Q Using the Quick Control Screen ISO speed (p.62) Highlight tone...
-
Page 40: Menu Operations
Menu Operations You can set various functions with the menus such as the image-recording quality, date/time, etc. While looking at the LCD monitor, use the <M> button, <S> cross keys, and < <M> button LCD monitor Menu Screen Basic Zone modes * In Basic Zone modes and Movie shooting mode, the tabs and menu options displayed will be different. - Page 41 Menu Setting Procedure The explanation of menu functions hereinafter assumes that you have pressed the <M> button to display the menu screen. A list of menu functions is on page 212. Display the menu. Press the <M> button to display the menu.
-
Page 42: Formatting The Card
Formatting the Card If the card is new or was previously formatted by another camera or computer, format the card with the camera. When the card is formatted, all images and data in the card will be erased. Even protected images will be erased, so make sure there is nothing you need to keep. - Page 43 Execute [Format] in the following cases: The card is new. The card was formatted by a different camera or a computer. The card is full with images or data. A card-related error is displayed (p.224). About Low-level Formatting Do low-level formatting if the card’s recording or reading speed seems slow.
-
Page 44: Switching The Lcd Monitor Display
Switching the LCD Monitor Display The LCD monitor can display the shooting settings screen, menu screen, image, etc. Shooting Settings While the menu screen or image is displayed as shown below, you can instantly return to the shooting settings screen (shown above) and shoot by pressing the shutter button halfway. -
Page 45: Basic Shooting And Image Playback
Basic Shooting and Image Playback This chapter explains how to use the Basic Zone modes on the Mode Dial for best results and how to playback images. With the Basic Zone modes, all you do is point and shoot and the camera sets everything automatically (p.210). -
Page 46: Fully Automatic Shooting
1 Fully Automatic Shooting AF point Focus confirmation light Set the Mode Dial to <1>. Aim any AF point over the subject. All the AF points will be used to focus, and generally the closest object will be focused. Aiming the center AF point over the subject will make focusing easier. - Page 47 1 Fully Automatic Shooting The focus confirmation light <o> blinks and focus is not achieved. Aim the AF point over an area having good contrast, then press the shutter button halfway (p.202). If you are too close to the subject, move away and try again.
-
Page 48: Full Auto Techniques
1 Full Auto Techniques Recomposing the Shot Depending on the scene, position the subject toward the left or right to create a balanced background and good perspective. In the <1> (Full Auto) mode, while you press the shutter button halfway to focus a still subject, the focus will be locked. You can then recompose the shot and press the shutter button completely to take the picture. -
Page 49: Disabling Flash
7 Disabling Flash In places where flash photography is prohibited, use the <7> (Flash Off) mode. This mode is also effective for candlelight scenes when you want to capture the ambient light. Shooting Tips If the numeric display in the viewfinder blinks, take care to prevent camera shake. -
Page 50: Shooting Portraits
2 Shooting Portraits The <2> (Portrait) mode blurs the background to make the human subject stand out. It also makes flesh tones and the hair look softer than with the <1> (Full Auto) mode. Shooting Tips The farther the distance between the subject and background, the better. -
Page 51: Shooting Landscapes
3 Shooting Landscapes Use the <3> (Landscape) mode for wide scenery, night scenes, or to have everything in focus from near to far. The greens and blues also become more vivid and sharper than with <1> (Full Auto). Shooting Tips With a zoom lens, use the wide-angle end. -
Page 52: Shooting Close-Ups
4 Shooting Close-ups When you want to photograph flowers or small things up close, use the <4> (Close-up) mode. To make small things appear much larger, use a macro lens (sold separately). Shooting Tips Use a simple background. A simple background makes the flower, etc., stand out better. Move to the subject as close as possible. -
Page 53: Shooting Moving Subjects
5 Shooting Moving Subjects To photograph a moving subject, whether it is a child running or a moving vehicle, use the <5> (Sports) mode. Shooting Tips Use a telephoto lens. Using a telephoto lens is recommended so you can shoot from afar. Use the center AF point to focus. -
Page 54: Shooting Portraits At Night
6 Shooting Portraits at Night To shoot someone at night and obtain a natural-looking exposure in the background, use the <6> (Night Portrait) mode. Shooting Tips Use a wide-angle lens and a tripod. When using a zoom lens, use the wide-angle end to obtain a wide night view. -
Page 55: C Creative Auto Shooting
C Creative Auto Shooting Basic Zone modes except <C> (Creative Auto) take care of everything, whereas the <C> Creative Auto mode enables you to easily change the picture’s brightness, depth of field, color tone (Picture Style), etc. The default settings are the same as the <1> (Full Auto) mode. - Page 56 C Creative Auto Shooting Shutter speed and aperture (1) Flash firing <a> (Auto flash), <D> (Flash on), or <b> (Flash off) can be selected. If you set <b> (Flash off), see “Disabling Flash” on page 49. (2) Blurring/sharpening the background If you move the index mark toward the left, the background will look more blurred.
- Page 57 (4) Image effects Besides the standard image effect, you can set it for portraits, landscapes, or black-and-white photos. (p.75: Picture Style) <P> (Standard): Standard image effect applicable to most scenes. <Q> (Smooth skin tones): Effective for close-ups of women or children.
-
Page 58: Image Playback
x Image Playback The easiest way to playback images is explained below. For more details on the playback procedure, see page 155. With no information displayed Histogram display Playback the image. When you press the <x> button, the last captured image will be displayed. Select the image. -
Page 59: Creative Shooting
Creative Shooting In the Basic Zone modes, to prevent spoiled shots, most functions are set automatically and cannot be changed. In the <d> (Program AE) mode, you can set various functions and be more creative. In the <d> (Program AE) mode, the camera sets the shutter speed and aperture automatically to obtain a standard exposure. -
Page 60: D: Program Ae
d: Program AE To obtain a good exposure of the subject, the camera sets the exposure (shutter speed and aperture) automatically. This is called Program AE. Set the Mode Dial to <d>. Focus the subject. Look through the viewfinder and aim the selected AF point over the subject. -
Page 61: Shooting Tips
Shooting Tips Change the ISO speed or use the built-in flash. To match the subject and ambient lighting level, you can change the ISO speed (p.62) or use the built-in flash (p.64). In the <d> mode, the built-in flash will not fire automatically. So under low light, press the <I>... -
Page 62: Z: Changing The Iso Speed
Z: Changing the ISO SpeedN Set the ISO speed (image sensor’s sensitivity to light) to suit the ambient light level. In the Basic Zone modes, the ISO speed is set automatically (p.63). ISO Speed Guide ISO Speed 100 - 400 400 - 1600 Overcast skies or evening time 1600 - 6400, H... - Page 63 About “AUTO” for Automatic ISO Speed Shooting Mode 1/7/3/4/5/6/C d/s/f/a/8 With flash *1: Depending on the maximum ISO speed that has been set. *2: If fill flash results in overexposure, ISO 100 or a higher ISO will be set. *3: In the <d/8> modes and Basic Zone modes <except 6>, ISO 400 - 1600 will be set automatically if bounce flash is used with an external Speedlite.
-
Page 64: D Using The Built-In Flash
D Using the Built-in Flash In indoors, low light, or backlit conditions in daylight, just pop up the built-in flash and press the shutter button to take flash pictures. In the <d> mode, the shutter speed (1/60 sec. - 1/200 sec.) will be set automatically to prevent camera shake. -
Page 65: Using Red-Eye Reduction
Shooting Tips If the subject is far away, increase the ISO speed. By increasing the ISO speed, you can extend the flash range. In bright light, decrease the ISO speed. If the exposure setting in the viewfinder blinks, decrease the ISO speed. Detach the lens hood and keep at least 1 meter/3.3 feet away from the subject. -
Page 66: E: Changing The Af Mode
E: Changing the AF ModeN You can select the AF mode suiting the shooting conditions or subject. In the Basic Zone modes, the optimum AF mode is set automatically. One-Shot AF for Still Subjects Suited for still subjects. When you press the shutter button halfway, the camera will focus only once. -
Page 67: Ai Servo Af For Moving Subjects
If focus cannot be achieved, the focus confirmation light <o> in the viewfinder will blink. If this occurs, a picture cannot be taken even if the shutter button is pressed completely. Recompose the picture and try to focus again. Or see “When Autofocus Fails” (p.202). If the [1 Beep] menu is set to [Disable], the beeper will not sound when focus is achieved. -
Page 68: S Selecting The Af Point
S Selecting the AF PointN In the Basic Zone modes, all the AF points are active. Generally, the AF point covering the closest subject will be selected to focus. Therefore, the camera sometimes may not focus the subject you want. With the <d>... -
Page 69: Mf: Manual Focusing
Shooting Tips When shooting a portrait up close, use One-Shot AF and focus the eyes. If you focus the eyes first, you can then recompose and the face will remain sharp. If it is difficult to focus, select and use the center AF point. The center AF point is the most sensitive among the nine AF points. -
Page 70: Continuous Shooting
i Continuous ShootingN You can shoot up to about 3.7 shots per sec. This is effective for shooting a child running toward you or capturing the different facial expressions. Shooting Tips Also set the AF mode matching the subject. • For moving subject When AI Servo AF is set, focusing will be continuous during continuous shooting. -
Page 71: Using The Self-Timer
j Using the Self-timer With <q>, the interval between the multiple shots may be prolonged depending on the shooting functions settings such as the image-recording quality or flash. After taking self-timer shots, you should check the image for proper focus and exposure (p.58). -
Page 72: Setting The Image-Recording Quality
Low quality High quality 1+73 * Based on Canon’s testing standards with a 4GB card, ISO 100, and Standard Picture Style. * The file size, number of possible shots, and maximum burst will vary depending on the subject, card brand, ISO speed, Custom Functions, and other settings. - Page 73 I want to select the image-recording quality matching the paper size for printing. Paper size A3 (42x29.7cm/16.5x11.7in.) A4 (29.7x21cm/ 11.7x8.3in.) 17.8x12.7cm/7.0x5.0in. 14.8x10cm/5.8x3.9in. What’s the difference between It indicates a different image quality due to a different compression rate. Even with the same number of pixels, the image quality.
- Page 74 3 Setting the Image-recording Quality About 1 1 is the raw image data before it is made into 73 or other images. Although 1 images require software like Digital Photo Professional (provided) so they can be displayed on the computer, they also offer flexibility for image adjustments possible only with 1.
-
Page 75: A Selecting A Picture Style
A Selecting a Picture StyleN By selecting a Picture Style, you can obtain image effects matching your photographic expression or the subject. Picture Style Effects P Standard (C: Standard) The image looks vivid, sharp, and crisp. This is a general-purpose Picture Style suitable for most scenes. - Page 76 A Selecting a Picture StyleN S Neutral This Picture Style is for users who prefer to process images with their computer. For natural colors and subdued images. U Faithful This Picture Style is for users who prefer to process images with their computer.
-
Page 77: Advanced Shooting
Advanced Shooting This chapter builds on the previous chapter and introduces more ways to shoot creatively. The first half of this chapter explains how to use the <s> <f> <a> <8> modes on the Mode Dial. Except for <8>, all the shooting modes can be used in combination with the functions introduced in Chapter 3. -
Page 78: S: Action Shots
s: Action Shots You can either freeze the action or create motion blur with the <s> (Shutter-priority AE) mode on the Mode Dial. * <s> stands for Time value. Frozen action (Fast shutter speed: 1/2000 sec.) Shutter Speed Display The LCD monitor displays the shutter speed as a fraction. However, the viewfinder displays only the denominator. -
Page 79: Using The Built-In Flash
Shooting Tips To freeze the action or moving subject. Use a fast shutter speed such as 1/4000 sec. to 1/500 sec. To blur a running child or animal giving the impression of fast movement. Use a medium shutter speed such as 1/250 sec. to 1/30 sec. Follow the moving subject through the viewfinder and press the shutter button to take the picture. -
Page 80: F: Changing The Depth Of Field
f: Changing the Depth of Field To obtain a blurry background or to make everything near and far look sharp, set the Mode Dial to <f> (Aperture-priority AE) to adjust the depth of field (range of acceptable focus). * <f> stands for Aperture value which is the size of the diaphragm hole inside the lens. - Page 81 f: Changing the Depth of Field Shooting Tips When using an aperture with a high f-number, note that camera shake can occur in low light scenes. A higher aperture f-number will make the shutter speed slower. Under low light, the shutter speed can be as long as 30 sec. In such cases, increase the ISO speed and hold the camera steady or use a tripod.
-
Page 82: Depth Of Field Preview
f: Changing the Depth of Field Using the Built-in Flash To obtain a correct flash exposure, the flash output will be set automatically to match the set aperture (autoflash exposure). The shutter speed will be set automatically between 1/200 sec. - 30 sec. to suit the scene’s brightness. -
Page 83: A: Manual Exposure
a: Manual Exposure You can set both the shutter speed and aperture manually as desired. With flash, the flash exposure will be set automatically to match the aperture that was set. The flash sync speed can be set within 1/200 sec. -
Page 84: Bulb Exposures
a: Manual Exposure Bulb Exposures Since bulb exposures produce more noise than usual, the image might look a little grainy. You can reduce this noise by setting the [7 Custom Functions (C.Fn)] menu’s [Long exp. noise reduction] to [1: Auto] or [2: On] (p.193). For bulb exposures, using a tripod and Remote Switch (p.204, 205) is recommended. -
Page 85: 8: Automatic Depth-Of-Field Ae
8: Automatic Depth-of-Field AE Objects in the foreground and background will be in focus automatically. All the AF points will function to detect the subject, and the aperture required to attain the necessary depth of field will be set automatically. * <8>... -
Page 86: Changing The Metering Mode
q Changing the Metering ModeN The metering mode measures the subject’s brightness to determine the correct exposure. Normally, evaluative metering is recommended. w Partial metering r Spot metering Select [Metering mode]. Under the [2] tab, select [Metering mode], then press <0>. Set the metering mode. -
Page 87: Oy Setting Exposure Compensation
Setting Exposure CompensationN O Setting Exposure Compensation Set exposure compensation if the exposure (without flash) does not come out as desired. This feature can be used in Creative Zone modes (except <a>). Although you can set the exposure compensation up to ±5 stops in 1/3-stop increments, the exposure compensation indicator in the viewfinder can only display the setting up to ±2 stops. - Page 88 Setting Exposure CompensationN y Flash Exposure CompensationN Set flash exposure compensation if the flash exposure of the subject does not come out as desired. You can set the flash exposure compensation up to ±2 stops in 1/3-stop increments. When you press the shutter button halfway, the <y> will appear in the viewfinder.
-
Page 89: Auto Exposure Bracketing
Auto Exposure BracketingN This feature takes exposure compensation a step further by varying the exposure automatically with three shots (±2 stops in 1/3-stop increments) as shown below. You can then choose the best exposure. This is called AEB (Auto Exposure Bracketing). Standard exposure AEB amount Darker exposure... -
Page 90: Canceling Aeb
3 Auto Exposure BracketingN Canceling AEB Follow steps 1 and 2 to turn off the AEB amount display. The AEB setting will be canceled automatically if the power switch is set to <2>, flash recycling is complete, etc. Shooting Tips Using AEB with continuous shooting. -
Page 91: A Customizing A Picture Style
A Customizing a Picture StyleN You can customize a Picture Style by adjusting individual parameters like [Sharpness] and [Contrast]. To see the resulting effects, take test shots. To customize [Monochrome], see page 93. Select [Picture Style]. Under the [2] tab, select [Picture Style], then press <0>. - Page 92 A Customizing a Picture StyleN Parameter Settings and Effects Sharpness Adjusts the sharpness of the image. To make it less sharp, set it toward the E end. The closer it is to E, the softer the image will look. To make it sharper, set it toward the F end. The closer it is to F, the sharper the image will look.
- Page 93 Monochrome Adjustment For Monochrome, you can also set [Filter effect] and [Toning effect] in addition to [Sharpness] and [Contrast] explained on the preceding page. kFilter Effect Filter N: None Normal black-and-white image with no filter effects. The blue sky will look more natural, and the white clouds will look Ye: Yellow crisper.
-
Page 94: A Registering A Picture Style
A Registering a Picture StyleN You can select a base Picture Style such as [Portrait] or [Landscape], adjust its parameters as desired and register it under [User Def. 1], [User Def. 2], or [User Def. 3]. You can create Picture Styles whose parameter settings such as for sharpness and contrast are different. - Page 95 If a Picture Style has already been registered under [User Def. *], changing the base Picture Style in step 4 will nullify the parameter settings of the registered Picture Style. If you execute [Clear all camera settings] (p.144), all the [User Def. *] settings will revert to the default.
-
Page 96: Setting The Color Space
Setting the Color SpaceN The color space refers to the range of reproducible colors. With this camera, you can set the color space to sRGB or Adobe RGB for captured images. For normal shooting, sRGB is recommended. In Basic Zone modes, sRGB is set automatically. About Adobe RGB This color space is mainly used for commercial printing and other industrial uses. -
Page 97: A Ae Lock
A AE LockN Use AE lock when the area of focus is to be different from the exposure metering area or when you want to take multiple shots at the same exposure setting. Press the <A> button to lock the exposure, then recompose and take the shot. -
Page 98: A Fe Lock
A FE LockN FE lock locks the flash exposure setting over the desired area of the subject. This feature can also be used with a Canon EX-series Speedlite. * FE stands for Flash Exposure. Spot metering circle If the subject is too far away and beyond the effective range of the flash, the <D>... -
Page 99: B: Setting The White Balance
B: Setting the White BalanceN White balance (WB) is for making the white areas look white. Normally, the <Q> (Auto) setting will obtain the correct white balance. If natural- looking colors cannot be obtained with <Q>, you can select the white balance to match the light source or set it manually by shooting a white object. - Page 100 B: Setting the White BalanceN If the exposure obtained in step 1 is way off, a correct white balance might not be obtained. If the image was captured while the Picture Style was set to [Monochrome] (p.76), it cannot be selected in step 3. Instead of a white object, an 18% gray card (commercially available) can produce a more accurate white balance.
-
Page 101: White Balance Correction
2 White Balance CorrectionN You can correct the white balance that has been set. This adjustment will have the same effect as using a commercially-available color temperature conversion filter or color compensating filter. Each color can be corrected to one of nine levels. This is for advanced users who are familiar with using color temperature conversion or color compensating filters. -
Page 102: White Balance Auto Bracketing
2 White Balance CorrectionN White Balance Auto Bracketing With just one shot, three images having a different color balance can be recorded simultaneously. Based on the color temperature of the current white balance setting, the image will be bracketed with a blue/amber bias or magenta/green bias. -
Page 103: Auto Lighting Optimizer
Auto Lighting OptimizerN If the image comes out dark or the contrast is low, the brightness and contrast can be corrected automatically. With JPEG images, the correction is done when the image is captured. For RAW images, it can be corrected with Digital Photo Professional (provided software). The default setting is [Standard]. -
Page 104: Lens Peripheral Illumination Correction
Lens Peripheral Illumination Correction Due to the lens characteristics, the four corners of the picture might look darker. This is called lens light fall-off or drop in peripheral illumination. With JPEG images, the correction is done when the image is captured. For RAW images, it can be corrected with Digital Photo Professional (provided software). - Page 105 Depending on shooting conditions, noise might appear on the image periphery. When using a non-Canon lens, setting the correction to [Disable] is recommended, even if [Correction data available] is displayed. Lens peripheral light correction is applied even when an Extender is attached.
-
Page 106: Preventing Camera Shake
Preventing Camera ShakeN The camera’s mechanical shake caused by the reflex mirror action can blur images taken with a super telephoto lens or close-up (macro) lens. In such cases, mirror lockup is effective. Mirror lockup is enabled by selecting the [7 Custom Functions (C.Fn)] menu’s [Mirror lockup] and setting it to [1: Enable] (p.195). -
Page 107: Shooting With The Lcd Monitor (Live View Shooting)
Shooting with the LCD Monitor (Live View Shooting) You can shoot while viewing the image on the camera’s LCD monitor. This is called “Live View shooting.” Live View shooting is effective for still subjects which do not move. If you handhold the camera and shoot while viewing the LCD monitor, camera shake can cause blurred images. -
Page 108: A Shooting With The Lcd Monitor
A Shooting with the LCD Monitor Display the Live View image. Press the <A> button. The Live View image will appear on the LCD monitor. The Live View image will closely reflect the brightness level of the actual image you capture. The image’s field of view is approx. - Page 109 To Enable Live View Shooting Battery Life with Live View Shooting [Approx. number of shots] Temperature At 23°C / 73°F At 0°C / 32°F The figures above are based on a fully-charged Battery Pack LP-E8 and CIPA (Camera & Imaging Products Association) testing standards. Continuous Live View shooting is possible for approx.
- Page 110 A Shooting with the LCD Monitor About the Information Display Each time you press the <B> button, the information display will change. White balance Picture Style Auto Lighting Optimizer Image-recording quality Drive mode AF mode •d : Live mode •c : Face detection Live mode •f : Quick mode Shutter speed...
-
Page 111: Shooting Function Settings
Shooting Function Settings Function settings particular to Live View shooting are explained here. Q Quick Control While the image is displayed on the LCD monitor, pressing the <Q> button will enable you to set the image-recording quality, drive mode, and AF mode. In Creative Zone modes, you can also set the white balance, Picture Style, and Auto Lighting Optimizer. -
Page 112: Menu Function Settings
Shooting Function Settings 3 Menu Function Settings Grid display With [Grid 1l] or [Grid 2m], you can display grid lines. Metering timer You can change how long the exposure setting is displayed (AE lock time). AF mode You can select [Live mode] (p.113), [u Live mode] (p.114), or [Quick mode] (p.118). -
Page 113: Using Af To Focus
Using AF to Focus Selecting the AF Mode The AF modes available are [Live mode], [u Live mode] (face detection, p.114), and [Quick mode] (p.118). If you want to achieve precise focus, set the lens focus mode switch to <MF>, magnify the image, and focus manually (p.120). Live Mode: d The image sensor is used to focus. - Page 114 Using AF to Focus u (Face detection) Live Mode: c With the same AF method as the Live mode, human faces are detected and focused. Have the target person face the camera. Focus the subject. Aim the AF point over the subject and press the shutter button halfway.
- Page 115 If the focus is way off, face detection will not be possible. If the lens enables manual focusing even while the lens focus mode switch is set to <f>, turn the focusing ring to attain rough focus. The face will then be detected and <p>...
- Page 116 Using AF to Focus Live Mode and u (Face Detection) Live Mode Notes AF operation Focusing will take slightly longer. Even when focus has been achieved, pressing the shutter button halfway will focus again. The image brightness may change during and after the AF operation.
- Page 117 Using AF to Focus Shooting conditions which can make focusing difficult: Low-contrast subjects such as the blue sky and solid-color, flat surfaces. Subjects in low light. Stripes and other patterns where there is contrast only in the horizontal direction. Under a light source whose brightness, color, or pattern keeps changing.
- Page 118 Using AF to Focus Quick Mode: f The dedicated AF sensor is used to focus in the One-Shot AF mode (p.66), using the same AF method as with viewfinder shooting. Although you can focus the target area quickly, the Live View image will be interrupted momentarily during the AF operation.
- Page 119 You cannot take a picture during autofocusing. Take the picture only while the Live View image is displayed. Focus the subject. Aim the AF point over the subject and press the shutter button halfway. The Live View image will turn off, the reflex mirror will go back down, and AF will be executed.
-
Page 120: Focusing Manually
Focusing Manually You can magnify the image and focus precisely manually. Magnifying frame AE lock Magnified area position Magnification Set the lens focus mode switch to <MF>. Turn the lens focusing ring to focus roughly. Move the magnifying frame. Press the <S> key to move the magnifying frame to the position where you want to focus. - Page 121 Notes About the Live View Image Under low or bright light conditions, the Live View image might not reflect the brightness of the captured image. If the light source within the image changes, the screen might flicker. If this happens, stop and resume the Live View shooting under the actual light source to be used.
- Page 122 Notes About the Shooting Results When you shoot continuously with the Live View function for a long period, the camera’s internal temperature may increase and it can degrade image quality. Terminate Live View shooting when not shooting images. Before taking a long exposure, stop Live View shooting temporarily and wait several minutes before shooting.
-
Page 123: Shooting Movies
Shooting Movies Cards which can record movies When shooting movies, use a large-capacity SD card rated SD Speed Class 6 “ If you use a slow-writing card when shooting movies, the movie might not be recorded properly. And if you playback a movie on a card having a slow reading speed, the movie might not playback properly. -
Page 124: Shooting Movies
k Shooting Movies Connecting the camera to a TV set is recommended to playback movies (p.167, 169). Autoexposure Shooting During movie shooting, do not point the lens toward the sun. The sun’s heat can damage the camera’s internal components. Cautions for movie shooting are on pages 135 and 136. If necessary, also read the Live View shooting cautions on pages 121 and 122. - Page 125 k Shooting Movies One continuous movie will be recorded as one file. During movie shooting, the top, bottom, left, and right parts of the screen will have a semi-transparent mask. The area enclosed by the semi- transparent mask will be the movie image that is recorded. The semi- transparent mask size will change depending on the [n Movie rec.
- Page 126 k Shooting Movies About the Information Display Each time you press the <B> button, the information display will change. Frame rate White balance Picture Style Auto Lighting Optimizer Image-recording quality Movie-recording size AF mode •d : Live mode •c : Face detection Live mode •f : Quick mode Shutter speed...
-
Page 127: Manual Exposure Shooting
Manual Exposure Shooting You can manually set the shutter speed, aperture, and ISO speed for movie shooting. Using manual exposure to shoot movies is for advanced users. <6> <O> + <6> Set the Mode Dial to <k>. The reflex mirror will make a sound, then the image will appear on the LCD monitor. - Page 128 k Shooting Movies With manual exposure shooting, AE lock and exposure compensation cannot be set. Changing the aperture during movie shooting is not recommended since variations in the exposure, due to the drive of the lens aperture, will be recorded. If you use a lens whose aperture changes while you zoom, you should not zoom while shooting a movie.
-
Page 129: Shooting Still Photos
Shooting Still Photos Taking still photos during movie shooting The still photo will record the entire screen including the semi- transparent mask. If you take a still photo during movie shooting, the movie will have a still moment lasting approx. 1 sec. The captured still photo will be recorded to the card, and the movie shooting will resume automatically when the Live View image is displayed. -
Page 130: Shooting Function Settings
Shooting Function Settings Function settings particular to movie shooting are explained here. Q Quick Control While the image is displayed on the LCD monitor, pressing the <Q> button will enable you to set the white balance, Picture Style, Auto Lighting Optimizer, image-recording quality (for still photos), movie- recording size, and AF mode. - Page 131 [n] Menu Movie-recording size You can select the movie’s image size [****x****] and frame rate [9] (frames recorded per second). The 9 (frame rate) displayed on the [Movie rec. size] screen switches automatically depending on the [6 Video system] setting. •...
- Page 132 Shooting Function Settings Total Movie Recording Time and File Size Per Minute Movie-recording Size [1920x1080] [1280x720] [640x480] [Crop 640x480] After you start shooting a movie, the movie shooting will stop automatically if the file size reaches 4 GB or if the movie length reaches 29 min.
- Page 133 kShutter/AE lock button You can change the function assigned to the AE lock button and to when you press the shutter button halfway. • AF/AE lock: Normal function. Press the shutter button halfway to execute AF. Press the <w> button for AE lock. •...
-
Page 134: Sound Recording
Shooting Function Settings [o] Menu Movie exposure Normally, set this option to [Auto]. Setting [Movie exposure] to [Manual] enables you to manually set the ISO speed, shutter speed, and aperture for movie shooting (p.127). Grid display With [Grid 1l] or [Grid 2m], you can display grid lines. Metering timer You can change how long the exposure setting is displayed (AE lock time). - Page 135 [2 Shooting 2] Menu Notes on Movie Shooting Recording and Image Quality If the attached lens has an Image Stabilizer, the Image Stabilizer will operate at all times even if you do not press the shutter button halfway. The Image Stabilizer will thereby consume battery power and may shorten the total movie shooting time or decrease the number of possible shots.
- Page 136 Notes on Movie Shooting Camera’s internal temperature increase and image degradation If the camera’s internal temperature becomes high, the <E> icon may appear on the screen. When not shooting, turn off the camera. If you take still photos while the <E> icon is displayed on the screen, the image quality may be degraded.
-
Page 137: Handy Features
Handy Features Silencing the Beeper (p.138) Card Reminder (p.138) Setting the Image Review Time (p.138) Setting the Auto Power-off Time (p.139) Adjusting the LCD Monitor Brightness (p.139) File Numbering Methods (p.140) Auto Rotation of Vertical Images (p.142) Checking Camera Settings (p.143) Reverting the Camera to the Default Settings (p.144) Preventing the LCD Monitor from Turning off Automatically (p.146) -
Page 138: Handy Features
Handy Features 3 Silencing the Beeper You can prevent the beeper from sounding when focus is achieved or during self-timer operation. 3 Card Reminder This prevents shooting if there is no card in the camera. 3 Setting the Image Review Time You can set how long the image is displayed on the LCD monitor immediately after capture. -
Page 139: Setting The Auto Power-Off Time
3 Setting the Auto Power-off Time To save battery power, the camera turns off automatically after the set time of idle operation elapses. You can set this auto power-off time. When the camera has turned off due to auto power off, you can wake up the camera by pressing the shutter button halfway or any of the following buttons: <M>... -
Page 140: File Numbering Methods
Handy Features 3 File Numbering Methods The file number is like the frame number on a roll of film. The captured images are assigned a sequential file number from 0001 to 9999 and saved in one folder. You can change how the file number is assigned. The file number will appear on a computer in this format: IMG_0001.JPG. - Page 141 [Auto reset]: Resets the file numbering to 0001 whenever the card is replaced. Each time you replace the card, the file numbering restarts from 0001. This is convenient if you want to organize images according to cards. If the replacement card contains images recorded previously, the file numbering of the new images might continue from the file numbering of the existing images in the card.
-
Page 142: Auto Rotation Of Vertical Images
Handy Features 3 Auto Rotation of Vertical Images [OnPD] : The vertical image is automatically rotated during playback on both the camera’s LCD monitor and on the computer. [OnD] : The vertical image is automatically rotated only on the computer. [Off] : The vertical image is not automatically rotated at all. -
Page 143: B Checking Camera Settings
B Checking Camera Settings While the menu is displayed, press the <B> button to display the camera’s major function settings. Settings Display Beeper (p.138) Auto power off (p.139) Sensor cleaning (p.150) While the menu is displayed, press the <B> button to display the settings. -
Page 144: Reverting The Camera To The Default Settings
Handy Features 3 Reverting the Camera to the Default SettingsN This is for reverting all the camera’s shooting settings and Custom Functions to the default settings. This works in the <d> and other Creative Zone modes. Select [Clear settings]. Under the [7] tab, select [Clear settings], then press <0>. -
Page 145: Shooting Settings
Shooting Settings AF mode One-Shot AF AF point selection Automatic selection q (Evaluative Metering mode metering) ISO speed AUTO (Auto) Drive mode u (Single shooting) Exposure Canceled compensation/AEB Flash exposure 0 (Zero) compensation Custom Functions Unchanged Camera Settings Auto power off 30 sec. -
Page 146: Preventing The Lcd Monitor From Turning Off Automatically
Handy Features 3 Preventing the LCD Monitor from Turning off Automatically This prevents the display-off sensor from turning off the shooting settings display automatically when your eye nears the viewfinder eyepiece. 3 Changing the Shooting Settings Screen Color You can change the background color of the shooting settings screen. Select [LCD auto off]. -
Page 147: Setting The Flash
Setting the FlashN The built-in flash and external Speedlite settings can be set with the menu. The [External flash ***] menu options for external Speedlites are applicable only to an attached EX-series Speedlite compatible with the respective functions. The setting procedure is the same as setting a camera menu function. [Flash firing] [Built-in flash func. -
Page 148: Flash Mode
3 Setting the FlashN [Built-in flash func. setting] and [External flash func. setting] Settable Functions Function Flash mode Shutter sync. FEB* Flash exposure compensation E-TTL II Zoom* Wireless setting* * Regarding [FEB] (Flash exposure bracketing), [Zoom], and [Wireless set.], refer to the Speedlite’s instruction manual. Flash mode With an external Speedlite, you can select the flash mode to suit your flash shooting. - Page 149 Flash exposure compensation See “y Flash Exposure Compensation” on page 88. E-TTL II For normal flash exposures, set it to [Evaluative]. If [Average] is set, the flash exposure will be averaged for the entire metered scene as with an external metering flash. Since flash exposure compensation may be necessary depending on the scene, this setting is for advanced users.
-
Page 150: Automatic Sensor Cleaning
f Automatic Sensor Cleaning Whenever you set the power switch to <1> or <2>, the Self Cleaning Sensor Unit operates to automatically shake off the dust on the front of the sensor. Normally, you need not pay attention to this operation. -
Page 151: Appending Dust Delete Data
Appending Dust Delete DataN Normally, the Self Cleaning Sensor Unit will eliminate most of the dust that might be visible on captured images. However, in case visible dust still remains, you can append the Dust Delete Data to the image for erasing the dust spots later. -
Page 152: Photograph A Solid-White Object
3 Appending Dust Delete DataN About the Dust Delete Data After the Dust Delete Data is obtained, it is appended to all the JPEG and RAW images captured thereafter. Before an important shoot, you should update the Dust Delete Data by obtaining it again. To erase dust spots automatically with the provided software, see the Software Instruction Manual in the CD-ROM. -
Page 153: Manual Sensor Cleaning
The surface of the image sensor is extremely delicate. If the sensor needs to be cleaned directly, having it done by a Canon Service Center is recommended. Before cleaning the sensor, detach the lens from the camera. - Page 154 Never use canned air or gas to clean the sensor. The blowing force can damage the sensor or the spray gas can freeze on the sensor. If smear that cannot be removed with a blower remains, having the sensor cleaned by a Canon Service Center is recommended.
-
Page 155: Image Playback
Image Playback This chapter explains features related to viewing photos and movies, going into more detail than in Chapter 2 “Basic Shooting and Image Playback” which explained the playback procedure. Here you will find explanations about how to playback and erase photos and movies with the camera and viewing them on a TV set. -
Page 156: Hi Searching For Images Quickly
x Searching for Images Quickly H Display Multiple Images on One Screen (Index display) Search for images quickly with the index display showing four or nine images on one screen. Playback the image. When you press the <x> button, the last captured image will be displayed. - Page 157 I Jump through Images (Jump display) With the single image display, you can turn the <6> dial to jump through the images. Jump method Image location To search images according to the shooting date, select [Date]. Turn the <6> dial to display the shooting date. If the card contains both [Movies] and [Stills], select either one to display only movies or stills.
-
Page 158: U/Y Magnified View
u/y Magnified View You can magnify a shot image by 1.5x to 10x on the LCD monitor. Magnified area position You can turn the <6> dial to view another image while the magnification is maintained. Magnified view is not possible during the image review immediately after the image is taken. -
Page 159: Rotating The Image
b Rotating the Image You can rotate the displayed image to the desired orientation. If you have set [5 Auto rotate] to [OnzD] (p.142) before taking vertical shots, you need not rotate the image as described above. If the rotated image is not displayed in the rotated orientation during image playback, set the [5 Auto rotate] menu option to [OnzD]. -
Page 160: Enjoying Movies
k Enjoying Movies Basically, there are the following three ways to playback the movies you shot. Playback on a TV set Movies on a card can be played only by devices which can play MOV files. Since hard disk recorders do not have an HDMI IN terminal, the camera cannot be connected with an HDMI cable. - Page 161 Playback and Editing with a Personal Computer (See the PDF file instruction manual for ZoomBrowser EX/ImageBrowser) For smooth movie playback, use a high-performance personal computer. Regarding the computer hardware requirements for ZoomBrowser EX/ ImageBrowser, see the PDF file instruction manual. If you want to use commercially-available software to playback or edit the movies, be sure it is compatible with MOV files.
-
Page 162: Playing Movies
k Playing Movies Speaker Playback the image. Press the <x> button to display the image. Select a movie. Press the <U> key to select a movie. With the single-image display, the <1s> icon displayed on the upper left indicates that it is a movie. During the index display, the perforation on the left edge of the image indicates that it is a movie. - Page 163 Function Exit Returns to the single-image display. Play Pressing <0> toggles between play and stop. Adjust the slow motion speed by pressing the <U> key. Slow motion The slow-motion speed is indicated on the upper right. First frame Displays the movie’s first frame. Each time you press <0>, a single previous frame is Previous frame displayed.
-
Page 164: Editing The Movie's First And Last Scenes
X Editing the Movie’s First and Last Scenes You can edit out the first and last scenes of a movie in 1-sec. increments. Since the editing is done in 1-sec. increments (position indicated by [X]), the exact position where the movie is edited may differ slightly from the position you specified. -
Page 165: Slide Show (Auto Playback)
Slide Show (Auto Playback) You can playback the images in the card as an automatic slide show. Number of images to be played Item All images All the still photos and movies in the card will be played back. Still photos and movies taken on the selected shooting date will Date be played back. -
Page 166: Start The Slide Show
3 Slide Show (Auto Playback) Display time To pause the slide show, press <0>. During pause, [G] will be displayed on the upper left of the image. Press <0> again to resume the slide show. During auto playback, you can press the <B> button to change the still photo display format. -
Page 167: Viewing The Images On Tv
Viewing the Images on TV You can also view the still photos and movies on a TV set. Before connecting or disconnecting the cable between the camera and television, turn off the camera and television. * Adjust the movie’s sound volume with the TV set. * Depending on the TV set, part of the image displayed might be cut off. - Page 168 Viewing the Images on TV Do not connect any other device’s output to the camera’s <D> terminal. Doing so may cause a malfunction. Some TVs might not be able to display the captured images. In such a case, use the provided AV cable to connect to the TV. The camera’s <q/C>...
-
Page 169: The Camera
Connect the AV cable to the camera’s < q C> terminal. With the plug’s <Canon> logo facing the back of the camera, insert it into the < q C> terminal. Connect the AV cable to the TV set. -
Page 170: K Protecting Images
K Protecting Images Protecting an image prevents it from being erased accidentally. Image protect icon If you format the card (p.42), the protected images will also be erased. Once an image is protected, it cannot be erased by the camera’s erase function. -
Page 171: L Erasing Images
L Erasing Images You can either select and erase images one by one or erase them in one batch. Protected images (p.170) will not be erased. Once an image is erased, it cannot be recovered. Make sure you no longer need the image before erasing it. To prevent important images from being erased accidentally, protect them. - Page 172 L Erasing Images 3 Erasing All Images in the Card You can also erase all the images in the card. When the [3 Erase images] menu is set to [All images on card], all the images in the card will be erased. To also erase protected images, format the card (p.42).
-
Page 173: B Shooting Information Display
B Shooting Information Display When you press the <B> button during single-image playback, you can switch the shooting information display. The most detailed shooting information is shown below. Exposure compensation amount Flash exposure compensation amount Aperture Shutter speed/ Recording time Metering mode Shooting mode/ Movie... - Page 174 B Shooting Information Display About the Histogram The brightness histogram display shows the exposure level distribution and overall brightness. The RGB histogram display is for checking the color saturation and gradation. The display can be switched with the [4 Histogram] menu. [Brightness] Display This histogram is a graph showing the distribution of the image’s brightness level.
-
Page 175: Printing Images
Printing Images Printing (p.176) You can connect the camera directly to a printer and print out the images in the card. The camera is compatible with “wPictBridge” which is the standard for direct printing. Digital Print Order Format (DPOF) (p.185) DPOF (Digital Print Order Format) enables you to print images recorded in the card according to your printing instructions such as the image selection, quantity to print,... -
Page 176: Preparing To Print
Preparing to Print The direct printing procedure is done entirely with the camera while you look at the LCD monitor. Connecting the Camera to a Printer Set the camera’s power switch to <2>. Set up the printer. For details, see the printer’s instruction manual. - Page 177 PictBridge Movies cannot be printed. The camera cannot be used with printers compatible only with CP Direct or Bubble Jet Direct. Do not use any interface cable other than the one provided. If there is a long beeping sound in step 5, it indicates a problem with the printer.
-
Page 178: Wprinting
wPrinting The screen display and setting options will differ depending on the printer. Some settings might not be available. For details, see the printer’s instruction manual. Printer-connected icon Print setting screen The paper size, type, and layout you have set are displayed. * Depending on the printer, certain settings such as the date and file number imprinting and trimming might not be available. - Page 179 The paper type screen will appear. Select the type of the paper loaded in the printer, then press <0>. When using a Canon printer and Canon paper, read the printer’s instruction manual to check what paper types can be used.
-
Page 180: Set The Printing Effects
wPrinting Printing Effect The image will be printed according to the printer’s standard colors. The image’s Exif data is used to make automatic corrections. EOff No automatic correction will be applied. The image will be printed with higher saturation to produce EVIVID more vivid blues and greens. -
Page 181: Start Printing
With Easy printing, you can print another image using the same settings. Just select the image and press the < number of copies will always be 1. (You cannot set the number of copies.) Also, any trimming (p.183) will not be applied. The [Default] setting for printing effects and other options are the printer’s own default settings as set by the printer’s manufacturer. - Page 182 wPrinting e Adjustment of Printing Effects Brightness The image brightness can be adjusted. Adjust levels When you select [Manual], you can change the histogram’s distribution and adjust the image’s brightness and contrast. With the Adjust levels screen displayed, press the <B> button to change the position of the <...
-
Page 183: Trimming The Image
Trimming the Image Tilt correction On the print setting screen, select [Trimming]. Set the trimming frame size, position, and aspect ratio. The image area within the trimming frame will be printed. The trimming frame’s aspect ratio can be changed with [Paper settings]. Changing the trimming frame size When you press the <u>... -
Page 184: Error Messages
wPrinting Depending on the printer, the trimmed image area might not be printed as you specified. The smaller you make the trimming frame, the grainier the picture will look on the print. While trimming the image, look at the camera’s LCD monitor. If you look at the image on a TV screen, the trimming frame might not be displayed accurately. -
Page 185: W Digital Print Order Format (Dpof)
W Digital Print Order Format (DPOF) You can set the print type, date imprinting, and file No. imprinting. The print settings will be applied to all print-ordered images. (They cannot be set individually for each image.) Setting the Printing Options Print type Select [Print order]. - Page 186 W Digital Print Order Format (DPOF) Standard Prints one image on one sheet. Index Print type Both Date [On] imprints the recorded date on the print. File number [On] imprints the file No. on the print. Even if [Date] and [File No.] are set to [On], the date or file No. might not be imprinted depending on the print type setting and printer model.
-
Page 187: Print Ordering
Print Ordering Sel.Image Quantity Total images selected Check mark Index icon All image If you select [Mark all on card], one copy of all the images in the card will be set for printing. If you select [Clear all on card], the print order will be cleared for all the images in the card. -
Page 188: Direct Printing With Dpof
W Direct Printing with DPOF Prepare to print. See page 176. Follow the “Connecting the Camera to a Printer” procedure up to step 5. Under the [3] tab, select [Print order]. Select [Print]. [Print] will be displayed only if the camera is connected to the printer and printing is possible. -
Page 189: Customizing The Camera
Customizing the Camera You can customize various camera features to suit your picture-taking preferences. You can do it with Custom Functions. Custom Functions can be set and used only in Creative Zone modes. -
Page 190: Setting Custom Functions
Setting Custom FunctionsN Custom Function No. Clearing All Custom Functions On the [7 Clear settings] menu, select [Clear all Custom Func. (C.Fn)] to clear all the Custom Function settings (p.144). Select [Custom Functions (C.Fn)]. Under the [7] tab, select [Custom Functions (C.Fn)], then press <0>. -
Page 191: Custom Functions
Custom Functions C.Fn I: Exposure Exposure level increments ISO expansion Flash sync. speed in Av mode * The C.Fn I -1 setting will also be applied to movie shooting. C.Fn II: Image Long exposure noise reduction High ISO speed noise reduction Highlight tone priority C.Fn III: Autofocus/Drive AF-assist beam firing... -
Page 192: Custom Function Settings
Custom Function SettingsN Custom Functions are organized into four groups based on the function type: C.Fn I: Exposure, C.Fn II: Image, C.Fn III: Autofocus/Drive, C.Fn IV: Operation/Others. C.Fn I: Exposure C.Fn-1 Exposure level increments 0: 1/3-stop 1: 1/2-stop Sets 1/2-stop increments for the shutter speed, aperture, exposure compensation, AEB, flash exposure compensation, etc. - Page 193 When 1 or 2 is set, high-speed sync cannot be used with an external Speedlite. C.Fn II: Image C.Fn-4 Long exposure noise reduction 0: Off 1: Auto For 1 sec. or longer exposures, noise reduction is performed automatically if noise typical of long exposures is detected. This [Auto] setting is effective in most cases.
- Page 194 3 Custom Function SettingsN C.Fn-6 Highlight tone priority 0: Disable 1: Enable Improves the highlight detail. The dynamic range is expanded from the standard 18% gray to bright highlights. The gradation between the grays and highlights becomes smoother. With setting 1, the [Disable] setting automatically takes effect for the Auto Lighting Optimizer (p.103) and it cannot be changed.
- Page 195 C.Fn-8 Mirror lockup 0: Disable 1: Enable Prevents camera vibrations caused by the reflex mirror action which can disturb shooting with super telephoto lenses or close-up (macro) shooting. See page 106 for the mirror lockup procedure. C.Fn IV: Operation/Others C.Fn-9 Shutter/AE lock button 0: AF/AE lock 1: AE lock/AF...
- Page 196 3 Custom Function SettingsN C.Fn-10 Assign SET button You can assign a frequently-used function to <0>. Press <0> when the camera is shooting-ready. 0: Normal (disabled) 1: Image quality Press <0> to display the image-recording quality setting screen on the LCD monitor.
- Page 197 C.Fn-12 Add image verification data 0: Disable 1: Enable Data for verifying whether the image is original or not is appended to the image automatically. When the shooting information of an image appended with the verification data is displayed (p.173), the <L> icon will appear.
-
Page 198: Registering My Menu
Registering My MenuN Under the My Menu tab, you can register up to six menu options and Custom Functions whose settings you change frequently. About My Menu settings Sort You can change the order of the registered items in My Menu. Select [Sort] and select the item whose order you want to change. -
Page 199: Setting Copyright Information
Setting Copyright InformationN When you set the copyright information, it will be appended to the image as Exif information. Select [Copyright information]. Under the [7] tab, select [Copyright information], then press <0>. Select the desired option. Press the <V> key to select either [Enter author’s name] or [Enter copyright details], then press <0>. - Page 200 3 Setting Copyright InformationN Text Entry Procedure Entering text In the bottom area, press the <S> key to select a character, then press <0> to enter it. Deleting a character Press the <L> button to delete a character. Exiting After completing the text entry, press the <M> button to return to the screen in step 2.
-
Page 201: Reference
Reference This chapter provides reference information for camera features, system accessories, etc. The back of this chapter also has an index to make it easier to look up needed information. -
Page 202: When Autofocus Fails
When Autofocus Fails Autofocus can fail to achieve focus (the focus confirmation light <o> blinks) with certain subjects such as the following: Subjects difficult to focus Very low-contrast subjects (Example: Blue sky, solid-color walls, etc.) Subjects in very low light Extremely backlit or reflective subjects (Example: Car with a highly reflective body, etc.) Near and far subjects covered by an AF point... -
Page 203: Using A Household Power Outlet
Using a Household Power Outlet With the AC Adapter Kit ACK-E8 (sold separately), you can connect the camera to a household power outlet and not worry about the battery level. Do not connect or disconnect the power cord while the camera’s power switch is set to <... -
Page 204: Remote Control Shooting
Remote Control Shooting Remote Controller RC-6 (Sold separately) This remote controller enables you to take pictures wirelessly up to about 5 meters/16.4 feet from the camera. You can either shoot immediately or use a 2-sec. delay. Set the self-timer to <Q> (p.71). Point the remote controller toward the camera’s remote control sensor and press the transmit button. -
Page 205: Using The Eyepiece Cover
Remote Switch RS-60E3 (Sold separately) This remote switch has a 60 cm/2.0 feet cord and enables you to press the shutter button halfway or completely. It connects to the camera’s remote control terminal. Using the Eyepiece Cover If you take a picture without looking at the viewfinder, light entering the eyepiece can throw off the exposure. -
Page 206: External Speedlites
External Speedlites EOS-dedicated, EX-series Speedlites Basically operates like a built-in flash for easy operation. When an EX-series Speedlite (sold separately) is attached to the camera, almost all the autoflash control is done by the camera. In other words, it is like a high-output flash attached externally in place of the built-in flash. -
Page 207: Using Non-Canon Flash Units
Using Non-Canon Flash Units Sync Speed The camera can synchronize with compact, non-Canon flash units at 1/200 sec. or slower. Be sure to test the flash unit beforehand to make sure it synchronizes properly with the camera. -
Page 208: Using Eye-Fi Cards
Using Eye-Fi Cards With a commercially-available Eye-Fi card already set up, you can automatically transfer captured images to a personal computer or upload them to an online service via a wireless LAN. The image transfer is a function of the Eye-Fi card. To set up, use the card and to troubleshoot any image transfer problems, refer to the Eye- Fi card’s instruction manual or inquire the card’s manufacturer. - Page 209 Transmission status icon (Gray) Not connected : No connection with access point. (Blinking) Connecting : Connecting with access point. (Displayed) Connected : Connection to access point established. ( ) Transferring Cautions for Using Eye-Fi Cards If “J” is displayed, an error occurred while retrieving the card information.
-
Page 210: Function Availability Table According To Shooting Modes
Function Availability Table according to Shooting Modes o: Set automatically k: User selectable Mode Dial JPEG RAW + 73 Auto Manual Standard Portrait Landscape Neutral Faithful Monochrome User Defined Auto WB Preset WB Custom WB WB correction WB bracketing Auto Lighting Optimizer Peripheral illumination correction Long exposure noise... - Page 211 Mode Dial Evaluative Partial Spot Center-weighted average Program shift Exposure compensation AE lock Depth-of-field preview Single Continuous Self-timer/ Remote control Self-timer:2 sec Self-timer:Continuous Auto Manual Flash off Red-eye reduction FE lock Flash exposure compensation sRGB Adobe RGB Live View shooting *1: For manual exposure only.
-
Page 212: Menu Settings
Menu Settings 1 Shooting 1 (Red) Quality Beep Release shutter without card Image review Peripheral illumination correction Red-eye reduction Flash control 2 Shooting 2 (Red) Exposure compensation/AEB Auto Lighting Optimizer Metering mode Custom White Balance WB Shift/BKT Color space Picture Style The [2] Shooting 2, [y] Shooting 3, [7] Set-up 3, and [9] My Menu screens (tabs) are not displayed in Basic Zone modes. - Page 213 y Shooting 3 (Red) Dust Delete Data ISO Auto 3 Playback 1 (Blue) Protect images Rotate Erase images Print order Slide show 4 Playback 2 (Blue) Histogram Image jump w/6 Ctrl over HDMI 5 Set-up 1 (Yellow) Auto power off Auto rotate Format File numbering...
- Page 214 Menu Settings 6 Set-up 2 (Yellow) LCD brightness Date/Time Language Video system Sensor cleaning Live View function settings 7 Set-up 3 (Yellow) Custom Functions (C.Fn) Copyright information Clear settings Firmware Ver. 9 My Menu (Green) My Menu settings Seven brightness levels provided Set the date (year, month, day) and time (hour, min., sec.) Select the interface language...
- Page 215 Movie Shooting Mode Menu n Movie 1 (Red) Movie recording size AF mode AF during k kShutter/AE lock button Remote control o Movie 2 (Red) Movie exposure Grid display Metering timer Sound recording kHighlight tone priority* * Displayed only when [Movie exposure] is set to [Manual]. About the menu screen in movie shooting mode The [n] Movie 1 and [o] Movie 2 screens (tabs) are displayed only in the movie shooting mode.
-
Page 216: System Map
System Map ST-E2 270EX 430EX II Bundled Eyepiece Extender EP-EX15ll Accessories Rubber Frame Ef E-series Dioptric Adjustment Lenses Wide Strap EW-100DB lll Eyecup Ef Angle Finder C Battery Pack Semi Hard Case EH19-L Battery Magazine Battery Grip BGM-E8L for two BG-E8 LP-E8 battery packs 580EX II... - Page 217 Remote Controller Remote Switch RC-6 RS-60E3 Stereo AV Cable AVC-DC400ST EOS DIGITAL Software Instruction Solution Disk Manual Interface Cable Interface Cable IFC-200U/500U Original Data Security Kit Card reader OSK-E3 SD memory card/ PCMCIA adapter SDHC memory card/ SDXC memory card EF lenses External microphone HDMI Cable...
-
Page 218: Troubleshooting Guide
Canon Service Center. Power-Related Problems The battery cannot be recharged with the battery charger provided. Do not recharge any battery pack other than a genuine Canon Battery Pack LP-E8. The camera does not operate even when the power switch is set to <1>. - Page 219 The battery becomes exhausted quickly. Use a fully-charged battery pack (p.24). The rechargeable battery pack performance will degrade over repeated use. Purchase a new one. If you use Live View shooting or shoot movies for a prolonged period (p.107, 123), the number of possible shots will decrease. The camera turns off by itself.
- Page 220 Troubleshooting Guide The card cannot be used. If a card error message is displayed, see page 42 or 224. The maximum burst during continuous shooting is lower. Set the [7 Custom Functions (C.Fn)] menu’s [High ISO speed noise reduction] to [Standard], [Low], or [Disable]. If it is set to [Strong], the maximum burst during continuous shooting will greatly decrease (p.193).
- Page 221 The built-in flash does not fire. If you shoot continuously with the built-in flash at short intervals, the flash might stop operating to protect the flash unit. The camera makes a noise when it is shaken. The built-in flash’s pop-up mechanism moves slightly. This is normal. The shutter makes two shooting sounds during Live View shooting.
- Page 222 Troubleshooting Guide Display & Operation Problems The LCD monitor does not display a clear image. If the LCD monitor is dirty, use a soft cloth to clean it. In low or high temperatures, the LCD monitor display may seem slow or might look black.
- Page 223 The shooting date and time displayed is incorrect. The correct date and time has not been set (p.29). No image appears on the TV screen. Make sure the AV cable or HDMI cable’s plug is inserted all the way in (p.167, 169).
-
Page 224: Error Codes
50, 60, Operate the power switch, remove and install the battery pack 70, 80 again, or use a Canon lens (p.27, 26) * If the error still persists, write down the error No. and contact your nearest Canon Service Center. -
Page 225: Specifications
SD memory card, SDHC memory card, SDXC memory card Image sensor size: 22.3 x 14.9 mm Compatible lenses: Canon EF lenses (including EF-S lenses) (35mm-equivalent focal length is approx. 1.6 times the lens focal length) Lens mount: Canon EF mount •... - Page 226 Specifications • Viewfinder Type: Coverage: Magnification: Eye point: Built-in dioptric adjustment: -3.0 - +1.0 m Focusing screen: Mirror: Depth-of-field preview: Provided • Autofocus Type: AF points: Metering range: Focus modes: AF-assist beam: • Exposure Control Metering modes: Metering range: Exposure control: ISO speed: (Recommended exposure index)
- Page 227 Continuous shooting speed: Max. approx. 3.7 shots/sec. Max. burst: JPEG Large/Fine: Approx. 34 shots RAW: Approx. 6 shots RAW+JPEG Large/Fine: Approx. 3 shots * Figures are based on Canon’s testing standards (ISO • Live View Shooting Focusing: Live mode, Face detection Live mode (Contrast detection)
- Page 228 Specifications • Movie Shooting Movie compression: Audio recording format: Linear PCM Recording format: Recording size and frame rate: File size: Focusing: Metering modes: Metering range: Exposure control: ISO speed: Sound recording: Grid display: • LCD Monitor Type: Monitor size and dots: Coverage: Brightness adjustment: Manual (7 levels) Interface language:...
- Page 229 • Image Playback Image display formats: Single image, Single image + Info (Basic info, detailed info, histogram), 4-image index, 9-image index, image rotate possible Zoom magnification: Approx. 1.5x - 10x Image browsing methods: Single image, jump by 10 or 100 images, by shooting date, by movie, by stills Highlight alert: Overexposed highlights blink...
-
Page 230: Operation Environment
Specifications • Dimensions and Weight Dimensions (W x H x D): 128.8 x 97.5 x 75.3 mm / 5.1 x 3.8 x 3.0 in. Weight: • Operation Environment Working temperature range: 0°C - 40°C / 32°F - 104°F Working humidity: •... - Page 231 LP1116 (sold separately) All specifications above are based on Canon’s testing standards. Product specifications and the exterior are subject to change without notice. If a problem occurs with a non-Canon lens attached to the camera, consult the respective lens maker. Specifications...
- Page 232 Use of genuine Canon accessories is recommended This product is designed to achieve excellent performance when used with genuine Canon accessories. Canon shall not be liable for any damage to this product and/or accidents such as fire, etc., caused by the malfunction of non- genuine Canon accessories (e.g., a leakage and/or explosion of a battery...
- Page 233 Safety Warnings Follow these safeguards and use the equipment properly to prevent injury, death, and material damage. Preventing Serious Injury or Death • To prevent fire, excessive heat, chemical leakage, and explosions, follow the safeguards below: - Do not use any batteries, power sources, and accessories not specified in this booklet.
- Page 234 • Do not use paint thinner, benzene, or other organic solvents to clean the equipment. Doing so may cause fire or a health hazard. If the product does not work properly or requires repair, contact your dealer or your nearest Canon Service Center.
- Page 235 — Consult the dealer or an experienced radio/TV technician for help. The cable with the ferrite core provided with the digital camera must be used with this equipment in order to comply with Class B limits in Subpart B of Part 15 of the FCC rules.
- Page 236 4. Do not expose the charger to rain or snow. 5. Use of an attachment not recommended or sold by Canon may result in fire, electric shock, or personal injury. 6. To reduce risk of damage to electric plug and cord, pull by plug rather than by cord when disconnecting charger.
-
Page 237: Index
Index 1280x720 ...131 1920x1080 ...131 1st-curtain sync...148 2nd-curtain sync...148 2-sec. self-timer ...71 4- or 9-image index display...156 640x480 ...131 A/V OUT...160, 169 Access lamp...32 A-DEP (Automatic depth-of-field AE)...85 Adobe RGB...96 AE lock...97, 112, 134 AEB...89 AF → Focusing AI FOCUS (AI Focus AF)...67 AI SERVO (AI Servo AF) ...67 AI Servo AF...67 Aperture-priority AE ...80... - Page 238 Index Copyright information...199 Creative Auto ...55 Creative Zone modes ...20 Custom Functions...190 Clear all ...190 List...191 Date/Time ...29 DC coupler...203 Depth-of-field preview...82 Dial...16, 77 Digital terminal ...176 Dioptric adjustment ...36 Direct printing → Printing DPOF...185 Drive mode ...70, 71 Dust Delete Data ...151 Erase (image) ...171 Error codes ...224 Evaluative metering ...86...
- Page 239 Function availability table...210 Grid display ...112, 134 HDMI...160, 167 HDMI CEC (High-Definition Multimedia Interface Consumer Electronics Control) ...168 High-Definition ...131, 160, 167 Highlight alert ...173 Highlight detail loss ...173 Highlight tone priority ...62, 194 Histogram (Brightness/RGB) ...174 Household power ...203 ICC profile ...96 Image Auto playback ...165...
- Page 240 Index Live View shooting...107 Focusing...113 Grid display ...112 Possible shots ...109 Long exposures → Bulb Low level format...42, 43 M (Manual exposure)...83 Magnified view ...120, 158 Malfunction ...218 Manual exposure ...83, 127 Manual focusing...69, 120 Maximum burst ...73 Memory card → Card Menu Menu settings ...212 My Menu...198...
- Page 241 Paper settings (printing)...178 Partial metering...86 Peripheral illumination correction ...104 PictBridge...175 Picture Style Adjustment...91 Selection...75 User defined ...94 Pixels ...72 Playback ...58, 155 Portrait ...50, 54, 75 Possible shots...28, 109 Power Auto power off ...27, 139 Battery check...28 Household power...203 Possible shots ...28, 109 Recharge ...24 Switch ...27 Printing...176...
- Page 242 Index Shooting mode...20 A-DEP (Automatic depth-of-field AE) ...85 M (Manual exposure) ...83 Av (Aperture-priority AE) ...80 Tv (Shutter-priority AE)...78 P (Program AE) ...60 C (Creative Auto) ...55 1 (Full Auto)...46 7 (Flash Off) ...49 2 (Portrait) ...50 3 (Landscape) ...51 4 (Close-up) ...52 5 (Sports)...53 6 (Night Portrait) ...54...
-
Page 243: End Pages: Quick Reference Guide And Software Start Guide
Quick Reference Guide Menu Operations - - - - - - - - - - - - - - - - - - - - - p.244 Q Quick Control Screen - - - - - - - - - - - - - - - p.245 Image-recording Quality - - - - - - - - - - - - - - - - p.246 Picture Style - - - - - - - - - - - - - - - - - - - - - - - - p.246 Nomenclature - - - - - - - - - - - - - - - - - - - - - - - p.247... -
Page 244: Quick Reference Guide
Quick Reference Guide Menu Operations <M> button monitor 1. Press the <M> button to display the menu. 2. Press the <U> key to select the tab, then press the <V> key to select the desired item. 3. Press <0> to display the setting. 4. -
Page 245: Q Quick Control Screen
Q Quick Control Screen Shutter speed Exposure compensation/ AEB setting Shooting mode Image-recording quality Picture Style White balance Press the <S> key to select the function, then turn the <6> dial to set it. In the Basic Zone modes (except C), you can select certain drive modes and the image-recording quality. - Page 246 Quick Reference Guide Image-recording Quality Select [1 Quality], then press <0>. Press the <U> key to select the quality, then press <0>. Image-recording quality A Picture StyleN Style Standard Portrait Landscape Monochrome For <S> (Neutral) and <U> (Faithful), see the camera’s instruction manual.
- Page 247 Nomenclature Power switch <Z> ISO speed setting button <6> Main Dial Shutter button <A> Live View shooting/ Movie shooting button Display-off sensor <O> Aperture/Exposure compensation button Quick Reference Guide Mode Dial <D> Flash button Focus mode switch <A> AE lock button <S>...
- Page 248 Quick Reference Guide Shooting Settings Display Shutter speed Shooting mode Picture Style Image-recording quality Quick Control icon Battery check zxcn Viewfinder Information AF points AE lock Flash-ready Flash exposure compensation Shutter speed Aperture Aperture AF mode AF point activation indicator <•> Exposure level indicator ISO speed Exposure level...
-
Page 249: Basic Zone Modes
Basic Zone Modes 1 Full Auto C Creative Auto 7 Flash Off 2 Portrait 3 Landscape 4 Close-up 5 Sports 6 Night Portrait D Using the Built-in Flash Basic Zone Modes If necessary, the built-in flash will pop-up automatically in low-light or backlit conditions (except in the <7>... - Page 250 Quick Reference Guide Creative Zone Modes d: Program AE The camera automatically sets the shutter speed and aperture in the same way as the <1> mode. Set the Mode Dial to <d>. s: Shutter-priority AE f: Aperture-priority AE You can change the camera settings as desired to shoot in various ways.
- Page 251 E: AF ModeN S AF PointN Quick Reference Guide Set the lens focus mode switch to <f>. Press the <ZE> button. Press the <U> key to select the AF mode, then press <0>. X(One-Shot AF): For still subjects 9(AI Focus AF): Switches the AF mode automatically Z(AI Servo AF):...
- Page 252 Quick Reference Guide Z : ISO SpeedN Drive ModeN Press the <Z> button. Turn the <6> dial or press the <U> key to select the ISO speed. When “AUTO” is selected, the ISO speed is set automatically. When you press the shutter button halfway, the ISO speed setting will be displayed.
-
Page 253: A Live View Shooting
A Live View Shooting To change the Live View settings, use the [6 Live View function settings] menu. Battery Life with Live View Shooting Temperature At 23°C / 73°F Approx. 200 shots Press the <A> button to display the Live View image. Press the shutter button halfway to focus. - Page 254 Quick Reference Guide k Shooting Movies Custom FunctionsN 1 Exposure level increments 2 ISO expansion 3 Flash sync. speed in Av mode 4 Long exposure noise reduction 5 High ISO speed noise reduction 6 Highlight tone priority Set the Mode Dial to <k>. Press the shutter button halfway to focus.
- Page 255 Quick Reference Guide Image Playback Index Magnify Select image Erase Playback Shooting information...
-
Page 256: Software Start Guide
Software Start Guide EOS DIGITAL Solution Disk This disk contains various software for EOS DIGITAL. EOS Utility Software that lets you connect your computer and camera in order to download images (still images/movies) shot with the camera to the computer, set various settings of the camera, and remotely shoot photos by operating the computer. -
Page 257: Installing The Software
Insert EOS DIGITAL Solution Disk (CD). For Macintosh, double-click to open the CD-ROM icon displayed on the desktop, and double-click on [Canon EOS Digital Installer]. Click [Easy Installation] and follow the instructions on the screen to install. -
Page 258: Software Instruction Manual
Software Start Guide Software Instruction Manual Contains the Instruction Manual files for the software provided. Copying and Viewing the Instruction Manual PDFs Insert the [Software INSTRUCTION MANUAL] CD into your computer. Double-click the CD-ROM icon. For Windows, it is the icon displayed in [My Computer]. For Macintosh, it is the icon displayed on the desktop. - Page 260 CANON INC. 30-2, Shimomaruko 3-chome, Ohta-ku, Tokyo 146-8501, Japan CANON U.S.A. INC. U.S.A. One Canon Plaza, Lake Success, NY 11042-1198, U.S.A. For all inquires concerning this product, call toll free in the U.S. 1-800-OK-CANON CANON CANADA INC. HEADQUARTERS CANADA 6390 Dixie Road, Mississauga, Ontario L5T 1P7, Canada CANON CANADA INC.