Canon PowerShot S100 DIGITAL ELPH User Manual
Canon digital camera user manual
Hide thumbs
Also See for PowerShot S100 DIGITAL ELPH:
- User manual (236 pages) ,
- Getting started (99 pages) ,
- Service manual (10 pages)
Table of Contents
Advertisement
Quick Links
Camera User Guide
This camera has three basic functions:
Shooting
Replaying
Downloading Images to a Computer
This guide explains the shooting and replay functions.
The downloading function is covered separately in the Software Starter Guide.
• Please read the precautions on the next page
before using your camera for the first time.
ENGLISH
Advertisement
Table of Contents

Related Manuals for Canon PowerShot S100 DIGITAL ELPH


Summary of Contents for Canon PowerShot S100 DIGITAL ELPH
- Page 1 Camera User Guide This camera has three basic functions: Shooting Replaying Downloading Images to a Computer This guide explains the shooting and replay functions. The downloading function is covered separately in the Software Starter Guide. • Please read the precautions on the next page before using your camera for the first time.
- Page 2 • While every effort has been made to ensure that the information contained in this guide is accurate and complete, no liability can be accepted for any errors or omissions. Canon Inc. reserves the right to change the specifications of the hardware and software described herein at any time without prior notice.
-
Page 3: Table Of Contents
Table of Contents Read This First Please Read ... 4 Safety Precautions ... 4 Warnings ... 5 Cautions ... 7 Preventing Mulfunctions ... 8 Preparing the Camera Guide to Components ... 9 Front View ... 9 Back View ... 10 Operation Panel ... - Page 4 Table of Contents Basic Functions Turning the Power On/Off ... 22 Switching between the Shooting/Replay Modes ... 23 Using the Optical Viewfinder ... 23 Using the LCD Monitor ... 25 Shooting Mode ... 25 Replay Mode ... 26 Information Displayed on the LCD Monitor ... 26 Shooting Mode ...
- Page 5 Formatting CF Cards ... 65 Setting the Language ... 66 Appendices Care and Maintenance of the Camera ... 67 Troubleshooting ... 68 List of Messages ... 72 Specifications ... 74 Index ... 76 Canon Customer Support Help Desk ... 78 Table of Contents...
-
Page 6: Read This First
Canon digital camera or CompactFlash™ card (CF card) resulting in the failure of an image to be recorded or to be recorded in a format that is machine sensible. -
Page 7: Warnings
There is a risk of high-voltage electrical shock. Please take the first opportunity to consult your camera distributor or a Canon Customer Support Help Desk. • Stop operating the equipment immediately in the event that it emits smoke or noxious fumes. - Page 8 Continued use of the equipment may result in fire or electrical shock. Please consult your camera distributor or the closest Canon Customer Support Help Desk. • Do not use substances containing alcohol, benzene, thinners or other flammable substances to clean or maintain the equipment.
-
Page 9: Cautions
• Before you discard a battery, cover the terminals with tape or other insulators to prevent direct contact with other objects. Contact with the metallic components of other materials in waste containers may lead to fire or explosions. Discard the batteries in specialized waste facilities if available in your area. -
Page 10: Preventing Malfunctions
Read This First Preventing Malfunctions Avoid Strong Magnetic Fields Never place the camera in close proximity to electric motors or other equipment generating strong electromagnetic fields. Exposure to strong magnetic fields may cause malfunctions or corrupt image data. Avoid Condensation Related Problems Moving the equipment rapidly between hot and cold temperatures may cause condensation (water droplets) to form on its external and internal surfaces. -
Page 11: Preparing The Camera
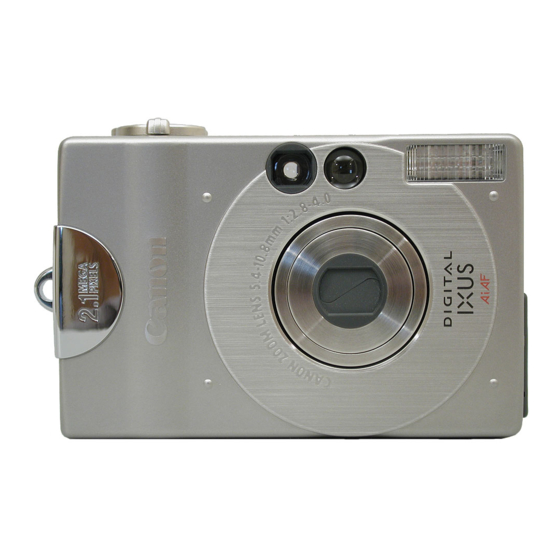
Preparing the Camera Guide to Components Front View * Used to connect the camera to a TV or computer. Open the cover and use the supplied video cable to connect to a TV or use the supplied interface cable to connect to a computer. Optical Viewfinder Window AF Auxiliary Light Emitter Red-Eye Reduction Lamp... -
Page 12: Back View
Preparing the Camera Back View Optical Viewfinder Lock for the CF Card Slot Cover CF Card Slot Cover Strap Holder Battery Cover DC Coupler Terminal Cover LCD Monitor p. 25 Tripod Socket p. 23 p. 16 p. 17 p. 18 p. -
Page 13: Operation Panel
Operation Panel Indicators (Macro) / p. 39 (Continuous) / p. 37 (Flash) / Indicators • The indicators will light or flash when the main switch is pressed or at various stages as the shutter button is pressed. Upper Indicator Green: Ready to record Flashing Green: During camera warm-up / Recording to CF card / Reading CF card / Deleting CF card images... -
Page 14: Charging The Battery Pack
• It takes approximately 120 minutes to charge a battery pack fully from a fully discharged state. (Based on standard Canon testing conditions) Please charge it at an ambient temperature ranging between 5 and 40 ºC (41 and 104 ºF). -
Page 15: Handling Precautions
Handling Precautions • Do not charge the battery pack in poorly ventilated areas. • Do not charge batteries other than Battery Pack NB-1L in this charger. • The battery pack continues to discharge a minimal portion of its power while installed in the camera, even with the camera power off. This will shorten battery life. -
Page 16: Installing The Battery Pack
Preparing the Camera Installing the Battery Pack Install rechargeable Battery Pack NB-1L in the camera as shown below. • Please recharge the battery pack ( the first time. Battery Lock • The camera contains a built-in rechargeable lithium battery to save the date and time settings whenever the main battery is removed. -
Page 17: Battery Performance
• Never open the battery cover or remove the battery pack when the main switch is on. • Remove the battery pack from the camera when the camera is not in use. Please note, however, that the date, time and other camera settings may reset to the default settings if the battery pack has been removed for approximately three weeks. -
Page 18: Using The Ac Adapter (Optional)
Preparing the Camera Using the AC Adapter (optional) It is recommended that you use the optional Canon AC adapter Kit ACK300, which includes the Compact Power Adapter CA-PS300, the DC Coupler DR-300 and the power cord, when using the camera for extended periods of time to shoot or connect to a computer. -
Page 19: Installing A Cf Card
Super-Fine / Large (1600 x 1200 pixels) Fine / Large (1600 x 1200 pixels) Fine / Small (640 x 480 pixels) • These figures reflect standard shooting conditions established by Canon. Actual totals may vary according to the subject, shooting conditions and shooting mode. -
Page 20: Attaching The Wrist Strap
Preparing the Camera • Never open the CF card cover while the main switch is on. • When the indicator flashes green, the camera is recording, reading or deleting images to and from the CF card. Never turn off the power or remove the CF card while the indicator flashes green. -
Page 21: Setting The Date And Time
Setting the Date and Time • Please note that the date and time settings may reset to the default settings if the camera battery has been removed for approximately three weeks. Reset the settings when this occurs. Preparing the Camera •... -
Page 22: Quick Start
Quick Start Shooting Slide the mode switch to (Shooting) position. Press the main switch. Holding it until the indicator glows green p. 22. To zoom, press the zoom lever towards the (telephoto) or (wide angle) icon. Press the shutter button. Press the shutter button lightly (halfway), wait until the two beeps sound, and... -
Page 23: Replaying
Replaying When you have finished viewing images, press the main switch to turn off the power. Erasing Shortcut 1. Hold down the press the button. 2. Use the button to select [OK] and press the button. Slide the mode switch to The last image will appear in the LCD monitor. -
Page 24: Basic Functions
Basic Functions Turning the Power On/Off • The Set Date/Time menu will appear the first time the camera power is turned on. Please set the date and time ( • If the power save function turns off the power, press the main switch again to restore it. -
Page 25: Switching Between The Shooting/Replay Modes
Switching between the Shooting/Replay Modes Using the Optical Viewfinder This camera is equipped with an optical viewfinder for standard shots. Shooting Slide the mode switch to the position. Replay Slide the mode switch to the position. • The lens remains extended when the mode switch is first switched to replay. - Page 26 Basic Functions About the Autofocus Function This camera employs AiAF (artificial intelligence autofocus) technology which uses a broad metering field to calculate the focal distance with high precision. It delivers a crisp focus even when the photographic subject is slightly off-center. Using the Focus Lock The following types of subject may not be suited to autofocus photography.
-
Page 27: Using The Lcd Monitor
Using the LCD Monitor Shooting Mode • The LCD monitor setting (On or Off) is saved by the camera when the power is turned off so that the same setting is automatically available when the power is turned on again. However, the setting may be lost when the power has been turned off after the “Change the battery pack”... -
Page 28: Replay Mode
Basic Functions Replay Mode Information Displayed on the LCD Monitor Shooting Mode In shooting mode, information about the current settings and remaining image capacity will display on the LCD monitor for approximately six seconds when the actions below are taken, regardless of whether the LCD monitor is set to On or Off. -
Page 29: Replay Mode
Replay Mode File Number Image Number Shooting Date The following information may also be displayed with some images. A sound file (WAV file) is attached (this camera does not feature sound recording). A sound file in a format other than the WAV format is attached or the file format is not recognized. -
Page 30: Lcd Monitor Menus/Switching Between Display Modes
Basic Functions LCD Monitor Menus / Switching between Display Modes Shooting Mode The following menus will display on the LCD monitor according to the shooting mode selection. Auto Manual Black & White Stitch Assist Replay Mode The zoom lever can be used to switch between magnification levels. - Page 31 Four red bars appear at the top of each menu. Each one represents, from left to right, the [Rec. Mode], [+/- (Exp.)], [White Balance] and [Setup] menus. The bar for the currently selected menu becomes orange. Bars displayed in gray represent menus that cannot be displayed in the shooting mode which is currently selected.
-
Page 32: Pressing The Shutter Button
Basic Functions Pressing the Shutter Button The shutter button features a two-stage action. Indicator • The displayed image can be erased immediately by holding down button and pressing the • The image ceases to display when the shutter button is pressed halfway again. -
Page 33: Using The Zoom
Using the Zoom The zoom can be adjusted to any setting in the 35 to 70 mm range in 35 mm film equivalent terms. Telephoto/Wide Angle Pressing the zoom lever towards (telephoto) zooms in on the subject, making it appear closer. Pressing the zoom lever towards (wide angle) zooms out from the subject, making it appear more distant. -
Page 34: Digital Zoom
Basic Functions Digital Zoom • The digital zoom is available when the LCD monitor is on and the digital zoom feature is set to On in the Setup menu ( • The digital zoom is not available in the If you continue to press the zoom lever towards fully extended, you will activate the digital zoom, which makes the subject appear even closer. -
Page 35: Shooting
Shooting Selecting a Shooting Mode The camera features the following shooting modes. Auto Mode Manual Mode Black & White Mode Images are shot in black and white. Stitch Assist Mode Most settings are automatically selected by the camera. The image quality, exposure, white balance and other settings are manually selected by the user. -
Page 36: Functions Available In Each Shooting Mode
Shooting Functions Available in Each Shooting Mode Function Digital Zoom Auto Red-Eye Reduction Flash Slow-Synchro Super-Fine/Large Image Fine/Large Quality Fine/Small Single Shooting Continuous Method Self-Timer Macro Mode Infinity Mode Exposure Compensation White Balance * Default value. Setting available. Selectable for first frame only. Auto Manual Black &... -
Page 37: Adjusting The Image Quality
Approximate File Size of One Image Image Quality * These figures reflect standard shooting conditions established by Canon. Actual totals may vary according to the subject, shooting conditions and shooting mode. mode. Shooting : selectable for... -
Page 38: Using The Flash
Shooting Using the Flash Auto Red-Eye Reduction Slow-Synchro Select a shooting mode p. 33) • The flash mode may be adjusted while information about the current settings is displayed on the LCD monitor ( When the image information is not displayed, you can press any of the , •... -
Page 39: Red-Eye Reduction
Red-Eye Reduction The red-eye phenomenon is caused by light reflected from the blood vessels in the back of the eye; the effect is most often seen when using a flash to photograph people in dimly lit environments. This phenomenon can be prevented by recording in the red-eye reduction flash will fire when the shutter button is pressed halfway, helping to reduce the chance that eyes will appear red. -
Page 40: Shooting Continuously
Recording ceases when the shutter button is released. * This figure reflects standard shooting conditions established by Canon. Actual figures may vary according to the subject and shooting conditions. buttons to activate the display. modes. -
Page 41: Shooting Close-Ups/Infinity Shots
Shooting Close-Ups/Infinity Shots Macro Mode Infinity Mode Select a shooting mode p. 33) • The macro/infinity modes may be set while information about current settings is displayed on the LCD monitor ( the image information is not displayed, you can press any of the the , •... -
Page 42: Adjusting The Exposure Compensation
Shooting Adjusting the Exposure Compensation An image can be under-exposed if the subject is backlit or positioned in a bright location. Lights in night shots may also appear too bright. To avoid under-exposing the image, use the exposure compensation function. Select a shooting mode p. -
Page 43: Setting The White Balance
Setting the White Balance Setting the white balance to match the dominant light source when shooting will adjust the coloring of the image to the correct settings for the prevailing light conditions. Auto Settings are automatically selected by the camera. Daylight Use this setting for recording outdoors on a bright day. -
Page 44: Shooting In Stitch Assist Mode
Shooting Shooting in Stitch Assist Mode Stitch Assist mode can be used to shoot images, which overlap, and which can later be merged to create one panoramic image on a computer. • To merge the images on the computer, use PhotoStitch, one of the supplied programs. -
Page 45: Shooting
• Make the brightness in each image consistent. The final image will appear unnatural if the difference in brightness is too great. Shooting Images can be shot in two sequences. Left to right horizontally Right to left horizontally Select a shooting mode p. - Page 46 Shooting Shoot the second image Shoot the third image • The zoom, flash ( compensation, white balance and macro/infinity mode ( settings can only be adjusted for the first image. The remaining images use the same settings. Additional images use the same settings.
-
Page 47: Shooting/Replaying With A Tv Monitor
Shooting/Replaying with a TV Monitor A TV monitor can be used to shoot or replay images when it is connected to the camera via the supplied video cable (VC-200). Always turn the camera and TV power off when attaching or detaching the video cable. -
Page 48: Replaying/Erasing
Replaying/Erasing Displaying Images Singly (Single Image Replay) Zooming an Image • You can erase the displayed image with a shortcut by holding down the button and pressing the • A TV monitor can be used to replay images ( • The last recorded image will appear in the display (single... -
Page 49: Displaying Images In Sets Of Nine (Multi Image Replay)
Displaying Images in Sets of Nine (Multi Image Replay) • You can erase the displayed image by holding down the button and pressing the Switching between Sets of Nine Images Replaying/Erasing • The last recorded image will appear in the display (single image replay). •... -
Page 50: Rotating Images In The Display
Replaying/Erasing Rotating Images in the Display Images can be rotated 90º or 270º clockwise in the display. 0º (Original) • If an image has been rotated in the camera before being loaded onto a computer, the particular software in use will determine whether or not the rotation settings are retained. -
Page 51: Automating Playback (Auto Play)
Automating Playback (Auto Play) All of the images on a CF card can be displayed one-by-one automatically with the auto play function. Each image is displayed for approximately 3 seconds. Replaying/Erasing • Use the button to select then press the button. - Page 52 Replaying/Erasing Pausing and Resuming Auto Play Stopping Auto Play • Pressing the button temporarily pauses auto play. Press the button again to resume auto play. • If the button is pressed while auto play is paused, the display can be switched to the previous or next image, respectively.
-
Page 53: Protecting Images
Protecting Images You can protect important images to prevent their accidental erasure. • Please note that even protected images are erased when a CF card is reformatted. Replaying/Erasing • Use the button to select then press • Use the button to select an image. -
Page 54: Print Settings (Dpof Settings)
Replaying/Erasing Print Settings (DPOF Settings) Images on a CF card can be individually selected for printing in a specified number of copies. The print type and date or file number printing options can also be selected. These settings are compatible with Digital Print Order Format (DPOF) standards so that images can be printed conveniently on DPOF compliant digital printers or at participating photo labs. -
Page 55: Setting The Print Style
Setting the Print Style The following settings can be selected. Standard Prints one image per page. Index Print Type Date File No. Display the Print Settings menu ( p. 52). Prints the selected images in a single sheet. Prints the images in both standard and index Both formats. -
Page 56: Selecting Images For Printing
Replaying/Erasing • The date is printed in the format selected in the date format field of the Set Date/Time menu. • The date and file number options cannot both be set to On when [Index] is selected as the print type. Selecting Images for Printing Display the Print Settings menu (... - Page 57 The selection method will vary according to the print type ( Standard/Both Number of Print Copies Index Check Mark for Index Printing Replaying/Erasing • Use the button to select an image. • You can use the zoom lever to switch between the single image and multi image (3 images) display.
-
Page 58: Resetting Print Settings
Replaying/Erasing • Images are printed in the order of the oldest image to the newest. • When the print type is set to [Both] and both the date and file number are set to [On], only the file number will print on the index sheet. -
Page 59: Erasing Images
Erasing Images Erasing Images Singly • Images can also be erased using a shortcut ( Replaying/Erasing • Please note that erased images cannot be recovered. Exercise adequate caution before erasing a file. • Protected images cannot be erased with this function. •... -
Page 60: Erasing All Images
Replaying/Erasing Erasing All Images • Please note that erased images cannot be recovered. Exercise adequate caution before erasing a file. • Protected images cannot be erased with this function. • Use the button to select then press the button. • Use the button to select [OK]. -
Page 61: Camera Settings
Camera Settings Displaying the Setup Menu The Setup menu is used to adjust the camera settings. The procedure for displaying the Setup menu is slightly different for each shooting mode (p. 33). Use the procedures shown below. Please see page 35 for instructions on changing the image quality settings. -
Page 62: Switching The Digital Zoom On/Off
Camera Settings Switching the Digital Zoom On/Off Display the Setup menu p. 59) • Use the button to select then press the button. • Use the button to select [On] or [Off]. • This function is not available in the mode. -
Page 63: Resetting The File Number
Resetting the File Number You can select the method which the camera uses to assign file numbers with the File No. Reset function. The starting file number is reset to 100-0001 each time a new CF card is inserted. New images recorded on previously recorded CF cards with existing files are assigned the next available number. -
Page 64: Saving The Shooting Mode Setting
Camera Settings Saving the Shooting Mode Setting You can select whether or not to save the shooting mode settings when the camera is turned off. When set to [Last], the current shooting mode setting will still be effective when the camera is turned on again. -
Page 65: Switching The Beep On/Off
Switching the Beep On/Off A beep sounds for confirmation purposes when the shutter button is pressed or a camera setting is changed. The beep can be turned off. Display the Setup menu p. 59) • The warning beep is not controlled by this setting and will still sound. -
Page 66: Switching The Atuopower Down Function On/Off
Camera Settings Switching the Auto Power Down Function On/Off The auto power down function can be set to automatically turn the camera power off after a set period of time passes without the camera being used. The camera shuts off after approximately 3 minutes in shooting mode or approximately 5 minutes in replay mode if the camera is not used. -
Page 67: Formatting Cf Cards
Display the Setup menu p. 59) • When the camera is not operating as expected, reformatting the CF card may solve the problem. • When a non-Canon brand CF card is malfunctioning, reformatting it may solve the problem. Camera Settings • Use the... -
Page 68: Setting The Language
Camera Settings Setting the Language The language in which menus and messages are displayed can be selected with this function. Display the Setup menu p. 59) • The Language menu can also be displayed in replay mode by holding down the SET button and pressing the MENU button. •... -
Page 69: Appendices
• Never use synthetic cleansers on the camera body or lens. • If dirt remains, contact the closest Canon Customer Support Help Desk (see the back of this guide). -
Page 70: Troubleshooting
• Format CF card. See Formatting a CF Card ( p. 65). • If reformatting does not work, the CF card logic circuits may be faulty or damaged. Contact the nearest Canon Customer Support Help Desk. - Page 71 Lens will not retract Cause Battery cover or CF card cover opened with main switch turned on Battery cover or CF card cover opened while camera was recording to the CF card (warning signal sounds) Battery pack consumed quickly Cause Battery pack capacity reduced because of disuse for an extended...
- Page 72 Appendices Image is blurred, out of focus, or not as expected Cause Camera moved Subject is out of focal range Autofocus function is hampered by something obstructing the AF auxiliary light emitter Subject is too dark in image Cause Insufficient light for shooting Subject is much darker than its surroundings...
- Page 73 Subject is too bright Cause Subject is too close Subject is much brighter than its surroundings Light is shining directly on subject or reflected off subject onto camera Flash is set to On Flash will not fire Cause Flash is set to Off Solution •...
-
Page 74: List Of Messages
Appendices List of Messages The following messages may appear in the LCD monitor. Busy...: No CF card: Cannot record!: CF card error: CF card full: Naming error!: Change the battery pack: Battery charge is insufficient to No image: Image too large: Incompatible JPEG format: You attempted to replay an Image is being recorded to, or read from, CF card... - Page 75 Turn the power off and then back on, then shoot or replay. Problem exists if error code reappears. Note the number and contact Canon Customer Support Help Desk. If an error code displays directly after taking a picture, the shot may not have been recorded.
-
Page 76: Specifications
Appendices Specifications PowerShot S100 DIGITAL ELPH / DIGITAL IXUS Image Sensor: Image Quality: Recording Media: Image Format: Sensitivity: Lens: Digital Teleconverter: Focusing Range: Viewfinder: Metering Method: Focusing Method: Auto Exposure Method: White Balance Control: Shutter: Shutter Speed: Flash: Flash Range: Camera Modes: Approx. -
Page 77: Battery Charger
CompactFlash™Card Card Slot Type: Dimensions: Weight: * All data is based on Canon’s standard testing methods. Subject to change without notice. USB / CF Card Slot (Type I) / Video Out Battery Pack NB-1L Compact Power Adapter CA-PS300 (with DC Coupler DR-300) 0 - 40 ºC (32 - 104 ºF) -
Page 78: Index
Appendices Index AC Adapter Autofocus Auto Mode Auto Play Auto Power Down On/Off Battery AC Power Supply Handling Installing Performance Recharging Battery Pack Beep Black and White Mode Camera Settings Care and Maintenance CF Card Capacity Formatting Handling Installing Continuous Shooting Date and Time Digital Zoom 32, 60... - Page 79 Optical Viewfinder Power On/Off Pressing Fully Pressing Halfway Print Settings Selecting Print Style Resetting Print Settings Protecting Images Red-Eye Reduction Replay 21, 46 TV Monitor Rotate Self-Timer Setup Menu Shooting 20, 33 TV Monitor Functions Available in each Shooting Mode List of Modes Saving the Shooting Mode Setting...
-
Page 80: Canon Customer Support Help Desk
Tel No.: 08705 143 723 (Calls may be recorded.) Fax No.: 08705 143 340 Canon France S.A. Hotline : 01.41.99.70.70 Tél : 01.41.99.77.77 Télécopie : 01.41.99.79.51 Canon Photo Vidéo France S.A. Hotline : 01.49.04.01.00 Télécopie : 01.49.04.01.01 Canon Deutschland GmbH Canon-Hotline-Service Customer-Support: (02151) 349-555... - Page 81 Appendices Canon Euro-Photo GmbH Customer-Support: (02154) 495-610 Info-Desk: (02154) 495-444 Fax: (02154) 495-333 Canon Italia S.p.A. Pronto Canon : 02 8249 2000 BBS : 02 8249 2099 Canon Belgium N.V. / S.A. Helpdesk: 0900-10627 Tel.: (02) 722.04.11 Fax: (02) 721.32.74 Canon Luxembourg S.A.
- Page 82 Canon Marketing Services No.1 Jalan Kilang Timor, #09-00, Pacific Tech Centre, Singapore 159303 Phone: (65) 799 8888 Canon Marketing (Malaysia) Sdn. Bhd. Wisma General Lumber, Block D, Peremba Square, Saujana Resort, Section U2, 40150, Shah Alam, Selangor Darul Ehsan, Malaysia...
-
Page 83: Fcc Notice
If such changes or modifications should be made, you could be required to stop operation of the equipment. Canon U.S.A. Inc. One Canon Plaza, Lake Success, NY 11042, U.S.A. Tel No. (516) 328-5600 Canadian Radio Interference Regulations THIS CLASS B DIGITAL APPARATUS MEETS ALL REQUIREMENTS OF THE CANADIAN INTERFERENCE CAUSING EQUIPMENT REGULATIONS. - Page 84 H-IE-037-V1 0400Ni0.0 © 2000 CANON INC. PRINTED IN JAPAN...