Table of Contents
Advertisement
Operating Instructions
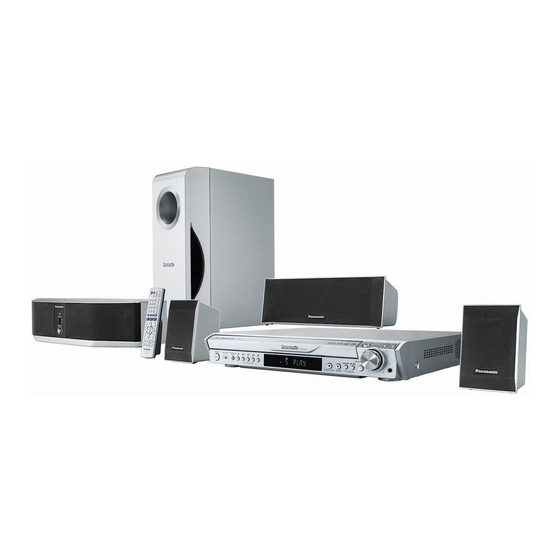
DVD Home Theater Sound System
SC-HT640W
Model No.
Region number
The player plays DVD-Video marked with labels containing the region
number "1" or "ALL".
Example:
1
Before connecting, operating or adjusting this product,
please read the instructions completely.
Please keep this manual for future reference.
P
PC
1
2
ALL
4
Wireless
surround sound
Wireless surround speaker
connection.
Advanced
progressive scan
Provides a smoother
and sharper image.
High-performance
sound effects
Sound quality enhancement,
Dolby Pro Logic II and more.
If you have any questions contact
In the U.S.A.: 1-800-211-PANA (7262)
In Canada: 1-800-561-5505
4
page
6
page
26
page
RQT8611-1P
Advertisement
Table of Contents

Related Manuals for Panasonic SC-HT640W


Summary of Contents for Panasonic SC-HT640W
- Page 1 Operating Instructions DVD Home Theater Sound System SC-HT640W Model No. Region number The player plays DVD-Video marked with labels containing the region number “1” or “ALL”. Example: Before connecting, operating or adjusting this product, please read the instructions completely. Please keep this manual for future reference.
-
Page 2: Important Safety Instructions
(1) This device may not cause harmful interference, and (2) this device must accept any interference received, including interference that may cause undesired operation. Responsible Party: Panasonic Corporation of North America One Panasonic Way Secaucus, NJ 07094 Telephone No.: 1-800-211-7262... -
Page 3: Table Of Contents
TABLE OF CONTENTS IMPORTANT SAFETY INSTRUCTIONS ..2 Simple Setup Getting Started STEP 1 Positioning the speakers ..4 Speaker installation options ... . . 5 STEP 2 Speaker connections . -
Page 4: Positioning The Speakers
Positioning the speakers STEP How you set up your speakers can affect the bass and the sound field. Note the following points: ≥ Place speakers on flat secure bases. ≥ Placing speakers too close to floors, walls, and corners can result in excessive bass. Cover walls and windows with thick curtains. ≥... -
Page 5: Speaker Installation Options
Speaker installation options ∫ Attaching to a wall You can attach the front and center speakers to a wall. ≥ The wall or pillar on which the speakers are to be attached should be capable of supporting 10 kg (22 lbs) per screw. Consult a qualified building contractor when attaching the speakers to a wall. -
Page 6: Basic Audio Connection
VIDEO To enjoy progressive video ≥ Connect to a progressive output compatible television. ≥ Set “Video Output Mode” to “480p”, and then follow the ≥ All Panasonic televisions that have 480p input connectors are Television (not included) RF IN AUDIO... -
Page 7: Connections
Radio and digital transceiver connections STEP AM loop antenna ≥ Using an outdoor antenna (optional) (➜ page 25). AM loop antenna Stand the antenna up on its base. Place the antenna where reception is best. Keep loose antenna cable away from other wires and cables. - Page 8 Preparing the remote control STEP Remote control Insert so the poles (i and j) match those in the remote control. R6/LR6, AA Performing QUICK SETUP STEP The QUICK SETUP screen assists you to make necessary settings. To display the picture from the main unit, turn on your television and change its video input mode (e.g. VIDEO 1, AV 1, etc.). ≥...
-
Page 9: Control Reference Guide
Control reference guide See page references in parentheses. Turn the unit on/off (8) Change the television’s video input mode (28) Select disc’s title numbers etc./Enter numbers (13) Select the disc or show disc information (14) Select preset radio stations (24) Show a disc top menu (16) or program list (17) Frame-by-frame/Select or register menu items on the television screen (13) -
Page 10: Discs That Can Be Played
≥ [DVD-VR] Recorded with devices using Version 1.1 of the Video Recording Format (a unified video recording standard), such as DVD video recorders, DVD video cameras, personal computers, etc. ≥ [JPEG] Recorded with Panasonic SD multi cameras or DVD video recorders using the DCF (Design rule for Camera File system) Standard Version 1.0. -
Page 11: Product Service
For product information or assistance with product operation: In the U.S.A., refer to “Customer Services Directory” on page 33. In Canada, contact the Panasonic Canada Inc. Customer Care Centre at 1-800-561-5505, or visit the website (www.panasonic.ca), or an authorized Servicentre closest to you. -
Page 12: Basic Play
Basic play Power on. Select “DVD/CD”. ≥ Select “AUX” to enjoy video cassette recorder, television or cable TV programs. (Refer to page 6 for the necessary connections.) SURROUND MUSIC POWER MUSIC PORT SURROUND MUSIC 5 DISC SELECTOR Start play. When the disc finishes playing If the next disc does not start playing, select it with the 5 DISC SELECTOR buttons. -
Page 13: Using The Remote Control
If you are experiencing problems, refer to troubleshooting (➜ page 30 to 31). Using the remote control Numbered buttons SKIP STOP PAUSE TOP MENU, DIRECT NAVIGATOR ENTER The position is memorized while “RESUME” is on the display. Stop ≥ Press [1 PLAY] to resume. ≥... -
Page 14: Displaying Current Playback Condition
Convenient functions Numbered buttons DISC QUICK OSD Checking the disc type in each tray You can select the disc after checking the discs loaded with the Disc information screen. ≥ You can also select the disc directly with the 5 DISC SELECTOR buttons on the main unit. -
Page 15: Program And Random Play
Program and Random play Press [PLAY MODE] while stopped. Program and random playback screens appear sequentially. Program__-----------------------------------------------------) Random ^------------------------ off (Normal play) (__-----------} § “RANDOM 1” and “RANDOM 2” (➜ right) are displayed on the main unit’s display when CD Mode is on (➜ page 14). To exit the program and random mode Press [PLAY MODE] several times while stopped. -
Page 16: Playing Data Discs Using Navigation Menus
Playing data discs using navigation menus Numbered buttons STOP TOP MENU, DIRECT NAVIGATOR FUNCTIONS Playing data discs [WMA] [MP3] [JPEG] Selecting “Play as Data Disc” in Other Menu (➜ page 20) will be effective if the following functions are not available to play WMA, MP3 or JPEG files. -
Page 17: Playing Ram Discs
Playing HighMAT discs [WMA] [MP3] [JPEG] Press [TOP MENU]. ≥ To exit the screen, press [∫ STOP]. ≥ To change the menu background to the one recorded on the disc, press [FUNCTIONS]. Press [3, 4, 2, 1] to select the item, and then press [ENTER]. -
Page 18: Using On-Screen Menus
≥ On iR/iRW, a subtitle number may be shown for subtitles that are not displayed. ≥ [DVD-VR] “On” or “Off” appears only with discs that contain subtitle on/off information (Subtitle on/off information cannot be recorded using Panasonic DVD Recorders). [DVD-VR] To recall a marker recorded on DVD-Video recorders Press [3, 4] ➜... -
Page 19: Other Settings
Other Settings [DVD-A] (Motion picture part) [DVD-VR] [DVD-V] To change play speed – from “k0.6” to “k1.4” ≥ Press [1 PLAY] to return to normal play. ≥ After you change the speed – Dolby Pro Logic II and Sound Enhancement have Play Speed no effect. -
Page 20: Other Settings
Using on-screen menus Other Settings ∫ Audio Menu ➜ Dolby Pro page 26, Enhancing the stereo sound: Dolby Pro Logic II) Logic II To make the dialogue in movies easier to hear Dialogue [DVD-V] (Dolby Digital, DTS, 3-channel or higher, with Enhancer the dialogue recorded in the center channel) On ,------. -
Page 21: Changing The Player Settings
Changing the player settings Numbered buttons Setup Disc Audio English Video Subtitle Automatic Audio Menus Display Advanced Disc Review Intro Mode Others Ratings Level 8 to select and press ENTER RETURN ≥ The settings remain intact even if you switch the unit to standby. ≥... - Page 22 Changing the player settings QUICK SETUP enables successive settings of the items in the shaded area. ∫ “Video” tab TV Aspect Choose the setting to suit your television and preference. TV Type Select to suit the type of television. Time Delay When connected with a Plasma display, adjust if you notice the audio is out of sync with the video.
-
Page 23: Changing The Delay Time Of The Speakers
Changing the delay time of the speakers (Effective when playing multi-channel audio) (Center and surround speakers only) For optimum listening with 5.1-channel sound, all the speakers, except for the subwoofer, should be the same distance from the seating position. If you have to place the center or surround speaker closer to the seating position, adjust the delay time to make up for the difference. -
Page 24: Using The Radio
Using the radio Numbered buttons FUNCTIONS -TUNE MODE / -FM MODE Presetting stations automatically ain unit only Up to 15 stations can be set in each band, FM and AM. Press [SELECTOR] to select “FM” or “AM”. Press [-TUNE MODE] to select “MANUAL”. Each time you press the button: MANUAL()PRESET Press [X TUNING W] to tune to the lowest frequency (FM: 87.9 or 87.5, AM: 520). - Page 25 ∫ FM frequency step ain unit only The step is factory-set to 0.2-MHz, but you can change it to receive broadcasts allocated in 0.1-MHz steps. 1 Press [SELECTOR] to select “FM”. 2 Press and hold [SELECTOR]. After a few seconds the display changes to show the current minimum frequency.
-
Page 26: Using Sound Effects
Using sound effects SUBWOOFER LEVEL CH SELECT, TEST [Note] ≥ When connected with headphones or the Rear Music Port (➜ page 29), Surround Music and the following sound effects may not be available or have no effect. (Excluding Sound Field Control: HEAVY, CLEAR or SOFT) ≥... -
Page 27: Adjusting The Volume Of Each Speaker Speaker Level Adjustments
Adjusting the volume of each speaker: Speaker level adjustments This is one of the ways to get appropriate surround effects. Preparation Press [DVD]. While stopped and no on-screen display is shown Press and hold [—TEST] to output a test signal. ≥... -
Page 28: Operating Other Equipment
Operating other equipment TV/VIDEO You can use the remote control to operate a Panasonic television. Connect your equipment referring to “Cable TV box or video cassette recorder connection” (➜ page 6). [Note] The remote control may not work properly with some models. -
Page 29: Using Other Useful Functions
Using other useful functions SLEEP Setting the sleep timer Press and hold [—SLEEP]. MODE While the time is shown Press [—SLEEP] to select the time (in minutes). SLEEP 30_----)SLEEP 60_----)SLEEP 90 ^""""" OFF(_ SLEEP120(__} To cancel the timer While the time is shown, press [—SLEEP] to select “OFF”. To confirm the remaining time Press and hold [—SLEEP] again. -
Page 30: Troubleshooting Guide
Troubleshooting guide Before requesting service, make the following checks. If you are in doubt about some of the check points, or if the solutions indicated in the chart do not solve the problem, refer to “Customer Services Directory” on page 33 if you reside in the U.S.A., or refer to “Product information” on page 11 if you reside in Canada. - Page 31 Picture abnormal or unviewable ≥ Ensure that the unit is connected directly to the television, and is not connected through a video The picture on the television is not displayed correctly or cassette recorder. ≥ Mobile telephone chargers can cause some disturbance. disappears.
-
Page 32: Specifications
Specifications AMPLIFIER SECTION RMS Output Power: Dolby Digital Mode 110 W per channel (3 ≠), 1 kHz, 10 % THD Front Ch §7 90 W per channel (4 ≠), 1 kHz, 10 % THD Surround Ch 225 W per channel (6 ≠), 1 kHz, 10 % THD Center Ch 225 W per channel (6 ≠), 100 Hz, 10 % THD Subwoofer Ch... -
Page 33: Limited Warranty (Only For U.s.a.)
Monday-Friday 9 am-9 pm; Saturday-Sunday 10 am-7 pm, EST. For hearing or speech impaired TTY users, TTY : 1-877-833-8855 Accessory Purchases Purchase Parts, Accessories and Instruction Books online for all Panasonic Products by visiting our Web Site at: http://www.pasc.panasonic.com or, send your request by E-mail to: npcparts@us.panasonic.com... -
Page 34: Limited Warranty (Only For Canada)
Limited Warranty (ONLY FOR CANADA) Panasonic Canada Inc. warrants this product to be free from defects in material and workmanship and agrees to remedy any such defect for a period as stated below from the date of original purchase. Technics Audio Product Panasonic Audio &... - Page 35 USA: 5,479,168, 5,638,074, 5,640,161, 5,808,574, 5,838,274, 5,854,600, 5,864,311, 5,872,531, and in Australia: 669114, with other patents pending. SC-HT640W To establish a safe level: ≥ Start your volume control at a low setting. ≥ Slowly increase the sound until you can hear it comfortably and clearly, and without distortion.
- Page 36 If you wish to discard this product, please contact your local authorities or dealer and ask for the correct method of disposal. [For\U.S.A.] Panasonic Consumer Electronics Company, Division of Panasonic Corporation of North America One Panasonic Way Secaucus, New Jersey 07094 http://www.panasonic.com C 2006 Matsushita Electric Industrial Co., Ltd.