Table of Contents
Advertisement
Before connecting, operating or adjusting this product,
please read these instructions completely.
Please keep this manual for future reference.
Region number supported by this player
Region numbers are allocated to DVD players and software
according to where they are sold.
¡The region number of this player is "1".
¡The player will play DVD-Video
marked with labels containing "1"
or "ALL".
P
PC
DVD Home Theater Sound System
Example:
1
1
2
ALL
4
Operating Instructions
Model No.
AUDIO / VIDEO
As an ENERGY STAR
has determined that this product meets the
ENERGY
STAR
efficiency.
For Canada only: The word "Participant" is used in place of the
word "Partner".
For U.S.A. only
The warranty can be found on page 35.
SC-HT670
®
Partner , Panasonic
®
guidelines
for
energy
RQT7534-3P
Advertisement
Table of Contents

Related Manuals for Panasonic SC-HT670


Summary of Contents for Panasonic SC-HT670
-
Page 1: Operating Instructions
"Partner". For U.S.A. only The warranty can be found on page 35. Operating Instructions SC-HT670 Model No. ® As an ENERGY STAR Partner , Panasonic has determined that this product meets the ® ENERGY STAR guidelines energy efficiency. RQT7534-3P... - Page 2 ENSURE THAT CURTAINS MATERIALS DO NOT OBSTRUCT THE VENTILATION VENTS. RQT7534 SC-HT670 SA-HT670 SB-FS670 Operations in these instructions are described mainly for SB-PC670 the remote control, but you can perform the operations on the main unit if the controls are the same.
-
Page 3: Table Of Contents
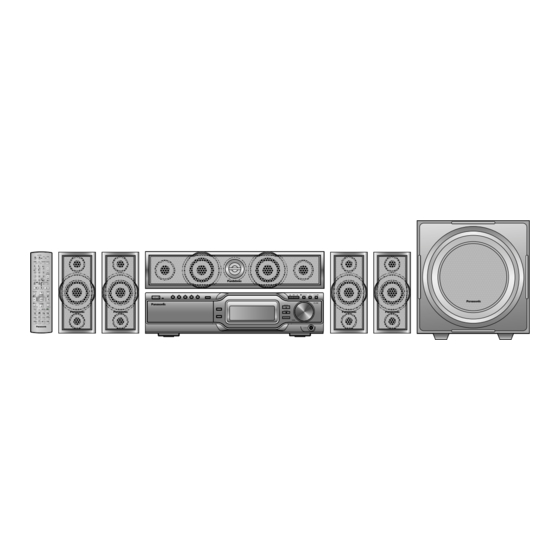
Accessories Please check and identify the supplied accessories. Use numbers indicated in parentheses when asking for replacement parts. In U.S.A. to order accessories, refer to “Accessory Purchases” on page 35. 1 AM loop antenna 1 Remote control (EUR7722X70) (N1DAAAA00001) 2 Batteries 1 FM indoor antenna for remote control (RSA0007-J) -
Page 4: Important Safety Instructions
IMPORTANT SAFETY INSTRUCTIONS Read these operating instructions carefully before using the unit. Follow the safety instructions on the unit and the applicable safety instructions listed below. Keep these operating instructions handy for future reference. 1) Read these instructions. 2) Keep these instructions. 3) Heed all warnings. -
Page 5: In U.s.a. To Order Accessories, Refer To "Accessory Purchases" Disc Information
Some DVD-Audio discs contain DVD-Video content. To play DVD-Video content, select “Play as DVD-Video” in Other Menu (A — Panasonic DVD-R recorded and finalized on Panasonic DVD-Video recorders or DVD-Video cameras are played as DVD-Video on this unit. — Conforming to IEC62107 This unit is compatible with HDCD. -
Page 6: Simple Setup
Simple setup STEP Positioning FRONT FRONT SURROUND SURROUND Setup example Main unit ¡ The front and surround speakers are the same. Use those you have connected the short cords to as front speakers and those you have connected the long cords to as surround speakers. ¡... -
Page 7: Television
(Video will not be displayed correctly if connected to an incompatible television.) ¡ Press [PROGRESSIVE] on the main unit so “PROG.” appears on the display (A page 12). ¡ All televisions manufactured by Panasonic and that have 480P input connectors manufacturer if you have another brand of television. -
Page 8: Step5 The Remote Control
STEP The remote control Remote control R6/LR6, AA, UM-3 Other speaker setup options Attaching to a wall Note The wall or pillar on which the speakers are to be attached should be capable of supporting 5 kg (11 Ib.) per screw. Screw a screw (not included) into the wall. -
Page 9: Step6 Quick Setup
STEP QUICK SETUP ENTER SHIFT The QUICK SETUP screen appears when you press [SHIFT]+ [SETUP] the first time after purchase and assists you to make necessary settings. You can access this screen again later if you need to (A page 28, Others — QUICK SETUP). To return to the previous screen Press [RETURN]. -
Page 10: Control Reference Guide
Source select buttons Face towards this unit to change the source. Press [TV] or [VCR] first to operate a Panasonic television or video cassette recorder (A page 27) Preset channel, TV channel button [4 4 4 4 4 CH 3 3 3 3 3 ] ... 11, 27 <... -
Page 11: The Radio
The radio Control reference guide 3 TUNING 4 MEMORY FM MODE SELECTOR Numbered buttons ENTER Manual tuning Press [SELECTOR] to select “FM” or “AM”. Each time you press the button: DVD/CD FM AM TV VCR AUX ¡ Remote control: Press [TUNER/BAND]. Press [ /TUNE MODE] to select “MANUAL”. -
Page 12: Discs-Basic Play
Discs—Basic play g/( )/f DISC CHECK DISC 1–DISC 5 OPEN/CLOSE c DISC CHANGE c Numbered buttons SKIP TOP MENU 89; : ENTER POSITION MEMORY PAGE SHIFT QUICK REPLAY Preparation ¡ Press [f] to turn on the unit. ¡ Turn on the television and select the appropriate video input on the television to suit the connections for the unit. -
Page 13: Changing The Disc/Checking The Disc Trays
Changing the disc You can change the other discs without interrupting play. Main unit only Press [DISC CHANGE c]. Within about 10 seconds Press [DISC 1] – [DISC 5] to open the tray and change the disc. Press [DISC CHANGE c c c c c ] again to close the tray. Repeat steps 1 and 2 to change other discs. -
Page 14: Video Cable Discs-Convenient Functions
Discs—Convenient functions DISC 1– DISC 5 CANCEL 89; : ENTER DISPLAY PAGE GROUP SHIFT Selecting groups to play Press [GROUP]. Example Menu Group Search Press the numbered buttons to select the group and press [ENTER]. ¡ ¡ ¡ ¡ ¡ Playing all the groups in succession (A Page 15, All group play) ¡... -
Page 15: Subtitles
Subtitles (Motion picture parts only) (with multiple subtitles) (SVCD only) You can change the subtitle language and turn the subtitles on and off. You can turn the subtitles on and off. During play Press [SUBTITLE] several times to select the subtitle language. -
Page 16: Marking Places To Play Again/Zoom Function
Discs—Convenient functions CANCEL 89; : ENTER DISPLAY SHIFT Marking places to play again can be displayed) You can mark a position so you can return to it easily at a later time. During play Press [DISPLAY] (A page 21). Press [8, 9] to select “Other Settings” and press [ENTER]. -
Page 17: Playing The Programs Or Play Lists On Dvd-Ram
Playing the programs or play lists on DVD-RAM DIRECT NAVIGATOR 89; : ENTER PAGE SHIFT Selecting a program to play — DIRECT NAVIGATOR Use the program list to find programs to play. Press [DIRECT NAVIGATOR]. Date Title Contents 1 11/ 1(WED) 12:05 AM Monday feature 1/ 1(MON) -
Page 18: Antenna Plug Wma/Mp3, Jpeg And Cd Text Navigation Menus
WMA/MP3, JPEG and CD text navigation menus TOP MENU 89; : ENTER DISPLAY PAGE SHIFT If the disc contains both audio data (WMA and MP3) and JPEG, press [TOP MENU] to select “All” (JPEG/WMA/MP3), “Audio” (WMA/MP3) or “Picture” (JPEG) in the Playback Menu. (CD text only) Various menus help you find items you want to start play. -
Page 19: Playing Highmat Discs
To use the tree screen to find a group While the menu is displayed Press [DISPLAY]. Press [8, 9] to select “Tree” and press [ENTER]. Example Navigation Menu 1:54 Sep 15 2003 Lirkin Park — Meteora Penguins Celine Dion Jazz Savage Garden Ashley Group 002/007... -
Page 20: Using On-Screen Menus
Using On-Screen Menus 89; : ENTER DISPLAY On-Screen Menus are menus that contain information about the disc or unit. These menus allow you to perform operations by changing this information. Common procedures 1 Press [DISPLAY]. Each time you press the button: Main menu (A page 21) Progress indicator (A right) Original display... -
Page 21: Main Menu/Other Settings
Unless otherwise indicated, select items with [8, 9, ;, :] and then [ENTER]. Items shown differ depending on the type of software. Main Menu Program Playlist Group Title Track Chapter Content Time ¡ ¡ ¡ ¡ ¡ Time Slip (during play) To skip forward or backward in time 1. - Page 22 Using On-Screen Menus Other Settings Picture Menu Picture Mode ¡ Normal: Normal mode ¡ Cinema1: Mellows images and enhances detail in dark scenes ¡ Cinema2: Sharpens images and enhances detail in dark scenes ¡ Animation ¡ Dynamic ¡ User: User mode (Press [ENTER] to select “Picture Adjustment)(A below) Picture Adjustment ¡...
-
Page 23: Sound Field
Sound fields 89; : SHIFT ¡ Super Surround, Center Focus and Subwoofer Level adjustment (A page 25) cannot be performed if headphones are connected (“ERROR” appears on the display.) ¡ You may experience a reduction in sound quality when these sound field systems are used with some sources. -
Page 24: Super Surround/Sound Field Control/Center Focus
Sound field ENTER DISPLAY SUBWOOFER LEVEL SLEEP C.S.M FL DISPLAY SHIFT Super Surround Press [SUPER SRND]. Each time you press the button: MUSIC MOVIE PARTY (off) MUSIC: Adds surround effects to stereo sources. MOVIE: Use this mode when playing movie software. PARTY: Sound is in stereo regardless of the direction you are facing. -
Page 25: Sound Quality
Sound quality Adjusting the subwoofer level Press [SUBWOOFER LEVEL]. Each time you press the button: SUB W 1 SUB W 2 SUB W 3 SUB W 4 (factory preset) Multi Re-master—Enjoying more natural sound (Discs recorded with 48 kHz only) (Discs recorded with 44.1 kHz and 48 kHz only) ¡... -
Page 26: Operating Other Equipment
Operating other equipment Connection example AUDIO OUT To play sound from your television Reduce the volume on the television to minimum and control the volume on this unit. To play sound from a tape deck Tape deck (not included) RQT7534 Television (not included) To show the video from the... - Page 27 AV SYSTEM TV/VIDEO TV VOL – Operating the television and the video cassette recorder You can use the remote control to operate a Panasonic television or a video cassette recorder. (Some models cannot be operated by this remote control.) Television Preparation ¡...
-
Page 28: Changing Settings
Changing settings This chart shows the settings for this unit. Change the settings to adapt your preferences and to adapt the unit to the environment in which it is being used. These settings are retained in memory until they are changed, even if the unit is turned off. See page 29 for details on menu opera- tion. - Page 29 CANCEL 89; : ENTER SHIFT Common procedures See page 28 for menu and option details. Preparation Press [DVD/CD]. Press [SHIFT]+[SETUP] to show the menus. Setup Disc Audio English Video Subtitle Automatic Audio Menus English Display Others Ratings Level 8 to select and press ENTER RETURN to exit...
-
Page 30: Optional Antenna Connections
Changing settings Language code list Chinese: Abkhazian: 6566 Corsican: Afar: 6565 Croatian: Afrikaans: 6570 Czech: Albanian: 8381 Danish: Ameharic: 6577 Dutch: Arabic: 6582 English: Armenian: 7289 Esperanto: Assamese: 6583 Estonian: Aymara: 6588 Faroese: Azerbaijani: 6590 Fiji: Bashkir: 6665 Finnish: Basque: 6985 French: Bengali;... -
Page 31: Glossary
Glossary Decoder A decoder restores the coded audio signals on DVDs to normal. This is called decoding. Dolby Digital This is a method of coding digital signals developed by Dolby Laboratories. Apart from stereo (2-channel) audio, these signals can also be multi-channel audio. A large amount of audio information can be recorded on one disc using this method. -
Page 32: Specifications
Specifications AMPLIFIER SECTION RMS Output Power: Dolby Digital Mode Front Ch 55 W per channel (6 Surround Ch 55 W per channel (6 Center Ch 160 W per channel (6 Subwoofer Ch 220 W per channel (4 Total RMS Dolby Digital mode Power FTC Output Power: Dolby Digital Mode Front Ch 35 W per channel (6 ), 120 Hz–20 kHz, 1 % THD... -
Page 33: Troubleshooting Guide
Troubleshooting guide Before requesting service, make the following checks. If you are in doubt about some of the check points, or if the remedies indicated in the chart do not solve the problem, refer to the “Customer Services Directory” on page 35 if you reside in the U.S.A., or refer to the “Product information” on backpage if you reside in Canada. - Page 34 Troubleshooting guide Sound No sound. Distorted sound. Humming heard during play. Picture Picture distorted. No picture. The picture shown on the television is not normal. (The sides of the picture are cut off, the picture is stretched horizontally, or black bands appear at the top and bottom of the screen.) There is ghosting when...
-
Page 35: Limited Warranty (Only For U.s.a.)
Monday-Friday 9 am-9 pm; Saturday-Sunday 10 am-7 pm, EST. For hearing or speech impaired TTY users, TTY: 1-877-833-8855 Accessory Purchases Purchase Parts, Accessories and Instruction Books online for all Panasonic Products by visiting our Web Site at: http://www.pasc.panasonic.comm or, send your request by E-mail to: npcparts@panasonic.com... -
Page 36: Product Service
For product information or assistance with product operation: In the U.S.A., refer to “Customer Services Directory” page 35. In Canada, contact the Panasonic Canada Inc. Customer Care Centre at 1-800-561-5505, or visit the website (www.panasonic.ca), or an authorized Servicentre closest to you.