Table of Contents
Advertisement
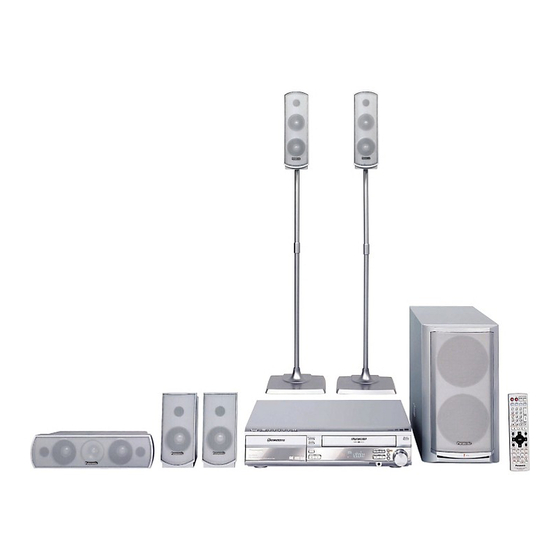
Operating Instructions
DVD/VHS Home Theater
Sound System
SC-HT830V
Model No.
SC-HT833V
SC-HT833V is only for the U.S.A.
Region number
The player plays DVD-Video marked with labels containing the region
number "1" or "ALL".
Example:
1
1
2
ALL
4
P
PC
ADVANCED
PROGRESSIVE SCAN
(DVD)
EASY-TO-USE 5 DVD/CD
CHANGER WITH QUICK
START CD KEY
LONG 10h RECORDING/
PLAYBACK & HIGH SPEED
x600 TAPE REWIND
(VHS)
If you have any questions, please call
In the U.S.A.: 1-800-211-PANA (7262)
In Canada: 1-800-561-5505
Before connecting, operating or adjusting this product, please
read the instructions completely. Please keep this manual for
future reference.
[For\U.S.A.\only]
The warranty can be found on page 49.
[For\Canada\only]
The warranty can be found on page 50.
8
page
18
page
28
page
RQT7921-4P
Advertisement
Table of Contents

Related Manuals for Panasonic SC-HT830V


Summary of Contents for Panasonic SC-HT830V
-
Page 1: Operating Instructions
Operating Instructions DVD/VHS Home Theater Sound System SC-HT830V Model No. SC-HT833V SC-HT833V is only for the U.S.A. Region number The player plays DVD-Video marked with labels containing the region number “1” or “ALL”. Example: ADVANCED PROGRESSIVE SCAN (DVD) EASY-TO-USE 5 DVD/CD... -
Page 2: Note To Catv System Installer
The socket outlet shall be installed near the equipment and easily accessible or the mains plug or an appliance coupler shall remain readily operable. RQT7921 SC-HT830V/SC-HT833V Center speaker SA-HT830V (SC-HT830V) Active subwoofer SA-HT833V (SC-HT833V) SB-FS730 Surround speakers (SC-HT830V/SC-HT833V) THE FOLLOWING APPLIES ONLY IN THE U.S.A. -
Page 3: Important Safety Instructions
IMPORTANT SAFETY INSTRUCTIONS Read these operating instructions carefully before using the unit. Follow the safety instructions on the unit and the applicable safety instructions listed below. Keep these operating instructions handy for future reference. 1) Read these instructions. 2) Keep these instructions. 3) Heed all warnings. -
Page 4: Table Of Contents
Table of contents IMPORTANT SAFETY INSTRUCTIONS ..3 Tape information......3 Tray/disc handling procedure . -
Page 5: Simple Setup
This prevents vibration from causing the speakers to move or fall over. Use 4 pads per speaker. The supplied stands are specially designed for attachment to Panasonic SB-FS730 front speakers. Use only as indicated in this setup. 2kBases... - Page 6 STEP Positioning How you set up your speakers can affect the bass and the sound field. Note the following points. ≥Attach the included rubber pads to the base of the center and surround speakers. This prevents vibration from causing the speakers to move or fall over. Use 4 pads per speaker.
-
Page 7: Subwoofer
STEP Connecting speakers with the subwoofer ≥Attach the speaker-cable stickers to make connection easier. ≥The terminals of the subwoofer have high output power. Carefully connect the speaker wires. Speaker cables ≥1kshort cable: For center speaker ≥2klong cables: For surround speakers Speaker-cable sticker SUBWOOFER Insert the wire fully. -
Page 8: For Better Video From Dvd
≥Connect to the component video input terminals on a 480p compatible television. (Video will not be displayed correctly if connected to an incompatible television.) ≥All televisions manufactured by Panasonic and that have 480p input , Y/B-Y/R-Y, Y/C ). Connect connectors are compatible. Consult the manufacturer if you have another brand of television. -
Page 9: Radio And System Connection
VHS audio type is on mono sound mode. For details, please refer to the operating instructions for Panasonic SH-FX50 Digital Transmitter and Receiver. [Note] The included AC power supply cords are for use with this unit only. -
Page 10: Optional Fm Antenna Connection
Use FM outdoor antenna if radio reception is poor. ≥Disconnect the outdoor antenna when the unit is not in use. ≥Do not use the outdoor antenna during an electrical storm. OFF: 1.9 W For example; Panasonic Antenna plug (K2RC021B0001, not included) 10 mm ( LOOP... -
Page 11: The Remote Control
INPUT SELECTOR DVD/VHS FM/AM TUNER PICTURE MODE VOLUME ENTER SETUP DISC SKIP SLOW/SEARCH JET REW OPEN/CLOSE/EJECT MENU TOP MENU NAVI DIRECT PLAY NAVIGATOR LIST ENTER STATUS/ FUNCTIONS RETURN POWER OPEN/CLOSE DISC CHECK H.BASS STOP PLAY DEMO STEP The remote control Remote control Batteries ∫... -
Page 12: The Source
TV manufacturer setting You can control the television by entering the remote control code. Refer the following chart for the code for your television. Manufacturer Code No. Panasonic 01, 02 FISHER G.E. 02, 03, 07, 09 GOLD STAR 07, 15... -
Page 13: Control Reference Guide
Control reference guide ≥See reference pages in brackets. Remote control Turn the unit on (11, 12) Select television channels and title number etc. Enter numbers (17) Picture mode button (29) DVD SETUP menu button (12, 26) Disc buttons (17) Basic operations for play Play button (16, 28), Stop button (17, 28) Open/close button (17), Tape eject button (28) Pause button (17, 28), Press and hold for slow (28) -
Page 14: Main Unit And Subwoofer
Main unit and subwoofer Power button [Í/I POWER] l 11; Press to switch the unit from on to standby mode or vice versa. Drawer open/close button l 16 Disc change button l 16 Disc buttons [DISC1–5] l 16 Drawer l 16 Input selector button VHS>DVD/CD>FM>AM ^"""""""""""""n... -
Page 15: Discs That Can Be Played
Video Recording Format (a unified video cameras, personal computers, etc. ≥Remove discs from their cartridges before use. video recording standard). ≥Recorded with Panasonic DVD-Video recorders. Recorded using the DCF (Design ≥To play JPEG files, select “Play as Data rule for Camera File system) standard Ver 1.0. -
Page 16: Basic Play
Basic play Turn on the television and select the appropriate video input for the DVD. Put the remote control in DVD mode. INPUT SELECTOR DVD/VHS FM/AM TUNER PICTURE MODE VOLUME ENTER SETUP DISC SKIP SLOW/SEARCH JET REW OPEN/CLOSE/EJECT MENU TOP MENU NAVI DIRECT PLAY... -
Page 17: Using Remote Control
INPUT SELECTOR DVD/VHS FM/AM TUNER Numbered buttons PICTURE MODE VOLUME ENTER SETUP DISC DISC SKIP SLOW/SEARCH JET REW OPEN/CLOSE/EJECT OPEN/CLOSE, TOP MENU MENU TOP MENU NAVI DIRECT NAVIGATOR DIRECT PLAY NAVIGATOR LIST ENTER STATUS/ ENTER FUNCTIONS RETURN TV VOL TV VOL MULTI RE-MASTER MIX 2CH PROGRESSIVE... -
Page 18: Convenient Functions
Convenient functions Numbered buttons [1] [5] PICTURE MODE ENTER SETUP DISC DISC SKIP OPEN/CLOSE/EJECT TOP MENU NAVI DIRECT NAVIGATOR ENTER STATUS/ FUNCTIONS TV VOL MULTI RE-MASTER MIX 2CH QUICK OSD ZOOM QUICK OSD H.BASS C.FOCUS ZOOM SUBWOOFER LEVEL ADVANCE CM SKIP DISC REVIEW CM SKIP PROG... -
Page 19: Repeat Play
Changing the zoom ratio MIX 2CH ZOOM (Zoom) [DVD-A] [RAM] [DVD-V] [VCD] (Motion picture part) Expands the letterbox picture to fit the screen. Press [ZOOM] several times to select the preset aspect ratio (Just Fit Zoom) or “Auto”. Functions Just Fit Zoom 1.00 16:9 Standard (16:9) 4:3 Standard (4:3) -
Page 20: Program/Random Play
Convenient functions Numbered buttons PICTURE MODE ENTER SETUP DISC SKIP OPEN/CLOSE/EJECT TOP MENU NAVI DIRECT NAVIGATOR ENTER ENTER STATUS/ FUNCTIONS TV VOL MULTI RE-MASTER MIX 2CH MULTI QUICK OSD ZOOM RE-MASTER H.BASS C.FOCUS SUBWOOFER LEVEL ADVANCE CM SKIP DISC REVIEW PROG SPEED SLEEP... -
Page 21: Multi Re-Master
To select an item using the cursor buttons Press [ENTER] and [3 4] to select an item, then press [ENTER] again to register. To change the selected program 1 Press [3 4] to select an item. 2 Repeat step 2 and 3. To clear the selected item, 1 Press [3 4] to select an item. -
Page 22: Using Navigation Menus
Using navigation menus Numbered PICTURE MODE buttons ENTER SETUP DISC SKIP OPEN/CLOSE/EJECT OPEN/CLOSE/EJECT TOP MENU TOP MENU DIRECT NAVI DIRECT NAVIGATOR NAVIGATOR ENTER STATUS/ FUNCTIONS STATUS/ FUNCTIONS TV VOL MULTI RE-MASTER MIX 2CH QUICK OSD ZOOM H.BASS C.FOCUS SUBWOOFER LEVEL TOP MENU MENU Playing data discs... -
Page 23: Playing Ram Discs
TOP MENU MENU Playing HighMAT NAVI [WMA] [MP3] [JPEG] Press [TOP MENU]. Press [3 4 2 1] to select the item, then press [ENTER]. e.g. Menu:Takes you to the next New Playlist Item Long Name Display Te PAG E 1 / 3 menu which shows play lists or another menu. -
Page 24: Using On-Screen Menus
Using On-Screen Menus Numbered buttons PICTURE MODE ENTER SETUP DISC SKIP OPEN/CLOSE/EJECT TOP MENU NAVI DIRECT NAVIGATOR ENTER STATUS/ FUNCTIONS STATUS/ FUNCTIONS TV VOL MULTI RE-MASTER MIX 2CH PROGRESSIVE QUICK OSD ZOOM H.BASS C.FOCUS SUBWOOFER LEVEL ADVANCE CM SKIP DISC REVIEW PROG SPEED SLEEP... -
Page 25: Other Settings
Other settings [RAM] [DVD-V] To change play speed – from k0.6 to k1.4 (in 0.1 units) Play Speed ≥After you change the speed – Output is in stereo. – Sampling frequency of 96 kHz is converted to 48 kHz. ∫ Play Menu (Only when the elapsed play time can be displayed [JPEG]: Works with all JPEG content.) Repeat... -
Page 26: Changing The Player Settings
Changing the player settings DVD/VHS Numbered buttons PICTURE MODE ENTER SETUP SETUP DISC SKIP OPEN/CLOSE/EJECT TOP MENU NAVI DIRECT NAVIGATOR ENTER STATUS/ FUNCTIONS TV VOL MULTI RE-MASTER MIX 2CH PROGRESSIVE QUICK OSD ZOOM CD MODE H.BASS C.FOCUS SUBWOOFER LEVEL SUPER SRND ADVANCE CM SKIP DISC REVIEW... -
Page 27: Changing The Delay Time (Speaker Setting)
Black Level Control Change the black level of the picture if you connected a television through the COMPONENT VIDEO OUT terminals. [Lighter] [Darker] Lighter When connected through VIDEO OUT or S-VIDEO OUT. Darker When connected through COMPONENT VIDEO OUT. ∫ “Audio” tab Dynamic Range Compression [Off] [On] Adjusts for clarity even when the volume is low through... -
Page 28: Playback
Playback Turn on the television and select the appropriate video input for the VHS. Put the remote control in VHS mode. INPUT SELECTOR DVD/VHS FM/AM TUNER PICTURE MODE VOLUME ENTER SETUP DISC SKIP SLOW/SEARCH , JET REW STOP JET REW OPEN/CLOSE/EJECT EJECT TOP MENU... -
Page 29: Manual Tracking
INPUT SELECTOR DVD/VHS FM/AM TUNER PICTURE PICTURE MODE VOLUME MODE ENTER SETUP DISC SKIP SLOW/SEARCH JET REW OPEN/CLOSE/EJECT TOP MENU MENU NAVI DIRECT PLAY NAVIGATOR LIST ENTER STATUS/ FUNCTIONS RETURN TV VOL TV VOL MULTI RE-MASTER MIX 2CH PROGRESSIVE REPEAT QUICK OSD ZOOM CD MODE... -
Page 30: Manual Recording
Manual recording INPUT SELECTOR DVD/VHS Numbered PICTURE MODE buttons ENTER SETUP DISC SKIP SLOW/SEARCH JET REW OPEN/CLOSE/EJECT TOP MENU NAVI DIRECT NAVIGATOR ENTER ENTER ENTER STATUS/ FUNCTIONS TV VOL MULTI RE-MASTER MIX 2CH PROGRESSIVE QUICK OSD ZOOM CD MODE H.BASS C.FOCUS TEST SUBWOOFER LEVEL... -
Page 31: Using Another Source While Recording
Using another source while recording You can watch and listen to other content when the unit is in timer recording standby or during VHS recording. ∫ Television (l 1 During recording Press [TV] to put the remote control in TV mode. 2 Press [TV/VIDEO] then select the channel with the numbered buttons, [W CH] or [X CH]. -
Page 32: Timer Recording
Timer recording INPUT SELECTOR DVD/VHS PICTURE MODE ENTER SETUP DISC SKIP SLOW/SEARCH JET REW OPEN/CLOSE/EJECT TOP MENU NAVI DIRECT NAVIGATOR ENTER ENTER STATUS/ FUNCTIONS TV VOL MULTI RE-MASTER MIX 2CH PROGRESSIVE QUICK OSD ZOOM CD MODE H.BASS C.FOCUS TEST SUBWOOFER LEVEL SUPER SRND ADVANCE QUICK... - Page 33 To check, correct, and cancel timer programs ∫ To check a program Press [PROG]. The timer-programming screen appears. ∫ To correct a program While the timer programming screen is on the television, 1 Press [PROG] to highlight the program you want to correct and press [ENTER].
-
Page 34: Jet Navigator
Convenient functions (Jet Navigator, VISS, On-screen display) PICTURE MODE ENTER SETUP DISC SKIP OPEN/CLOSE/EJECT TOP MENU NAVI NAVI DIRECT NAVIGATOR ENTER ENTER STATUS/ FUNCTIONS STATUS/ FUNCTIONS TV VOL MULTI RE-MASTER MIX 2CH PROGRESSIVE QUICK OSD ZOOM H.BASS C.FOCUS SUBWOOFER LEVEL ADVANCE CM SKIP DISC REVIEW... -
Page 35: Finding Programs—Vhs Index Search System (Viss)
Setting categories Set categories to make it easier to see what kind of programs are in the list. Press [1] (cursor) while the program you want to categorize is highlighted. Press [3 4 2 1] to select a category and press [MENU] to confirm and return to the previous screen. -
Page 36: Changing Settings
Changing settings PICTURE MODE ENTER SETUP DISC SKIP OPEN/CLOSE/EJECT TOP MENU NAVI DIRECT NAVIGATOR ENTER ENTER STATUS/ FUNCTIONS TV VOL MULTI RE-MASTER MIX 2CH QUICK OSD ZOOM H.BASS C.FOCUS SUBWOOFER LEVEL ADVANCE CM SKIP DISC REVIEW PROG SPEED SLEEP SHIFT SHIFT Shows VHS MENU. -
Page 37: Channel Set
CHANNEL SET The unit tunes automatically after you plug it in and turn it on for the first time (l 11, Plug-in Auto Tuning), but you can start the process again if necessary. ≥Make sure you have tuned to a television channel. This does not work if you have selected “AV”... -
Page 38: Option
Changing settings [1], [2] PICTURE MODE ENTER SETUP DISC SKIP OPEN/CLOSE/EJECT TOP MENU NAVI DIRECT NAVIGATOR ENTER ENTER STATUS/ FUNCTIONS TV VOL MULTI RE-MASTER MIX 2CH QUICK OSD ZOOM H.BASS C.FOCUS SUBWOOFER LEVEL ADVANCE CM SKIP DISC REVIEW PROG SPEED SLEEP SHIFT SHIFT... -
Page 39: Changing Audio
Change the code on this unit and its remote control (the two must match) if you place another Panasonic video cassette recorder close together. ≥Use “1”, the factory preset, under normal circumstances. -
Page 40: The Radio
The radio Press [TUNER] to put the remote control in TUNER mode. DVD/VHS Numbered buttons PICTURE MODE ENTER SETUP DISC SKIP OPEN/CLOSE/EJECT TOP MENU NAVI ENTER DIRECT NAVIGATOR ENTER STATUS/ FUNCTIONS TV VOL MULTI RE-MASTER MIX 2CH PROGRESSIVE QUICK OSD ZOOM CD MODE H.BASS... -
Page 41: Sound Field And Sound Quality
Sound field and sound quality ≥When connected with headphones, the following sound field systems cannot be used. (Excluding Sound Field Control) ≥You may experience a reduction in sound quality when these sound field systems are used with some sources. If this occurs, turn the sound field system off. -
Page 42: Enhancing The Bass Sound
Sound field and sound quality DVD/VHS PICTURE MODE ENTER SETUP DISC SKIP TV VOL MULTI RE-MASTER MIX 2CH QUICK OSD ZOOM OPEN/CLOSE/EJECT H.BASS C.FOCUS H.BASS SUBWOOFER LEVEL SUBWOOFER LEVEL ADVANCE CM SKIP DISC REVIEW PROG SPEED SLEEP SHIFT SHIFT SHIFT Enhancing the bass sound You can enhance low-frequency sound so that heavy bass sound can be heard clearly, even if the acoustics of your room are not optimal. -
Page 43: Other Speaker Setup Options
Other speaker setup options ∫ Attaching to a wall 1 Drive a screw (not included) into a wall. 2 Attaching 4 rubber pads to the rear of the speaker. 3 Fit the speaker securely onto the screw(s) with the hole(s). ‰3.0–4.0 mm q–... -
Page 44: Connecting A Cable Tv Box/Satellite Receiver
Optional connections ≥The equipment connections described are examples. ≥Peripheral equipment and optional cables sold separately unless otherwise indicated. ≥Before connection, turn off all equipment and read the appropriate operating instructions. Connecting a cable TV box/satellite receiver ≥You need to subscribe to a cable TV or satellite TV service, to enjoy viewing their programming. ≥Consult your service provider regarding appropriate cable TV box or satellite receiver. -
Page 45: Troubleshooting Guide
Troubleshooting guide Before requesting service, make the following checks. If you are in doubt about some of the check points, or if the remedies indicated in the chart do not solve the problem, refer to the “Customer Services Directory” on page 49 if you reside in the U.S.A., or refer to the “Product information” on page 50 if you reside in Canada. - Page 46 Troubleshooting guide Picture incorrect Picture distorted. The television may display incorrectly or colors appear faded. The picture on the television disappears or stripes appear on the screen. Disc picture incorrect Picture size doesn’t fit the screen. ≥Change “TV Aspect” in “Video” tab. Menus not displayed correctly.
-
Page 47: Maintenance
Troubleshooting guide Unit display ≥Demo function is on. Press and hold [–DEMO] on the main unit to select “DEMO OFF”. The unit’s display lights and changes when the unit is turned off. ≥The DISPLAY setting is set to “DIM” or “OFF” under OPTION from the VHS MENU. Select The unit’s display disappears or fades once the unit is turned off. -
Page 48: Specifications
Specifications ∫ AMPLIFIER SECTION [System_SC-HT830V] RMS output power, 10 % total harmonic distortion 1 kHz FL/FR 1 kHz Center 1 kHz SL/SR 100 Hz Subwoofer Total RMS Dolby Digital mode power FTC output power, 1 % total harmonic distortion 120 Hz–20 kHz FL/FR 120 Hz–20 kHz Center 120 Hz–20 kHz SL/SR 45 Hz–120 Hz Subwoofer... -
Page 49: Limited Warranty (Only For U.s.a.)
Monday-Friday 9 am-9 pm; Saturday-Sunday 10 am-7 pm, EST. For hearing or speech impaired TTY users, TTY : 1-877-833-8855 Accessory Purchases Purchase Parts, Accessories and Instruction Books online for all Panasonic Products by visiting our Web Site at: http://www.pasc.panasonic.com or, send your request by E-mail to: npcparts@us.panasonic.com... -
Page 50: Limited Warranty (Only For Canada)
PANASONIC/TECHNICS PRODUCT—LIMITED WARRANTY Panasonic Canada Inc. warrants this product to be free from defects in material and workmanship and agrees to remedy any such defect, or at its option, replace the product for a period as stated below from the date of original purchase. -
Page 51: Index
Index Common Batteries... 11 Center Focus ... 41 Cleaning Discs ... 15 Main unit ... 47 Video heads... 47 Connection Antennas... 7, 44 Cable TV ... 44 LINE IN/OUT... 31, 43 Optional antenna connection ... 44 Speakers... 5, 6 Subwoofer... 7 Television ... -
Page 52: Listening Caution
(REEX0449G-1K) ∏ 2 Pipes A ∏ 2 Pipes B (RYQV0057-1) (RMAV0033-S) Panasonic Consumer Electronics Company, Division of Panasonic Corporation of North America One Panasonic Way, Secaucus, New Jersey 07094 http://www.panasonic.com C 2004 Matsushita Electric Industrial Co., Ltd. Printed in Malaysia Listening caution ∏...