Table of Contents
Advertisement
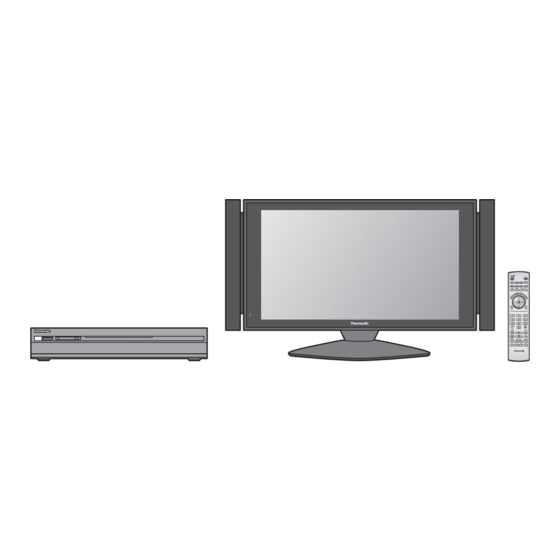
TH-42XVS30U
System No.
Model No.
• TH-42XVS30UP: Display / Speaker / Pedestal
TH-42XVS30:
High Definition Plasma Display
TY-SP42XVS30: Speaker System
TY-ST42XVS30: Pedestal
• TU-PT700U:
Digital Media Receiver
For assistance, please call : 1-888-VIEW-PTV(843-9788)
or send e-mail to : consumerproducts@panasonic.com
or visit us at www.panasonic.com
For assistance, please call : 787-750-4300
or visit us at www.panasonic.com
For assistance, please call : 1-800-561-5505
or visit us at www.panasonic.ca
Before connecting, operating or adjusting this product, please read these instructions completely.
Please keep this manual for future reference.
For details on installation of the pedestal, refer to the Pedestal's Installation Manual. For details on installation and
connection of the speaker, refer to the Speaker's Installation Manual.
English
POWER
SAP
LIGHT
TV
VCR
DVD
DBS
RCVR
CBL
AUX
TV/VIDEO
A -ANTENNA - B
CH
VOL
OK
VOL
MENU
CH
EXIT
1
2
3
4
5
6
7
8
9
R-TUNE
PROG
0
PIP MIN
PIP MAX
REW
PLAY
FF
PAUSE
STOP
REC
FREEZE
SPLIT CH
SEARCH
TV/VCR
DVD/VCR CH
OPEN/CLOSE
PIP
SPLIT
MOVE
SWAP
Digital High Definition Plasma TV
Operating Instructions
TH-50XVS30U
System No.
Model No.
• TH-50XVS30UP: Display / Speaker / Pedestal
TH-50XVS30:
High Definition Plasma Display
TY-SP50XVS30: Speaker System
TY-ST50XVS30: Pedestal
• TU-PT700U:
Digital Media Receiver
(U.S.A.)
(Puerto Rico)
(Canada)
TQBC0941-1
Advertisement
Table of Contents
Troubleshooting

Related Manuals for Panasonic TH-42XVS30


Summary of Contents for Panasonic TH-42XVS30
-
Page 1: Operating Instructions
TY-ST42XVS30: Pedestal • TU-PT700U: Digital Media Receiver For assistance, please call : 1-888-VIEW-PTV(843-9788) or send e-mail to : consumerproducts@panasonic.com or visit us at www.panasonic.com For assistance, please call : 787-750-4300 or visit us at www.panasonic.com For assistance, please call : 1-800-561-5505 or visit us at www.panasonic.ca... - Page 2 CAUTION RISK OF ELECTRIC SHOCK DO NOT OPEN WARNING: To reduce the risk of electric shock, do not remove cover or back. No user-serviceable parts inside. Refer servicing to qualified service personnel. WARNING: To reduce the risk of fire or electric shock, do not expose this apparatus to rain or moisture. Do not place liquid containers (flower vase, cups, cosmetics, etc.) above the set.
-
Page 3: Important Safety Instructions
Important Safety Instructions 1) Read these instructions. 2) Keep these instructions. 3) Heed all warnings. 4) Follow all instructions. 5) Do not use this apparatus near water. 6) Clean only with dry cloth. 7) Do not block any ventilation openings. Install in accordance with the manufacturer’s instructions. 8) Do not install near any heat sources such as radiators, heat registers, stoves, or other apparatus (including amplifiers) that produce heat. - Page 4 Dear Panasonic Customer Welcome to the Panasonic family of customers. We hope that you will have many years of enjoyment from your new Plasma TV. To obtain maximum benefit from your set, please read these Instructions before making any adjustments, and retain them for future reference.
-
Page 5: Table Of Contents
Table of Contents Important Safety Instructions ... 3 FCC STATEMENT ... 6 Safety Precautions ... 7 Cleaning and maintenance ... 8 Installation ... 9 Receiver Location ... 9 Optional External Equipment ... 9 Remote Control Battery Installation ... 9 Accessories ... 10 Connection ... -
Page 6: Fcc Statement
America could result harmful interference and would void the user’s authority to operate this device. Responsible Party: Contact Source: CANADIAN NOTICE: For Models TH-42XVS30, TH-50XVS30, TU-PT700U This Class B digital apparatus complies with Canadian ICES-003. FCC Declaration of Conformity Model No.TH-42XVS30, TH-50XVS30, TU-PT700U... -
Page 7: Safety Precautions
Safety Precautions WARNING Set up Do not place the Plasma TV on sloped or unstable surfaces. • The Plasma TV may fall off or tip over. Do not place any objects on top of the Plasma TV. • If water spills onto the Plasma TV or foreign objects get inside it, a short-circuit may occur which could result in fire or electric shock. -
Page 8: Cleaning And Maintenance
(All of the following accessories are manufactured by Matsushita Electric Industrial Co., Ltd.) • Pedestal (included) ... TY-ST42XVS30 (TH-42XVS30) • Speaker System (included) ... TY-SP42XVS30 (TH-42XVS30) • Wall-hanging bracket (Vertical) ... TY-WK42PV7 • Wall-hanging bracket (Angled) ... TY-WK42PR7 Always be sure to ask a qualified technician to carry out set-up. -
Page 9: Installation
Installation Receiver Location This unit is intended to be used with an optional stand or entertainment center. Consult your dealer for available options. Locate for comfortable viewing. Avoid placing where sunlight or other bright light (including reflections) will fall on the screen. -
Page 10: Accessories
Accessories Check that you have the Accessories and items shown Plasma Display unit • Plasma Display TH-42XVS30 / TH-50XVS30 • Batteries for the remote control (AA Battery × 2) • F-Type antenna adapter (for 5C-2V) × 2 Pedestal • TY-ST42XVS30 (TH-42XVS30) -
Page 11: Connection
Connection Note: Please turn off the power of the Plasma Display unit and Digital Media Receiver when connecting or removing Display - Receiver cable. Display connection When connecting the speakers, be sure to use only the optional accessory speakers. For details on installation and connection of the speaker, refer to the Speaker’s Installation Manual. (Supplied) Speakers SPEAKERS Terminals (R) -
Page 12: Connection To The Display
Connection Connection to the display SERVICE ONLY DIGITAL AUDIO OUT ANTENNA CableCARD CARD TOP Cable In (Turn Card upside down and gently insert it.) AUDIO AUDIO AUDIO DEDICATED DISPLAY OUT AUDIO OUT COMPONENT VIDEO INPUT DEDICATED DISPLAY OUT Notes: • Install the Digital Media Receiver at least 15.7 inch (40 cm) away from the Plasma Display to avoid interference. •... -
Page 13: Av Connection
Notes: • Certain cable systems offset some channels to reduce interference or have Premium (scrambled) channels. A cable converter box is required for proper reception. Check with your local cable company for its compatibility requirements. • To obtain optimum quality picture and sound, from an antenna, the correct cable (75 Ohm coaxial) and the correct terminating plug are required. -
Page 14: Digital Tv - Set-Top Box (Dtv-Stb) Or Dvd Connection
• Select the output of the STB to either 480i, 1080i or 480p. • A DTV signal must be available in your area. • Use a Panasonic DTV-STB (Digital TV-Set-Top Box) or DVD Player. Set Top Box DIGITAL TV OUTPUT... -
Page 15: Amplifier Connection
Amplifier Connection For a full Home Theater sound experience, an external Dolby Digital ∗ decoder and a multichannel amplifier must be connected to the DIGITAL AUDIO OUT terminal on the TV. Dolby Digital 5.1 channel surround sound delivers digital-quality sound. Dolby Digital provides five discrete full-bandwidth ∗... -
Page 16: Hdmi Connection
2. EIA/CEA-861/861B profiles compliance covers profiles for transmission of uncompressed digital video including high bandwidth digital content protection. ∗ 3. Consult your consumer electronics dealer for availability details. [for USA] HDMI-DVI conversion cable (TY-SCHO3DH): available on Panasonic Website (www.panasonic.com). S VIDEO VIDEO AUDIO AUDIO... -
Page 17: Pc Connection
PC Connection COMPUTER Conversion adapter if necessary (purchase locally) Notes: • Computer signals which can be input are those with a horizontal scanning frequency of 15 to 110 kHz and vertical scanning frequency of 48 to 120 Hz. (However, the image will not be displayed properly if the signals exceed 1,200 lines.) •... -
Page 18: Cablecard Tm Connection
• If you experience keyboard or remote control function hang-up when using CableCARD on and try the controls again. If this condition still exists, please call Panasonic Customer Call Center for further instructions. • Do not insert a PCMCIA card into CableCARD... -
Page 19: Power On / Off
Power ON / OFF Connecting the AC cord plug to the Plasma Display. Fix the AC cord plug to digital media receiver. DISPLAY OUT Connecting the plug to the Wall Outlet Press the Power switch on the side of the Plasma Display to turn the set on: Power-On. -
Page 20: Location Of Controls
Location of Controls POWER button MENU Display Main Menu or return one step backward in menus (see pages 24, 57). Choose menu and submenu entry. TV/VIDEO Change the input mode. POWER Turn the TV ON or OFF. Mode Selection buttons (see page 59, 60) Selects the operation mode for the remote control. - Page 21 • Digital channel Select the audio track (if available). Audio Track 1 of 1 (English) • Analog channel Cycle through different audio modes. e.g. Stereo LIGHT Light the remote control buttons. The selected button blinks when lit. A -ANTENNA - B Switch to (A or B) RF antenna input.
-
Page 22: First Time Setup
First Time Setup POWER LIGHT RCVR TV/VIDEO A -ANTENNA - B MENU EXIT Auto Scan This feature allows you to selectively auto scan channels. You can scan All, Analog only channels or Analog & Digital channels. First Time Setup Input Setup Auto Scan Language Press to select Auto Scan. -
Page 23: Watching Tv Programs
Watching TV programs POWER LIGHT RCVR TV/VIDEO A -ANTENNA - B MENU EXIT R-TUNE PROG PIP MIN PIP MAX PLAY PAUSE STOP FREEZE SPLIT CH SEARCH TV/VCR OPEN/CLOSE DVD/VCR CH SPLIT MOVE SWAP To enjoy cable TV programs, first insert the CableCARD its front side facing down) into CableCARD CableCARD of the Receiver. -
Page 24: Menu Navigation
Menu Navigation POWER LIGHT RCVR TV/VIDEO A -ANTENNA - B MENU EXIT R-TUNE PROG PIP MIN PIP MAX PLAY PAUSE STOP FREEZE SPLIT CH SEARCH TV/VCR DVD/VCR CH OPEN/CLOSE SPLIT MOVE SWAP MENU Press to display the Main menu. Picture (see page 26) Audio (see page 28) - Page 25 [Channel / Setup] Press to select the menu. Press to enter the sub- menu field. Proceed to adjustment and setting. [Lock] Enter password and repeat step 2. Proceed to adjustment and setting. To return to the previous screen MENU Press to return. To exit menu EXIT Press to return to normal picture.
-
Page 26: Picture
Menu Navigation Picture Press the MENU key to activate the main menu and select Picture. (refer to page 24) Picture Pic Mode Vivid Color Tint Brightness Picture Sharpness Normal Other Adjust Pic Mode Lets you choose the pre-set picture modes that best suits the program you are viewing. This feature also affects Color Temp setting (see page 27). - Page 27 Color Temp (temperature) / Color Mng. / Video NR / 3D Y/C Filter Press to select the sub-menu. Press to adjust or activate the sub-menu. Color Temp (Temperature) Color Mng. (Color Management) Video NR 3D Y/C Filter Color Matrix Displays 480p input signals in a natural color from digital equipment adapters connected to COMPONENT VIDEO INPUT (Y, P ) terminals.
-
Page 28: Audio
Menu Navigation Audio Press the MENU key to activate the main menu and select Audio. (refer to page 24) Audio Bass Treble Balance Normal Other Adjust Bass / Treble / Balance / Normal Press to select the sub-menu. Press to adjust or activate the sub-menu. Treble Balance Normal... - Page 29 BBE VIVA 3D / BBE BBE VIVA 3D BBE VIVA 3D provides a musically accurate natural 3D image with hi-fi sound. The clarity of the sound is improved by BBE while the width, depth and height of the sound image are expanded by BBE’s proprietary 3D sound processing.
-
Page 30: Channel
Menu Navigation Channel Press the MENU key to activate the main menu and select Channel. (refer to page 24) Press to select the menu. Press to display the sub-menu. Favorite Allows you to create Favorite channel list from Antenna (A) or Antenna (B). Surf Mode Press to select Surf Mode. -
Page 31: Captions
Captions To enter preset and manual labels to desired stations. Also to enter input label to video inputs. Preset Labels To enter channel numbers for popular TV stations. Press to select Preset Labels. Press to enter the sub-menu field. Press to select RF Input. Press to select Antenna (A) or Antenna (B). - Page 32 Menu Navigation Manual Labels Press to select Manual Labels. Press to enter the sub-menu field. Press to select RF Input. Press to select Antenna (A) or Antenna (B). Press to enter your selection. Press to select Channel. Press to select the available channel number. Press to select Caption.
-
Page 33: Timer
Input Labels To label video input connections for on-screen display. Press to select Input Labels. Press to enter the sub-menu field. Press to select the video input. Press to select the preset input label. • To delete Input labels, press until no label is displayed, and then press OK button to enter your selection. -
Page 34: Timer
Menu Navigation Timer Select timer to turn the TV on and off at selected times and on selected day. Press to select Timer. Press to enter the Timer sub-menu. Press to select Day. Press to select appropriate day setting. On Time / Off Time Press to select On Time or Off Time. -
Page 35: Sleep
Sleep Press to select Sleep. Press to select the desired sleep time (No, 30, 60 or 90). • To turn off the timer, select No. • To confirm the remaining time, press RECALL button (see page 21). To return to the previous screen MENU Press to return. -
Page 36: Setup
Menu Navigation Setup Press the MENU key to activate the main menu and select Setup. (refer to page 24) Press to select the menu. Press to display the sub-menu. Program CH Input Setup Lets you specify the antenna mode (Cable only, Cable/Antenna or Antenna only). Press to select Input Setup. -
Page 37: Auto Scan
Auto Scan Automatically scans all available channels, Antenna (A) Analog, Antenna (A) Analog & Digital, Antenna (B) Analog and Antenna (B) Analog & Digital. Press to select Auto Scan. Press to enter the sub-menu field. Press to select the sub-menu. Press to start Auto Scan. -
Page 38: Signal Meter
Menu Navigation Signal Meter (For digital channels only) Displays the signal strength of the ATSC digital channel in either Antenna (A) or Antenna (B). Press to select Signal Meter. Press to enter the sub-menu field. Press to select the channel. Press to display the Signal Strength. -
Page 39: Closed Caption
Closed Caption The television includes a built-in decoder that is capable or providing a visual display of the audio portion. The program viewed must provide Closed Captioning (CC) for the television to display it. CC Mode Activates Closed Captioning when the MUTE button is pressed. Press to select CC Mode. - Page 40 Menu Navigation Digital The Digital Closed Caption menu lets you configure the way you choose to view the digital captioning. Press to select Digital. Press to enter the sub-menu field. [Service / Font / Size / Style] Press to select the sub-menu. Press to select the setting.
-
Page 41: Other Adjust
Other Adjust Press to select Other Adj. Press to display the sub-menu. Press to select the sub-menu. Press to select or activate the sub-menu. Side Bar (Off, Dark, Mid, Bright) Displaying a picture in 4:3 mode for an extended period may cause an after-image. Change the brightness of the side bars to reduce the risk of after-image. -
Page 42: Lock
Menu Navigation Lock Press the MENU key to activate the main menu and select LOCK. (refer to page 24) New Password / Enter Password Create a 4-digit password to enter the Lock menu. Enter a 4-digit password. After entering your password for the first time, “New Password”... -
Page 43: Channel Lock
Channel Lock RF Input Select either Antenna (A) or Antenna (B). Press to select RF Input. Press to select the setting. Press to enter your selection. Channel Select up to four (4) channels to be blocked out. These channels will be blocked out regardless of the program rating. Press to select Channel. - Page 44 Menu Navigation U.S. MOVIES RATINGS CHART CONTAINS NO RATING (NOT RATED) AND NA (NOT APPLICABLE) PROGRAMS. Movie been rated or rating does not apply. GENERAL AUDIENCES. All ages admitted. PARENTAL GUIDANCE SUGGESTED. Some material may not be suitable for children. PG-13 PARENTS STRONGLY CAUTIONED.
-
Page 45: How Long
CANADIAN FRENCH RATINGS CHART Exempt - Exempt programming. General - Programming intended for audience of all ages. Contains no violence, or the violence content is minimal or is depicted appropriately. 8+ General - Not recommended for young children. Programming intended for a broad audience but contains light 8 ANS+ or occasional violence. -
Page 46: Photo Viewer
Photo Viewer Photo Viewer lets you display JPEG images recorded by digital camera on SD card or other types of memory card when it is inserted in the proper card slot. Inserting and removing a card DIGITAL MEDIA RECEIVER TU-PT700U PC CARD SD CARD MENU... - Page 47 Folders and Files • Photo Viewer can only show still images recorded by a digital still camera with DCF ∗DCF (Design rule for Camera File system) Unified standard established by Japan Electronics and Information Technology Industries Association (JEITA). • Memory cards must be formatted with FAT12 or FAT16 in order to be viewed on TV. If the card is not formatted, it may cause incompatibility with certain memory card adapters.
-
Page 48: Thumbnail Mode
Photo Viewer Thumbnail Mode The thumbnail screen is the initial entry screen from the main menu. • When both SD card and PCMCIA card are inserted, the TV plays SD card. To play a PCMCIA card, select “PC” in “Card” (see page 50) after inserting the PCMCIA card. -
Page 49: Photo Viewer Setup Menu
Photo Viewer Setup Menu This menu allows you to customize features in the Photo Viewer Setup Menu. While in the thumbnail mode or the single picture view mode (see page 48) Press to display the Setup Menu screen. Press to select the sub-menu. Press to adjust or activate the sub-menu. -
Page 50: Rotate
Photo Viewer Rotate To access menu see page 49. Allows you to rotate the image (see also page 48). Press to select Rotate. Press to select Left or Right. Press to activate the setting. Zoom To access menu see page 49. (While in the single picture view mode only) Lets you select the magnification of the single picture display. -
Page 51: Photo Viewer Troubleshooting
Photo Viewer Troubleshooting Symptom Cannot read the content of the card. PC card cannot be ejected. Poor picture quality. Long time to display. The screen turns black. Error messages “Card is not inserted correctly.” “This type of image is not supported.” “This type of format is not supported.”... -
Page 52: Pip (Picture In Picture) Operation
PIP (Picture in Picture) Operation This television includes a two-tuner Picture In Picture (PIP) feature. This allows you to watch two (2) live broadcasts at the same time with or without an external video source such as a VCR, cable box, etc. POWER LIGHT RCVR... - Page 53 To freeze the picture PIP frame FREEZE TV/VCR • Press again to cancel Freeze. Main Picture While PIP frame is not displayed FREEZE TV/VCR • Select PIP or Split (see page 27, Freeze) when freezing the Main picture. Notes: • Freeze is canceled after 3 minutes. •...
-
Page 54: Split Operation
SPLIT Operation This feature lets you watch two different channels side by side with or without an external video source. POWER LIGHT RCVR TV/VIDEO A -ANTENNA - B MENU EXIT R-TUNE PROG PIP MIN PIP MAX PLAY PAUSE STOP FREEZE SPLIT CH SEARCH TV/VCR... - Page 55 To freeze the picture SPLIT frame FREEZE TV/VCR • Press again to cancel Freeze. Main Picture While SPLIT frame is not displayed FREEZE TV/VCR • Select PIP or Split (see page 27, Freeze) when freezing the Main picture. Note: • Freeze is canceled after 3 minutes. To select the input mode of SPLIT frame TV/VIDEO To search the channel...
-
Page 56: Aspect Controls
Aspect Controls Lets you choose the aspect depending on the format of the received signal and your preference. POWER LIGHT RCVR TV/VIDEO A -ANTENNA - B MENU EXIT Mode 4 : 3 4 : 3 (NORMAL in PC mode) Zoom Full Just Note:... -
Page 57: Pc Menu
PC MENU Preparation: • Connect a PC to the TV (see page 17). • Select PC input mode (see page 20). POWER LIGHT RCVR TV/VIDEO A -ANTENNA - B MENU EXIT PICTURE NORMALIZE Select “NORMALIZE” to reset adjustments to the factory default setting. Note: •... - Page 58 PC MENU PICTURE POS./SIZE (To access menu see page 57.) Note: If a “Cue” or “Rew” signal from a VCR or may DVD player is received, the picture position may shift up or down despite of the PICTURE POS./SIZE settings. NORMALIZE Select “NORMALIZE”...
-
Page 59: Operating Peripheral Equipment
The selected button light and all others go out. RCVR Enter the 3-digit infrared code (see pages 60-62). • Factory default setting : Panasonic • Press POWER to test the operation. Notes: • If the component does not operate with the Remote Control, repeat the procedure using another code. -
Page 60: Infrared Code Index
Minolta Mitsubishi Multitech Olympic Video Cassette Recorder RCVR Receiver or Amplifier Other Component Other Component Code Optimus Orion Panasonic 314, 315, 316, 329 Penney 311, 339 Pentax 305, 313 Philco 320, 326 Philips 323, 325 Pioneer Proscan 305, 306, 329... - Page 61 200, 201, 211, 245 LXI/Sears Magnavox 229, 232 Marantz McIntosh Nakamichi Onkyo 214, 215 Codes for Personal Video Recorders Brand Panasonic Replay TV 100 Philips Tivo Sony Tivo Codes for Cassette Deck Brand Aiwa 223, 224, 225 Denon Fisher Jensen 229, 230...
- Page 62 Curtis Diamond Eagle Eastern GC Brand Gemini General Instrument/Jerrold 124, 125, 126, 127 Hamlin Hitachi Macom Magnavox Memorex Movietime Panasonic Philips Pioneer Pulsar Codes for DBS Brand Dish Network Echo Star (Echostar) Express VU G.E. G.I. (General Instrument) Gradiente Hitachi...
-
Page 63: Mode Operational Key Chart
Mode Operational Key Chart This chart defines which keys that are operational after programming (if needed), while in the selected remote control mode, DTV, CABLE, DBS, VCR, DVD ...etc. KEY NAME DTV MODE POWER POWER NAVIGATION UP/DOWN NAVIGATION RIGHT/LEFT MENU DTV MENU PROGRAM INFO. - Page 64 Operating peripheral equipment KEY NAME VCR MODE (DVD) POWER POWER POWER TV/VIDEO TV INPUT SW LIGHT NAVIGATION UP/DOWN MENU ONSCREEN VCR DVD DISPLAY DISPLAY EXIT R-TUNE PROG PIP MIN PIP MAX SKIP SEARCH VCR REW/FF REW/FF PLAY PLAY PLAY PAUSE PAUSE STILL/PAUSE STOP...
-
Page 65: Troubleshooting Chart
Troubleshooting Chart Before calling for service, determine the symptoms and follow suggested solutions. Symptoms VIDEO Snowy Video Multiple Image Interference Normal Video No Video with Snow No Video / No PIP No Color Digitalization of image Image freeze up Normal Video Black Box on Screen Normal Video... - Page 66 Troubleshooting Chart Plasma Display panel Symptoms Some parts of the screen • The plasma display panel is manufactured using an extremely high level of do not light up. precision technology, however, sometimes some parts of the screen may be missing picture elements or have luminous spots. This is not a malfunction. •...
-
Page 67: Specifications
Specifications Digital Media Receiver Power Source Power Consumption Maximum Stand-by condition Dimensions (W × H × D) Mass (weight) Channel Capability-ATSC / NTSC FEATURES Two screen display functions BBE VIVA 3D CLOSED CAPTION 3D Y/C FILTER CableCARD Accessories Supplied Operating condition Temperature Humidity Connection terminals... - Page 68 By using this TV you are indicating acceptance of the GNU Public Licenses indicated below. This product utilizes the following so called “open source” software: (1) the software which is licensed under the GNU GENERAL PUBLIC LICENSE, (2) the software which is licensed under the GNU LESSER GENERAL PUBLIC LICENSE, and (3) software developed by the third parties and available under certain terms and conditions.
- Page 69 7. If, as a consequence of a court judgment or allegation of patent infringement or for any other reason (not limited to patent issues), conditions are imposed on you (whether by court order, agreement or otherwise) that contradict the conditions of this License, they do not excuse you from the conditions of this License.
- Page 70 We call this license the "Lesser" General Public License because it does Less to protect the user's freedom than the ordinary General Public License. It also provides other free software developers Less of an advantage over competing non-free programs. These disadvantages are the reason we use the ordinary General Public License for many libraries.
- Page 71 libraries that do not normally accompany the operating system. Such a contradiction means you cannot use both them and the Library together in an executable that you distribute. 7. You may place library facilities that are a work based on the Library side-by-side in a single library together with other library facilities not covered by this License, and distribute such a combined library, provided that the separate distribution of the work based on the Library and of the other library facilities is otherwise permitted, and provided that you do...
-
Page 72: Video/Component/Rgb/Pc/Hdmi Input Signals
Warranty Service purposes. Model Number Panasonic Consumer Electronics Company, Division of Matsushita Electric Corporation of America One Panasonic Way Secaucus, New Jersey 07094 2004 Matsushita Electric Industrial Co., Ltd. All Rights Reserved. horizontal...