Panasonic TH-50PX600U Operating Instructions Manual
Digital high definition plasma television
Hide thumbs
Also See for TH-50PX600U:
- Service manual (181 pages) ,
- Operating instructions manual (130 pages) ,
- Technical manual (98 pages)
Table of Contents
Advertisement
Available languages
Available languages
Digital High Definition Plasma Television
Televisor digital con pantalla de plasma de alta definición
R
For assistance, please call : 1-888-VIEW-PTV (843-9788)
or contact us at www.panasonic.com/contactinfo
For assistance, please call : 787-750-4300
or visit us at www.panasonic.com
For assistance, please call : 1-800-561-5505
or visit us at www.panasonic.ca
Para solicitar ayuda, llame al: 1-888-VIEW-PTV (843-9788)
ó visítenos en www.panasonic.com/contactinfo
Para solicitar ayuda, llame al: 787-750-4300
ó visítenos en www.panasonic.com
Please read these instructions before operating your set and retain them for future reference.
English
Español
Lea estas instrucciones antes de utilizar su televisor y guárdelas para consultarlas en el futuro.
Operating Instructions
Manual de instrucciones
TH-42PX600U
Model No.
TH-50PX600U
Número de modelo
TH-58PX600U
(U.S.A.)
(Puerto Rico)
(Canada)
(EE.UU.)
(Puerto Rico)
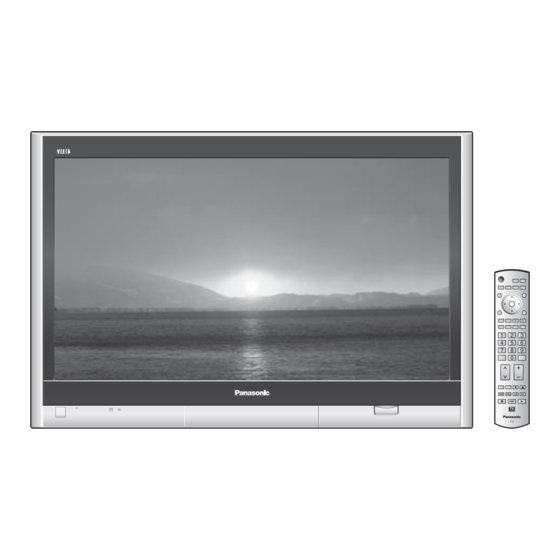
The images shown in this manual are for illustrative purposes only.
Las imágenes mostradas en este manual tienen solamente fines ilustrativos.
TQB2AA0665-1
Advertisement
Table of Contents

Related Manuals for Panasonic TH-50PX600U


Summary of Contents for Panasonic TH-50PX600U
-
Page 1: Operating Instructions
Digital High Definition Plasma Television Televisor digital con pantalla de plasma de alta definición For assistance, please call : 1-888-VIEW-PTV (843-9788) or contact us at www.panasonic.com/contactinfo For assistance, please call : 787-750-4300 or visit us at www.panasonic.com For assistance, please call : 1-800-561-5505 or visit us at www.panasonic.ca... -
Page 2: Table Of Contents
TV Guide On Screen system. Natural disasters, system trouble or other such factors may make it impossible for TV GUIDE to be used. Panasonic shall in no way be liable for any damages or losses related to the use of TV GUIDE. -
Page 3: Safety Precautions
Pursuant to 47CFR, Part 15.21 of the FCC rules, any changes or modifications to this TV not expressly approved by Panasonic Corporation of North America could result in harmful interference and would void the user’s authority to operate this device. -
Page 4: Accessories/Options
Do not use the pedestal if it becomes warped or physically damaged. • If you use the pedestal while it is physically damaged, personal injury may result. Contact your nearest Panasonic Dealer immediately. During setting-up, make sure that all screws are securely tightened. - Page 5 Accessories/Options Preventing the plasma television from falling over * The plasma TV must be fastened to both the base and the wall. For 42'' Plasma television Accessories for pedestal security Band (1) Screw (3) Wood screw (1) Nominal diameter 4 mm x 10 Securing to a base screw Wood screw...
-
Page 6: Connection
• If you experience front panel control or remote control function hang-up when using CableCARD TV and plug it back on and try the controls again. If this condition persists, please call Panasonic Customer Call Center for further instructions. •... -
Page 7: Identifying Controls
Identifying Controls Display the TV Guide. Display the Main menu. SD CARD slot Choose menu and submenu entry. POWER Remote Swing up the door at “PULL”. button control C.A.T.S. sensor sensor Plasma C.A.T.S. (Contrast Automatic Tracking System). Power indicator (on: red, off: no light) Switches TV to On or Standby Sets the remote to communicate with other equipment (p. -
Page 8: Initial Guide Setup For Tv Guide
First Time Setup Auto channel setup Select “Auto program” First time setup Language Clock Auto program Select antenna and input modes Auto program ANT In Cable Mode Start scan Start scanning the channels Auto program ANT In Cable Mode Start scan Now scanning analog channel ... - Page 9 INITIAL GUIDE SETUP for TV Guide Configure Your VCR If you want to use TV Guide On Screen Listings to schedule recordings to your VCR, answer Yes, set up VCR control. Additional screens ask you to • Confirm remote control options •...
- Page 10 Watching TV Other Useful Functions (Operate after in p. 17) Switches the unit OFF in a preset amount of time from 0 to 90 minutes in 30 minute intervals. • Sleep 0/30/60/90 (minutes) Timer Display or remove the channel banner. Channel Ending time Information...
-
Page 11: Using Tv Guide
Using TV Guide TV Guide provides an on-screen listing of shows currently broadcast and to be broadcast over the next one week. Initial setup (p. 14) is required. View TV Guide (from the front panel) • Select "TV Guide" using "TVG/Photo" Current Service Label Indented to identify the current Service screen Lock/Unlock icon Service Bar... - Page 12 Using TV Guide (Continued) Select "LISTINGS" in (p. 20) Select the show and display the panel menu select Reserve a show Select "set recording" or Recording "set reminder" Reminder select next To check/change/delete reserved contents "SCHEDULE" (p. 24) Select "SETUP" in (p.
- Page 13 Using TV Guide (Continued) Select "SCHEDULE" in (p. 20) Select "TO DO" Icon List From TO DO, press MENU. The Schedule Options menu appears. You can set sort by, new manual recording, new manual reminder. To edit/delete reservations Check Select the reservation Select on the panel menu •...
-
Page 14: Viewing From Sd Card
Viewing from SD Card You can view photos taken with a digital camera or a digital video camera saved on SD card. (Media other than SD Cards may not be reproduced properly.) Insert the SD Card • For cautions and details on SD Cards (p. 28 and 53) Select the SD mode Select “Memory card”... -
Page 15: Sd Card: Notes And Cautions
• Back up the recorded data at regular intervals in case of deteriorated or damaged data or erratic operation of the unit. (Panasonic is not liable for any deterioration or damage of recorded data.) Watching Videos and DVDs Some Panasonic equipment connected to the TV unit can be operated with the remote control. -
Page 16: Displaying Pc Screen On Tv
Displaying PC Screen on TV The screen of the PC connected to the unit can be displayed on the TV. You can also listen to PC sound with the audio cable connected. To connect PC (p. 46) Select the external input Select "PC"... -
Page 17: How To Use Menu Functions
How to Use Menu Functions Various menus allow you to make settings for the picture, sound, and other functions so that you can enjoy watching TV in your own way. Display menu • Displays the functions that can be set (varies according to the input signal) Select the menu Menu... -
Page 18: Control With Hdmi "Hdavi Control
If using DIGA operation, the TV’s input automatically switches to DIGA and the DIGA menu is displayed. You can control the theater speaker with TV’s remote control. “Home theater” with speaker icon appears when a Panasonic “Control with HDMI” home theater system is connected via the HDMI input (1 or 2). - Page 19 Follow the connection diagrams below for HDMI control of If connection (or setting) of equipment compatible with HDMI a single AV piece of equipment such as a Panasonic DIGA- control is changed, switch the power of this unit Off then On DVD recorder, RAM Theater or Player Theater system.
-
Page 20: Channel Lock
Channel Lock You can lock out specified channels or shows to prevent children from watching objectionable content. Display menu Select “Lock” You will be asked to enter your password each time you display the Lock menu. Menu Picture Audio Timer Lock Memory card TVG/Photo... -
Page 21: Editing And Setting Channels
Editing and Setting Channels The current channel settings can be changed according to your needs and reception conditions. Display menu Select “Setup” Menu Picture Audio Timer Lock Memory card TVG/Photo Setup Select “Program channel” Setup CH scan Language Clock Program channel Input labels Select the function Press to exit... -
Page 22: Input Labels/Closed Caption
Input Labels/Closed Caption Display menu Select “Setup” Menu Picture Audio Timer Lock TVG/Photo Memory card Setup Select “Input labels” or “CC” Setup CH scan Fav. Language Clock Program channel Input labels Press to exit Devices connected to external input terminals can be labeled for easier identification during input selection. -
Page 23: Using Timer
Using Timer The TV can automatically turn On/Off at the designated date and time. • The Clock must be set before On time/Off time settings. (p. 13) Display menu Select “Timer” Menu Picture Audio Timer Lock Memory card TVG/Photo Setup Select the timer to set Timer Sleep... -
Page 24: Recommended Av Connections
• If you use both IR Blaster and “HDAVI Control” (P. 34) for the same Panasonic DIGA (with VCR type), please set “Power off link” (under “Other adjust” of “Setup” menu ) to “No” (P. 34), to avoid failure for your recording. -
Page 25: Remote Control Operation/Code List
0899 Memorex 0000 Pulsar 0000 1187 Motorola 1376, 0276, 0476, 0810, 1187 Quasar 0000 0476 Pace 0008, 0237, 1877 Regal 0273, 0279 Panasonic 0000, 0107 Runco 0000 0144 Paragon 0000 Samsung 0144 0772 Magnavox 0722, 0724 General 0869 Instrument 0216... -
Page 26: Channel Lock
Systems Samsung 0739 PVR ( 1972 Niveus Media 1972 Hughes Network 0739 Systems Alienware 1972 Northgate CyberPower 1972 Humax 0739 Panasonic Dell 1972 Hush 1972 Philips DirecTV 0739 iBUYPOWER 1972 Gateway 1972 Linksys 1972 ReplayTV Hewlett Packard 1972 Media Center... -
Page 27: Technical Information
You can enjoy your home theater by connecting a Dolby Digital (5.1 channel) decoder and “Multi Channel” amplifier to the DIGITAL AUDIO OUT terminals. Side bar • • • Note HDMI connections to some Panasonic equipment allow you to enjoy the easy playback or home theater. • • • • • •... - Page 28 Technical Information HDMI connection HDMI (high-definition multimedia interface) allows you to enjoy high-definition digital images and high-quality sound by connecting the TV unit and the devices. HDMI-compatible equipment (*1) with an HDMI or DVI output terminal, such as a set top box or a DVD player, can be connected to the HDMI terminal using an HDMI compliant (fully wired) cable.
-
Page 29: Maintenance
Do not scratch or hit the surface of the panel with fingernails or other hard objects. Furthermore, avoid contact with volatile substances such as insect sprays, solvents and thinner; otherwise, the quality of the surface may be TH-50PX600U TH-58PX600U adversely affected. -
Page 30: Faq
Before requesting service or assistance, please follow these simple guides to resolve the problem. If problem still persists, please contact your local Panasonic dealer or Panasonic Service center for assistance. For details (p. 63, 64) Pictures from external... -
Page 31: Specifications
42.4 ” (1077 mm) 27.0 ” (684 mm) Note • Design and Specifications are subject to change without notice. Weight and Dimensions shown are approximate. TH-42PX600U TH-50PX600U TH-58PX600U AC 120 V, 50 / 60 Hz 399 W 525 W 665 W 0.2 W... -
Page 32: Limited Warranty (For U.s.a.)
If your product does not work properly because of a defect in materials or workmanship, Panasonic Consumer Electronics Company or Panasonic Puerto Rico, Inc. (collectively referred to as “the warrantor”) will, for the length of the period indicated on the chart below, which starts with the date of original purchase (“Limited Warranty period”), at its option either (a) repair your product with new or refurbished parts, or (b) replace it with a new or a refurbished product. -
Page 33: Limited Warranty (For Canada)
If removal is required to service the product, it will be at the discretion of the Servicentre and in no event will Panasonic Canada Inc. or the Servicentre be liable for any special, indirect or consequential damages. - Page 34 Note Note...
- Page 35 One Panasonic Way, Secaucus Carolina, Puerto Rico 00985 New Jersey 07094 U.S.A. 2006 Panasonic Corporation of North America. All Rights Reserved. 2006 Panasonic Corporation of North America. Todos los Derechos Reservados. Panasonic Canada Inc. 5770 Ambler Drive Mississauga, Ontario L4W 2T3 CANADA Printed in U.S.A.
-
Page 36: Primera Vez
Los desastres naturales, los problemas del sistema u otros factores similares pueden hacer imposible la utilización de la guía de TV. Panasonic no se hará responsable, de ninguna forma, por cualquier daño o pérdida relacionado con el uso de la guía de TV. -
Page 37: Precauciones Para Su Seguridad
De conformidad con el artículo 47CFR, Apartado 15.21 de la normativa FCC, cualquier cambio o modificación realizados en este televisor sin la autorización expresa de Panasonic Corporation of North America podría dar lugar a interferencias perjudiciales a invalidaría la licencia del usuario a operar este aparato. - Page 38 Cable de CA Pedestal • • • TBL2AX00021 TBL2AX00061 TBL2AX00071 (TH-42PX600U) (TH-50PX600U) (TH-58PX600U) Instalación de las pilas del mando a distancia Abrir. Gancho Ponga las polaridades (+ ó -) en las posiciones correctas Precaución • La instalación mal hecha puede causar fugas de electrolito y corrosión, lo que podría dañar el mando a distancia.
- Page 39 Accesorios/Opciones Para impedir la caída del televisor de pantalla de plasma * El televisor con pantalla de plasma deberá apretarse a la base y a la pared. Para televisor con pantalla de plasma de 42’’ Accessories for pedestal security Banda (1) Tornillo (3) Tornillo de madera (1) Diámetro nominal de...
- Page 40 CableCARD , desenchufe el televisor, vuelva a enchufarlo y pruebe otra vez a utilizar los controles. Si el problema persiste, llame a Centro de Llamadas del Cliente de Panasonic para recibir instrucciones. • No introduzca la tarjeta PCMCIA en la ranura CableCARD Fijación de los cables de conexión y del cable de CA...
- Page 41 Identificación de los controles Visualiza la guía de televisión. Visualiza el menú principal. Ranura de tarjeta SD Selecciona el menú y la entrada de submenú. El botón Sensor Sujete la puerta en “PULL” y ábrala hacia arriba. POWER del control Sensor del S.S.A.C remoto El S.S.A.C (sistema de seguimiento automático de contraste).
- Page 42 Configuración por primera vez Configuración automática de canales Seleccione “Programa auto”. Ajuste inicial Idioma Reloj Programa auto Seleccione la antena y los modos de entrada Programa auto Ent. ANT Cable Modo Todos Iniciar escaneo Inicie la exploración de los canales. Programa auto Ent.
- Page 43 AJUSTE DE GUÍA INICIAL para Guía de TV Configure su videograbadora. Si quiere utilizar las listas de la guía de TV en pantalla para programar grabaciones en su videograbadora, responda Yes, set up VCR control (Sí, configurar el control del VCR). Las pantallas adicionales le preguntarán lo siguiente: •...
- Page 44 Para ver la televisión Otras funciones útiles (Utilícelas después de en la pág. 17) Apaga la unidad después de pasar un periodo de tiempo de 0 a 90 minutos que puede ajustarse a intervalos de 30 minutos. • Cronómetro 0/30/60/90 (minutos) de apagado Visualice ó...
- Page 45 Utilización de la guía de TV La guía de TV muestra en la pantalla una lista de los programas que están siendo emitidos y de los que se emitirán en la semana próxima. Se necesita hacer la configuración inicial (pág. 14). Vista de la guía de TV (TV Guide) (desde el panel delantero) ó...
- Page 46 Utilización de la guía de TV Seleccione “LISTINGS” en (pág. 20) Seleccione el programa y visualice el menú del panel. Seleccione Seleccione “set recording” Reserva de (establecer grabación) o un programa “set reminder” (establecer recordatorio). Recording Reminder Seleccione Siguiente Para comprobar/cambiar/ eliminar el contenido reservado "SCHEDULE"...
- Page 47 Utilización de la guía de TV Seleccione “SCHEDULE” en (pág. 20) Seleccione “TO DO” (POR HACER). Icono Lista Desde TO DO, pulse MENU. Aparece el menú Schedule Options. Puede establecer la clasificación mediante la grabación manual nueva o el recordatorio manual nuevo. Comprobación Para editar/eliminar reservas de reserva...
- Page 48 Para ver imágenes de tarjeta SD Puede ver fotos tomadas con una cámara digital ó con una cámara de vídeo digital que estén guardadas en una tarjeta SD. (El contenido de otros medios que no sean tarjetas SD puede que no se reproduzca correctamente.) Inserte la tarjeta SD.
- Page 49 Haga una copia de seguridad de los datos grabados a intervalos regulares por si estos se deterioran ó se dañan, ó por si la unidad funciona de forma errática. (Panasonic no acepta ninguna responsabilidad por el deterioro ó daño que puedan sufrir los datos grabados.) Para ver vídeos y DVDs...
- Page 50 Visualización de la pantalla del PC en el televisor La pantalla del PC conectado a la unidad se podrá visualizar en el televisor. También podrá escuchar el sonido del PC con el cable de audio conectado. Para conectar el PC (pág. 46) Seleccione la entrada externa.
- Page 51 Cómo utilizar las funciones de los menús Varios menús le permiten seleccionar configuraciones para la imagen, el sonido y otras funciones, para que usted pueda disfrutar viendo la televisión como usted desee. Visualice el menú • Visualiza las funciones que pueden establecerse (cambia según la señal de entrada).
- Page 52 Puede controlar los altavoces de cine para casa con el mando a distancia del televisor. Cuando un sistema de cine para casa “Control con HDMI” de Panasonic se conecta mediante la entrada HDMI (1 ó 2) aparece “Altavoces ext.” con el icono de altavoz.
- Page 53 DIGA/DVD, un equipo de cine para casa RAM ó de esta unidad y vuelva a conectarla mientras la alimentación un reproductor de cine para casa de Panasonic. de todos los equipos está conectada (para que esta unidad Consulte la página 34 para conocer la configuración del menú...
-
Page 54: Bloqueo De Canales
Bloqueo de canales Puede bloquear canales ó programas especificados para impedir que los niños vean su contenido censurable. Visualice el menú Seleccione “Bloqueo”. Cada vez que visualice el menú Bloqueo se le pedirá que introduzca su contraseña. Menú Imagen Audio Cronόmetro Bloqueo TVG/Foto... - Page 55 Edición y configuración de canales Los ajustes del canal actual se pueden cambiar según sus necesidades y las condiciones de la recepción. Visualice el menú Seleccione “Ajuste”. Menú Imagen Audio Cronόmetro Bloqueo TVG/Foto Ajuste Seleccione “Programa canal”. Ajuste Búsqueda Todos Idioma Reloj Programa canal...
- Page 56 Títulos de entradas/Subtítulos Visualice el menú Seleccione “Ajuste”. Menú Imagen Audio Cronόmetro Bloqueo TVG/Foto Ajuste Seleccione “Títulos de entradas” ó “CC”. Ajuste Búsqueda Todos Idioma Reloj Programa canal Títulos de entradas Para salir Establezca Los dispositivos conectados a los terminales de entrada externos se pueden etiquetar para identificarlos más fácilmente durante la selección de entrada.
- Page 57 Utilización del temporizador El televisor se puede encender/apagar automáticamente en la fecha y a la hora designadas. • El reloj deberá estar puesto en hora antes de hacer los ajustes de la hora de encendido/apagado. (pág. 13) Visualice el menú Seleccione “Cronómetro”.
-
Page 58: Conexiones Av Recomendadas
• Si utiliza IR Blaster y “HDAVI Control” (pág. 34) para el mismo Panasonic DIGA (con videograbadora), ponga “Apaga control” (bajo “Otros ajustes” del menú “Ajuste”) en “No” (pág. 34) para evitar fallos en su grabación. Conexiones HDMI recomendadas (pág. - Page 59 0899 Memorex 0000 Pulsar 0000 1187 Motorola 1376, 0276, 0476, 0810, 1187 Quasar 0000 0476 Pace 0008, 0237, 1877 Regal 0273, 0279 Panasonic 0000, 0107 Runco 0000 0144 Paragon 0000 Samsung 0144 0772 Magnavox 0722, 0724 General 0869 Instrument 0216...
- Page 60 Systems Samsung 0739 PVR ( 1972 Niveus Media 1972 Hughes Network 0739 Systems Alienware 1972 Northgate CyberPower 1972 Humax 0739 Panasonic Dell 1972 Hush 1972 Philips DirecTV 0739 iBUYPOWER 1972 Gateway 1972 Linksys 1972 ReplayTV Hewlett Packard 1972 Media Center...
- Page 61 “Multi Canal” a los terminales DIGITAL AUDIO OUT. Barra lateral • • • Nota Las conexiones HDMI a algunos equipos Panasonic le permiten disfrutar de la reproducción sencilla del equipo de cine para casa. • • • • •...
- Page 62 Información técnica Conexión HDMI HDMI (interfaz multimedia de alta definición) le permite disfrutar de imágenes digitales de alta definición y de sonido de alta calidad conectando el televisor y los dispositivos. El equipo compatible con HDMI (*1) que tenga un terminal de salida HDMI o DVI, como, por ejemplo, un receptor digital multimedia o un reproductor DVD, podrá...
- Page 63 No raye ó golpee la superficie del panel con sus uñas u otros objetos duros ya que la superficie puede dañarse. Además, evite el contacto con sustancias volátiles tales como rociadores de insecticida, disolventes y diluyentes TH-50PX600U TH-58PX600U de pintura, de lo contrario puede verse afectada la calidad de la superficie.
-
Page 64: Preguntas Frecuentes
Antes de solicitar reparaciones ó ayuda, siga las indicaciones siguientes para solucionar el problema. Si el problema persiste, póngase en contacto con su concesionario de Panasonic ó con el centro de servicio de Panasonic local para solicitar ayuda. - Page 65 [TH-42PX600U] Nota • El diseño y las especificaciones están sujetos a cambios sin previo aviso. La masa y dimensiones son aproximadas. TH-42PX600U TH-50PX600U AC 120 V, 50 / 60 Hz 399 W 525 W 0,2 W 0,2 W (con CableCARD™: 14,0 W) (con CableCARD™: 14,5 W)