FujiFilm FINEPIX S602 ZOOM Owner's Manual
Fujifilm finepix s602: user guide
Hide thumbs
Also See for FINEPIX S602 ZOOM:
- Service manual (89 pages) ,
- Brochure & specs (5 pages) ,
- Catalog (11 pages)

Related Manuals for FujiFilm FINEPIX S602 ZOOM


Summary of Contents for FujiFilm FINEPIX S602 ZOOM
- Page 1 This manual will show you how to use your FUJIFILM DIGITAL CAMERA FinePix S602 ZOOM correctly. Please follow the instructions carefully. BL00135-200 ( 1 )
-
Page 2: Warning
Notes on the Grant: To comply with Part 15 of the FCC rules, this product must be used with a Fujifilm- specified ferrite-core A/V cable, USB cable and DC supply cord. For customers in Canada... -
Page 3: Ec Declaration Of Conformity
Address : Heesenstrasse 31 40549 Dusseldorf, Germany declare that the product Product Name : FUJIFILM DIGITAL CAMERA FinePix S602 ZOOM Manufacture’s Name : Fuji Photo Film Co., Ltd. 26 - 30, Nishiazabu 2 - chome, Minato - ku, Manufacture’s Address :... -
Page 4: Table Of Contents
Contents Warning ... 2 EC Declaration of Conformity ... 3 Preface ... 6 ATTACHING THE LENS CAP AND CAMERA STRAP ... 10 LOADING THE BATTERIES ... 12 Compatible Batteries ... 12 LOADING THE MEDIA ... 14 SmartMedia™ (optional) ... 14 Microdrive (optional: supplied by another manufacturers) ... - Page 5 SETTING THE MANUAL FOCUS ... 48 One-touch AF Function ... 48 Focus Check Function ... 48 PHOTOGRAPHY MENU ... 49 PHOTOGRAPHY MENU OPERATION ... 49 SELF-TIMER PHOTOGRAPHY ... 50 SETTING THE ISO SENSITIVITY ... 51 High-sensitivity Photography (ISO 800/1600) ... 51 SETTING THE WHITE BALANCE ...
-
Page 6: Preface
Phase Alternation by Line, a color television system adopted mainly by European countries and China. Exif Print (Exif ver. 2.2) Exif Print Format is a newly revised digital camera file format that contains a variety of shooting information for optimal printing. -
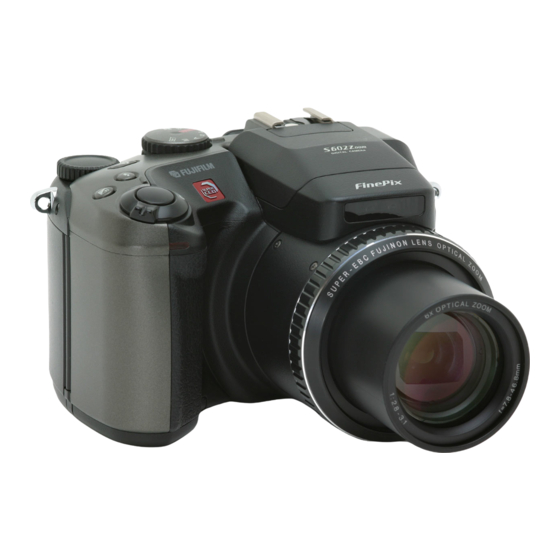
Page 7: Camera Features And Accessories
Camera Features and Accessories Features h 3.1 million effective pixels h 1/1.7-inch Super CCD provides high quality images with 2832 2128 (6.03 million) recorded pixels h Powerful Super EBC Fujinon 6 optical zoom lens (aspherical lens) for superb optical performances h Maximum 4.4 seamless digital zoom h Wide range of light sensitivity settings from ISO 160, 200, 400 up to ultra-high settings with ISO 800 and... -
Page 8: Nomenclature
Nomenclature Power-OFF Playback mode Power switch (P.27) Photography mode (P.22) Mode dial EVF/LCD (viewfinder/ monitor) button (P.18,23) Viewfinder (EVF) Diopter adjustment dial LCD monitor Tripod mount DISP button (P.26) MENU/OK button (P.19) 4-direction ( ) button (P.19) Refer to the pages in parentheses for information on using the camera features. Hot shoe (P.56) Shutter button Exposure... - Page 9 Flash control sensor Flash (P.41) AF sensor Lens Macro (close-up photography) button (P.47) Example of Monitor Text Display : Shooting Flash mode Macro Self-timer Continuous shooting Manual focus Sensitivity Example of Monitor Text Display : Playback Voice memo DPOF Date Playback Focus mode selector switch (P.20,48) W...
-
Page 10: Attaching The Lens Cap And Camera Strap
Getting Ready When attaching the strap to the camera, attach the metal strap clip to the camera before threading the strap through the clip. This description explains how to attach the strap using the clip attaching tool provided to make attaching the metal strap clip easier. (Numbers refer to the illustrations.) Metal strap Clip... - Page 11 Fastener Fastener Lens cap holder Using the Lens Cap Holder 1Attach the lens cap cord by threading it through the metal strap clip near the terminal cover. 2Attach the lens cap by pressing in on each side of the cap. The lens cap cord should be attached to the camera to avoid losing the lens cap.
-
Page 12: Loading The Batteries
When Using AA-size Ni-MH Batteries To charge Ni-MH batteries, the optional charger ( h Always use the specified FUJIFILM batteries. Attempting to recharge other types of battery (manganese, alkaline or lithium batteries) could cause the batteries to burst or leak fluid, causing a fire or injury or damage to surroundings. - Page 13 When the Battery Cover Will Not Close Slide the battery cover out and lift it open. Do not apply excessive force to the battery cover. Take care not to drop the batteries when opening or closing the battery cover. Never open the battery cover while the camera is switched on as this could damage the media or the image files.
-
Page 14: Loading The Media
LOADING THE MEDIA You can use either SmartMedia or Microdrive as recording media in the FinePix S602 ZOOM. h If you load a SmartMedia and a Microdrive at the same time, images will be recorded onto the media selected as the “Primary media” ( h Data cannot be copied between the two media types on the FinePix S602 ZOOM. - Page 15 SmartMedia Gold marking Push the SmartMedia firmly all the way into the SmartMedia slot. Insert only the appropriate media types into the Microdrive and SmartMedia slots. Inserting the incorrect media will damage the camera and/or media. If the media is oriented incorrectly, it will not go all the way into the slot. Do not apply excessive force when inserting a SmartMedia or Microdrive.
-
Page 16: Switching On And Off Setting The Date And Time
SWITCHING ON AND OFF DATE/TIME DATE/TIME NOT SET NOT SET OK OK SET SET DATE/TIME DATE/TIME 2002 . 01 . 01 2002 . 01 . 01 12 : 00 : 00 AM 12 : 00 : 00 AM OK DATE/TIME DATE/TIME 2002 . 04 . 20 2002 . 04 . 20 12 : 00 12 : 00 : 00 PM : 00 PM OK SETTING THE DATE AND TIME • To switch the camera on, set the Power switch to “... -
Page 17: Number Of Available Shots
Checking the Battery Level Switch the camera on and check that no battery level icon ( displayed, the battery has sufficient remaining charge. Lit red : The batteries are low on charge. Replace the batteries as they will run out shortly. -
Page 18: Basic Operation Guide
Basic Photography This section describes the functions available on this camera. Flash release To use the flash, press the flash pop-up button to release the flash. Switching between the viewfinder (EVF) and the monitor (LCD) Pressing the “EVF/LCD” button toggles between the viewfinder and the LCD monitor. -
Page 19: Command Dial
Command dial In photography mode, you can turn the Command dial to select program shift and specify settings such as the shutter speed and aperture. Using the Menus 1Display the menu. Press the “MENU/OK” button. : Exposure compensation Hold down the “ ”... - Page 20 BASIC OPERATION GUIDE Diopter adjustment dial Makes the image in the viewfinder easier to see. Set the dial to the position where the AF frame appears sharpest. Focus Check button Pressing this button enlarges the central portion of the screen. Use this to focus the image precisely.
-
Page 21: Number Of Recorded Pixels
SHIFT button Holding down the “SHIFT” button for 1 second or longer displays the “SHIFT CONTROL” guide. By pressing one of the displayed button combinations, you can quickly and easily access the corresponding setting. The functions you can access vary depending on the current mode. The example below shows the procedure for photography mode. -
Page 22: Actually Taking Pictures
ACTUALLY TAKING PICTURES You’ve read the chapter on getting ready and the camera is now set up and ready to take pictures. The Basic Photography section explains the three basic steps of “taking pictures”, “viewing pictures” and “erasing pictures”. Master the basic steps by actually trying them out on the camera as you go. - Page 23 Diopter adjustment dial W T Zoom bar 250 250 F5.6 F5.6 Each time you press the “EVF/LCD” button, display switches between the viewfinder (EVF) and the monitor (LCD). If the AF frame in the viewfinder (EVF) is difficult to see, adjust the viewfinder using the diopter adjustment dial.
-
Page 24: Indicator Lamp Display
TAKING PICTURES ( AUTO MODE ) 250 250 F5 F5.6 Bebeep 250 250 F5 F5.6 Click Indicator Lamp Display Display Lit green Blinking green Blinking green and orange alternately Lit orange Blinking orange Blinking red Frame the shot so that the subject fills the entire N... -
Page 25: Using Af/Ae Lock
AF/AE Lock On the FinePix S602 ZOOM, when you press the shutter button down half way, the focus and exposure settings are fixed (AF/AE lock). If you want to focus on a subject that is off to one side of the image or if you want to set the exposure before you compose the final shot, lock the AF and AE settings and then compose and shoot your picture to get the best results. -
Page 26: Digital Zoom
TAKING PICTURES ( AUTO MODE ) DIGITAL ZOOM Zoom bar display W W W h Digital zoom focal lengths (35 mm camera equivalents) : Approx. 210 mm-294 mm, max. zoom scale: 1.4 : Approx. 210 mm-462 mm, max. zoom scale: 2.2 : Approx. -
Page 27: Viewing Your Images (Playback)
Images That Can be Viewed on the FinePix S602 ZOOM The FinePix S602 ZOOM can be used to view still images (excluding some uncompressed images) recorded on an FinePix S602 ZOOM or images recorded onto a 3.3V SmartMedia or Microdrive using a FUJIFILM FinePix series, MX series and DX series digital camera. -
Page 28: Single-Frame Playback/Playback Zoom/Panning/Trimming
VIEWING YOUR IMAGES ( PLAYBACK ) Single-frame Playback Playback Zoom Zoom bar Pressing the zoom button during single-frame playback zooms (enlarges) the still image. When you do this, a zoom bar is displayed. h Zoom scales 2832 2128 pixel images: Max. 18 2048 1536 pixel images: Max. -
Page 29: Erasing Images (Erase Frame)
Erasing Images (Erase Frame) ERASE ERASE FORMAT FORMAT ALL FRAMES ALL FRAMES FRAME FRAME BACK BACK ERASE ERASE FORMAT FORMAT ALL FRAMES ALL FRAMES FRAME FRAME Return to single- BACK BACK frame playback FRAME FRAME ERASE OK? ERASE OK? OK OK BACK BACK Note that erased images cannot be restored. 1Press the “MENU/OK”... -
Page 30: Focusing (Distance)
The AF Sensor The FinePix S602 ZOOM uses an external AF sensor (external-light passive phase difference AF) that features faster AF operation than previous models. The external AF sensor does not operate in Macro or Super Macro mode, when the digital zoom or AREA AF is used, or when “SET ADAPTER... -
Page 31: Exposure (Aperture And Shutter Speed)
EXPOSURE ( APERTURE AND SHUTTER SPEED ) EXPOSURE Exposure refers to the light that hits the CCD or the total amount of captured light and determines the brightness of the image. The exposure is determined by the combination of aperture and shutter speed. In AE (automatic exposure), the camera automatically determines the correct exposure, allowing for factors such as the brightness of the subject and the ISO setting. -
Page 32: Taking Pictures - Selecting The Camera Settings
TAKING PICTURES — SELECTING THE CAMERA SETTINGS Consider the scene you are photographing and the sort of image you want to achieve when you specify the camera settings. A general guide to the procedure is given below. Select the photography mode ( P.34-40). Leaves all the settings to the camera. -
Page 33: List Of Functions Available In Each Mode
List of Functions Available in Each Mode Photography mode Function Auto Flash Red-Eye Reduction Flash Forced Flash Slow Synchro Red-Eye + Slow Macro/ Super Macro AE Lock Exposure Compensation AF/MF Switching Frame (OFF) Top 5-frame Continuous shooting Auto Bracketing Selections Final 5-frame Long-period (up to 40 frames) List of Menu Options Available in Each Mode... -
Page 34: Photography Mode
PHOTOGRAPHY MODE AUTO SCENE POSITION F5 F5.6 250 250 This is the best mode for shooting portraits. Skin tones are Portrait shown beautifully and the overall tone is soft. This is the best mode for shooting scenery in daylight and Landscape provides crisp, clear shots of scenery such as buildings and mountains. -
Page 35: Programmed Auto
PROGRAMMED AUTO PHOTOGRAPHY MODE N 0049 0049 250 250 F5 F5.6 The Shutter Speed and Aperture Setting Display N 0049 0049 Set the Mode dial to “ ”. This is an automatic mode that allows you to specify any of the settings other than the shutter speed and aperture. -
Page 36: Shutter-Priority Auto
PHOTOGRAPHY MODE Shutter speed 320 320 F6.3 F6.3 The Shutter Speed and Aperture Setting Display Overexposed 250 250 Underexposed 1000 1000 1000 Metering failed 125 125 SHUTTER-PRIORITY AUTO Set the Mode dial to “ ”. This is an automatic mode that allows you to set the shutter speed. -
Page 37: Aperture-Priority Auto
APERTURE-PRIORITY AUTO PHOTOGRAPHY MODE Aperture 320 320 F6.3 F6.3 The Shutter Speed and Aperture Setting Display Overexposed 1000 F2.8 1000 F2.8 1000 F2.8 Underexposed 3” F5.6 3” F5.6 F5.6 Metering failed F6.3 F6.3 F6.3 Set the Mode dial to “ ”. This is an automatic mode that allows you to set the aperture. -
Page 38: Manual
PHOTOGRAPHY MODE Shutter speed F5.6 F5.6 500 500 Aperture 1000 1000 F8.0 F8.0 The exposure indicator Exposure indicator F8.0 F8.0 1000 1000 MANUAL Set the Mode dial to “ ”. Manual mode allows you to set any shutter speed and aperture setting. h Shutter speed settings 15 sec. -
Page 39: Movie (Video)
PHOTOGRAPHY MODE Standard Available Shooting Times for Different Media Number of recorded pixels MG-4S (4 MB) Approx. 3 sec. MG-8S (8 MB) Approx. 6 sec. MG-16S/SW (16 MB) Approx. 13 sec. MG-32S/SW (32 MB) Approx. 27 sec. MG-64S/SW (64 MB) Approx. - Page 40 PHOTOGRAPHY MODE REC REC STORING・・・ STORING・・・ When shooting long movies, it is recommended that you use a fully charged Ni-MH (nickel- metal hydride) batteries. MOVIE ( VIDEO ) Press the shutter button down fully to start shooting. The brightness and color of the screen shown during movie shooting may differ from those shown before shooting begins.
-
Page 41: Flash Photography
FLASH PHOTOGRAPHY 250 250 F5.6 F5.6 250 250 F5.6 F5.6 Suppressed Flash If you are shooting in Suppressed Flash mode in dark conditions, use a tripod to prevent camera shake. See P.24, 84 for information on the camera shake warning. ( EXCLUDING Press the Flash pop-up button to pop-up the flash. -
Page 42: Auto Flash
FLASH PHOTOGRAPHY Red-Eye Effect When you use the flash to photograph people in low-light conditions, their eyes sometimes appear red in the picture. This is caused by the light of the flash reflecting off the inside of the eye. Use Red-Eye Reduction flash to effectively minimize the likelihood of the red-eye effect. Take the following measures to make Red-Eye Reduction more effective: h Get the subjects to look at the camera. -
Page 43: Continuous Shooting
CONTINUOUS SHOOTING OFF OFF 250 250 F5.6 F5.6 250 250 F5.6 F5.6 Notes on Using the Continuous Shooting Modes h Shooting continues for as long as you hold down the shutter button. In Auto Bracketing mode however, just press the shutter button once to shoot 3 frames. h If there is insufficient space on the media, as many frames are shot as can be recorded on the available space. -
Page 44: Top 5-Frame Continuous Shooting
CONTINUOUS SHOOTING Top 5-frame Continuous Shooting STORING・・・ STORING・・・ Auto Bracketing STORING・・・ STORING・・・ AUTO BRACKETING AUTO BRACKETING 0 OFF OFF OFF OFF Final 5-frame Continuous Shooting Max. 25 shots Press shutter Release shutter button button × × × × In this mode, you can shoot up to 5 frames at intervals as short as 0.2 seconds. -
Page 45: Long-Period Continuous Shooting With 1280 × 960-Pixel Mode
Long-period Continuous Shooting with 1280 QUALITY QUALITY Focusing on a Moving Subject If you press the shutter button down halfway to focus on the subject at the starting point A, the subject may no longer be in focus when it reaches point B where you want to take the shot. In such situations, use AF lock or manual focusing to focus on point B beforehand and then lock the focus so that it does not shift (lock pin). -
Page 46: Exposure Compensation
EXPOSURE COMPENSATION Use this function for shots where you cannot obtain the optimum brightness (exposure), such as shots with extremely high contrast between the subject and the background. Exposure compensation cannot be used in the “ Exposure compensation is disabled in the following situations: When “... -
Page 47: Ae-L Using Ae Lock
AE-L USING AE LOCK/ USING AE LOCK F5.6 F5.6 250 250 Click 250 250 F5.6 F5.6 MACRO ( CLOSE-UP ) PHOTOGRAPHY cancel macro F5.6 F5.6 250 250 Shooting distance Approx. 10 cm-80 cm Macro (3.9 in.-2.6 ft.) Approx. 1 cm-20 cm Super Macro (0.4 in.-7.9 in.) MACRO ( CLOSE-UP ) PHOTOGRAPHY... -
Page 48: Setting The Manual Focus
SETTING THE MANUAL FOCUS 250 250 F5.6 F5.6 250 250 F5.6 F5.6 250 250 F5.6 F5.6 Use manual focus for subjects that are not suitable for Auto Focus or where you want the focus fixed for a shot. 1Set the focus mode selector switch to “MF”. 2The “... -
Page 49: Photography Menu
PHOTOGRAPHY MENU PHOTOGRAPHY MENU OPERATION SELF-TIMER SELF TIMER OFF OFF OFF OFF 200 200 AUTO AUTO MULTI AUTO BRACKETING AUTO BRACKETING OFF OFF 0 OFF OFF Pressing “g” moves to the next or previous menu page as indicated by “ of the page. Photography Information Flash brightness adjustment... -
Page 50: Self-Timer Photography
PHOTOGRAPHY MENU SELF-TIMER PHOTOGRAPHY SELF SELF-TIMER TIMER Factory default OFF OFF OFF OFF 200 200 AUTO AUTO MULTI Using the 2-second self-timer This is useful when you have the camera on a tripod and you want to avoid camera shake. 250... -
Page 51: Setting The Iso Sensitivity
SETTING THE ISO SENSITIVITY ISO ISO 800 800 400 400 Factory default 200 200 160 160 OFF OFF 200 200 AUTO AUTO MULTI MULTI Setting the Mode dial to “ 800/1600) and resets the camera to ISO 200. However, the number of recorded pixels is still set to “... -
Page 52: Setting The White Balance
PHOTOGRAPHY MENU SETTING THE WHITE BALANCE WHITE BALANCE WHITE BALANCE Factory default OFF OFF 200 200 AUTO MULTI AUTO : Automatic adjustment AUTO (Shooting to show the ambience of the light source) : Custom white balance type 1 : Custom white balance type 2 : Shooting outdoors in fine weather : Shooting in shade The white balance setting (unless it is a Custom White Balance setting) is ignored when you use the flash. - Page 53 COMPLETED ! COMPLETED ! OK OK BACK BACK ! OVER ! OVER or or ! UNDER ! UNDER ! OVER ! OVER When the correct exposure is measured, “ ” is displayed. Press the “MENU/OK” button to confirm the setting. The specified custom white balance is retained until it is reset.
-
Page 54: Photometry
PHOTOGRAPHY MENU PHOTOMETRY PHOTOMETRY PHOTOMETRY Factory default OFF OFF 200 200 AUTO MULTI AUTO The Light Metering Modes are Effective for the Following Subjects h AVERAGE The advantage of this mode is that the exposure tends not to change for different compositions or subjects. -
Page 55: Sharpness
SHARPNESS SHARPNESS SHARPNESS HARD HARD SOFT SOFT Factory default NORMAL NORMAL 0 OFF OFF OFF OFF NORMAL NORMAL MULTI-EXPOSURE MULTI MULTI-EXPOSURE EXPOSURE ON ON Factory default OFF OFF OFF OFF 0 OFF OFF NORMAL NORMAL h Continuous shooting and Auto bracketing are disabled when MULTI-EXPOSURE is selected. h You cannot change the photography menu settings or the FILE SIZE/QUALITY setting during shooting. -
Page 56: Flash Brightness Adjustment
PHOTOGRAPHY MENU FLASH BRIGHTNESS ADJUSTMENT FLASH FLASH +0.6 +0.6 +0.3 +0.3 0 −0.3 −0.3 0 OFF OFF OFF OFF USING AN EXTERNAL FLASH EXTERNAL FLASH EXTERNAL FLASH ON ON Factory default OFF OFF 0 OFF OFF OFF OFF Brightness adjustment allows you to change just the amount of light emitted by the flash to suit the photography conditions or to achieve a desired effect. -
Page 57: External Flash Settings
AUTO MODE SELECT WHITE BALANCE WHITE BALANCE AUTO AUTO OFF OFF 200 200 AUTO MULTI AUTO Click External Flash Settings For external flash, refer to the user’s manual for the flash and specify the settings as described below. h Select External Flash mode (TTL mode cannot be used). -
Page 58: Voice Memo
PHOTOGRAPHY MENU VOICE MEMO VOICE MEMO VOICE MEMO Factory default ON ON OFF OFF Click VOICE MEMO VOICE MEMO REC STANDBY REC STANDBY 30s 30s OK OK START START BACK BACK CANCEL CANCEL VOICE MEMO VOICE MEMO RECORDING・・・ RECORDING・・・ 20s 20s OK OK REC REC BACK BACK RESTART RESTART... -
Page 59: Playback Information
Advanced PLAYBACK INFORMATION Features Playback Number of recorded pixels Quality Shutter speed Aperture ISO Sensitivity Flash ON/OFF Histograms A histogram is a chart showing the distribution of brightness in an image (horizontal axis: brightness; vertical axis: pixels). 1Optimal exposure: There is an ample distribution of pixels overall with a peak in the middle range. -
Page 60: Playing Back Movies
Refer to the Software Quick Start Guide (provided) for information on playing back movies on your PC. Compatible Movie Files The FinePix S602 ZOOM can play back movie files shot on a FinePix S602 ZOOM or movie files recorded on a 3.3 V SmartMedia or Microdrives using FUJIFILM digital cameras. -
Page 61: Playing Back Voice Memos
Refer to the Software Quick Start Guide (provided) for information on playing back voice memos on your PC. Compatible Voice Memo Files The FinePix S602 ZOOM can play voice memo files recorded on a FinePix S602 ZOOM and voice memo files up to 30 seconds long that were recorded on FUJIFILM digital cameras and stored on a 3.3 V SmartMedia or Microdrives. -
Page 62: Playback Menu
PLAYBACK MENU ERASING SINGLE FRAME ERASE ERASE FORMAT FORMAT ALL FRAMES ALL FRAMES FRAME FRAME BACK BACK ERASE ERASE FORMAT FORMAT ALL FRAMES ALL FRAMES FRAME FRAME BACK BACK ALL FRAMES/FORMATTING • 1Set Power switch to “ 2Press the “MENU/OK” button to display the menu screen. - Page 63 FRAME FRAME 100−0010 100−0010 ERASE OK? ERASE OK? OK OK BACK BACK ALL FRAMES ALL FRAMES 100−0010 100−0010 ERASE ALL OK? ERASE ALL OK? OK OK BACK BACK FORMAT FORMAT 100−0010 100−0010 FORMAT FORMAT OK? OK? OK OK BACK BACK FRAME 1Use “d ” and “c ” to select the file to be erased.
-
Page 64: How To Specify Print Options (Dpof)
This section gives a detailed description of how to order your prints with the FinePix S602 ZOOM. On the FinePix S602 ZOOM, you can specify only one print per image in the DPOF settings. Note that some printers do not support date and time imprinting or specification of the number of prints. - Page 65 DPOF DPOF DATE ON DATE ON DATE OFF DATE OFF DPOF DPOF TOTAL/009 TOTAL/009 SET SET RESET RESET FRAME FRAME OK OK SET SET BACK BACK DPOF Settings Cannot be Modified RESET DPOF OK? RESET DPOF OK? OK OK BACK BACK 1Use “a ” and “b ” to select “DATE ON” or “DATE OFF”.
-
Page 66: Voice Memo (Recording)
PLAYBACK MENU VOICE MEMO ( RECORDING ) VOICE MEMO VOICE MEMO ON ON VOICE MEMO VOICE MEMO REC STANDBY REC STANDBY 30s 30s OK OK START START BACK BACK CANCEL CANCEL VOICE MEMO VOICE MEMO RECORDING・・・ RECORDING・・・ 20s 20s OK OK REC REC BACK BACK RESTART RESTART You can add voice memos to still images. 1Set Power switch to “... - Page 67 VOICE MEMO VOICE MEMO FINISH FINISH OK OK REC REC BACK BACK RESTART RESTART When the Image Already Has a Voice Memo VOICE MEMO VOICE MEMO BACK BACK RE/REC RE/REC After 30 seconds of recording, “ on the screen. To finish: Press the “MENU/OK” button. To re-record your comment: Press the “BACK”...
-
Page 68: Set-Up
Settings SET–UP Menu Options Settings Display QUALITY QUALITY IMAGE OFF/POSTVIEW/ DISPLAY PREVIEW AF MODE AF/AF AREA SET ADAPTER YES/NO RING AUTO POWER 2MIN/5MIN/OFF USB MODE DSC/PC CAM LOW/HIGH/OFF SOUND ( SMART MEDIA ) PRIMARY MEDIA ( MICRODRIVE ) DATE/TIME ENGLISH/FRANCAIS/ LANGUAGE DEUTSCH RESET ALL... -
Page 69: Number Of Recorded Pixels
NUMBER OF RECORDED PIXELS QUALITY QUALITY NORMAL NORMAL F N OK OK BACK BACK Still Image Number of Recorded Pixels Settings You can select any combination of 4 image sizes and 4 quality settings. Try using the settings in the table below as a guide to achieving the desired results. Select “HI”... -
Page 70: Displaying Photographed Images
SET–UP DISPLAYING PHOTOGRAPHED IMAGES SET−UP SET−UP QUALITY QUALITY QUALITY QUALITY IMAGE DISPLAY IMAGE DISPLAY AF MODE AF MODE SET ADAPTER RING SET ADAPTER RING AUTO POWER OFF AUTO POWER OFF : Photographed images are automatically recorded without being displayed. POSTVIEW: Photographed images are displayed for approx. 2 seconds and then automatically recorded. -
Page 71: Af Mode
AF MODE SET−UP SET−UP QUALITY QUALITY QUALITY QUALITY IMAGE DISPLAY IMAGE DISPLAY OFF OFF AF MODE AF MODE AF AF SET ADAPTER RING SET ADAPTER RING N0 N0 AUTO POWER OFF AUTO POWER OFF 2 MIN MIN AF mode : Focuses on the center of the screen. AF AREA mode: Allows you to change the location on the screen where the shot will be focused. -
Page 72: Set Adapter Ring
SET–UP SET ADAPTER RING SET−UP SET−UP QUALITY QUALITY QUALITY QUALITY IMAGE DISPLAY IMAGE DISPLAY AF MODE AF MODE SET ADAPTER RING SET ADAPTER RING AUTO POWER OFF AUTO POWER OFF Overview of the Conversion Lens/Adapter Ring Wide Conversion Lens WL-FX9 This is a set that includes a wide conversion lens and adapter ring and converts the camera’s focal length by 0.79 (equivalent to a 28 mm wide-angle lens). -
Page 73: Auto Power Off Setting
AUTO POWER OFF SETTING SET−UP SET−UP QUALITY QUALITY QUALITY QUALITY IMAGE DISPLAY IMAGE DISPLAY OFF OFF AF MODE AF MODE AF AF SET ADAPTER RING SET ADAPTER RING NO NO AUTO POWER OFF AUTO POWER OFF 2 MIN MIN Sleep does not function in set-up or playback mode, but the camera automatically switches off if the camera is not used for a set time (2 minutes or 5 minutes). -
Page 74: Connecting To A Tv/Using The Ac Power Adapter (Optional)
“DC IN 5V” socket. Then plug the AC power adapter into a power outlet. Problems arising through the use of products other than genuine FUJIFILM products are not covered by your warranty. See P.82 for notes on using the AC power adapter. -
Page 75: Connecting To A Computer
CONNECTING TO A COMPUTER This section gives an overview of the functions that can be used with a USB connection and describes the connection method. Refer also to the Software Quick Start Guide booklet. Refer to the Software Quick Start Guide booklet for details. The first time you connect the camera to your computer You must install all the software before... -
Page 76: Connecting At Dsc Mode
CONNECTING AT DSC MODE SET−UP SET−UP USB MODE USB MODE SOUND SOUND PRIMARY MEDIA PRIMARY MEDIA DATE/TIME DATE/TIME RESET ALL RESET ALL LANGUAGE LANGUAGE (USB) (USB) socket socket AC-5V(optional) If you are using a Windows PC, the driver settings are specified automatically when installation is completed. No further action is required. If your PC fails to recognize the camera, refer to the Software Quick Start Guide. -
Page 77: Connecting At Pc Camera Mode
CONNECTING AT PC CAMERA MODE SET−UP SET−UP USB MODE USB MODE PC CAM PC CAM SOUND SOUND LOW LOW PRIMARY MEDIA PRIMARY MEDIA DATE/TIME DATE/TIME RESET ALL RESET ALL LANGUAGE LANGUAGE ENGLISH ENGLISH (USB) (USB) socket socket socket AC-5V(optional) If you are using a Windows PC, the driver settings are automatically specified when installation ends. -
Page 78: Disconnecting From The Pc (Important - Always Use This Procedure.)
DISCONNECTING FROM THE PC ( Important — always use this procedure. ) For a DSC connection, proceed to step In some cases, the camera and computer may still be communicating even after the “Copying” message disappears from the computer screen. Always check that the indicator lamp is lit green. Perform the steps shown below before you switch the camera off. -
Page 79: System Expansion Options
System Expansion Options eBy using the FinePix S602 ZOOM together with other optional FUJIFILM products, your system can be expanded to fill a wide range of uses. Video output TV monitor ( commercially available) FinePix S602 ZOOM Digital Camera Microdrive... -
Page 80: Accessories Guide
Accessories Guide e The optional accessories (sold separately) can make taking pictures with the FinePix S602 ZOOM even easier. For information on how to attach and use the accessories, refer to the instructions provided with the accessory used. Visit the FUJIFILM web site for the latest information on camera accessories. http://home.fujifilm.com/products/digital/index.html h SmartMedia™... -
Page 81: Notes On Using Your Camera Correctly
AF sensor and then gently wipe the camera with a soft, dry cloth. If any soiling remains, apply a small amount of lens cleaning liquid to a piece of FUJIFILM lens cleaning paper and wipe gently. h Do not scratch hard objects against the lens, LCD monitor screen or viewfinder as these surfaces are easily damaged. -
Page 82: Notes On The Power Supply
Plug the connection cord plug securely into the DC input terminal of the FUJIFILM Digital camera. h Turn off the power switch of the FUJIFILM Digital camera before disconnecting the connection cord from the FUJIFILM Digital camera’s DC input terminal. To disconnect, take hold of the plug and pull it out (do not disconnect it by pulling on the cord). -
Page 83: Notes On The Media (Smartmedia™ And Microdrives)
Storing Data In the situations listed below, recorded data may be erased (destroyed). Please note that FUJIFILM accepts no responsibility whatsoever for the loss (destruction) of recorded data. When the media is used incorrectly by the owner or a third... -
Page 84: Warning Displays
Use a formatted SmartMedia to take pictures. i Reload the media or switch the camera off and then on again. If this does not remedy the problem, contact your FUJIFILM dealer. i Use a new media. i The voice memo cannot be played back. - Page 85 Switch the camera on again taking care not i Switch the camera on and off again several Use a media that was formatted on the camera. Remedy to touch the lens. times. If that does not remedy the problem, contact your FUJIFILM dealer.
-
Page 86: Troubleshooting
Troubleshooting Troubleshooting The camera won’t switch i The batteries are exhausted. i The batteries are loaded the wrong way i The AC power adapter is not connected Power cuts out during i The batteries are exhausted. operation. Batteries run out quickly. i You are using the camera in extremely i The battery terminals are soiled. - Page 87 Load new or fully charged batteries. i Briefly remove the batteries or disconnect the AC power adapter and then reload the batteries or reconnect the AC power adapter and try using the camera again. If that does not remedy the problem, contact your FUJIFILM dealer.
-
Page 88: Specifications
Specifications S y stem h Model: Digital camera FinePix S602 ZOOM h Number of effective pixels: 3.1million pixels h CCD sensor 1/1.7 inch Super CCD in an interwoven pattern Number of total pixels 3.3 million pixels h Number of recorded pixels 2832 2128 pixels (6.03 million pixels) / 2048... -
Page 89: Explanation Of Terms
AF/AE Lock: On the FinePix S602 ZOOM, pressing the shutter button down half way locks the focus and exposure settings (AF and AE lock). If you want to focus on a subject that is not centered in the frame or change the picture composition after the exposure is set, you can obtain good results by changing the composition after the AF and AE settings are locked. -
Page 90: Safety Notes
Safety Notes h To ensure that you use your FinePix S602 ZOOM camera correctly, read these Safety Notes and your Owner’s Manual carefully beforehand. h After reading these Safety Notes, store them in a safe place. About the Icons The icons shown below are used in this document to... - Page 91 Request regular internal testing and cleaning for your camera. Build-up of dust in your camera can cause a fire or electric shock. h Contact your FUJIFILM dealer to request internal cleaning every 2 years.
- Page 92 Printed on recycled paper. 26 - 30, Nishiazabu 2 - chome, Minato - ku, Tokyo 106 - 8620, Japan FGS - 204103 - FG Printed in Japan...