Table of Contents
Advertisement
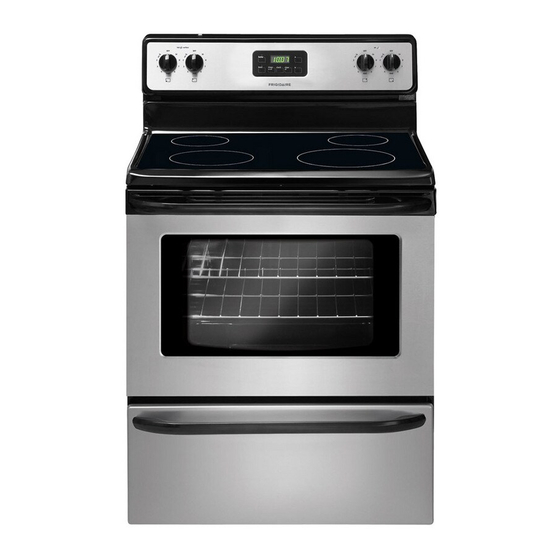
All about the
Use
of your
Important Safety Instructions ........................... 3-5
Before Setting Oven Controls .............................. 6
Before Setting Surface Controls ....................... 7-8
Oven Control Functions (100) ............................ 12
www.frigidaire.com USA 1-800-944-9044
&
Electric Range
TA B L E O F C O N T E N T S
www.frigidaire.ca Canada 1-800-265-8352
Care
Setting Oven Controls .................................. 12-15
Care & Cleaning ..........................................16-19
Before You Call ............................................ 20-21
Major Appliance Warranty ................................ 23
Advertisement
Table of Contents

Related Manuals for Frigidaire FFEF3012L


Summary of Contents for Frigidaire FFEF3012L
-
Page 1: Table Of Contents
Before Setting Oven Controls ... 6 Before Setting Surface Controls ... 7-8 Setting Surface Controls (Ceramic cooktop) ... 9-11 Oven Control Functions (100) ... 12 www.frigidaire.com USA 1-800-944-9044 & Care TA B L E O F C O N T E N T S Setting Oven Controls ... -
Page 2: Product Registration
If you do need service, help is only a phone call away. Call Frigidaire Customer Services at 1-800-944-9044. Product Registration Registering your product with Frigidaire enhances our ability to serve you. You can register online at www.frigidaire.com or by dropping your Product Registration Card in the mail. -
Page 3: Important Safety Instructions
IMPORTANT SAFETY INSTRUCTIONS Ask your dealer to recommend a qualified technician and an authorized repair service. Know how to disconnect the power to the range at the circuit breaker or fuse box in case of an emergency. WARNING • All ranges can tip. - Page 4 • Use care when opening oven door , lower oven door or warmer drawer (if equipped)—Stand to the side of the range when opening the door of a hot oven. Let hot air or steam escape before you remove or replace food in the oven.
-
Page 5: Important Safety Instructions
IMPORTANT INSTRUCTIONS FOR CLEANING YOUR RANGE Clean the range regularly to keep all parts free of • grease that could catch fire. Pay particular attention to the area around each surface element. Do not allow grease to accumulate. -
Page 6: Before Setting Oven Controls
Do not block the oven vent. oven vent location Types of oven racks Your range may be equipped with one or more of the oven rack styles shown. flat oven rack... -
Page 7: Before Setting Surface Controls
About the ceramic glass cooktop The ceramic cooktop has radiant surface elements located below the surface of the glass. The design of the ceramic cooktop outlines the area of the surface element underneath. Be sure to match the pan size with the diameter of the element outline on the cooktop and only flat-bottomed cookware should be used. -
Page 8: Cookware Material Types
BEFORE SETTING SURFACE CONTROLS Types of cooktop elements The ceramic glass cooktop has radiant surface elements located below the surface of the glass. The patterns on the ceramic glass will outline the size and type of element available. The single radiant element will have one round outline pattern shown. -
Page 9: Setting Surface Controls (Ceramic Cooktop)
Do not place flammable items such as plastic salt and pepper shakers, spoon holders or plastic wrappings on top of the range when it is in use. These items could melt or ignite. Potholders, towels or wooden spoons could catch fire if placed too close to the surface elements. -
Page 10: Setting Dual Radiant Surface Elements
Do not place flammable items such as plastic salt and pepper shakers, spoon holders or plastic wrappings on top of the range when it is in use. These items could melt or ignite. Potholders, towels or wooden spoons could catch fire if placed too close to the surface elements. -
Page 11: Home Canning
Do not place flammable items such as plastic salt and pepper shakers, spoon holders or plastic wrappings on top of the range when it is in use. These items could melt or ignite. Potholders, towels or wooden spoons could catch fire if placed too close to the surface elements. -
Page 12: Oven Control Functions (100)
OVEN CONTROL FUNCTIONS READ THE INSTRUCTIONS CAREFULLY BEFORE USING THE OVEN. For satisfactory use of your oven, become familiar with the various pad features and functions of the oven as described below. Feature indicator lights— These indicator lights show if bake or broil is active. -
Page 13: Setting Minute Timer
Setting the minute timer 1. Press timer on-off. 2. Press the to increase the time in one minute increments. Press and hold the time in 10 minute increments. The timer can be set for any amount of time from 1 minute to 11 hours and 59 minutes. -
Page 14: Setting Broil
SETTING OVEN CONTROLS Setting broil Use the broil feature to cook meats that require direct exposure to radiant heat for optimum browning results. When broiling always remember to arrange the oven racks while oven is still cool. For medium done steaks, position the oven rack closer to the broil element (positions 4 or 5;... -
Page 15: Adjusting Oven Temperature
5°F increments with each press of the adjustment range is +35°F to -35° F). 3. To accept the change, wait until the oven control provides the acceptance beep (See Notes). -
Page 16: Care & Cleaning
Do not spray cleaner on oven door trim, door gasket, plastic drawer glides, handles or any exterior surfaces of the range. Clean any soils from the oven frame, the door liner outside the oven door gasket and the small area at the front center of the oven bottom. -
Page 17: Cooktop Maintenance & Cleaning
Cooktop maintenance IMPORTANT Consistent and proper cleaning is essential to maintaining your ceramic glass cooktop. Prior to using your cooktop for the first time, apply some of the glass-ceramic cooktop cleaner supplied with your new appliance. Buff with a non-abrasive cloth or no-scratch cleaning pad. -
Page 18: Cautions For Aluminum Use
Replacing oven light CAUTION Be sure the range is unplugged and all parts are COOL before replacing oven light. Wear a leather-faced glove for protection against possible broken glass. The interior oven light bulb is located at the upper left rear of the oven cavity. -
Page 19: Removing & Replacing Oven Door
Removing and replacing the lift-off oven door CAUTION The oven door is heavy. For safe, temporary storage, lay the oven door flat with the inside of the door facing down. To remove oven door Open oven door completely (horizontal with floor-Fig. 1). Remove 2 screws located on the inside of the oven door liner (See A Fig. -
Page 20: Before You Call
If you feel the oven is too hot or cool, see Adjusting oven temperature section in this Use & Care Guide. • Be sure floor is level, strong & stable enough to adequately support range. • If floor is sagging or sloping, contact a carpenter to correct the situation. - Page 21 Problem Oven smokes excessively during broiling. Flames inside oven or smoking from oven vent. Oven control panel beeps & displays any F code error. Scratches or abrasions on cooktop surface. Metal marks on the cooktop. Brown streaks or specks on cooktop surface.
-
Page 23: Major Appliance Warranty
Your appliance is covered by a one year limited warranty. For one year from your original date of purchase, Electrolux will pay all costs for repairing or replacing any parts of this appliance that prove to be defective in materials or workmanship when such appliance is installed, used and maintained in accordance with the provided instructions. - Page 24 This page is left blank intentionally...