Table of Contents
Advertisement
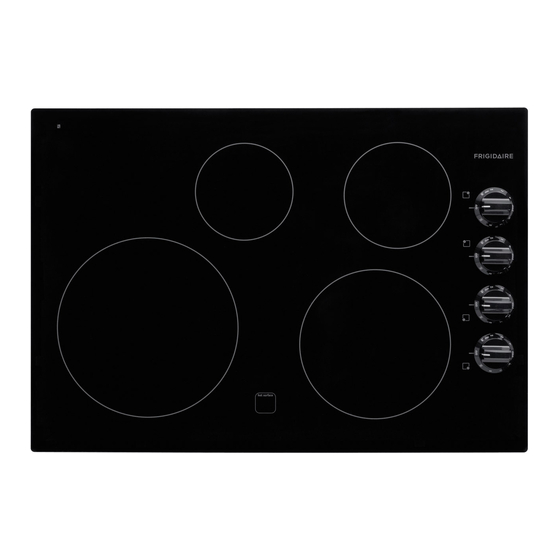
All about the
Use
of your
Welcome & Congratulations ...................................2
Important Safety Instructions .................................3
Surface Cooking ....................................................5
Before Setting Surface Controls ..............................7
Setting Surface Controls ........................................8
www.frigidaire.com USA 1-800-944-9044
&
Cooktop
TA B L E O F C O N T E N T S
www.frigidaire.ca Canada 1-800-265-8352
Care
Care & Cleaning (Cleaning Chart) .........................11
Care & Cleaning ..................................................12
Before You Call ..................................................14
Major Appliance Warranty ....................................16
Advertisement
Table of Contents

Related Manuals for Frigidaire FFEC2605L


Summary of Contents for Frigidaire FFEC2605L
-
Page 1: Table Of Contents
Important Safety Instructions ...3 Surface Cooking ...5 Before Setting Surface Controls ...7 Setting Surface Controls ...8 www.frigidaire.com USA 1-800-944-9044 & Care TA B L E O F C O N T E N T S Care & Cleaning (Cleaning Chart) ...11 Care &... -
Page 2: Welcome & Congratulations
Welcome & congratulations Product registration register Your Product The Product registration card should be filled in completely, signed and returned to Electrolux Home Products. serial Plate location Cooktop Serial Plate Location Please record your model and serial numbers below for future reference. Model Number: Serial Number: Purchase Date:... -
Page 3: Important Safety Instructions
read all instructions before using this appliance. save these instructions for future reference. deFinitions This is the safety alert symbol. It is used to alert you to potential personal injury hazards. Obey all safety messages that follow this symbol to avoid possible injury or death. - Page 4 • Glazed Cooking Utensils. Only certain types of glass, glass/ceramic, ceramic, earthenware, or other glazed utensils are suitable for range top service without breaking due to the sudden change in temperature. Check the manufacturer’s recommendations for cooktop use.
-
Page 5: Surface Cooking
selecting surface cooking cookware Cookware should have flat bottoms that make good contact with the entire surface heating element. Check for flatness by rotating a ruler across the bottom of the cookware (See Figure 1). Figure 1 Be sure to follow the recommendations for using cookware as shown in Figure 2. - Page 6 The bottom surface of the pan in either of these situations could cause discoloring or crazing of the porcelain enamel range surface, and damage to the surface elements and/ or damage to the drip pans (if equipped). Wire trivets: Do not use wire trivets.
-
Page 7: Before Setting Surface Controls
ceramic glass cooktop The ceramic cooktop has radiant surface elements located below the surface of the glass. The design of the ceramic cooktop outlines the area of the surface element underneath. make sure the diameter of the pan matches the diameter of the element outline on the cooktop. -
Page 8: Setting Surface Controls
setting surFace controls surface cooking settings Use the chart to determine the correct setting for the type of food you are preparing. note: The size and type of cookware used will influence the setting needed for best cooking results. recommended setting for surface element setting type of cooking HIGH (HI) -
Page 9: Indicator Lights
indicator lights (some models) Some models have an indicator light for each heating unit, other models have an indicator light for each pair of heating units, also some other models have an indicator light for all heating units. The indicator light glows as soon as a heating unit is turned on. - Page 10 setting surFace controls operating the Warm Zone Feature (some ceramic glass cooktop models only) to operate the warm zone Your appliance is equipped with a warm zone. The purpose of the warm zone is to keep hot cooked foods at serving temperature.
-
Page 11: Care & Cleaning (Cleaning Chart)
cleaning various Parts of Your cooktop Before cleaning any part of the cooktop, be sure all controls are turned OFF and the cooktop is COOL. REMOVE SPILLOVERS AnD HEAvy sOIlInG As sOOn As POssIblE. REGUlAR ClEAnInGs nOW WIll REDUCE THE DIFFICUlTy AnD ExTEnT OF A MAjOR ClEAnInG lATER. -
Page 12: Care & Cleaning
care & cleaning ceramic glass cooktop cleaning & maintenance consistent and proper cleaning is essential to maintaining your ceramic glass cooktop. Prior to using your cooktop for the first time, apply the recommended CERAMA BRYTE® Cleaning Creme to the ceramic surface. Clean and buff with a non abrasive cloth or pad. -
Page 13: To Raise The Top For Cleaning
Plastic or foods with a high sugar content: These types of soils need be removed immediately if spilled or melted onto the ceramic cooktop surface. Permanent damage (such as pitting of the cooktop surface) may occur if not removed immediately. After turning the surface elements OFF, use a razor blade scraper or a metal spatula with a mitt and scrape the soil from the hot surface (as illustrated). -
Page 14: Before You Call
BeFore You call imPortant Before you call for service, review this list. It may save you time and expense. The list includes common occurrences that are not the result of defective workmanship or materials in this appliance. occurrence PossiBle cause/solution entire cooktop does House fuse has blown or circuit breaker has tripped. - Page 15 BeFore You call occurrence PossiBle cause/solution Brown streaks and Boilovers have cooked onto surface. Use razor blade scraper to remove soil. See Ceramic- specks on ceramic glass cooktop section in this Owner’s Guide. glass cooktop Cleaning materials not recommended for ceramic-glass cooktop have been used. Use surface.
-
Page 16: Major Appliance Warranty
maJor aPPliance WarrantY Your appliance is covered by a one year limited warranty. For one year from your original date of purchase, Electrolux will pay all costs for repairing or replacing any parts of this appliance that prove to be defective in materials or workmanship when such appliance is installed, used and maintained in accordance with the provided instructions.