Epson LX-300 Manual
Epson lx-300: user guide
Hide thumbs
Also See for LX-300:
- Service manual (107 pages) ,
- User manual (100 pages) ,
- Manual (12 pages)
Table of Contents
Advertisement
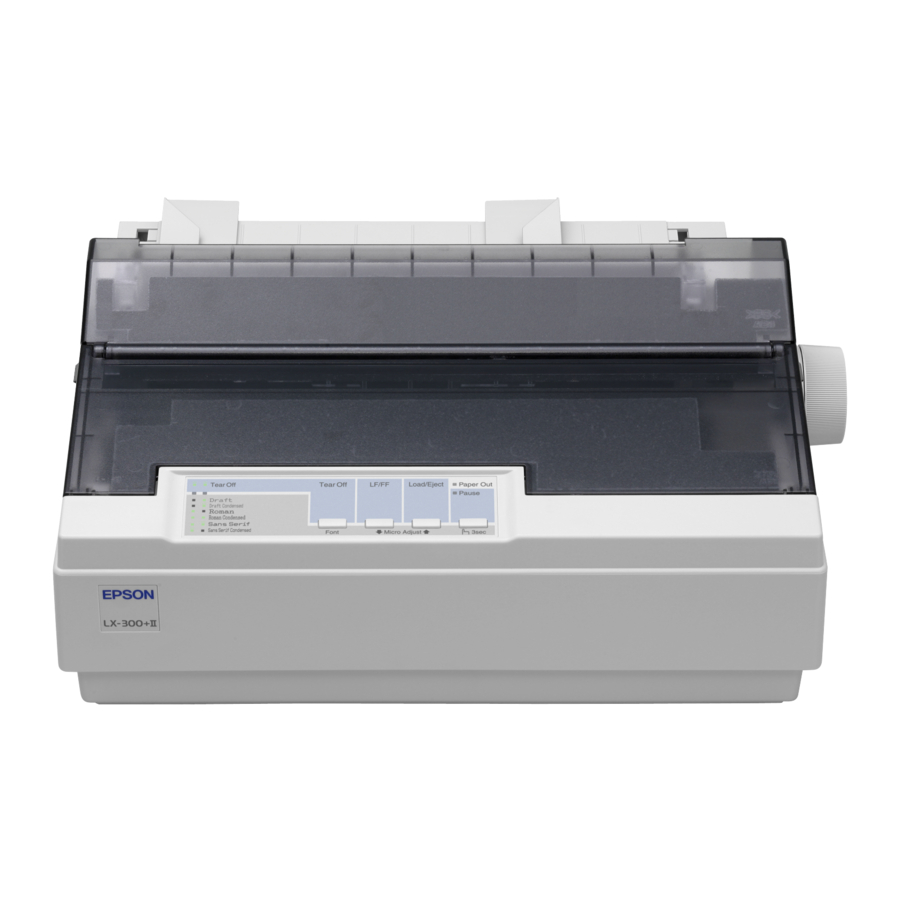
LX-300+II Parts
Printer
cover
Control panel
Paper tension unit
Serial
interface
Parallel
interface
Tractor
USB interface
USB cable holder
Paper supports
Paper guide
Edge guides
Knob
Paper release lever
Ribbon cartridge
Paper
thickness
lever (gap)
Power switch
Power cord
User Replaceable Parts
User replaceable part
Knob
Logo plate
Paper supports
Paper eject assembly
Printer cover assembly
Sheet guide assembly
Options
You can purchase the following options from an Epson
authorized reseller. To find the nearest reseller, call
800-GO-EPSON (800-463-7766). Or you can purchase online
at www.epsonstore.com (U.S. sales) or www.epson.ca
(Canada sales).
Single-bin Cut-sheet Feeder (C806371)
Feeds up to 50 sheets of ordinary single-sheet paper.
Additional Tractor Unit (C800301)
Used in combination with the other tractor, improves
continuous paper handling and reduces the chance of paper
jams. Two tractors are especially useful for printing on
continuous multipart forms.
Roll Paper Holder (C12C811141 or 8310)
Allows you to use 8.5-inch roll paper in your printer.
Black Ribbon Cartridge (#8750)
Expected ribbon life is approximately 3 million characters.
7/06
Epson LX-300+II
Reference number
Part number
106
1051718
120
1056595
180
1054395
570
1050616
105
1050626
109
1050625
Epson LX-300+II
1
-
Advertisement
Table of Contents

Related Manuals for Epson LX-300


Summary of Contents for Epson LX-300
-
Page 1: User Replaceable Parts
Paper eject assembly Printer cover assembly Sheet guide assembly Options You can purchase the following options from an Epson authorized reseller. To find the nearest reseller, call Knob 800-GO-EPSON (800-463-7766). Or you can purchase online at www.epsonstore.com (U.S. sales) or www.epson.ca (Canada sales). -
Page 2: Printer Specifications
64KB Bitmap fonts Epson Draft 10, 12, 15 cpi Epson Roman 10, 12, 15 cpi, proportional Epson Sans Serif 10, 12, 15 cpi, proportional Bar code fonts EAN-13, EAN-8, Interleaved 2 of 5, UPC-A, UPC-E, Code 39, Code 128, POSTNET... -
Page 3: Safety Approvals
Width Length Copies Thickness 7/06 Epson LX-300+II Paper guide 3.9 to 10.1 inches (100 to 257 mm) Cut-sheet feeder 7.2 to 8.5 inches (182 to 216 mm) Paper guide 3.9 to 14.3 inches (100 to 364 mm) Cut-sheet feeder 10.1 to 14 inches (257 to 356 mm) -
Page 4: Printable Area
14 to 22 lb (52 to 82 g/m Paper Alignment Printing starts at “0” on the scale. The unprintable area is to the left of the “0”. 4 - Epson LX-300+II Printable Area Single sheets and envelopes Printable A The minimum top margin is 0.17 inch (4.2 mm). -
Page 5: Selecting A Built-In Font
It is best to use your application program to select the font you want to use in a document. However, you may sometimes need to select one of the printer’s six built-in fonts using the buttons on the control panel, as described below. (The settings you make in application programs usually override settings you make from the printer’s control panel.) -
Page 6: Error Indicators
You can identify many printer problems using the lights on the control panel. If your printer stops working and one or more control panel lights are on or flashing, or the printer beeps, use the following table to diagnose and fix the problem. -
Page 7: Printing On Continuous Paper
Printing with the push tractor Follow these steps to load continuous paper on the push tractor: 1. Turn off the printer. 2. Remove the printer cover and the paper guide, and pull the paper release lever forward to the continuous paper position. - Page 8 Font tear-off position and the Tear Off (Font) lights start flashing. 8 - Epson LX-300+II 2. Open the printer cover, then tear off the printed document using the tear-off edge on the paper tension unit. Paper tension unit If your paper’s perforation is not properly aligned with the tear-off edge, you can adjust the tear-off position using the Micro Adjust feature.
-
Page 9: Printing With The Pull Tractor
5. Lower the tractor onto the mounting slots at the top of the printer as shown below, and tilt it back until you feel it lock into place. 6. Unlock the sprockets by pulling the blue lock levers forward. -
Page 10: Adjusting The Top-Of-Form Position
Hold it horizontally and fit its notches over the printer’s mounting posts. Then slide the paper guide toward the back of the printer until you feel it click. 11. Turn the paper feed knob to adjust the paper position. The perforation between pages should be just above the print head. -
Page 11: Advancing Paper To The Tear-Off Edge
Your tear-off position setting remains in effect until you change it, even if you turn off the printer. (If you want to restore the printer’s default tear-off position, you can reset the printer. See page 14 for instructions.) -
Page 12: Printing On Single Sheets
When the printer receives data, it begins printing. If the document is more than one page, the printer beeps three times after printing each page. Load the next sheet and the printer will continue printing. Printing on Special Paper You can print on a wide variety of special paper types, including multipart forms, labels, and envelopes. -
Page 13: Multipart Forms
Because labels are especially sensitive to temperature and humidity, use them only under normal operating conditions. ❏ Do not leave labels loaded in the printer between jobs; they curl around the platen and may jam when you resume printing. ❏... -
Page 14: Changing Default Settings
) button to print a list of all the Tear Off Font current settings. 5. If the settings are all correct, turn off the printer to exit Default Setting mode. If you want to change any settings, go to step 6. 6. Press the ) button. -
Page 15: Clearing A Paper Jam
Use paper that is at least 8.25 inches (210 mm) wide. 1. Make sure paper is loaded and the printer is turned off. 2. To run the test using a draft font, turn on the printer while holding down the button. To run the test using the LF/FF printer’s near letter-quality font, hold down the... -
Page 16: Related Documentation
5. If the outer case or paper guide is still dirty, clean it with a soft, clean cloth dampened with mild detergent dissolved in water. Keep the printer cover in place and flat on top of the printer to prevent water from getting inside the printer.