Epson Stylus Photo RX520 Series Operation Manual
Epson stylus photo rx520: user guide
Hide thumbs
Also See for Stylus Photo RX520 Series:
- Brochure & specs (4 pages) ,
- Supplementary manual (4 pages) ,
- Start manual (1 page)
Table of Contents
Advertisement
Basic Operation Guide
Introduction ........................................................................................ 2
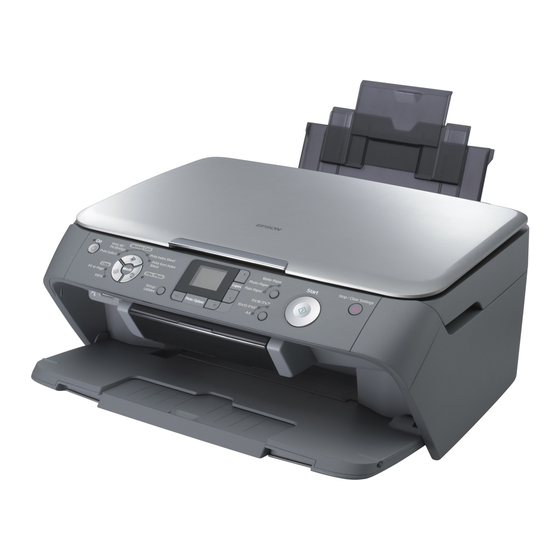
Parts ......................................................................................................... 2
Control Panel.......................................................................................... 3
Loading Paper ...................................................................................4
Selecting Paper ...................................................................................... 4
Loading Paper in Your EPSON STYLUS PHOTO RX ............................... 4
Copying .............................................................................................. 6
Placing Your Original on the Document Table................................... 6
Copying Text and Graphics.................................................................. 7
Copying a Photo.................................................................................... 8
Selecting Copy Quality ......................................................................... 9
Making Prints From Your Digital Camera ...................................... 10
Compatible Cards and Inserting Positions ........................................ 10
Inserting a Memory Card .................................................................... 11
Printing Snapshots ................................................................................ 11
Connecting Your Camera ................................................................. 15
Making Prints From Slides or Negatives ......................................... 16
Removing the Document Mat and Film Holder ............................... 16
Placing 35-mm Slides in the Holder .................................................... 17
Placing 35-mm Film Strips in the Holder ............................................. 17
Printing Snapshots ................................................................................ 18
Replacing Ink Cartridges..................................................................... 19
Checking and Cleaning the Print Head............................................ 21
Aligning the Print Head........................................................................ 22
Transporting Your EPSON STYLUS PHOTO RX...................................... 23
Solving Problems .............................................................................. 24
LCD Messages ...................................................................................... 24
Problems and Solutions........................................................................ 25
Customer Support ................................................................................ 26
Notices .............................................................................................. 27
Important Safety Instructions .............................................................. 27
Copyright Notice.................................................................................. 28
Index ................................................................................................. 30
Advertisement
Table of Contents

Related Manuals for Epson Stylus Photo RX520 Series


Summary of Contents for Epson Stylus Photo RX520 Series
-
Page 1: Table Of Contents
Loading Paper ...4 Copying ... 6 Making Prints From Your Digital Camera ... 10 Making Prints From Slides or Negatives ... 16 Maintaining and Transporting Your EPSON STYLUS PHOTO RX ... 19 Solving Problems ... 24 Notices ... 27 Index ... 30 Parts ... -
Page 2: Introduction
This book tells you how to do these things without ever turning on your computer! Of course your EPSON STYLUS PHOTO RX can do lots more when you connect it to your Windows computer—Such as improving the color and quality of your prints and scanned images, or restoring the color in faded photographs. -
Page 3: Control Panel
Control Panel Buttons Buttons Function Press to turn the EPSON STYLUS PHOTO RX on and off. Press to print photos from a memory card. Memory card The memory card print options are: Print Select: Select this option to choose the photos you want to print. -
Page 4: Loading Paper
EPSON STYLUS PHOTO RX Follow the steps below to load A4, 10 × 15 cm (4 × 6 in.), and 13 × 18 cm (5 × 8 in.) paper in your EPSON STYLUS PHOTO RX. (& See the User's Guide for instructions on loading other types of paper.) - Page 5 Slide the edge guide against the left side of the paper, but not too tightly. Note: If you are using special Epson paper, follow any instructions that came with it. Make sure you do not load more than the recommended number of sheets. Check the Paper Type setting before printing to make sure it matches the type of paper you have loaded (&...
-
Page 6: Copying
Copying You can use your EPSON STYLUS PHOTO RX to copy documents and photos without a computer. If you have photos that have become faded over time, you can even bring them back to life with color restoration. See these sections: ■... -
Page 7: Copying Text And Graphics
Tip: Plain photocopier paper works well for making everyday copies. For crisper text and more vivid colors, try one of the special Epson papers listed on page 4. Make sure the EPSON STYLUS PHOTO RX is turned on. -
Page 8: Copying A Photo
Copying a Photo To print long-lasting photos with a professional finish, choose an Epson paper specially designed for photos (& page 4). Make sure the EPSON STYLUS PHOTO RX is turned on. Load several sheets of 10 × 15 cm (4 × 6 in.) or 13 ×... -
Page 9: Selecting Copy Quality
If you want to copy a photo without color restoration, select the document type without the color restoration icon. For example the screen below shows copy photo without color restoration. Press the x Start button to choose your document type. The document is scanned and a preview of the photo appears on the LCD screen. -
Page 10: Making Prints From Your Digital Camera
EPSON STYLUS PHOTO RX. If you have a PictBridge- or USB Direct Print-enabled camera, you can connect it to the EPSON STYLUS PHOTO RX with a USB cable; & page 15. After inserting your memory card, you can select photos by viewing them on the LCD screen or by printing and scanning an index sheet. -
Page 11: Inserting A Memory Card
❏ Keep the memory card cover closed while a card is inserted. This protects the card and the slot from dust and static; otherwise data on the memory card may be lost, or the EPSON STYLUS PHOTO RX may be damaged. -
Page 12: Printing Selected Photos
Printing selected photos Follow the steps below to select the photos you want to print from your memory card. Insert the memory card (& page 11). Load the type of paper you want to use (& page 4). Load enough sheets for the number of photos you want to print. -
Page 13: Printing From An Index Sheet
Then you mark the pictures on the index sheet that you want to print, scan the sheet, and let the EPSON STYLUS PHOTO RX automatically print the selected photos. Printing an index sheet. - Page 14 ❏ If you need to stop printing, press the y Stop/Clear Settings button. ❏ If you have more than one index sheet, wait for the EPSON STYLUS PHOTO RX to finish printing. Then repeat the steps above to scan and print from each additional sheet.
-
Page 15: Connecting Your Camera
❏ Some of the settings on your digital camera may not be reflected in the output. ❏ Depending on the EPSON STYLUS PHOTO RX and the digital camera settings, there may be some combinations of paper type, size, and layout that are not supported. -
Page 16: Making Prints From Slides Or Negatives
Making Prints From Slides or Negatives You can use the film holder that came with your EPSON STYLUS PHOTO RX to scan 35-mm slides and strips of negatives or positive film. You can then print directly from the scanned images. -
Page 17: Placing 35-Mm Slides In The Holder
Placing 35-mm Slides in the Holder Fit the holder’s tabs into the two small holes at the rear edge of the document table. Make sure the cutouts for 35-mm slides are in the upper-left corner of the document table (not at the rear edge) to align them with the transparency unit window when you close the cover. -
Page 18: Printing Snapshots
Close the document cover. Continue with the steps in the next section to scan and print your photos. Making Prints From Slides or Negatives Printing Snapshots Once you have placed your slides, negatives, or film strips on the scanner as described above, you can scan and print quick snapshots. -
Page 19: Maintaining And Transporting Your Epson Stylus Photo Rx
Magenta Yellow Caution: To ensure good results, use genuine Epson ink cartridges and do not refill them. Other products not manufactured by Epson may cause damage that is not covered by Epson's warranties, and under certain circumstances, may cause your EPSON STYLUS PHOTO RX to behave erratically. -
Page 20: Removing And Installing Ink Cartridges
❏ When an ink cartridge is empty, you cannot continue copying or printing even if the other cartridges still contain ink. ❏ Leave the empty cartridge installed in the EPSON STYLUS PHOTO RX until you have obtained a replacement. Otherwise the ink remaining in the print head nozzles may dry out. -
Page 21: Checking And Cleaning The Print Head
Tip: It is a good idea to turn on your EPSON STYLUS PHOTO RX at least once a month to maintain good print quality. Checking the Print Head... -
Page 22: Aligning The Print Head
Cleaning takes about 30 seconds, during which the processing icon appears on the LCD screen. Caution: To avoid damaging the EPSON STYLUS PHOTO RX, never turn it off while head cleaning is in progress. When cleaning finishes, print a nozzle check pattern to check the results;... -
Page 23: Transporting Your Epson Stylus Photo Rx
10. Press the Setup/Utilities button to return to the previous mode. Transporting Your EPSON STYLUS PHOTO RX If you need to move your EPSON STYLUS PHOTO RX some distance, you need to prepare it for transportation in its original box or one of a similar size. -
Page 24: Solving Problems
Solving Problems If you have a problem with your EPSON STYLUS PHOTO RX, check the messages on the LCD screen, run a nozzle check (& page 21), or see “Problems and Solutions” on page 25. See these sections: ■ “LCD Messages” on page 24 below ■... -
Page 25: Problems And Solutions
If the paper is stuck near the sheet feeder or output tray, gently pull it out then press the x Start button. If the paper is stuck inside the EPSON STYLUS PHOTO RX, press the P On button to turn it off. Open the scanner unit and remove any paper inside, including any torn pieces. -
Page 26: Customer Support
Customer Support Contacting Customer Support If your Epson product is not operating properly and you cannot solve the problem using the troubleshooting information in your product documentation, contact customer support services for assistance. -
Page 27: Notices
■ Use only the type of power source indicated on the label. ■ Place the EPSON STYLUS PHOTO RX near a wall outlet where the plug can be easily unplugged. ■ Do not let the power cord become damaged or frayed. -
Page 28: Copyright Notice
Seiko Epson Corporation. The information contained herein is designed only for use with this product. Epson is not responsible for any use of this information as applied to other printers. - Page 29 Copyright 2002 Seiko Epson Corporation. All rights reserved. USB DIRECT-PRINT™ is a trademark of Seiko Epson Corporation. The USB DIRECT-PRINT logo is a trademark of Seiko Epson Corporation. ® ® Microsoft and Windows are registered trademarks of Microsoft Corporation. DPOF™ is a trademark of CANON INC., Eastman Kodak Company, Fuji Photo Film Co., Ltd.
-
Page 30: Index
7, 8 printing, 12, 13 Cartridge cover, 2 Cartridges, replacing, 19 to 21 Checking print nozzles, 21 Cleaning print head, 22 Contacting EPSON, 26 Contact sheet, 13 to 14 Control panel, 3 Copy Density setting, 7 Copying brightness, adjusting, 7... - Page 31 Paper loading, 4 to 5 selecting, 4 Paper support, 2 Paper Type setting, 4 Photos copying, 8 multiple, 9 placing on glass, 6 supported file types, 10 PictBridge, 15 Print head aligning, 22 to 23 cleaning, 22 Printing from camera, 10 to 15 from index sheet, 13 to 14 from memory card, 10 to 14 Problems...
- Page 32 Printed in XXXXXXX XX.XX-XX XXX...