Advertisement
Quick Links
Appliances
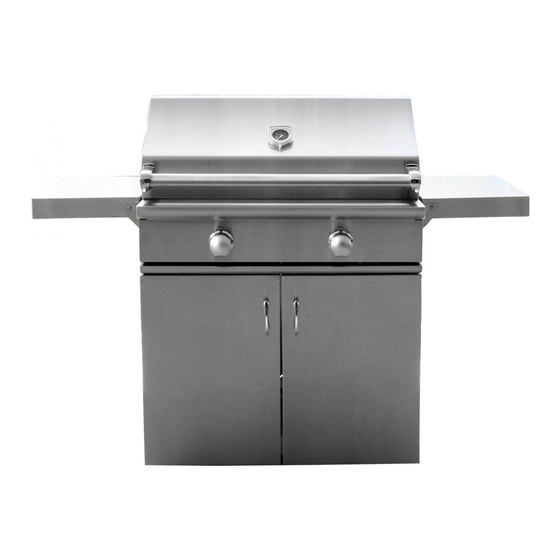
Caliber Crossflame™ Silver Series Outdoor Grills
Models:
35" 2 BURNER GRILLS:
CGA35-2GR-L/N; (2) grill burners, (1) rotisserie burner w/ stainless steel finish
CGA35-2G-L/N; (2) grill burners, no rotisserie burner w/ stainless steel finish
Add suffix "-C" for cart mounted units
41" 3 BURNER GRILLS:
CGA41-2G-1SR-L/N; (2) grill burners, (1) sear burner w/ rotis w/ stainless steel finish
CGA41-2G-1S-L/N; (2) grill burners, (1) sear burner no rotis w/ stainless steel finish
Add suffix "-C" for cart mounted units
Installation + Use/Care Instructions
Advertisement

Related Manuals for Caliber Crossflame Silver Series


Summary of Contents for Caliber Crossflame Silver Series
- Page 1 Appliances Caliber Crossflame™ Silver Series Outdoor Grills Models: 35” 2 BURNER GRILLS: CGA35-2GR-L/N; (2) grill burners, (1) rotisserie burner w/ stainless steel finish CGA35-2G-L/N; (2) grill burners, no rotisserie burner w/ stainless steel finish Add suffix “-C” for cart mounted units 41”...
-
Page 2: Table Of Contents
Table of Contents Pages 1-5 Care and Safety Precautions Pages 6-11 Grill Placement and Installation Pages 12-13 Pressure Testing and Hookups Pages 14-15 Leak Testing Page 16 Air Shutter Adjustments Pages 17-18 Lighting, Match Lighting Instructions Page 19 Using the Rotisserie Page 20 Care and Maintenance Page 21-22... - Page 3 AVERTISSEMENT DANGER: S’IL Y A UNE ODEUR DE GAZ: If you smell gas: 1. Coupez l’admission de gaz de l’appariel. 1. Shut off gas to the grill. 2. Extinguish any open flame. 2. Éteindre toute flamme nue. 3. Open Lid. 3.
- Page 4 SAFETY PRACTICES TO AVOID PERSONAL INJURY! When properly cared for, your Caliber grill will give safe and reliable service for many years. However, extreme care must be used since the grill produces intense heat and can increase accident potential. When using your grill, basic safety prac-...
- Page 5 POTHOLDERS » Use only dry potholders: moist or damp potholders on hot surfaces may cause burns from steam. Do not use a towel or bulky cloth in place of potholders. Do not let potholders touch hot portions of the grill rack. GREASE »...
- Page 6 WARNING! Spiders and insects can nest in the grill burners , causing gas not to flow through the burner. The gas will flow from the front of the burner into the control panel. This is a very dangerous condition which can cause a fire to occur behind the valve panel, thereby damaging the grill components and making it unsafe to operate.
- Page 7 » To avoid burns when cooking, use long handled BBQ tools. » Do not move the appliance during its use. » This unit is for outdoor use only! Do not operate in enclosed areas. This could result in carbon monoxide build-up which would result in injury or death.
-
Page 8: Grill Placement And Installation
GRILL PLACEMENT AND INSTALLATION Clearance to non-combustible construction*: A minimum of 3” clearance from the back of the grill to non-combustible construction is required for the lid to open freely. It is desirable to allow at least 6” rear and side clearance to non- combustible construction above the cooking surface for counter space. - Page 9 During heavy use, the grill will produce considerable smoke. therefore, locate the grill in a well-ventilated area. Never locate the grill in a building, garage, breezeway, shed or other such enclosed areas without an approved ventilation system for outdoor use. If installing grill in an island in an open area, without suitable protection from windy conditions, a windbreak MUST be created to ensure proper performance of the grill.
- Page 10 GENERAL The grill is designed for easy placement into built-in masonry enclosures. For non-combustible applications the grill drops into the opening shown below and hangs from its side flanges. A deck is not required to support it from the bottom. A carpenter’s “spirit level”...
- Page 11 GAS REQUIREMENTS Verify the type of gas supply to be used, either natural or LP, and make sure the marking on the appliance rating plate agrees with that of the supply. The rating plate is located underneath the unit bottom. Never connect an unregulated gas line to the appliance.
- Page 12 LP GAS HOOK UP (TYPE 1 OR QCC1 REGULATOR): Grills orificed for use with LP gas come equipped with a high capacity hose/regulator assem bly for connection to a standard 20 lb. LP cylinder (Type 1). The LP tank is not included. Connection: 1/2”...
- Page 13 LP TANK RESTRAINT FOR BUILT-IN INSTALLATION If the grill is to be installed in a Built-in application, then the grill must be installed in accordance with the Built–in instal- lation guidelines. If you intend to operate your Built-in grill on LP gas utilizing a 20 lb Type 1 cylinder, then the Built-in LP tank restraint must be installed prior to initial use of the grill.
-
Page 14: Pressure Testing And Hookups
PRESSURE TESTING AND HOOKUPS CAUTION! Use grill only in NON-COMBUSTIBLE enclosures. DO NOT build grill into a combustible enclosure. PRESSURE TESTING » The appliance and its individual shut off valve must be disconnected from the gas supply piping system during any pressure testing of that system, at test pressures in excess of 1/2 PSIG (3.5 kPa). - Page 15 applicable, for connection type QCC-1 in the standard for compressed gas cylinder valve outlet and inlet connec- tion ANSI/CGA-V-1. NOTE: The LP Tank is NOT INCLUDED with the grill and must be purchased separately from your local LP cylinder supplier.
- Page 16 LEAK TESTING GENERAL » Although all gas connections to the grill are leak tested at the factory prior to shipment, a complete gas tightness check must be performed at the installation site due to possible mishandling in shipment, or excessive pressure unknowingly applied to the unit.
- Page 17 Check all gas supply fittings for leaks before each use: LP Gas: Leak test points Leak test points Leak test point LP tank Nat. Gas: NG safety shut off valve Leak test points Leak test points Leak test point...
-
Page 18: Air Shutter Adjustments
AIR SHUTTER ADJUSTMENTS BURNER AIR SHUTTER ADJUSTMENT » Each burner air shutter is tested at the factory prior to shipment; however, variations in the local gas supply may make it necessary to adjust the air shutters. The flames of the burners should be visibly checked. »... - Page 19 LIGHTING INSTRUCTIONS BEFORE TURNING ON THE BURNERS » Ensure that all packaging material has been removed » Ensure that the grill has been leak tested and is properly located » Check that the radiant trays and grill racks are properly seated »...
- Page 20 TO MATCH LIGHT THE GRILL If the burners do not light after several attempts, then the burners and rotisserie burner may be match lit using a long stem match and the provided match holder arm. Attach the match to the lighter arm which is attached to the drip pan handle and light it. Pass the lit match through the notch in the front of the grill rack, keeping your hand and face away fron the grill area while pushing and turning the grill knob 90 degrees to the HI position.
-
Page 21: Using The Rotisserie
USING THE ROTISSERIE TO LIGHT ROTISSERIE (if equipped) Open the lid, push and turn the knob to the “HI” position. You will hear a single snap sound at the burner control knob which is the ignition switch sending a spark to the flame electrode mounted under the stainless steel box to the left of the rotiserrie burner. -
Page 22: Care And Maintenance
CARE AND MAINTENANCE GRILL RACKS It is recommended that the grill racks be cleaned immediately after grilling, AFTER the flame has been turned off. Be sure to wear a barbecue mitt to protect your hands from the heat and steam. Dip a wire brush in tap water and scrub the hot grill racks. - Page 23 Any part determined by Caliber to be defective will be repaired or replaced free of charge with the owner paying all other costs including freight and labor.
- Page 24 Caliber will not pay for service calls for correcting an improper installation or for educating the owner/user. The owner is responsible for proper installation, cleaning, providing normal care and...
- Page 25 AVERTISSEMENT S’IL Y A UNE ODEUR DE GAZ: » Coupez l’admission de gaz de l’appariel. » Éteindre toute flamme nue. » Ouvrir le couvercle. » Si l’odeur persiste, appeler immédiatement votre compagnie de gaz ou votre département des incendies. AVERTISSEMENT »...
- Page 26 » Tout contact de la peau avec la phase liquide de la bouteille causera des brûlures par le froid. » Empêcher les enfants de manipuler la bouteille ou de jouer avec. » Lorsque la bouteille n’est pas raccordée à l’appareil, en maintenir fermé le robinet. Pour les appareils de cuisson auto- nomes d’exténeur, utiliser une bouteille d’une capacité...
- Page 28 Caliber Appliances. Copyright 2017 CA LIBE R AP P L I A NC ES . CO M Caliber Appliances 17812 Metzler Lane, Huntington Beach, California 92647 USA www.caliberappliances.com (714) 848-1349...