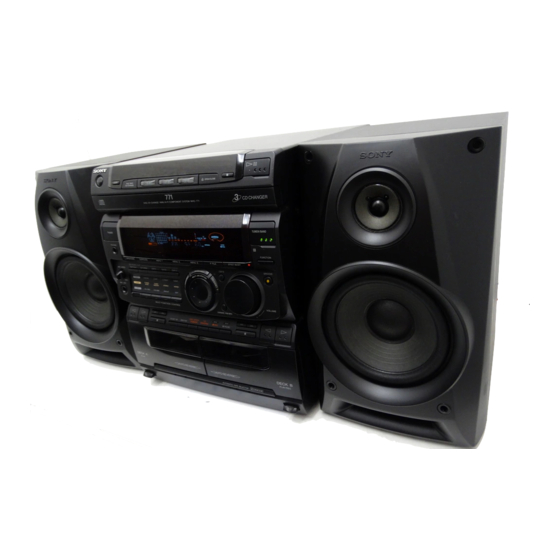
Sony MHC-771 Operating Instructions Manual
Micro & mini shelf systems: mini hi-fi component system
Hide thumbs
Also See for MHC-771:
- Limited warranty (1 page) ,
- Operating instructions manual (31 pages)
Table of Contents
Advertisement
Advertisement
Table of Contents

Related Manuals for Sony MHC-771


Summary of Contents for Sony MHC-771
- Page 1 Sony Corporation Printed in Malaysia...
- Page 2 3-810-989-51(1) Mini Hi-Fi Component System Operating Instructions MHC-771 ©1996 by Sony Corporation...
- Page 3 The model and serial numbers are located on the rear panel. Record the serial number in the space provided below. Refer to them whenever you call upon your Sony dealer regarding this product. Model No. MHC-771 Serial No. ____________________________ INFORMATION This equipment has been tested and found to comply with the limits for a Class B digital device, pursuant to Part 15 of the FCC Rules.
-
Page 4: Table Of Contents
Table of Contents Chapter 1: Setting Up Connecting the Stereo 4 Inserting the Batteries 6 Setting the Clock 6 Chapter 2: the CD Player Playing CDs (normal play) 7 Playing Tracks in Random Order (shuffle play) 8 Playing Tracks in the Desired Order (program play) 9 Playing Tracks Repeatedly (repeat play) 9 Grouping Tracks (music clip) 10 Playing Tracks: Repeating a Specified Portion (loop play) 10... -
Page 5: Chapter 1: Setting Up
Chapter 1: Setting Connecting the Stereo Inserting the Batteries Setting the Clock Chapter 1: Setting Up Connecting the Stereo Use the illustrations below to connect your stereo. If you want to connect any optional components to the stereo, see “Connecting Optional Equipment”... - Page 6 AM loop antenna (supplied) FM lead antenna (supplied) STEP 3 to a wall outlet !Do this connection last! To improve the AM reception After you connect the AM antenna, connect a 6- to 15-meter (20- to 50-feet) insulated wire to the AM terminal. Connect the y terminal to earth.
-
Page 7: Inserting The Batteries
Close the lid. Battery life You can expect the remote to operate for about six months (using Sony SUM-3 (NS) batteries) before the batteries run down. When the batteries no longer operate the remote, replace all the batteries with new ones. -
Page 8: Chapter 2: The Cd Player
Chapter 2: the CD Player Playing CDs (normal play) Playing Tracks in Random Order (shuffle play) Playing Tracks in the Desired Order (program play) Playing Tracks Repeatedly (repeat play) Grouping Tracks (music clip) Playing Tracks: Repeating a Specified Portion (loop play) Playing CDs (normal play) -
Page 9: Playing Tracks In Random Order (Shuffle Play)
continued Remote You can use the JOG dial to search quickly through tracks on different discs (seamless feature). Automatic Music Sensor If no disc is loaded at that number, the tray will emerge. DISC SKIP EX-CHANGE functions differently depending on a different situation. To select a particular CD, press DISC SKIP EX-CHANGE while you stop playing a CD. -
Page 10: Playing Tracks In The Desired Order (Program Play)
Playing Tracks in the Desired Order (program play) You can make a program of up to 32 tracks from all the CDs in the order you want them to be played. POWER n ON π CHECK CLEAR Press FUNCTION repeatedly until “CD” appears in the display. -
Page 11: Grouping Tracks (Music Clip)
Grouping Tracks (music clip) The music clip function is an easy way to produce up to three groups of tracks from your CDs. For example, you could store tracks for the morning in CLIP A, tracks to play for your friends in CLIP B, and tracks for relaxing in CLIP C. - Page 12 Press FUNCTION repeatedly until “CD” appears in the display. Press § OPEN/CLOSE and place a CD. Then, press § OPEN/CLOSE again to close the disc tray. If the button for the disc tray containing the CD you want to record on is not lit green, press DISC SKIP EX-CHANGE repeatedly so that it lights green.
-
Page 13: Chapter 3: The Radio
Chapter 3: Radio Listening to the Radio Presetting Radio Stations Playing Preset Radio Stations Chapter 3: the Radio Listening to the Radio When you want to play a radio program, you can have the tuner automatically scan the radio frequencies and tune in the stations with clear signals. -
Page 14: Presetting Radio Stations
Presetting Radio Stations You can store radio frequencies in the tuner’s memory to tune in your favorite stations quickly. You can preset up to 20 FM stations and 10 AM stations. Use the buttons on the unit for presetting stations. POWER n ON Tune in a station you want to store in the preset memory. -
Page 15: Chapter 4: The Tape Player
Chapter 4: the Tape Player Playing a Tape Recording a CD Recording a CD: Selecting Tape Length Automatically (tape select edit) Recording a CD: Specifying Tape Length (time edit) Recording a CD: Specifying Track Order (program edit) Recording From the Radio Recording From Another Tape (dubbing) Chapter 4: the Tape Player... -
Page 16: Recording A Cd
Recording a CD You can record from a CD to a tape. Use TYPE I (normal) or TYPE II (CrO tapes. Do not use TYPE IV (metal) tapes for recording. To listen to other sources while recording, you must stop recording. Recording a CD Automatically By using CD SYNCHRO, you can record... -
Page 17: Recording A Cd: Specifying Tape Length (Time Edit)
continued Press FUNCTION repeatedly until “CD” appears in the display. Press § OPEN/CLOSE and place a CD. Then, press § OPEN/CLOSE again to close the disc tray. If the button for the disc tray containing the CD you want to record is not lit green, press DISC SKIP EX-CHANGE repeatedly so that it lights green. -
Page 18: Recording A Cd: Specifying Track Order (Program Edit)
To select the desired tracks beforehand You can place priority on some tracks to be recorded by selecting them before programming (only up to 20 tracks). See “Playing Tracks in the Desired Order (program play)”. To activate DOLBY NR When you want to reduce the hiss noise in low-level high-frequency signals, press DOLBY NR so that “DOLBY NR B”... -
Page 19: Recording From Another Tape (Dubbing)
continued Press ® REC. Deck B stands by for recording. Press ∏ PAUSE to release recording pause. Recording starts. To stop recording Press π on deck. To reduce noise during AM recording If a whistling noise is heard while recording, reorient the AM loop antenna for optimum reception. -
Page 20: Chapter 5: Sound Adjustment
Adjust the equalization to obtain the effect you desire. •The sound may be distorted with DBFB or GROOVE activated when connecting an optional super woofer (Sony SA-W10, etc.) to the unit. In this case, set DBFB off and adjust the sound of a super woofer. -
Page 21: Adjusting The Audio Emphasis
continued Music menu options “SUR ” appears if you select an effect with surround effects. MENU Effect button MENU 1 ROCK standard POPS music sources JAZZ CLASSIC DANCE MENU 2 SALSA REGGAE BALLADE OLDIES SOUL MENU 3 MORNING listening situations EVENING NIGHT RELAX... -
Page 22: Making A Personal Audio Emphasis File (Personal File)
Making a Personal Audio Emphasis File (personal file) You can create a personal file of audio patterns (surround effect and graphic equalizer) and store them in the memory of the unit. Later call up an audio pattern to play a favorite tape, CD, or radio program. Create up to five audio files. -
Page 23: Chapter 6: Additional Features
Chapter 6: Additional Features Falling Asleep to Music Waking up to Music Timer-Recording Radio Programs Microphone Mixing Karaoke: Singing Along Connecting Optional Equipment Chapter 6: Additional Features Falling Asleep to Music You can set the stereo system to turn off automatically so you can go to sleep to music (sleep timer). -
Page 24: Timer-Recording Radio Programs
Use the JOG dial to select either DAILY 1 or 2 and press ENTER/NEXT. “ON” appears and the hour digits flash in the display. TIMER 1 2 3 4 5 DAILY1 VOLUME 6 7 8 16k(Hz) CLIP flashing Use the JOG dial to set the hour you want the system to turn on and press ENTER/NEXT. -
Page 25: Microphone Mixing
continued If the power is on at the preset time The sound source will automatically change to the tuner, but tuner recording will not start. Notes •You cannot set the timer if the timer ON and OFF times are the same. •You cannot activate timer-recording and wake-up timer at the same time. -
Page 26: Connecting Optional Equipment
Connecting Optional Equipment For greater enjoyment of your stereo system, you can connect other components to the stereo. You can connect: •an MD recorder •a VCR •a turntable •surround speakers •a super woofer Connecting an MD Recorder You can record from the sound sources of the stereo into the MD recorder in analog sound. -
Page 27: Connecting Surround Speakers
continued Connecting Surround Speakers You can connect surround speakers to SURROUND SPEAKER connectors. Connect the right rear speaker to the SURROUND SPEAKER R connectors and the left rear speaker to the SURROUND SPEAKER L connectors. rear panel surround speakers Connecting a Super Woofer You can connect a super woofer to SUPER WOOFER jack. -
Page 28: For Your Information
Index Precautions If you have any questions or problems concerning your stereo system, please consult your nearest Sony dealer. On safety • The unit is not disconnected from the AC power source (mains) as long as it is connected to the wall outlet, even if the unit itself has been turned off. -
Page 29: Maintenance
Press PLAY MODE so that “PROGRAM” or “SHUFFLE” goes out. General The sound from an optional super woofer (Sony SA-W10, etc.) is distorted. Set DBFB off Adjust the sound of a super woofer. There is no sound. Rotate VOLUME clockwise. -
Page 30: Specifications
Recording system 4-track 2-channel stereo Frequency response (DOLBY NR OFF) 40 – 13,000 Hz (±3 dB), using Sony TYPE I cassette 40 – 14,000 Hz (±3 dB), using Sony TYPE II cassette Wow and flutter ±0.15% W.Peak (IEC) 0.1% W.RMS (NAB) ±0.2% W.Peak (DIN) -
Page 31: Index To Parts And Controls
Index to Parts and Controls Refer to the pages indicated in parentheses for details on how to use the controls. Controls with an asterisk have indicators on themselves. Front Panel !“ !£ !¢ #¡ #™ #£ #¢ #∞ #§ #¶ #•... -
Page 32: Index
Remote !º !¡ !™ !£ !¢ !∞ !§ !¶ !• !ª 1 SLEEP button (22) 2 LOOP button (10) 3 CD button (7) 4 TUNER/BAND button (12) 5 DECK A /DECK B button (14) 6 FUNCTION button (8, 24) 7 MUSIC MENU buttons (19) 8 MUSIC MENU ON/OFF button (19) 9 MUSIC MENU...