Datamax MP-Nova4 DT User Manual
Direct thermal transfer
Hide thumbs
Also See for MP-Nova4 DT:
- Network manual (19 pages) ,
- Programmer's reference manual (95 pages)

Related Manuals for Datamax MP-Nova4 DT


Summary of Contents for Datamax MP-Nova4 DT
- Page 1 Direct Thermal Thermal Transfer MP Nova4 DT MP Nova4 TT MP Nova6 DT MP Nova6 TT MP Nova8 DT Ì540430hÎ 540430 U s e r M a n u a l N o v a...
-
Page 2: Table Of Contents
Product Presentation Product Overview 4.1 In the Box 4.2 Printer Parts MP Nova4, 6 & 8 DT 4.3 Opening and Closing the Cover of MP Nova4, 6 & 8 DT 4.4 Printer Parts MP Nova4 & 6 TT 4.5 Opening and Closing the Cover of MP Nova4 & 6 TT Getting Started 5.1 Overview... -
Page 3: Introduction
The MP Nova printers with their unique technology have been developed to offer a range of different applications. Thank you for choosing an Imaje printer for your business needs. The high quality, user-friendliness and simple maintenance procedures of the MP Nova direct thermal (DT) and thermal transfer (TT) printers make them the perfect choice. -
Page 4: Safety
Safety & Certification Safety Requirements Imaje disclaims all responsibility regarding the CE directive if the printer is used, altered or installed in any way other than described in this manual. This symbol is used to indicate circumstances that may be dangerous to the user or that cause damage to the equipment. - Page 5 ! Rain or water has got into the printer. ! The printer is not functioning correctly despite that the user has followed the instructions for use. ! You have dropped the printer or the casing has been damaged. ! The printer is not functioning correctly and requires...
- Page 6 2. Safety Safety & Certification Machine Sign Certification and Approvals The MP Nova printers are certified in accordance with the requirements for CE marking. CE = European Commission The MP Nova printers are UL-approved. UL = Underwriter Laboratories USA...
- Page 7 2. Safety Safety & Certification CE Standards & Directives MP Nova printers are subject to the following standards: In accordance with European directives applicable to the products, that is to say: • With the electromagnetic compatibility directive EMC Directive 89/336/CEE with the European standards which are its technical answer.
-
Page 8: Product Presentation
They are built on a platform with advanced software, offering wide possibilities from simple local solutions to integrated solutions working over Internet. Printer Models MP Nova4 DT, 200 dpi Item number: 745130. MP Nova4 DT, 300 dpi Item number: 745160. -
Page 9: Product Overview
MP Nova4 DT & MP Nova6 DT The following items should be included in the box when you receive your new MP Nova4 DT or MP Nova6 DT printer: 1 x MP Nova4 DT or MP Nova6 DT 1 x Cleaning cloth... - Page 10 MP Nova4 TT & MP Nova6 TT The following items should be included in the box when you receive your new MP Nova4 TT or MP Nova6 TT printer: 1 x MP Nova4 TT or MP Nova6 TT 1 x Cleaning cloth...
- Page 11 4.1 In the Box MP Nova8 DT The following items should be included in the box when you receive your new MP Nova8 DT printer: 1 x MP Nova8 DT 1 x Cleaning cloth 1 x Communication cable (Serial RS 232)
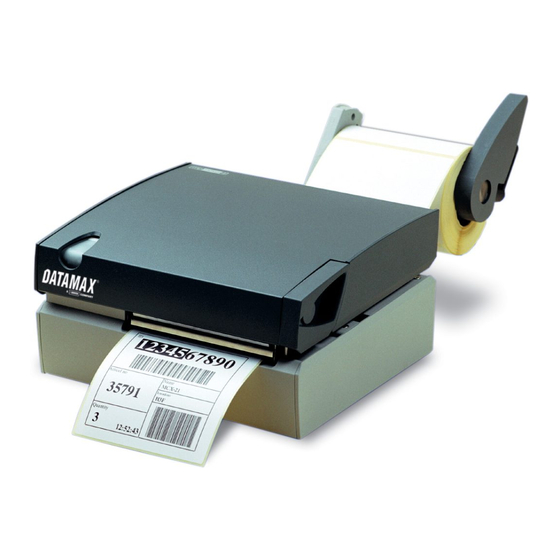
- Page 12 4. Product Overview 4.2 MP Nova4, 6 & 8 DT – Printer Parts Print button Status lamp (LED) Cover Media roll Roll steering Roll guide lock Media track Handle Communication ports Unroll shaft Power connection Power switch Fan-fold steering (MPNova8)
- Page 13 4. Product Overview 4.2 MP Nova4, 6 & 8 DT – Printer Parts Print head Print roll Media Positioning Sensor (MPS) Paper guide Outer plate holder...
-
Page 14: Opening And Closing The Cover Of Mp Nova4, 6 & 8 Dt
4. Product Overview 4.3 Opening and Closing the Cover Open MP Nova4, 6 & 8 DT Pull handle. Open cover. -
Page 15: Opening And Closing The Cover Of Mp Nova4 & 6 Tt
4. Product Overview 4.3 Opening and Closing the Cover Close MP Nova4, 6 & 8 DT Close cover. Fold handle. (Print head will be engaged.) Note: Make sure the handle is folded all the way down. - Page 16 4. Product Overview 4.4 MP Nova4 & 6 TT – Printer Parts Print button Status lamp (LED) Front cover Rear cover Media roll Roll guide lock Roll steering Media track Handle Ink ribbon guide Rewind spool Unwind spool...
- Page 17 4. Product Overview 4.4 MP Nova4 & 6 TT – Printer Parts Communication ports Unroll shaft Power connection Power switch...
- Page 18 4. Product Overview 4.5 Opening and Closing the Cover Open MP Nova4 & 6 TT Open cover. The inner cover slides automatically up together with the cover.
- Page 19 4. Product Overview 4.5 Opening and Closing the Cover Close MP Nova4 & 6 TT Close cover. The inner cover slides automatically down together with the cover.
-
Page 20: Getting Started
5. Getting Started 5.1 Overview MP Nova4, 6 & 8 DT Insert media, MPNova4 & 6 DT, see chapter 5.3.1 Insert media, MPNova8 DT, see chapter 5.3.2 Connecting, see chapter 5.6. Run a test print, see chapter 5.7. MP Nova4 & 6 TT Insert media. -
Page 21: Overview Peel-Off
5. Getting Started 5.2 Overview Peel-Off MP Nova4 & 6 DT Peel-Off Insert peel-off media, see chapter 5.4 Connecting, see chapter 5.6. Run a test print, see chapter 5.7. MP Nova4 & 6 TT Peel-Off Insert peel-off media. See MP Nova4 &... -
Page 22: Inserting Media Mp Nova4
Position a new media roll onto the spool and insert the media from the side into the printer’s media track. Check that the media is aligned with the internal printer wall. Make sure the outer roll guide suits the width of the media. - Page 23 Fold the handle (the print head folds automatically onto the roller). Press the print button a few times until the printer automatically finds the correct position of the media. Note: If necessary, make a test printout and auto adjust the media positioning sensor as described in chapter 5.7.
-
Page 24: Inserting Media Mp Nova8
5. Getting Started 5.3.2 Inserting Media MP Nova8 DT Adjusting the Fan-Fold Steering Note: It is only necessary to adjust the fan-fold steering when changing media type. An Allen key (2 mm) is mounted underneath the fan- fold steering. Loosen the Allen screw to unlock the fan-fold steering. - Page 25 Inserting Media Pull handle to lift the print head from the roller. Insert the media through the fan-fold steering and through the printer. Note: Make sure the fan-fold steering suits the width of the media. To adjust the steering se previous page.
- Page 26 Pull out some of the media. Fold the handle (the print head folds automatically onto the roller). Press the print button a few times until the printer automatically finds the correct position of the media. Note: If necessary, make a test...
-
Page 27: Inserting Media - Peel-Off Kit
5.3.1. Lift the handle and then pull, 40 cm of the label roll, out of the printer. Fold the handle. Remove all the labels on the exposed section. Pull the backing paper under the printer. - Page 28 5. Getting Started 5.4 Inserting Media – Peel-Off Kit Open the rewind unit slot by turning the knob clockwise while holding the cylinder firmly. Slide the backing paper into the rewind unit slot.
- Page 29 This increases the tension of the backing paper. Press the print button a few times until the printer automatically finds the correct position of the media. Note: If necessary, make a test...
-
Page 30: Inserting Ink Ribbon
5. Getting Started 5.5 Inserting Ink Ribbon – MP Nova4 & 6 TT Undo the handle and open the cover. Remove the old ink ribbon. Slide the new ink ribbon on to the spool. Feed the ink ribbon under the print head. Note: Check that the inked side of the ribbon is facing downwards. - Page 31 5. Getting Started 5.5 Inserting Ink Ribbon – MP Nova4 & 6 TT Note: The ink ribbon must not pass under the MPS (Media Positioning Sensor). Move the empty roll, which will collect the used ink ribbon, up and around the print head.
- Page 32 5. Getting Started 5.5 Inserting Ink Ribbon – MP Nova4 & 6 TT Fold the handle. Press the print button. The ink ribbon will automatically wind around the rewind spool, thus tensioning the ink ribbon. Close the cover.
-
Page 33: Connecting
5. Getting Started 5.6 Connecting Note: This process works for all the MP Nova printers. Make sure the printer is switched off (the power switch is set to ‘0’). Connect the communication cable from the PC to the printer. The connection... -
Page 34: Test Print & Sensor Auto Adjustment
5. Getting Started 5.7 Test Print & Sensor Auto Adjustment To be sure the printer is working, and to adjust the media positioning sensor, MPS, to the media, make a test printout: Switch off the printer. Press the print button. -
Page 35: Operation
6. Operation 6.1 Tearing the Media MP Nova4 & 6 DT MP Nova8 DT MP Nova4 & 6 TT Tear the media upwards, from one edge to the other. Tear the media upwards, from one edge to the other. Tear the media upwards, from one edge to the other. -
Page 36: Interpreting The Status Lamp - Led
"!" Red (flashing) System temperature too high, printer has entered cool down state Yellow Printer is starting up or is in test print mode. Note: Restart the printer to exit test print mode. Green Ready to print... -
Page 37: Media Positioning Sensor Settings
5 mm from the edge of the media. To change the settings, see the Printer settings menu on the Getting started CD. Note: Changes in the printer settings should be made by qualified personnel. -
Page 38: Adjusting The Print Head
MP Nova printers. Changing the position of the adjustment screws can be necessary if the labels are very narrow Check that the printer is turned off. Open the cover and fold the handle. Loosen the upper nut of the... - Page 39 6. Operation 6.4 Adjusting the Print Head Adjusting Print Head Pressure Note: MP Nova4 DT only. On the MP Nova4 DT the position of the print head itself can be changed. As default there is a 3 mm non-printable area on the left side.
-
Page 40: Maintenance
Remove all media before starting: Tear the bag. Pull out the cleaning cloth. Pull the handle and feed the cloth into the printer in the same way as inserting the media (described in chapter 5.3). Fold the handle. Hold the cloth firmly and press the print button a few seconds. -
Page 41: Troubleshooting
When troubleshooting the Nova printer, it is necessary to narrow down the various possible causes of faults: does the printer, the media or the application software cause the fault? A simple way of beginning your troubleshooting is to carry out a... -
Page 42: Test Pattern
Switch off the printer. Press the print button, but do not release it. Switch on the printer without releasing the print button. Keep the print button depressed until the printer starts printing the test pattern. - Page 43 Note: This method is only for advanced troubleshooting by service technicians. This shows all information sent to the printer in hex-code and the function is used to determine possible communication faults, since it is possible to see exactly what data the printer receives.
- Page 44 Wait Replace roller (chapter 9.1) Replace print head (9.2) Clean print head (chapter 7) See ‘Printer settings’ on the Getting Started CD Replace media (5.3 or 5.4) Adjust Print Head (6.4) Have the printer serviced to adjust the Ink ribbon...
-
Page 45: Changeable Parts
The pictures shown describe an MP Nova4 DT. The process works just the same for all MP Nova printers. Check that the printer is turned off and open the cover (chapter 4.3 DT or 4.5 TT). Pull the roller and the roller... - Page 46 9. Changeable Parts 9.1 Replacing the Roller Pay carefully attention to the drive belt when removing the left-hand end of the roller from the printer. Unpack the new roller.
- Page 47 9. Changeable Parts 9.1 Replacing the Roller Insert the left-hand end of the roller (the end with the cog wheel). Check that it fits inside the drive belt.
- Page 48 9. Changeable Parts 9.1 Replacing the Roller Insert the right-hand end of the roller into position. Push the left-hand end of the roller downwards into the notch until the roller is parallel with the edge of the printer.
- Page 49 9. Changeable Parts 9.1 Replacing the Roller Push the roller slightly to the left so that the left-hand end slots into the groove. Close the cover (chapter 4.3 DT or 4.5 TT). Switch on the printer.
-
Page 50: Replacing The Print Head
Note: The pictures shown describe an MP Nova4 DT. The process works just the same for all MP Nova printers. Make sure the printer is turned off and open the cover. Check and remember the current lateral position of the print head. 3 mm is the default position. - Page 51 9. Changeable Parts 9.2 Replacing the Print Head Carefully remove the print head. Carefully remove the cables from the back of the print head. Note: There is a “button” on top of the right cable. Push the “button” before removing the cable.
- Page 52 9. Changeable Parts 9.2 Replacing the Print Head Unpack the new print head and attach the cables to the new print head. Remember to handle the print head with care! Carefully insert the print head into position.
- Page 53 3 mm is the default position. Note: Only adjustable on MP Nova 4 DT. Hold the print head in place and tighten the finger nut. Close the cover (chapter 4.3 DT or 4,5 TT). Switch on the printer.
-
Page 54: Printer Options And Spare Parts
10. Printer Options and Spare Parts 10.1 Printer Options Peel-Off Kit MP Nova4 & 6 DT, MP Nova4 & 6 TT LTS – Label Taken Sensor MP Nova4 & 6 & 8 DT, MP Nova4 & 6 TT Item number: 533541 Nova4... -
Page 55: Printer Options
10. Printer Options and Spare Parts 10.1 Printer Options 215 mm Kit MP Nova4 & 6 DT, MP Nova4 & 6 TT Item number: 533615 The 215 mm Kit makes it possible to use media rolls with diameters up to 215 mm. -
Page 56: Spare Parts
10. Printer Options and Spare Parts 10.2 Spare Parts Consumables Cables Optional Part number Description 10 x Cleaning cloths (4") 501933 50 x Cleaning cloths (4") 501934 501935 10 x Cleaning cloths (6") 501936 50 x Cleaning cloths (6") 501937 10 x Cleaning cloths (8") -
Page 57: Consumables Media General
• In order to start and stop the media during the print process, the printer is equipped with a detector that senses any gaps or black marks. For more detailed information about media and consumables, we recommend you read Imaje’s ‘CONSUMABLES’... -
Page 58: Technical Specification
12. Technical Specifications MP Nova4 DT & TT Dimensions (H x W x L) Weight Power pack Printer technology Printing width Printing speed Printing resolution Media specifications Media types Ink ribbon, TT Connections Typefaces Barcodes Graphics Settings program Counters Memory... -
Page 59: Technical Specifications
12. Technical Specifications MP Nova6 DT & TT Dimensions (H x W x L) Weight Power pack Printer technology Printing width Printing speed Printing resolution Media specifications Media types Ink ribbon, TT Connections Typefaces Barcodes Graphics Settings program Counters Memory... - Page 60 12. Technical Specifications MP Nova8 DT Dimensions (H x W x L) Weight Power pack Printer technology Printing width Printing speed Printing resolution Media specifications Media types Connections Typefaces Barcodes Graphics Settings program Counters Memory Time and date Print head diagnostic DT: 150 x 345 x 360 mm (6”...
- Page 61 Imaje S.A. 9, rue Gaspard Monge 26501 Bourg-lès-Valence cedex France Tel.: (33) 04 75 75 56 00 Fax: (33) 04 75 82 98 10 http://www.imaje.com...