
Related Manuals for Curtis iP220


Summary of Contents for Curtis iP220
- Page 1 MODEL NO. iP220 PORTABLE DOCKING STATION FOR iPOD INSTRUCTION MANUAL PLEASE READ BEFORE OPERATING THIS EQUIPMENT...
-
Page 2: Warnings And Precautions
Warnings and Precautions TO PREVENT IRE OR HOCK AZARDS, DO NOT EXPOSE THIS UNIT TO RAIN OR MOISTURE. This symbol, located on back or bottom of the unit, is intended to alert the user to the presence of un-insulated “dangerous voltage” within the product’s ’s enclosure that may be of sufficient magnitude to constitute a risk of electric shock to persons. -
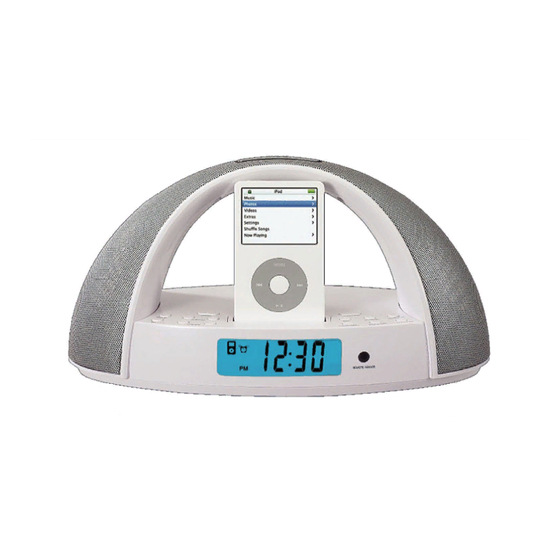
Page 3: Product View
Features... -
Page 4: Features Defined
Features Defined iPod Docking Station Connect your iPod, Pod mini, or iPod nano. VOLUME Press the up arrow to increase the volume, and the down arrow to decrease volume. POWER Press the POWER button to turn the radio off or on. STOP/BAND Press the BAND/STOP button to switch between AM or FM radio stations, or stop iPod playing. -
Page 5: Peripheral Defined
Peripherals Notes: NOTES: Buttons that are not defined in the Periperals section, are defined in the Features section. Peripheral Defined REPEAT Press the REPEAT button to switch between REPEAT 1, REPEAT ALL, or Off (iPod playing only). MUTE Press the MUTE button to decrease the volume entirely. DISP (DISPLAY) In radio mode press the DISP button to switch between viewing the time or the radio frequency. -
Page 6: Ipod Insert
iPod Insert 3G iPod 10GB, 15 GB, 20 GB 3G iPod 30 GB, 40GB iPod mini 4GB, 6GB 4G iPod, U2 I pod 20GB 4G iPod 40GB NOTES: The number engrave in the backside of the inserts. iPod photo, Color U2 iPod 20 GB, 30GB iPod photo 40GB, 60GB 1G iPod nano 2GB, 4GB... - Page 7 Installing a Battery in the Remote Warning There is danger of an explosion if you replace the battery incorrectly. Replace only with the same or equivalent battery. To install or replace the battery: 1 Pull the battery tray out of the remote. 2 If you are replacing the battery, remove the old battery and dispose of it properly.
-
Page 8: Setting The Clock
Operations Setting the Clock With the power off, hold the CLOCK SET button. b. Press the SEARCH/TUNE down or up buttons to toggle between 12HR and 24HR time, and press the MEM/CLK SET button to select either option. c. Press the SEARCH/TUNE up button to cycle up through the hours, or press the SEARCH/TUNE down button to cycle down through the hours. - Page 9 Operations Connecting Other Digital Audio Devices Use a line-in cord to connect an iPod shuffle or other audio device to the AUX-IN port. b. Press the FUNCTION button to activate the AUX-IN. c. The iPod shuffle or other audio device will now play through the speakers of the unit.
-
Page 10: Specifications
Specifications Power Requirement Input: Battery Back-up for Clock: Battery CR2025 for remote control handset Frequency Range Radio Receiving: Power Consumption AC~120V/60Hz 2 x DC 1.5V ”AA” (LR-6) Size Batteries AM 530 - 1710 KHz FM 87.5 - 108 MHz 20 Watts...