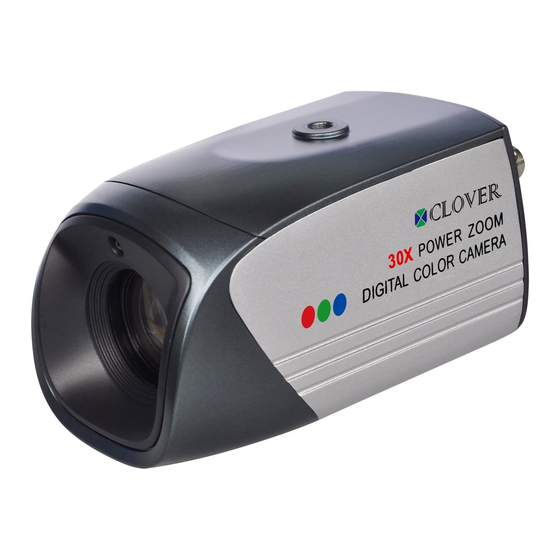
Summary of Contents for Clover Z670
- Page 1 INSTRUCTION MANUAL 30X DAY/NIGHT ZOOM CAMERA MODEL Z670 Copyright © 2009 Clover Inc. All Rights Reserved...
-
Page 2: Important Safety Precautions
1. IMPORTANT SAFETY PRECAUTIONS To prevent fire or shock hazard, do not expose the camera to rain or moisture. ▪ To avoid electrical shock, do not open the case of this product. ▪ Operate this product with the system such as COM22168, LCD2088, TFT2284C, ▪... - Page 3 1. Video Output/DC power Input (6 pin Din) This is a 6pin Din connector for outputting video signals and for DC 12V input from the system such as COM22168, LCD2088, TFT2284C, TFT2288C and LCD261616. Note: When the 6pin Din is connected, do not apply 12V DC to the DC IN Jack ③ and connect the BNC video out ②.
- Page 4 LANGUAGE ▪ Choose “LANG (LANGUAGE)” in the Menu shown in Fig.4-1 by pressing “TELE”/”WIDE” button and select “EN (English)” by pressing “NEAR”/”FAR” button. FOCUS ▪ Choose “FOCUS” in the Menu shown in Fig.4-1 by pressing “TELE”/”WIDE” button and choose one among MANU (Manual), KCTL and AUTO by pressing “NEAR”/”FAR”...
- Page 5 WHITE BALANCE (WB) ▪ Choose “WB (WHITE BALANCE)” in the Menu shown in Fig.4-2 by pressing “TELE”/”WIDE” button and choose one among AUTO, OUT DOOR, INDOOR and LAMP by pressing “NEAR”/”FAR” button. IRIS ▪ Choose “IRIS” in the Menu shown in Fig.4-2 by pressing “TELE”/”WIDE” button and choose one among AUTO, FIX, NIGHT and MOVE by pressing “NEAR”/”FAR”...
- Page 6 Click the “PAN/TILT (PELCO D)” button on the channel you wish to install the ▪ zoom camera and then the PAN/TILT Menu will be displayed as shown in Fig.4-5. Settings in the PAN/TILT Menu ▪ (Refer to System manual section 7-4.5 on page 90 for more detail) - Click the PTZ ID button in the PAN/TILT Menu shown in Fig.4-5, then the On Screen Keyboard will show up.
-
Page 7: Installation
- Click the “PAN/TILT & REMOTE” button in the PAN/TILT menu shown in Fig.4-5, then the vendor lists will show up. Select “PELCO” on the vendor lists by clicking the mouse and then the protocol “PELCO D” will display. - Click the “BAUD RATE” button in the PAN/TILT menu and choose 2400bps among 1200bps, 2400bps, 4800bps, 9600bps, 19200bps, 38400bps, 57600bps and 115200bps on the Baud Rate pop-up window by clicking the mouse. -
Page 8: Operation
Zoom Camera DVR SYSTEM Connect the one end of 60’ 6pin Din cable to the Din jack on the rear of the zoom ▪ camera and the other end of cable to the DIN jack that the settings for PAN/TILT menu on the DVR system has been completed. -
Page 9: Troubleshooting
Click the Channel button in Fig. 6-2 and select the Channel number of zoom camera on ▪ the pop-up screen. PAN / TILT CHANNEL Click and hold the “+” or “-“ button for Zoom In/Out until getting the best quality of ▪... -
Page 10: Specifications
8. SPECIFICATIONS Image pickup device TV system Resolution Minimum illumination Video output S/N ratio Gamma characteristics Electronic Shutter Speed Zoom White Balance Gain Control Control Interface Baud Rate Focus Adjustment Current consumption Power supply Operational temperature Dimensions Weight 9. PACKAGE INCLUDED 1-Zoom camera 1-Mounting bracket 1-60’... -
Page 11: Limited 1 Year Warranty
HS13HB Outdoor camera housing w/heater and blower MBK010 Mounting bracket for HS13HB ADT241200 AC 24V 1.2A AC power supply for HS13HB 11. LIMITED 1 YEAR WARRANTY This warranty gives the original purchaser specific legal rights and you may also have other rights, which may vary from state to state.

