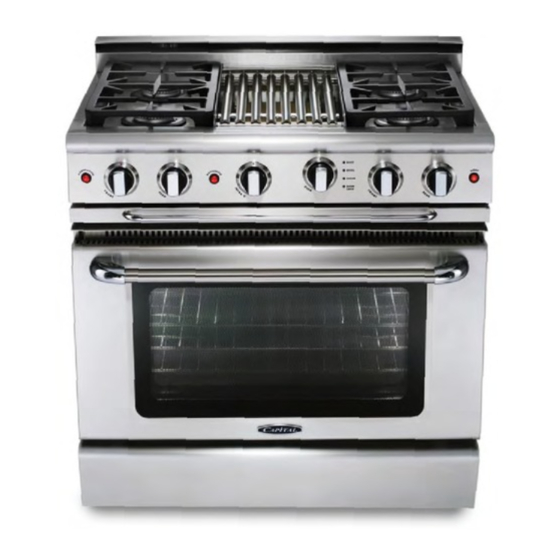
Capital Precision Series GCR364G Use And Care Manual
30" precision series, gas self clean with convection, gas manual clean with convection
Hide thumbs
Also See for Precision Series GCR364G:
- Specifications (2 pages) ,
- Specifications (2 pages) ,
- Use and installation manual (46 pages)

Related Manuals for Capital Precision Series GCR364G


Summary of Contents for Capital Precision Series GCR364G
- Page 1 U S E A N D C A R E / I N S TA L L AT I O N G U I D E 30” R a n g e ™ G a s S e l f C l e a n w i t h C o n v e c t i o n G a s M a n u a l C l e a n w i t h C o n v e c t i o n...
- Page 2 A S P E C I A L M E S S A G E T O O U R C U S T O M E R S Dear Valued Customer, Congratulations on making a smart choice! You have joined an elite group of cooking enthusiasts who demand only the very best from their appliances.
-
Page 3: Table Of Contents
Warnings Safety Practices / Electrical, General Safety Practices / Cooking Range Parts Identification Using The Range-top / Power-flo™ Burners Using The Rangetop Using Your Oven Using Your Oven - Self Clean Mode Care And Maintenance / Locating the Rating Plate... -
Page 4: Precision Features
(Available in Black or Red.) 3 0 ” P R E C I S I O N F E A T U R E S... - Page 5 3 0 ” P R E C I S I O N S E R I E S M O D E L S ( S E L F C L E A N / M A N U A L C L E A N ) GCR304 GSCR305 / GCR305 /...
-
Page 6: Warnings
One of three available back- guards must be ordered separately and installed at the back of the range. The three back-guard choices include Island Trim, Low Back or High- Shelf. Before using the range insure that it is equipped with a proper back-guard. -
Page 7: Safety Practices / Electrical, General
• In the event a burner goes out and gas escapes, open a window or door immediately. DO NOT attempt to use the range until the gas has had time to dissipate. Wait at least 5 minutes before using the range. -
Page 8: Safety Practices / Cooking
WARNING! This appliance is for cooking! Based on safety considerations, never use the range to warm or heat a room. Such use can damage the range. • HOLD THE HANDLE of the pan to prevent • DO NOT TOUCH THE BURNER GRATES OR THE IMMEDIATE SURROUNDING AREAS adjacent to the burners. - Page 9 Turn the oven burner on to 450°F and then the broiler burner on to “Broil”. Be sure to turn on the ventilator above your range while these burners are on, as there will be an odor.
-
Page 10: Range Parts Identification
8. Vertical Rod Support 9. Oven Baffel 10. Convection Fan (center back wall of oven can behind baffle) 11. Heat Shield RANGE SIDE IDENTIFICATION 1. Adjustable Feet 2. Adjustable Casters RANGE PARTS IDENTIFICATION 1. Power Flo Wok Burner 2. Power Flo Standard Burner 3. -
Page 11: Using The Range-Top / Power-Flo™ Burners
U S I N G T H E R A N G E - T O P / P O W E R - F L O ™ B U R N E R S POWER-FLO™ BURNERS Your new gas range is equipped with the latest in burner technology. The Power-Flo™ burners are designed for maximum control and the precise use of heat where it matters most. -
Page 12: Using The Rangetop
It is always ON when the burner is in use. The burner should never be operated if the cap is not in place. All the range-top burners have electronic spark ignition to eliminate continuously burning pilots. When the main burner flame is blown out, it will relight. -
Page 13: Oven Use
CONTROL KNOB BURNERS • The griddle is electronically controlled with Your new Precision Series™ range is equipped temperatures marked on the knob from 150 with bake and broil burners typical of those degrees F to 500 degrees F. -
Page 14: Using Your Oven
USING CONVECTION BAKE AND REGULAR BAKE FOODS SUITABLE FOR CONVECTION BAKE Air Leavened Foods (angel food cake, soufflés, TO SET THE OVEN FOR CONVECTION BAKE cream puffs, meringue shells) AND REGULAR BAKE Decide if you are going to use CONVECTION BAKE or REGULAR BAKE. - Page 15 U S I N G Y O U R O V E N FOODS SUITABLE FOR BAKE Appetizers Pies, Cakes Breads Desserts Main Dishes Oven Meals (1 to 2 racks) Poultry Roasts CAUTION: Aluminum foil should never be used to cover the oven racks or to line the oven bottom.
- Page 16 160°F to 165°F for well done. If you are cooking pork, cook to 160°F. A large two-piece broil pan comes with your new range. When you are broiling, always use both pieces. Do not cover the grid with aluminum foil. This slotted grid allows the grease drippings to flow into the bottom of the pan keeping it away from the intense heat of the infra-red broiler burner.
- Page 17 NOTE: For Convection Rotisserie, simply follow the OVEN SELF-CLEANING same steps and first press the rotisserie button, The self-cleaning oven of your new range features followed by the convection button. pyrolytic self-cleaning. When set in the SELF-CLEAN NOTE: Rotisserie system is only available in the Precision...
-
Page 18: Using Your Oven - Self Clean Mode
4 Be sure the light bulbs and glass covers are in place. and the oven door can be opened. Use caution as 4 T urn on the ventilator hood above the range and the oven may be hot enough to cause burns. -
Page 19: Care And Maintenance / Locating The Rating Plate
C A R E A N D M A I N T E N A N C E that were given for the burner grates. A bristle brush can be used to clean out the toothed burner ports, if necessary. Disassembly of the Simmer Ring is not recommended, however, it may become necessary to do so if the ports remain clogged after normal cleaning. - Page 20 The rating plate contains necessary information supermarkets. DO NOT use a standard light bulb in regarding your range. It provides the model #, serial any oven, the heat will break it. # and verifies the gas type and BTU input ratings for each burner of your appliance.
-
Page 21: Troubleshooting
T R O U B L E S H O O T I N G RANGES AND RANGE-TOPS PROBLEM Range non-functional One or more burners will not light Incorrect flame/ sooty burner flame BBQ-GRILL doesn’t light POSSIBLE CAUSE PROPOSED SOLUTION... - Page 22 RANGE OVENS PROBLEM POSSIBLE CAUSE No oven light No electricity Loose bulb Burned out bulb No oven heat (bake) No gas No electricity (check oven light) Improper settings No oven broil Improper settings (see no bake) Uneven baking Insufficient pre-heat time...
-
Page 23: Installation Instructions
INSTALLATION INSTRUCTIONS P R E C I S I O N S E R I E S R a n g e s SELF CLEAN GAS CONVECTION MODELS: GSCR30 (4Q, 4G, 5) GSCR36 (4Q, 4G, 4W, 6) GSCR48 (4G, 4W, 4QG, 6Q, 6G, 8) GSCR60 (4QG,4QW, 4GW, 6QG, 6G, 6W) MANUAL CLEAN GAS CONVECTION MODELS: GCR30 (4, 5) - Page 24 T A B L E O F C O N T E N T S Important Information 30” - All Models 36” - All Models 48” - All Models 60” - All Models Unpacking and Ventilation Requirements Cabinet Preparation Cabinet Install Drawing / Front View Cabinet Install Drawing / Side View Installation Instructions Gas Hook-Up / Testing and Adjustments...
-
Page 25: Important Information
The Capital PRECISION SERIES Low Back or High Shelf must be ordered separately and installed at the rear of the range. For island installations and other installations with more than 12” clearance, our stainless steel Island Trim is suitable to cover the back guard mounting flanges. - Page 26 GCR304 - 4 Burner Gas Convection range GSCR305 - 5 Burner Gas Self Clean Range w/ Wok Burner GCR305 - 5 Burner Gas Convection Range w/ Wok Burner GRT305 - 5 Burner Gas Range Top w/ Wok Burner GSCR304Q - 4 Burner Gas Self Clean Range w/ 9” Infra-BBQ Note: 304 = 19K BTU Power-Flo Burners •...
- Page 27 GCR366 -- 6 Burner Gas Convection Range GRT366 -- 6 Burner Gas RangeTop GSCR364G -- 4 Burner Gas Self Clean Range w/ 12” Griddle GCR364G -- 4 Burner Gas Convection Range w/ 12” Griddle GRT364G -- 4 Burner Gas RangeTop w/ 12” Griddle GSCR364Q -- 4 Burner Gas Self Clean Range w/ 12”...
- Page 28 GCR486B - 6 Burner Gas Convection Range w/ 12” SS-BBQ GRT486Q- 6 Burner Gas RangeTop w/ 12” Infra-BBQ GSCR484QG - 4 Burner Gas Self Clean Range w/12” Infra-BBQ + 12” Griddle GCR484BG - 4 Burner Gas Convection Range w/ 12” SS-BBQ + 12” Griddle GRT484QG- 4 Burner Gas RangeTop w/ 12”...
- Page 29 6 0 ” A L L M O D E L S GSCR604GW -- 4 Burner Gas Self Clean Range w/12” Griddle + 24” Wok GRT604GW -- 4 Burner Gas RangeTop w/12” Griddle + 24” Wok GSCR604QW -- 4 Burner Gas Self Clean Range w/12” Infra-BBQ + 24” Wok GRT604QW -- 4 Burner Gas RangeTop w/12”...
-
Page 30: Unpacking And Ventilation Requirements
• Lift the range from the skid with a soft wheel dolly. surface. Where space permits, a hood larger in width than the cooking surface may be desirable for • Support the range uniformly across the bottom improved ventilation performance. - Page 31 U N P A C K I N G A N D V E N T I L A T I O N R E Q U I R E M E N T S combustible materials, gasoline, and other flammable vapors and liquids.
-
Page 32: Cabinet Install Drawing / Front View
C A B I N E T I N S T A L L D R A W I N G / F R O N T V I E W FIG 1A. Cabinet Clearances:... -
Page 33: Cabinet Install Drawing / Side View
C A B I N E T I N S T A L L D R A W I N G / S I D E V I E W FIG 2A Side View:... -
Page 34: Installation Instructions
National Electrical Codes ANSI / NFPA No. 70 (current issue). GROUNDING METHOD The range is factory fitted with a power supply and cord with a three-prong grounding plug. It must be plugged into a matching grounding type receptacle connected to a correctly polarized 120 Volt circuit. - Page 35 • A risk of tip-over may exist if the appliance is not installed in accordance with these instructions. • If the range is pulled away from the wall for cleaning, service or any other reason, ensure that the Anti-Tip Device is properly re-engaged when the range is pushed back against the wall.
-
Page 36: Gas Hook-Up / Testing And Adjustments
• Leak testing of the appliance shall be in accordance regulator. WARNING! Gas line cannot be run inside back cover of range. Run gas line in channel in back • Turn on gas and check supply line connections for of range. -
Page 37: Post-Install Check
(without requiring removal of range) q Unit tested and free of gas leaks q Gas supply pressure does not exceed 14” (37 mb) W.C. -
Page 38: Service & Warranty Info
SERVICE INFORMATION WILL PAY FOR: If none of the above has occurred, contact our All repair labor and parts found to be defective due customer service department at 1-866-402-4600. to material or workmanship for two (2) full years “IN HOME” warranty. This does not apply if the unit Before you call for service, please have the following was subjected to other than normal household use. - Page 39 N O T E S...
- Page 40 N O T E S...
- Page 41 D E S I G N Y O U R D R E A M K I T C H E N...
- Page 42 ALL SPECIFICATIONS ARE FOR PLANNING PURPOSES ONLY. REFER TO INSTALLATION INSTRUCTIONS AND CONSULT YOUR COUNTERTOP SUPPLIER PRIOR TO MAKING COUNTER OPENING. IF YOU HAVE ANY QUESTIONS, PLEASE CALL US AT 866-402-4600 PRIOR TO CUTTING ANY OPENINGS. CONSULT WITH A HEATING AND VENTILATING ENGINEER FOR YOUR SPECIFIC VENTILATION REQUIREMENTS. FOR THE MOST UP TO DATE USE AND CARE AND INSTALLATION INSTRUCTIONS CONTACT CAPITAL COOKING EQUIPMENT, INC.