Table of Contents
Advertisement
Advertisement
Table of Contents

Related Manuals for Boss Audio Systems BV7335B


Summary of Contents for Boss Audio Systems BV7335B
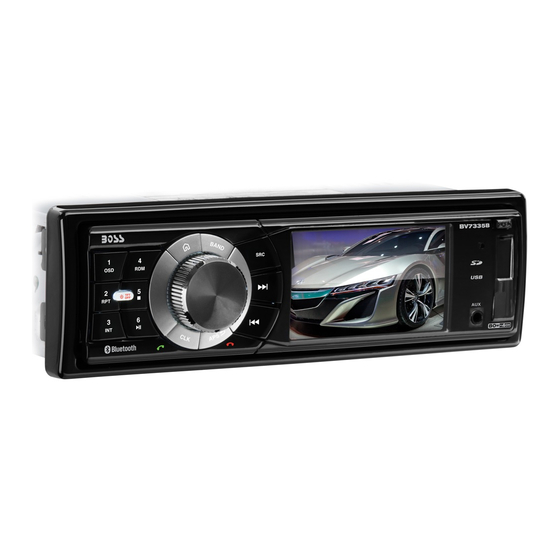
- Page 2 BV7335B OWNER’S MANUAL Mobile Audio/Video System 3.2 Inch TFT Monitor DVD Player with Radio Fold down detachable Panel Bluetooth Hands-free function & A2DP (Advanced Audio Distribution Profile) Stereo Audio Transmission Memory Card Interface USB Interface AV IN interface on the front panel...
-
Page 3: Table Of Contents
CONTENTS SAFETY INFORMATION ... 3 DISC NOTES ... 5 INSTALLATION... 6 USING THE DETACHABLE FRONT PANEL ... 9 CONNECTIONS... 10 LOCATIONS AND FUNCTION OF THE PLAYER ... 11 LOCATIONS AND FUNCTION OF THE REMOTE CONTROL ... 12 OPERATION ... 15 BASIC OPERATION ... -
Page 4: Use This Product Safely
Features Compatible with PAL DVD (Video CD) and NTSC DVD (Video CD) This player can play discs recorded in either PAL or NTSC format. L/R stereo analog audio outputs for connection to existing head unit av inputs. Video output is composite video. -
Page 5: Safety Information
SAFETY INFORMATION CAUTION: MOBILE DVD PLAYER IS A CLASS I LASER PRODUCT. HOWEVER THIS MOBILE DVD PLAYER USES A VISIBLE/INVISIBLE LASER BEAM WHICH COULD CAUSE HAZARDOUS RADIATION EXPOSURE IF DIRECTED. BE SURE TO OPERATE THE MOBILE DVD PLAYER CORRECTLY AS INSTRUCTED. -
Page 6: Disc Notes
DISC NOTES Handling and Cleaning Dirt, dust, scratches and warping discs will cause wrong operation. Do not place stickers or make scratches on discs. Do not warp discs. A disc should always be kept in its case when not in use to prevent from damage. -
Page 7: Installation
INSTALLATION Notes: Choose the mounting location where the unit will not interfere with the normal driving function of the driver. Before finally installing connect the wiring temporarily and make sure it is all connected up properly and the unit and the system work properly. - Page 8 INSTALLATION they will go (with the notches facing up) into the appropriate slots at the middle left and right sides of the unit. Then slide the sleeve off the back of the unit. (1) Front Panel; (2) Outer Trim Ring; (3) Sleeve;...
- Page 9 INSTALLATION 3. Press the release button to remove the front panel. 4. Lift the top of the outer trim ring then pull it out to remove it. 5. Insert both of the supplied keys into the slots at the middle left and right sides of the unit, then pull the unit out of the dashboard.
-
Page 10: Using The Detachable Front Panel
USING THE DETACHABLE FRONT PANEL To Detach the Front Panel 1. Press the release ( front panel will be folded down. Release button OPEN 2. To remove the front panel, lift it up at a little angle from horizontal position, then first pull out the right side and then pull out the left side. -
Page 11: Connections
CONNECTIONS Connector A 1. N.C 2. N.C 3. N.C 4. MEMORY +12V (YELLOW) 5. AUTO ANTENNA OUTPUT (BLUE) 6. N.C 7. +12V (TO IGNITION KEY) (RED) 8. GROUND (BLACK) Connector B 1. REAR RIGHT SPEAKER (+) (VIOLET) 2. REAR RIGHT SPEAKER (-) (VIOLET/BLACK) 3. -
Page 12: Locations And Function Of The Player
LOCATIONS AND FUNCTION OF THE PLAYER When the front panel is folded down: (Release button) 2. Volume knob (when rotated) Push SEL (when pressed) 3. EQ/ (hang up phone) 4. 3.2 inch TFT display 5. 1 6. 2 7. 3 OSD 8. -
Page 13: Locations And Function Of The Remote Control
LOCATIONS AND FUNCTION OF THE REMOTE CONTROL... -
Page 14: Locations And Function Of The Remote Control
LOCATIONS AND FUNCTION OF THE REMOTE CONTROL Press it to turn on the unit. When the unit is on, press it to turn the unit off. 2. MODE When the unit is on, press it to select the different mode, such as RADIO, DVD, USB, SD, AV IN mode. - Page 15 LOCATIONS AND FUNCTION OF THE REMOTE CONTROL 20. SLOW/PAIR For some discs, press to start slow forward function. Press it to enter the pair function for Bluetooth operation. 21. ZOOM/CLR Press to allow the picture to be increased in size. CLR button serves as back spaces key in Bluetooth operation.
-
Page 16: Operation
OPERATION BASIC OPERATION ◆ Turn the unit on/off When all the connection is finished, press MUT button on the front panel or on the remote control will turn the unit on. When the unit is on, hold press MUT button or press to turn the unit off. -
Page 17: Dvd Operation
OPERATION displayed on the screen. Pressing MUT button on the front panel or MUTE button on the remote control will mute the sound. Press it again will resume the sound. ◆ Mode selection Press MODE button on the front panel or MODE on the remote control to select the desired mode to enjoy. - Page 18 OPERATION ◆ Pausing play Shortly press on the front panel or on the remote control during playback to stop playback temporarily. Shortly press again will return to the normal playback. ◆ Rapid forward / rapid reverse Hold press on the front panel or hold press on the remote control during playback.
- Page 19 OPERATION Note: The language is different according to the disc. Some discs only contain one subtitle language. ◆ Multi-angle function (For DVD) Press ANGLE button on the remote control during playback. The corresponding information will be shown on the screen. Each time the button is pressed, the angle changes in sequential order.
- Page 20 OPERATION the unit will play the tracks you programmed. d) If you want to clear the program, select CLEAR on the screen and press OK on the remote control to confirm, and the unit will cancel the programmed play. For DVD disc: The operation is the same as VCD/CD operation.
- Page 21 OPERATION SYSTEM SETUP TV SYSTEM AUTO PLAY VIDEO TV TYPE PASSWORD RATING DEFAULT * TV SYSTEM: Change the TV SYSTEM among NTSC, PAL and AUTO. * AUTO PLAY: Change between ON and OFF. When AUTO PLAY ON, the unit will skip over the DVD menu to play automatically.
-
Page 22: Usb Play Operation
OPERATION 6) DIGITAL SETUP When you open the DIGITAL menu, you will see the following picture: DIGITAL SETUP OP MODE DYNAMIC RANGE DUAL MONO * OP MODE: to set the operating modes for Dolby Digital decoder, there are LINE OUT and RF REMOD to be selected. -
Page 23: Memory Card Operation
OPERATION the files in the USB driver and start to play automatically. If in other mode, you can also press MODE button to select USB mode. When playing the audio/video/photo files in the device, the operation is the same with DVD operation described above. NOTE: When in USB play mode, be sure not to remove the USB driver from... -
Page 24: Bluetooth Operation
OPERATION 1) Store in Memory Press and hold desired radio preset buttons (numeric buttons 1~6) on the remote control or on the front panel for several seconds, the memory icon will be shown display and the current listening station will be stored into the number button. -
Page 25: Av In Operation
OPERATION ◆ Pairing and Connection 1) Pressing PAIR button on the front panel of the unit or on the remote control to enter paring mode. On the mobile phone, select the Bluetooth set up. (Please refer to the instruction manual of your mobile phone on how to operate Bluetooth.) 2) Select the Bluetooth device in the list on your mobile phone and... -
Page 26: Trouble Shooting
TROUBLE SHOOTING If it appears that your DVD unit is faulty, first consult this checklist. It may be that something simple has been overlooked. Under no circumstances should you try to repair the player yourself, as this will invalidate the warranty. Only qualified service personnel can remove the cover or service this player. - Page 27 TROUBLE SHOOTING The sound/picture skips on a DVD/VCD/CD/MP3. The disc is scratched or dirty. Clean the disc. A track will not play. Random play has been selected. Turn off random play. A VCD cannot be played using menus. The VCD disc being played is not compatible with PBC.
-
Page 28: Specifications
SPECIFICATIONS GENERAL Power Supply Requirements Maximum Output Power Current Drain RADIO Frequency Coverage Sensitivity (S/N=30dB) Image Rejection Stereo Separation Frequency Coverage Sensitivity (S/N=20dB) Image Rejection Signal system: Discs played: Monitor Screen Size: Note: Specifications and design are subject to modification, without notice, due to improvements in technology.