Sony MEX-DV1700U Operating Instructions Manual
Multi disc player
Hide thumbs
Also See for MEX-DV1700U:
- Specifications (5 pages) ,
- Limited warranty (1 page) ,
- Installation/connections (2 pages)
Table of Contents
Advertisement
4-296-931-11(1)
Multi Disc Player
Operating Instructions US
Owner's Record
The model and serial numbers are located on the bottom of the unit.
Record the serial number in the space provided below.
Refer to these numbers whenever you call upon your Sony dealer
regarding this product.
Model No. MEX-DV1707U/DV1700U Serial No.
MEX-DV1707U/DV1700U
Advertisement
Table of Contents

Related Manuals for Sony MEX-DV1700U


Summary of Contents for Sony MEX-DV1700U
- Page 1 The model and serial numbers are located on the bottom of the unit. Record the serial number in the space provided below. Refer to these numbers whenever you call upon your Sony dealer regarding this product. Model No. MEX-DV1707U/DV1700U Serial No.
- Page 2 Be sure to install this unit in the dashboard of the car for safety. For installation and connections, see the supplied installation/connections manual. Warning To prevent fire or shock hazard, do not expose the unit to rain or moisture. To avoid electrical shock, do not open the cabinet.
-
Page 3: Copyrights
All other marks and logos are the property of their respective owners. All rights reserved. ZAPPIN and Quick-BrowZer are trademarks of Sony Corporation. Windows Media is either a registered trademark or trademark of Microsoft Corporation in the United States and/or other countries. - Page 4 PROMOTIONAL, INTERNAL AND COMMERCIAL USES AND LICENSING MAY BE OBTAINED FROM MPEG LA, LLC. SEE HTTP://WWW.MPEGLA.COM...
-
Page 5: Table Of Contents
Table of contents Copyrights ............. . . 3 Playable discs and symbols used in this manual . - Page 6 Settings ............41 Visual setup.
-
Page 7: Playable Discs And Symbols Used In This Manual
Playable discs and symbols used in this manual This unit can play various video/audio discs. The following chart helps you to check if a disc is supported by this unit, as well as what functions are available for a given disc type. Disc symbol in manual *1 Audio files can also be stored. -
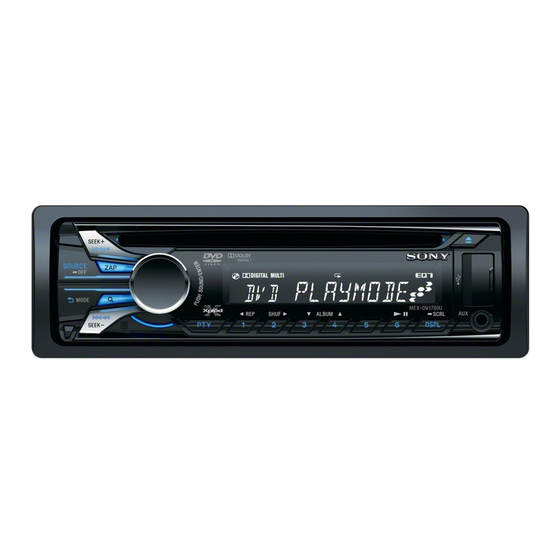
Page 8: Location And Function Of Controls
Location and function of controls Main unit Refer to the pages listed for details. SOURCE/OFF button* 14, 16, 18, 19 Press to turn on the power/change the source (Radio/Disc/USB/AUX). Press for 1 second to turn off the power. Press for more than 2 seconds to shut off completely. -
Page 9: Number Buttons
(BACK)/MODE* button page 13, 19, 21, 32, 35, 36, 50 Press to return to the previous display/ move to the upper level/exit the system setup menu or sound menu/select the radio band (FM/AM)/select an auxiliary device connected to the AUX input jack (front) or AUX IN terminal (rear)/select the play mode of iPod. - Page 10 Card remote commander RM-X168 • Refer to the pages listed for details. • Remove the insulation film before use. OFF button page 14, 16, 18, 19 Press to turn off/stop the source. Press and hold to shut off completely. ...
- Page 11 Number buttons page 14, 15, 21, 23, 24, 31, 32 Disc/USB: To locate a title/chapter/track. Radio: Press to receive stored stations. Press and hold to store stations. CLEAR button page 32 To delete an entered number. DSPL (display) button page 25, 33, ...
-
Page 12: Getting Started
Getting Started Performing initial setup When you first turn on the unit after purchasing it, the display for initial speaker setup appears. Be sure to set correctly following the procedure below to enjoy the various sound functions of this unit. To skip the initial setup, press , or insert a disc. -
Page 13: Basic Operations
Basic Operations Listening to the radio SOURCE / OFF SEEK MODE Press repeatedly until “TUNER” appears. Press repeatedly until the desired band (FM1, FM2, FM3, AM1 or AM2) appears. Perform tuning. To tune automatically Press +/–. Scanning stops when the unit receives a station. Repeat this procedure until the desired station is received. -
Page 14: Playing Video Discs
Playing video discs Depending on the disc, some operations may be different or restricted. Refer to the operating instructions supplied with your disc. SOURCE / OFF Turn on your monitor, then select the input source on your monitor corresponding to this unit. Insert the disc (label side up). - Page 15 Other playback operations ALBUM .m/M> b/B/V/v pause/resume play after pause skip a chapter/track/scene/file reverse/fast-forward disc cancel reverse/fast-forward show the DVD menu* select items in the DVD menu* change audio language/format/channel (page 26)* turn off/change the subtitle language* change the viewing angle* skip an album (folder)* skip albums (folders) continuously* *1 Unavailable depending on the disc.
-
Page 16: Playing Audio Discs
*2 When the 4-digit input prompt appears, input the language code (page 62) for the desired language. *3 When a Xvid/MPEG-4 is played. Note on Xvid/MPEG-4 playback If a disc contains multiple file types, only the selected file type (audio/video/image) can be played. To play Xvid/MPEG-4 video files of such a disc, press FILES,”... -
Page 17: Playing A Usb Device
Other playback operations .m/M> ALBUM pause/resume play after pause skip a track reverse/fast-forward track skip an album* skip albums continuously* * When an MP3/WMA/AAC is played. Playing a USB device • DRM (Digital Rights Management) files may not be played. •... - Page 18 Open the USB cover, then connect the USB device to the USB connector with its USB. Playback starts automatically. If a USB device is already connected, to start playback, press repeatedly until “USB” appears. With the card remote commander Use ...
-
Page 19: Playing An Ipod
Playing an iPod In this manual, “iPod” is used as a general reference for the iPod functions on the iPod and iPhone, unless otherwise specified by the text or illustrations. Control dial SOURCE / OFF MODE Connect the iPod to the USB connector. Use of the optional USB connection cable RC- 202IPV is recommended.* The following display appears on the iPod screen*... - Page 20 To play videos of iPod with video Press during playback. Rotate the control dial to select “VIDEO,” then press it. Rotate the control dial to select the desired play mode, then press it. Rotate the control dial to select the desired video, then press it. With the card remote commander, press /...
-
Page 21: Advanced Operations - Radio
Advanced Operations — Radio Storing and receiving stations Caution When tuning in stations while driving, use Best Tuning Memory (BTM) to prevent an accident. Storing automatically — BTM Press repeatedly until “TUNER” appears on the main unit. To change the band, press repeatedly. - Page 22 Type of programs (U.S. models) NEWS (News), INFORM (Information), SPORTS (Sports), TALK (Talk), ROCK (Rock), CLS ROCK (Classic Rock), ADLT HIT (Adult Hits), SOFT RCK (Soft Rock), TOP 40 (Top 40), COUNTRY (Country), OLDIES (Oldies), SOFT (Soft), NOSTALGA (Nostalgia), JAZZ (Jazz), CLASSICL (Classical), R AND B (Rhythm and Blues), SOFT R B (Soft Rhythm and Blues), LANGUAGE (Foreign Language), REL...
-
Page 23: Advanced Operations - Discs
Advanced Operations — Discs This chapter consists of the following sections. • Video-specific operations* page 23 to 29 • Video*/audio common operations page 30 to 33 • Audio-specific operations page 33 * Including JPEG operations. Playing JPEG files You can enjoy a slide show of JPEG files on this unit. -
Page 24: Using Play Mode Menu
Playback starts. The PBC menu does not appear during playback. Notes • The items on the menu, and operation procedures differ depending on the disc. • During PBC playback, the track number, playback item, etc., do not appear in the play mode menu (page 24). -
Page 25: Viewing Time/Text Information Of The Disc
CHAPTER 31 To select a chapter to play. IMAGE 31 To select an image to display. FILE 31 To select a video file to play. TIME 31 To check the elapsed playback time; input time code. AUDIO 15, 26 To change the audio language/format/ channel;... -
Page 26: Configuring Audio Settings
(Only when playing version 1.0/1.1, or version 2.0 without PBC function.) • T **:** Elapsed playback time of the current track • T-**:** Remaining time of the current track • D **:** Elapsed playback time of the current disc • D-**:** Remaining time of the current disc JPEG playback •... -
Page 27: Checking The Program Format
The options are indicated below. STEREO (ST): Standard stereo sound (default) 1/L (L): Left channel sound (monaural) 2/R (R): Right channel sound (monaural) During playback, press repeatedly until the desired audio channel appears. E.g., when playing an MP3 TRACK NAME ALBUM NAME 0003/1000 ARTIST NAME... -
Page 28: Magnifying Pictures
During playback, press . The system setup item appears on the main unit. Press / to select “DVD-LEVEL,” then press . Press to set to “ADJST-ON,” then press . Press / to select “DOLBY-ADJ,” then press . Press / to adjust the output level. The output level is adjustable in single steps, between –10 and +10. -
Page 29: Customizing The Picture
The current option appears. 12 ( 67 ) 018 ( 034 ) T 1:35:55 DAYTIME SUNSET SHINE CUSTOM NORMAL NORMAL Press / to select the desired option, then press . Options differ depending on the setting in visual setup (page 43). In visual setup, the settings of “PICTURE EQ”... -
Page 30: Repeat And Shuffle Play
Repeat and shuffle play During playback, press (REP) or (SHUF) on the main unit repeatedly until the desired option appears. Repeat or shuffle play starts. The repeat options and switching order of each disc/format are indicated below. Disc/format Options CHAPTER: Repeats the current chapter. -
Page 31: Direct Search Play
Press / to select then press . 12 ( 67 ) 018 ( 034 ) T 1:35:55 CHAPTER TITLE Press / to select the desired option, then press . Repeat or shuffle play starts. Press to hide the play mode menu. -
Page 32: Listing Up Tracks/Images/Video Files - Quick-Browzer
Press / to select the desired item, then press . - - ( 67 ) 018 ( 034 ) T 1:35:55 The number in parentheses indicates the total number of selected item. Press the number buttons to enter an item number or time code. For example, to locate 2 hours, 10 minutes, and 20 seconds, just enter “21020.”... -
Page 33: Viewing Audio Disc Information
Press / to select the desired file, then press . Playback of the selected file starts. With the main unit Rotate the control dial instead of pressing /, press the control dial instead of . Viewing audio disc information During audio playback, you can check the disc information or display the sleeve image (Album Artwork Display)* of MP3/WMA/ AAC file on the monitor. -
Page 34: Repeat And Shuffle Play
Repeat and shuffle play During playback, press (REP) or (SHUF) on the main unit repeatedly until the desired option appears. Select REP-TRACK REP-ALBUM SHUF-ALBUM REP-DRIVE* * When two or more drives are created on the USB device. To return to normal play mode, select “REP-OFF”... -
Page 35: Advanced Operations - Ipod
Advanced Operations — iPod Display items during playback Source (iPod) indication Track name, Artist name, Album name, Track number/Elapsed playing time, Clock To change display items , press . When album/podcast/genre/artist/playlist is changed, its item number appears momentarily. Note Some letters stored in iPod may not be displayed correctly. -
Page 36: Operating An Ipod Directly - Passenger Control
For video playback Displayed options may not conform to actual operation. Select TRACK RENTAL TV SHOW MUSIC-V PLAYLIST PODCAST After 3 seconds, the setting is complete. To return to normal play mode, select “ OFF” or “SHUF OFF.” Operating an iPod directly —... -
Page 37: Enjoying Sophisticated Sound Functions
POS SUB* (Subwoofer position): Selects the subwoofer position from your listening position: “NEAR,” “NORM,” “FAR” (page 38). RBE (Rear Bass Enhancer): Uses rear speakers as a subwoofer: “OFF,” “1,” “2,” “3” (page 37). *1 Appears only when “REAR/SUB” is set to “SUB OUT”... -
Page 38: Setting The Subwoofer
By the sound menu Press repeatedly until “POS” appears, then select your listening position. For details on this procedure, see “Adjusting the sound characteristics — SOUND” on page 36. By the visual setup menu Press while the unit is off. -
Page 39: Listening Position
Precisely calibrating the listening position — Intelligent Time Alignment Tune You can precisely calibrate your listening position from each speaker so that the sound delay reaches the listener more correctly. The setting is configurable both from the system setup menu (page 45) and the visual setup menu (page 41). -
Page 40: Adjusting The Speaker Volume
Customizing the equalizer curve — EQ7 Tune “CUSTOM” of EQ7 allows you to make your own equalizer settings. You can adjust the level of 7 different bands: 63 Hz, 160 Hz, 400 Hz, 1.0 kHz, 2.5 kHz, 6.3 kHz, and 16 kHz. -
Page 41: Settings
Settings Various settings are configurable from the following two setup menus. • Visual setup menu (page 41) Allows configuration of visual-related items (by the monitor). • System setup menu (page 45) Allows configuration of system-related items (by the main unit). Visual setup The visual setup menu includes the following categories. -
Page 42: Display Setup
Language setup for display or soundtrack (LANGUAGE SETUP), then select the desired item and option below, using / Select and . For details on this procedure, see “Basic operation of visual setup” on page 41. Item MENU AUDIO SUBTITLE Display setup (DISPLAY SETUP), then select the desired item and option below, using /... -
Page 43: Custom Setup
Item PICTURE EQ (page 28) MPEG-4 Selects the setting option to show in the play mode menu. Note Depending on the disc, “4:3 LETTER BOX” may be selected automatically instead of “4:3 PAN SCAN,” and vice versa. Custom setup (CUSTOM SETUP), then select the desired item and option below, using / and Select . -
Page 44: Audio Setup
Item PBC (Playback control) * DVD VIDEO only. Audio setup (AUDIO SETUP), then select the desired item and option below, using / and Select . For details on this procedure, see “Basic operation of visual setup” on page 41. Follow the page reference for details. “” indicates the default setting. Item AUDIO DRC Makes the sound clear when... -
Page 45: System Setup
Resetting all settings All settings in visual setup can be reset. Select (RESET), then “RESET ALL SETTINGS,” “YES” using / and . For details on this procedure, see “Basic operation of visual setup” on page 41. Note Do not power off the unit while resetting, as it takes a few seconds to complete. - Page 46 SET (Setup) Item CLOCK-ADJ (Clock Adjust) (page 50) CT (Clock Time) (page 21, 22) ON BEEP COLOR-SYS (Color System) Changes the video output signal according to the connected monitor. RM (Rotary Commander) Changes the operative direction of the rotary commander controls. AUTO OFF Shuts off automatically after a desired time when...
- Page 47 DSPL (Display) Item BLACKOUT* Turns off the illumination automatically for any source (e.g, during playback/radio reception, etc.) if no operation is performed for 5 seconds. M.DSPL (Motion Display) DEMO (Demonstration) DIMMER Changes the display brightness. AUTO-SCRL (Auto Scroll) Scrolls long items automatically.
- Page 48 P/M (Play mode) Item ZAP TIME (Zappin Time) Selects the playback time for the ZAPPIN function. ZAP BEEP (Zappin Beep) R/M (Receive mode) Item LOCAL (Local Seek Mode) MONO (Monaural Mode) Selects monaural reception mode to improve poor FM reception. BTM (Best Tuning Memory) (page 21) PARENTAL* (page 51)
- Page 49 SND (Sound) Item EQ7 TUNE (page 40) AUX-LEVEL (page 51) DVD-LEVEL (page 27) DOLBY-ADJ (Dolby Level Adjust) (page 27)* SP SETUP (Speaker Setup) *1 Appears and available only when “DVD-LEVEL” is set to “ADJST-ON.” *2 Appears only when “REAR/SUB” is set to “SUB OUT” (page 46). Option Purpose –...
-
Page 50: Using Optional Equipment
Setting the clock The clock uses a 12-hour indication. Press . The system setup item appears on the main unit. Press / to select “CLOCK-ADJ,” then press . The hour indication flashes. Press / to set the hour and minute. To move the digital indication, press / . -
Page 51: Siriusxm Tuner (U.s. Models Only)
Adjusting the volume level Be sure to adjust the volume of each connected device before playback. Turn down the volume on the unit. Press repeatedly until “AUX” appears on the main unit. If two auxiliary devices are connected, select the device to adjust its volume by pressing ... -
Page 52: Additional Information
Changing display items Press . Additional Information Precautions • Cool off the unit beforehand if your car has been parked in direct sunlight. • Do not leave the front panel or audio devices brought in inside the car, or it may cause malfunction due to high temperature in direct sunlight. - Page 53 • Discs that this unit CANNOT play – Discs with labels, stickers, or sticky tape or paper attached. Doing so may cause a malfunction, or may ruin the disc. – Discs with non-standard shapes (e.g., heart, square, star). Attempting to do so may damage the unit.
-
Page 54: About Aac Files
Playback order of MP3/WMA/ AAC/JPEG/Xvid/MPEG-4 files MP3/WMA/AAC/ JPEG/Xvid/ MPEG-4 About MP3 files • MP3, which stands for MPEG-1 Audio Layer-3, is a music file compression format standard. It compresses audio CD data to approximately 1/10 of its original size. • ID3 tag versions 1.0, 1.1, 2.2, 2.3 and 2.4 apply to MP3 only. -
Page 55: Maintenance
If you have any questions or problems concerning your unit that are not covered in this manual, consult your nearest Sony dealer. Maintenance Replacing the lithium battery of the card remote commander When the battery becomes weak, the range of the card remote commander becomes shorter. -
Page 56: Specifications
Notes • For safety, turn off the ignition before cleaning the connectors, and remove the key from the ignition switch. • Never touch the connectors directly with your fingers or with any metal device. Specifications AUDIO POWER SPECIFICATIONS CEA2006 Standard Power Output: 17 Watts RMS 4 at 4 Ohms <... -
Page 57: Troubleshooting
If you try to play any other DVD, the message “Playback prohibited by region code.” will appear on the monitor screen. Depending on the DVD, no region code may be labeled even though playing the DVD is prohibited by area restrictions. -
Page 58: Disc Operation
Automatic tuning is not possible. Setting of the local seek mode is not correct. – Tuning stops too frequently: Set “LOCAL-ON” (page 48). – Tuning does not stop at a station: Set “LOCAL-OFF” (page 48). The broadcast signal is too weak. –... - Page 59 The DVD is not applicable due to the region code. The disc is not finalized (page 53). The disc format and file version are incompatible with this unit (page 7, 53). Press to remove the disc. MP3/WMA/AAC/JPEG/Xvid/MPEG-4 files do not play back.
-
Page 60: Error Displays/Messages
OFFSET There may be an internal malfunction. – Check the connection. If the error indication remains on in the display, consult your nearest Sony dealer. OVERLOAD USB device is overloaded. – Disconnect the USB device, then change the source by pressing . - Page 61 For details on the compatibility of your USB device, visit the support site. If these solutions do not help improve the situation, consult your nearest Sony dealer. If you take the unit to be repaired because of disc playback trouble, bring the disc that was...
-
Page 62: Language Code/Area Code List
Language code/area code list Language code list The language spellings conform to the ISO 639: 1988 (E/F) standard. Code Language 1027 Afar 1028 Abkhazian 1032 Afrikaans 1039 Amharic 1044 Arabic 1045 Assamese 1051 Aymara 1052 Azerbaijani 1053 Bashkir 1057 Byelorussian 1059 Bulgarian 1060... - Page 63 Area code list Code Area Code Area 2044 Argentina 2165 2047 Australia 2174 2046 Austria 2109 2057 Belgium 2248 2070 Brazil 2238 2079 Canada 2254 2090 Chile 2276 2092 China 2304 2115 Denmark 2363 Code Area Finland 2362 Mexico France 2376 Netherlands Germany...
- Page 64 Operating Instructions. Please contact (U.S.A. only); Call Support site If you have any questions or for the latest support information on this product, please visit the web site below: http://www.sony-asia.com/section/support http://www.sony-asia.com/caraudio/ http://www.sony.net/ ©2011 Sony Corporation Printed in Thailand 1-800-222-7669 http://www.SONY.com...