Table of Contents
Advertisement
Quick Links
Advertisement
Table of Contents

Related Manuals for Baumatic TITAN1


Summary of Contents for Baumatic TITAN1
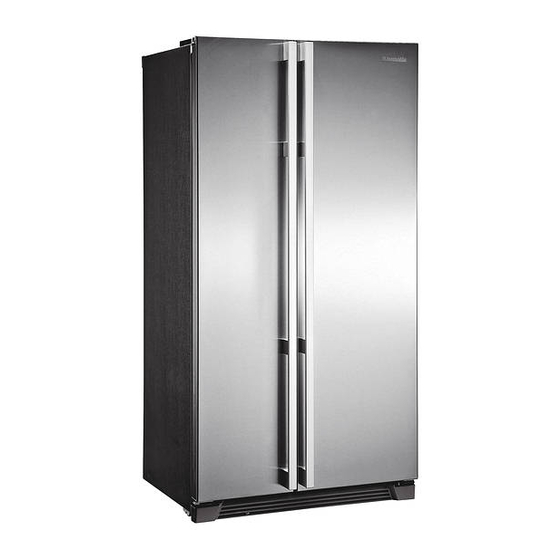
- Page 1 TITAN1 Stainless steel side by side frost free fridge/freeze...
- Page 2 USER MANUAL FOR YOUR BAUMATIC TITAN1 Stainless steel side by side 570 litre frost free fridge/freezer NOTE : This User Instruction Manual contains important information, including safety & installation points, which will enable you to get the most out of your appliance. Please keep it in a safe place so that it is easily available for future reference, for you or any person not familiar with the operation of the appliance.
-
Page 3: Table Of Contents
Energy efficiency class Cubic capacities Specifications of your appliance Description of the appliance Description of the product features Using your Baumatic fridge freezer Before switching on During first use Control panel Turning on the appliance and setting the thermostat Arranging and storing food in the fridge section... -
Page 4: Environmental Note
This should be undertaken by a competent person. Disable the door lock to make sure that children cannot get stuck inside the appliance. o The packaging materials that Baumatic uses are environmentally friendly and can be recycled. o Please discard all packaging material with due regard for the... -
Page 5: Important Safety Information
Important safety information Your safety is of the utmost importance to Baumatic. Please make sure that you read this instruction booklet before attempting to install or use the appliance. If you are unsure of any of the information contained in this booklet, please contact the Baumatic Technical Department. - Page 6 Do not place electrical devices inside of the appliance, such as mixers or ice cream makers. Service You should not attempt to repair the appliance yourself, as this could cause injury or a more serious malfunction. If you require a service call then please contact the Baumatic Service Department.
-
Page 7: Specifications Of Your Fridge Freezer
Specifications of your fridge freezer Congratulations on purchasing a Baumatic fridge freezer Dimensions of your appliance o Height: 1790 mm o Width: o Depth: Energy efficiency class o Energy class: Cubic capacities o Gross capacity (fridge): o Gross capacity (freezer):... -
Page 8: Description Of The Appliance
Description of the appliance Freezer section Door storage compartments Freezer shelves (x 4) Dried foods compartment Meat storage compartment Fridge section Refrigerator shelves (x 4) Movable egg container Salad/vegetable drawer Fruit drawer Dairy compartment 10) Door storage compartments 12) Chiller case... -
Page 9: Description Of The Product Features
Shelves o The shelves may be placed in any of the guide slots within the interior of the appliance. They are protected from sliding out. o To remove a shelf: Take off all of the items that are stored on the shelf that you want to remove. -
Page 10: Using Your Baumatic Fridge Freezer
Using your Baumatic fridge freezer Before switching on o Make sure that it has been installed by a suitably qualified person, as per the information contained in Baumatic’s installation instructions. o After delivery, wait for eight hours before connecting the appliance to your mains supply. -
Page 11: During First Use
o When you first switch on the appliance, the compressor will run continuously for approximately 24 hours or until the fridge freezer reaches a cool enough temperature. o During this period of time, you should try not to open the door frequently or place a large amount of food within the appliance. -
Page 12: Turning On The Appliance And Setting The Thermostat
o You switch on your appliance by connecting it to your mains supply. o Press the FRZ. TEMP button until the neon above number 3 lights. o Press the REF. TEMP button until the neon above number 3 lights. o The neons will light in the following order:- o We would recommend that the fridge and freezer sections are set on number 3 during regular use of the appliance. -
Page 13: Arranging And Storing Food In The Fridge Section
Arranging and storing food in the fridge section o Warm food or evaporating liquids should not be stored in your refrigerator, as this will increase the humidity inside of the appliance. o All foods should be wrapped or covered, this is particularly important if the food has a strong flavour. -
Page 14: The Freezer Compartment
bottle shelves that sit in the door. o Garlic, potatoes, onions and bananas should only be stored in a refrigerator IF they are stored in airtight containers. freezer compartment The freezer compartment is suitable for storing and freezing food. o The freezer compartment temperature must have already reached -18 degrees centigrade (or lower) before you attempt to store food that is already frozen or freezing fresh food. -
Page 15: Tips On Freezing
are already frozen. o After 24 hours you should check that the fresh food is satisfactorily frozen. If it is then you should return the temperature setting to number 3 using the FRZ. TEMP button. Tips on freezing o Freezer bags, polythene wraps, aluminium foil (extra thick) and special cans for frozen foods are suitable packaging for storing frozen goods in. -
Page 16: Important User Information
IMPORTANT: Care should be taken to make sure that the airflow duct vents on the rear interior wall of the fridge and freezer sections are not blocked. IMPORTANT: If your mains power supply fails, then the food inside of the freezer section will be preserved for a 12 hour period. - Page 17 the plug to your mains supply. IMPORTANT: Before attempting any of the cleaning steps shown below, you should remove all items from the shelves and compartments that you are cleaning. Dairy compartment Fridge and freezer door compartments Fridge and freezer shelves Salad/Vegetable and fruit drawers Interior parts Open the dairy compartment cover...
-
Page 18: Defrosting The Freezer Compartment
Rear grill Defrosting the Your appliance is frost free, so you should not need to manually defrost the freezer section. However if for example the door is left open for a prolonged period of time or the door gasket is not sealing correctly, then you could get ice building in the freezer section. -
Page 19: Replacing The Light Bulb
leave the door to the freezer compartment open. You can place a bowl of warm water inside the freezer compartment to speed up the defrost process. o You can use a sponge to mop up the defrost water that will run into the bottom of the freezer section. - Page 20 Push the cover back into position and fully tighten the screws that hold it in place. Freezer section The light bulbs can be found behind the light cover that is below the top shelf. Push the cover back into position and fully tighten the screws that hold it in place.
-
Page 21: Installation
Installation IMPORTANT: Before installation and usage read all the instructions and make sure that the voltage (V) and the frequency (Hz) indicated on the rating plate are exactly the same as the voltage and frequency in your home. The rating plate can be found on the front left edge of the inside of the refrigerator. -
Page 22: Positioning
o It is advisable that your appliance is only installed in a location where the ambient temperature of the room, corresponds with the climate classification that is stated on the rating plate of your appliance. Your appliance may not function correctly if the ambient temperature falls outside of the following ranges. -
Page 23: Installation Preparation
IMPORTANT: A minimum of two people should complete all of the installation steps given in this manual. o Check that the appliance will easily pass through all doorways en route to its final position. o Appliance dimensions: 1790 mm(h) x 900 mm(w) x 730 mm(d). (including door handles). - Page 24 IMPORTANT: One person should support the door before attempting this next step. Lift up the front of the hinge and remove it from the appliance. Whilst still supporting the door, slowly lift it upwards to disengage it from the lower hinge. Once the door has been lifted clear of the lower hinge, pull it away from the main chassis of the freezer section.
-
Page 25: Removing The Fridge Door
Unscrew the top hinge cover using a screwdriver. Insert a thin screwdriver into the side groove of the cover to remove it. Turn the top hinge fastener anti-clockwise 3-4 times and then disconnect the harness wires. IMPORTANT: One person should support the door before attempting this next step. -
Page 26: Replacing The Freezer Door
Insert the bottom of the freezer door into the bottom hinge, making sure that the hinge pin has been inserted into the hole in the bottom of the freezer door. Insert the back of the top hinge in the groove on the top of the cabinet. -
Page 27: Replacing The Fridge Door
Insert the bottom of the fridge door into the bottom hinge, making sure that the hinge pin has been inserted into the hole in the bottom of the fridge door. Insert the back of the top hinge in the groove on the top of the cabinet. -
Page 28: Levelling The Appliance And Adjusting The Doors
The appliance must be situated on a level and even floor; otherwise the doors may not hang properly or seal correctly. The front of the appliance should be a little higher than the rear of the fridge freezer. This will allow for easy closing of the doors. -
Page 29: Fitting The Front Cover
Use these screws to fix the front cover to the appliance. Troubleshooting IMPORTANT: If your fridge freezer appears not to be operating properly, before contacting the Baumatic Service Department, please refer to the checklist below. My fridge freezer does not appear to be working/there is no power to my appliance. - Page 30 Ice has formed on the inner back wall of my fridge or there is water in the base of the fridge. o Check that food has not been pushed too far back inside the appliance, so that it is in contact with the inner back wall. The front and side of my fridge freezer feels warm or hot.
-
Page 31: Baumatic Ltd. Conditions Of Guarantee
Baumatic appliance. * In addition, your appliance is covered by a 5 year parts warranty. Baumatic Ltd will provide free of charge the parts required to repair the appliance, only if they are fitted by a Baumatic engineer, for any defect that arises due to faulty materials or workmanship within a period of 5 years from the original purchase date. -
Page 32: Contact Details
Headquarters Baumatic Ltd. Baumatic Buildings, 6 Bennet Road, Reading, Berkshire RG2 0QX, United Kingdom Sales Telephone +44 118 933 6900 Sales Fax +44 118 931 0035 Service Telephone +44 118 933 6911 Service Fax +44 118 986 9124 Spares Telephone... - Page 36 36 36...