Table of Contents
Advertisement
Advertisement
Table of Contents

Related Manuals for Banner American Easy-Lam II


Summary of Contents for Banner American Easy-Lam II
-
Page 2: Table Of Contents
TABLE OF CONTENTS Important Safety Messages and Electrical Safeguards……………………3-4 Introduction………………………………………………………………….5 Specifications………………………………………………………………..5 Initial Setup……………………………………………………………….6-8 Ø Unpacking……………………………………………………………6 Ø Components………………………………………………………….6 Motor Switch……...……………………………………………...6 Reverse Switch………...…………………………………………6 Heater Switch……………...……………………………………..8 Heat Indicator Light……………………………………………...8 Loading Laminating Film onto Mandrels……………………………...8-9 Threading Laminating Film…………………………………………...9-12 Adjusting Mandrel/Film Tension……………………………………..12-13 Setting Heat Shoe Temperature………………………………………13-14 Laminating…………………………………………………………...14-15 Troubleshooting………………………………………………………15-16 Maintenance…………………………………………………………...17... -
Page 3: Important Safety Messages And Electrical Safeguards
IMPORTANT SAFETY MESSAGES AND ELECTRICAL SAFEGUARDS For your protection, do not connect the laminator to electrical power or attempt to operate it until you have read these instructions completely. Keep these instructions in a convenient location for future reference. This instruction manual and labels affixed to the laminator are important safety messages. - Page 4 plug into an outlet, contact a qualified electrician to have a suitable outlet installed. Ø Do not leave the laminator power on overnight. Unplug the laminator at the end of the day. Ø Unplug the laminator before moving it or when it is not in use for an extended period of time as a precaution against the possibility of an internal malfunction that could create a fire hazard.
-
Page 5: Introduction
Congratulations on your purchase of the Easy-Lam II Roll Laminator. This unit is designed to provide years of trouble-free service. The Easy-Lam II will accept rolls of laminating film up to 27” wide in both 1.5 and 3 mil thicknesses. Paper and card stock up to 1/16” (1.6mm) thick may be laminated without adjusting the feed rollers. -
Page 6: Initial Setup
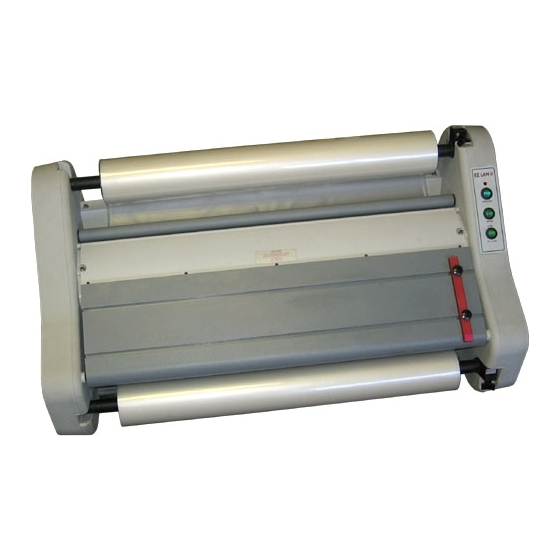
Components Figure 1 shows the location of the major components and controls of the Easy-Lam II. You should become familiar with these before operating the laminator. Motor Switch This switch provides power to the motor. If the switch is pressed to the “on”... - Page 7 Figure 1...
-
Page 8: Heater Switch
Heater Switch This switch turns power on and off to the top and bottom heat shoe. (Switch will light up in the “on” position). Heat Indicator Light This light goes on when the heat switch is first turned on and then remains on until the heat shoe reaches the operating temperature. -
Page 9: Threading Laminating Film
Threading Laminating Film These instructions apply to poly-in film rolls (shiny side out, dull side in). 1. For the top supply roll, place the mandrel ends into the slots on the top of the laminator. If you are facing the front of the laminator, the film should unwind toward you from the bottom of the roll as in Figure 3. - Page 10 2. Pull 6”-12” of film from the top roll. Pass the film under the idler bar and safety shield, and over the heat shoes. Make sure the shiny side of the film is against the shoes. See Figure 5 and 6. 3.
- Page 11 running the machine. If the idler bar is not in the upper position, you will not be able to properly adjust roll film tension. Drape the film from the bottom roll over the film from the top roll. (Use a piece of tape to hold film in place).
-
Page 12: Adjusting Mandrel/Film Tension
5. Turn the motor switch to the “on” position to start the rollers. 6. Push a piece of thin letter-sized cardboard against the film so that it is centered between the two heat shoes. Push the cardboard and film into the nip rollers. See Figure 5. 7. -
Page 13: Setting Heat Shoe Temperature
counterclockwise to decrease) until the film passes over the top heat shoe without wrinkles and the web between the laminating and pull rollers is tight. Note: This adjustment should require only a slight turn. If increased too much, you may stall the drive motor. 5. -
Page 14: Laminating
3. Turn the knob clockwise to increase and counterclockwise to decrease the temperature. If reducing the temperature, wait several minutes for the heat to drop to the desired operating temperature. When increasing temperature, the indicator lamp will come on as the laminator is heating up and go off when it reaches the set temperature. -
Page 15: Troubleshooting
9. Use the zippy cutter to cut across the film to remove the laminated items from the unit. 10. The Easy-Lam II has mounting capability up to 3/16”. Please refer to the video for instructions. 11. The 5 mil option switch is a factory installed option which gives the user the capability of laminating 5 mil laminate. - Page 16 ACTION: Check the thickness of item to be laminated. Maximum thickness is 1/16” (1.6mm). Clean heat shoes of residual adhesive. Refer to the MAINTENANCE section for cleaning instructions. PROBLEM: Plastic is not bonding to the item or to itself at the edges. ACTION: Make sure heat shoes and rollers are at the proper operating temperature and have had time to warm up.
-
Page 17: Maintenance
Maintenance This section contains instructions for cleaning and maintaining your laminator. These procedures should be performed at regular intervals to help ensure the trouble-free operation of your laminator. Cleaning the Heat Shoes and Laminator Rollers The Heat Shoes and Laminating Rollers should be cleaned of any residual adhesive whenever the film does not pass smoothly over their surfaces. -
Page 18: Ø Removing Wrap-Arounds
Removing Wrap-arounds When laminating with thinner gauges of films, there is the possibility of the film wrapping around the Pull Rollers. Refer to Cleaning the Heat Shoes and Laminating Rollers in order to remove a wrap-around. If the film cannot be pulled out of the back of the machine, leave the motor switch on and use the reverse switch on the back of the machine to reverse the rollers so the film can be pulled up and out the front of the machine. -
Page 19: Parts List And Illustrations
HOLDER, GLASS, HEAT SHIELD 10106 BAR, TIE, EASY-LAM II 10108 COVER, REAR, EASY-LAM II 10110 SHOE, HEAT, EASY-LAM II 10111 GLASS, HEAT SHIELD, EASY-LAM II 10343 COVER, ROLLER, EASY-LAM II, NEW 10113 HOLDER, ROLLER BUSHING 10114 ROD, IDLER, TOP EASY-LAM II 10115... - Page 20 SPROCKET, MOTOR, EASY-LAM II 2801 SPROCKET, 22T, STEEL 10371 SPROCKET, 25B21, .625 BORE 10232 SWITCH, MOTOR REVERSE, EASY-LAM II 10282 COVER, SIDE, LEFT, EASY-LAM II 10315 COVER, SIDE, RIGHT, EASY-LAM II 10303 SUPPORT, SIDE, LEFT-MOLD 10304 SUPPORT, SIDE, RIGHT-MOLD 10318 LABEL, EASY-LAM II...