AMX NetLinx NI-3101-SIG Operation/Reference Manual
Signature series netlinx integrated controller
Hide thumbs
Also See for NetLinx NI-3101-SIG:
- Installation manual (2 pages) ,
- Dimension manual (1 page) ,
- Programming manual (162 pages)

Related Manuals for AMX NetLinx NI-3101-SIG


Summary of Contents for AMX NetLinx NI-3101-SIG
- Page 1 Operation/Reference Guide NI-3101-SIG ® Signature Series NetLinx Integrated Controller L a t e s t R e l e a s e : 4 / 1 4 / 2 0 0 8 N e t L i n x C o n t r o l l e r s...
- Page 2 RMA number. AMX is not liable for any damages caused by its products or for the failure of its products to perform. This includes any lost profits, lost savings, incidental damages, or consequential damages. AMX is not liable for any claim made by a third party or by an AMX Dealer for a third party.
-
Page 3: Table Of Contents
Resetting the Factory Default System and Device Values ... 27 Obtaining the Master’s IP Address (using DHCP) ... 28 Assigning a Static IP to the NetLinx Master... 30 Communicating with the NI Device via an IP ... 31 NI-3101-SIG Signature Series NetLinx Integrated Controller... - Page 4 Modifying the Server Port Settings ... 76 SSL Server Certificate Creation Procedures... 78 Server - Display SSL Server Certificate Information... 80 Server - Creating a self-generated SSL Certificate ... 80 Server - Regenerating an SSL Server Certificate Request ... 81 NI-3101-SIG Signature Series NetLinx Integrated Controller...
- Page 5 Accessing the Security configuration options ... 118 Option 1 - Set system security options for NetLinx Master (Security Options Menu) . 119 Option 2 - Display system security options for NetLinx Master ... 121 NI-3101-SIG Signature Series NetLinx Integrated Controller...
- Page 6 LED Disable/Enable Send_Commands ... 154 RS232/422/485 Ports Channels ... 154 RS-232/422/485 Send_Commands... 155 RS-232/422/485 Send_String Escape Sequences... 158 IR / Serial Ports Channels ... 159 IR/Serial Send_Commands ... 160 Input/Output Send_Commands ... 166 Troubleshooting ...167 NI-3101-SIG Signature Series NetLinx Integrated Controller...
-
Page 7: Introduction
In technology-driven environments, this solution allows for the future addition of more devices and control capabilities. The NI-3101-SIG features an easy-to-install form factor that mounts into 1 unit of rack space and provides extended rack depth to simplify rear connections. Its sleek, gloss black faceplate complements the Tango Distributed Audio line and Metreau Keypads. -
Page 8: Ni-3101-Sig Specifications
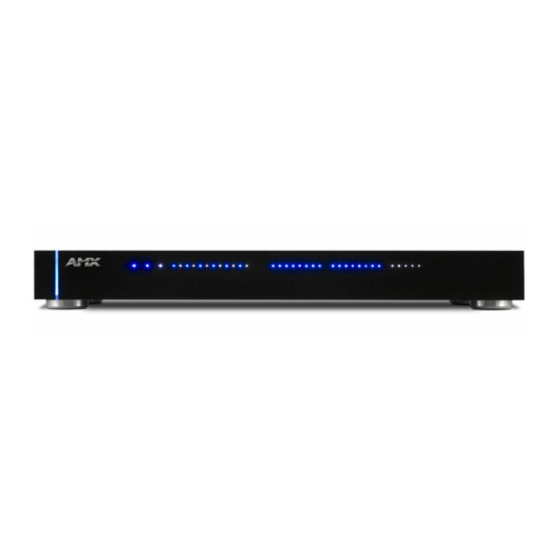
Introduction NI-3101-SIG Specifications The NI-3101-SIG (FIG. 1) provides support for 6 configurable RS-232/RS-422/RS-485 Ports, 8 IR/ Serial Output ports, 8 Digital Input/Output ports, and 8 Relays. FIG. 1 NI-3101 NetLinx Integrated Controller (front view) Power Link/Active-Status-I/O Front RS-232/422/485 Ports (1-6) Rear FIG. - Page 9 RS-232/422/485 (Ports 1 - 6) • Six RS-232/422/485 control ports using DB9 (male) connectors with XON/ Relay (Port 8) NI-3101-SIG Signature Series NetLinx Integrated Controller • White Output LED blinks when the Controller transmits data, sets channels On/Off, sends data strings, etc. White Input LED blinks when it receives data from button pushes, strings, commands, channel levels, etc.
- Page 10 SPD (speed) - Yellow LED lights On when the connection speed is 100 Mbps and turns Off when the speed is 10 Mbps. L/A (link/activity) - Green LED lights On when the Ethernet cables are connected/terminated correctly, and blinks when receiving Ethernet data packets. NI-3101-SIG Signature Series NetLinx Integrated Controller...
- Page 11 Power port Included Accessories: Other AMX Equipment: NI-3101-SIG Signature Series NetLinx Integrated Controller • Green LED indicates the state of the AXlink connector port. • Normal AXlink activity = 1 blink/second • Abnormal AXlink activity = cycle of 3 consecutive blinks and then Off •...
- Page 12 Introduction NI-3101-SIG Signature Series NetLinx Integrated Controller...
-
Page 13: Installation And Upgrading
NUMBER:PORT:SYSTEM where: NUMBER: PORT: SYSTEM: NI-3101-SIG Signature Series NetLinx Integrated Controller // Device number // Port on device // System the device belongs to 16-bit integer represents the device number 16-bit integer represents the port number (in the range 1 through the number of... -
Page 14: Installation Into An Equipment Rack
Installation and Upgrading Installation into an Equipment Rack Use the rack-mounting ears supplied with the NI-3101-SIG controller for equipment rack installations. The device comes installed with four rubber feet for flat surface installations. The maximum operating ambient temperature is 40°C. -
Page 15: Connections And Wiring
2. Set DIP switch positions according to the information listed in thePRD Mode Settings table. 3. Reconnect the 12 VDC power supply to the 2-pin 3.5 mm mini-Phoenix PWR connector. NI-3101-SIG Signature Series NetLinx Integrated Controller Position 1 Connections and Wiring... -
Page 16: Configuration Port Connections And Wiring
Downloading Boot firmware to the Master’s on-board flash memory. Do not cycle power during this process! Either no program is loaded, or the program is disabled. On-board Master is functioning normally. NI-3101-SIG Signature Series NetLinx Integrated Controller LEDs and Blink Patterns STATUS OUTPUT INPUT (blue) -
Page 17: Port Assignments And Functionality
All NI units have an AXlink port and adjacent status LED (FIG. 3). This port allows the NI to support AMX legacy AXlink devices such as G3 touch panels (ex: CP4/A) and PosiTrack Pilot devices. A green LED shows AXlink data activity. When the AXlink port is operating normally, blink patterns include: Off - No power, or the controller is not functioning properly. -
Page 18: Wiring Guidelines
3. Tighten the screws to secure the wire in the connector. Do not tighten the screws excessively. Doing so may strip the threads and damage the connector. Maximum wiring length 120.41 feet (39.70 meters) 76.45 feet (23.30 meters) 49.36 feet (15.04meters) 30.08 feet (9.17 meters) NI-3101-SIG Signature Series NetLinx Integrated Controller... -
Page 19: Wiring A Power Connection
FIG. 5. To the Integrated Controller’s AXlink/PWR connector Top view FIG. 5 Mini-Phoenix connector wiring diagram (direct data and power) NI-3101-SIG Signature Series NetLinx Integrated Controller Connections and Wiring Power Supply To the external AXlink device Top view... -
Page 20: Using The 4-Pin Mini-Phoenix Connector For Data With External Power
12 VDC power supply. Do not connect the PWR wire to the AXlink connector’s PWR (+) opening. To the external AXlink device Local +12 VDC PWR (+) power supply (coming from GND (-) an external power supply) NI-3101-SIG Signature Series NetLinx Integrated Controller Top view... -
Page 21: Db9 Device Port: Connections And Wiring
Connectors labeled A are for common; B are for output. Each relay is isolated and normally open. A metal commoning strip is supplied with each device to connect multiple relays. NI-3101-SIG Signature Series NetLinx Integrated Controller DB9 Serial Port pinouts (male connector) RS-232... -
Page 22: Relay Connections
FIG. 9 INPUT/OUTPUT connector (male) Up to eight devices may be connected to the I/O connectors on the NI-3101-SIG (FIG. 9). A contact closure between the GND and an I/O port is detected as a Push. When used for voltage inputs, the I/O port detects a low signal (0 - 1.5 VDC) as a Push, and a high signal (3.5 - 5 VDC) as a Release (this IO port uses 5V logic but can handle up to 12V... -
Page 23: Ir/Serial Port: Connections And Wiring
I/O Port Wiring Specifications - NI-3101-SIG Signal I/O 1 I/O 2 I/O 3 I/O 4 I/O 5 I/O 6 I/O 7 I/O 8 12 VDC IR/Serial Port: Connections and Wiring Up to eight IR- or Serial-controllable devices may be connected to the IR/Serial connectors on the rear of the NI-3101 (FIG. -
Page 24: Ethernet/Rj-45 Port: Connections And Wiring
(yellow) when the connection speed is 100 Mbps and turns Off when speed is 10 Mbps. ETHERNET 10/100 NI-3101-SIG Signature Series NetLinx Integrated Controller 1 2 3 4 5 6 7 8 1 2 3 4 5 6 7 8... -
Page 25: Ethernet Ports Used By The Integrated Controllers
1319, or disable ICSP over Ethernet completely from either Telnet or the Program Port located on the rear of the Master itself. This type of communication is used by the various AMX products for communication amongst themselves. integration! -
Page 26: Replacing The Timekeeper Battery
The NI-3101-SIG uses a combination lithium battery and clock crystal package called a Timekeeper. Only one Timekeeper unit is installed within a given NI-3101-SIG. The battery can be expected to have up to 3 years of usable life under very adverse conditions. Actual life is appreciably longer under normal operating conditions. -
Page 27: Configuration And Firmware Update
The NI-3101-SIG Kit file begins with 2105_04_X100. Before beginning: 1. Set up and configure the NI-3101-SIG. Refer to the previous Installation and Upgrading section. 2. Verify that the latest version of NetLinx Studio has been installed on the PC. If an update is necessary, download the latest NetLinx Studio software from www.amx.com. -
Page 28: Communicating With The Master Via The Program Port
5. Click the Serial radio button (from the Transport Connection Option section) to select communication to the on-board Master via a (Serial) COM port. 6. Click the Edit Settings button to open the Serial Settings dialog (FIG. 15). FIG. 15 Serial Settings dialog box NI-3101-SIG Signature Series NetLinx Integrated Controller... -
Page 29: Setting The System Value
This process should be done while communicating to the Master via a Serial connection. System Address (default for initial system is 1) Check-Off to verify change FIG. 16 Device Addressing tab (changing the system value) NI-3101-SIG Signature Series NetLinx Integrated Controller Configuration and Firmware Update... -
Page 30: Using Multiple Netlinx Masters
The Device Addressing dialog will not allow you to alter the NetLinx Master address value. Example: Using NetLinx Studio v 2.x to work with an NXC-ME260/64 and NI-3101-SIG: The NXC-ME260/64 could be assigned to System 1 (with a value of 00000). -
Page 31: Changing The Device Address Of A Netlinx Device
If the Master does not appear in the Workspace window, make sure that the Master’s System Number (from within the Device Addressing tab) is correctly assigned. If this issue persists, use a system value of zero (0) on the Master. NI-3101-SIG Signature Series NetLinx Integrated Controller Configuration and Firmware Update... -
Page 32: Recommended Netlinx Device Numbers
• ICSNet Panels: DMS, IMS, and future panels • Virtual devices: these start at 33001 • Dynamic devices: the actual range used by Master • Virtual devices: the actual range used by Master NI-3101-SIG Signature Series NetLinx Integrated Controller Assign the new value to the Controller... -
Page 33: Resetting The Factory Default System And Device Values
System. This establishes a new connection to the specified System and populates the list with devices on that system. 8. Use Ctrl+S to save the existing NetLinx Project with the new changes. NI-3101-SIG Signature Series NetLinx Integrated Controller Configuration and Firmware Update... -
Page 34: Obtaining The Master's Ip Address (Using Dhcp)
Master be rebooted. 8. Click OK to accept the change to the new IP/DNS information. 9. Click the Reboot Master button and select Yes to close the Network Addresses dialog. NI-3101-SIG Signature Series NetLinx Integrated Controller... - Page 35 IP Settings section of the System Connection page (on the touch panel) or within the Address field on the web browser. 12. Complete the communication process by continuing on to the Communicating with the NI Device via an IP section on page 31. NI-3101-SIG Signature Series NetLinx Integrated Controller Configuration and Firmware Update...
-
Page 36: Assigning A Static Ip To The Netlinx Master
Verify that these IP values are also entered into the related fields within either the IP Settings section of the System Connection page (on the touch panel) or within the Address field on the web browser. NI-3101-SIG Signature Series NetLinx Integrated Controller... -
Page 37: Communicating With The Ni Device Via An Ip
5. Click on the NetLinx Master radio button to indicate you are working with a NetLinx Master, and click on the TCP/IP radio button to indicate a connection to the Master via an IP Address. NI-3101-SIG Signature Series NetLinx Integrated Controller Configuration and Firmware Update... - Page 38 10. Click the Select button to make the new entry the currently used IP Address communication parameter. 11. Click OK to return to the Communications Settings dialog and place a checkmark within the Authentication Required radio box if the Master has been previously secured with a username/ password. NI-3101-SIG Signature Series NetLinx Integrated Controller...
- Page 39 IP Address if communication fails. Press the Retry button to reconnect using the same communication parameters. Press the Change button to alter the communication parameters and repeat steps 4 thru 18. NI-3101-SIG Signature Series NetLinx Integrated Controller Configuration and Firmware Update...
-
Page 40: Verifying The Current Version Of Netlinx Master Firmware
4. If either the on-board NI Master or Integrated Controller is not the latest firmware version, follow the procedures outlined in the following sections to obtain these Kit files from www.amx.com and then transfer the new firmware Kit files to the device. -
Page 41: Upgrading The On-Board Master Firmware Via An Ip
5. If the on-board Master firmware being used is not current, download the latest Kit file by first logging in to www.amx.com and then navigating to Tech Center > Firmware Files to locate the desired file from within the NetLinx section of the web page. - Page 42 Wait until the STATUS LED is the only LED to blink. Selected on-board Master firmware file Device and System Number must match the Device and System values listed in the Workspace window NI-3101-SIG Signature Series NetLinx Integrated Controller Description field for selected Kit file Firmware download status...
-
Page 43: Upgrading The Ni Controller Firmware Via Ip
5. If the NI Controller firmware being used is not current, download the latest Kit file by first logging in to www.amx.com and then navigating to Tech Center > Firmware Files, locating the desired file from within the NI Series Device (Integrated Controller) section of the web page. - Page 44 System and populates the list with the devices and their firmware versions currently on the system. Description field for selected Kit file Firmware download status Device and System Number must match the Device and System values listed in the Workspace window NI-3101-SIG Signature Series NetLinx Integrated Controller...
- Page 45 Try selecting a different IP Address if communication fails. Press the Retry button to reconnect using the same communication parameters. Press the Change button to alter the communication parameters and repeat steps 2 thru 11. NI-3101-SIG Signature Series NetLinx Integrated Controller...
- Page 46 Configuration and Firmware Update NI-3101-SIG Signature Series NetLinx Integrated Controller...
-
Page 47: Netlinx Security Within The Web Server
This NetLinx Web Server is used to power Master security, data encryption, and SSL certificate/ encryption features on current AMX Masters such as the ME260/64 and NI-Series of Controllers. This web server not only provides username and password security for the target Master, but also a new level of secure encryption for ICSP data communication among the various AMX software and hardware components. -
Page 48: Netlinx Security Terms
SSL works by using a private key to encrypt data that's transferred over the SSL connection. By default, current Masters are shipped with a default AMX SSL certificate called sslexample.amx.com. This pre-configured certificate can be used as a road map to create a unique certificate. -
Page 49: Accessing An Unsecured Master Via An Http Address
Refer to theUpgrading the On-board Master Firmware via an IP section on page 35 for more detailed information on how to download the latest firmware from www.amx.com. This firmware build enables SSL certificate identification and encryption, HTTPS communication, ICSP data encryption, and disables the ability to alter the Master security properties via a TELNET session. -
Page 50: Browser Application Frames
Master. Only with this type of access can a user begin to alter security or operational parameters such as access rights, Port assignments, System values, and SSL certificate usage. NI-3101-SIG Signature Series NetLinx Integrated Controller Active frame... - Page 51 By default, Master Security (and all subordinate options) are disabled. If the user/group is given FTP access rights by the administrator, all directories can become accessible (read/ write/modify). NI-3101-SIG Signature Series NetLinx Integrated Controller Log In/Log Out button Account 2...
-
Page 52: Master Firmware Security Access Parameters
ICSP Connectivity (for AMX product communication) Encryption Requirement (only used if ICSP Connectivity is enabled - encrypts the data being transferred among the different AMX products) Installation of SSL functionality onto your Master causes security setup via Telnet to be disabled. Although Telnet security configuration access can no longer be used on the Master, a Terminal connection (using HyperTerminal) can still be established using the Master’s RS232 Program port. -
Page 53: Web Control
An example is a CA15 panel link opening a new window using an 800 x 600 resolution. NI-3101-SIG Signature Series NetLinx Integrated Controller NetLinx Security within the Web Server... -
Page 54: Security Features
• Use Low Color allows the user to specify the number of colors used to display the image from the panel be reduced. By reducing the numbers of colors, both the size of the information is reduced and the response delay is decreased. Security features NI-3101-SIG Signature Series NetLinx Integrated Controller... -
Page 55: Security - System Level Security Page
Requiring verification before accessing the Master - HTTP Access must be enabled. Requiring verification before altering a current Master security setting - Master Security and Configuration must be enabled. NI-3101-SIG Signature Series NetLinx Integrated Controller NetLinx Security within the Web Server Description Provides an authorized user with the ability to alter the current security options of the system assigned to the target Master. - Page 56 NetLinx Security within the Web Server Requiring verification from a communicating AMX software (such as NetLinx Studio v 2.4 or TPD4 v 2.5) before accepting communication for file/firmware transfers, the Configuration, ICSP Connectivity and Require Encryption options must be enabled.
- Page 57 Requires that any data being transmitted or received via an ICSP connection (among the various AMX products) be encrypted and that any application or hardware communicating with the Master over ICSP must provide a valid username and password.
-
Page 58: Setting The System Security Options For A Netlinx Master
Master Security components (even though they might show a checkmark, they are greyed out). An open Master does not require a user to enter a valid username and password. Telnet Port ICSP Port HTTP Port HTTP/SSL Port SSH Port FTP Port Master NI-3101-SIG Signature Series NetLinx Integrated Controller... - Page 59 The ICSP Connectivity option is required to allow authenticated and/or secure communication between the Master and other AMX hardware/software. To establish an authenticated ICSP connection (where the external AMX hardware/software would have to provide a valid username and password). This option must be enabled (checked).
-
Page 60: Icsp Authentication
• This button is greyed-out if the current user doesn’t have the right to modify the rights for that group. Note: The “administrator” group can’t be modified unless you are logged in as a user with Configuration Access rights. NI-3101-SIG Signature Series NetLinx Integrated Controller... - Page 61 A User represents a single potential client of the NetLinx Master, while a Group represents a logical collection of users. Any properties possessed by groups (example: access rights, directory associations, etc.) are inherited by all the members of the group. NI-3101-SIG Signature Series NetLinx Integrated Controller NetLinx Security within the Web Server Description This page allows an authorized user to configure the options for either a pre-existing or new group.
-
Page 62: Adding A New Group
5. Click the Update button to save the changes to the target Master. If the modification of any of this page’s parameters has no errors, a “Group updated successfully” notice is displayed at the top of the page. 6. Click the Back button to return to the Manage Groups page. NI-3101-SIG Signature Series NetLinx Integrated Controller... -
Page 63: Deleting An Existing Group
(none) as a group. When returning to delete the desired group, the "Group deleted successfully" notice is displayed. NI-3101-SIG Signature Series NetLinx Integrated Controller NetLinx Security within the Web Server... -
Page 64: Security - User Level Security Page
Properties page. • Clicking this button opens the selection’s corresponding Configure User Properties page. • This button is greyed-out if the current authorized user doesn’t have the right to modify the rights for that user. NI-3101-SIG Signature Series NetLinx Integrated Controller... - Page 65 HTTP Access Telnet Access Configuration Access ICSP Access NI-3101-SIG Signature Series NetLinx Integrated Controller NetLinx Security within the Web Server Description This page allows an authorized user to configure the options for either a pre-existing or new user. Configuration on this page consists of both the options and directories to which the user is granted access.
-
Page 66: Adding A New User
• A Directory Association is a path that defines the directories and files a particular user or group can access via the Web Server on the NetLinx Master. • The displayed folders are the directory pathnames present on the target Master. NI-3101-SIG Signature Series NetLinx Integrated Controller... -
Page 67: Modifying The Properties Of An Existing User
“User updated successfully” is displayed at the top of the page. 7. Click the Back button to return to the Manage Users page. NI-3101-SIG Signature Series NetLinx Integrated Controller NetLinx Security within the Web Server Group Rights are... -
Page 68: Deleting An Existing User
This section of the Navigation frame (FIG. 40) provides the ability to both manage existing and pending license keys, manage the active NetLinx system communication parameters, and configure/modify the SSL certificates on the target Master. FIG. 40 System Settings - System an Licensing Management System and Licensing management features NI-3101-SIG Signature Series NetLinx Integrated Controller... -
Page 69: System Settings - Manage System Page
Manage System Page Components Feature Online Tree menu: Online Tree: Selection Item Properties: NI-3101-SIG Signature Series NetLinx Integrated Controller NetLinx Security within the Web Server Management menu options (System, Device, and Port) Control/Emulate & Diagnostics buttons are available from within all menu options... - Page 70 • This button is available from within all Management menus. • Allows a user to both change the port numbers (used for various Web services) and configure the SSL settings used on the Master. NI-3101-SIG Signature Series NetLinx Integrated Controller...
- Page 71 Control/Emulate Diagnostics Port menu buttons: Control/Emulate Diagnostics NI-3101-SIG Signature Series NetLinx Integrated Controller NetLinx Security within the Web Server Description The selected system number: device number are displayed below these menu buttons. • Allows a user to configure the network IP/DNS settings.
-
Page 72: Manage System - System Menu Buttons
5. Click the Update button to save these settings to the target Master. The message "Time/date set successfully" is displayed if the update process had no problems. NI-3101-SIG Signature Series NetLinx Integrated Controller... -
Page 73: System Menu - Changing The System Number
Online Tree (left frame). For example, when navigating down to a specific channel on a device, the Control/Emulate page then populates the D:P:S and Channel Code fields. NI-3101-SIG Signature Series NetLinx Integrated Controller NetLinx Security within the Web Server Current... - Page 74 Selecting this option adds a Push button with the Channel Code section of this page. 6. Enter a System Number, Device Number, and Port Number into the appropriate fields. These values correspond to the device to be controlled, whether real or fictitious. NI-3101-SIG Signature Series NetLinx Integrated Controller...
- Page 75 (prepended with a $), and are comma-delimited. String Literals start and end with single quotes ( ' ). To escape a single quote, use ''' (three single quotes). NI-3101-SIG Signature Series NetLinx Integrated Controller NetLinx Security within the Web Server Minimum Value...
-
Page 76: Manage System - Diagnostics
4. Use the Refresh Interval drop-down to select from the following values: 2 seconds, 5 seconds, or 10 seconds. This refresh interval allows you to select how often the messages are updated. Selected device Device Configuration dialog NI-3101-SIG Signature Series NetLinx Integrated Controller NetLinx Notification types... -
Page 77: Setting Up And Removing A Diagnostic Filter
Diagnostic Configuration Dialog Feature Update: Remove: NI-3101-SIG Signature Series NetLinx Integrated Controller NetLinx Security within the Web Server Description Click this button once you have completed setting up your filter. The popup then closes and returns you to the Diagnostics window. - Page 78 • Command To Device: Generates a message with a command to the target device. • Status Messages: Generates a message with a change in the target device’s status. • Custom Events From Device: Generates a message with a custom event occurring from the target device. NI-3101-SIG Signature Series NetLinx Integrated Controller...
- Page 79 NetLinx Master controller. This message field is a text box, where the text within it may be selected and then copied or pasted for storage. NI-3101-SIG Signature Series NetLinx Integrated Controller NetLinx Security within the Web Server...
-
Page 80: Setting The Master's Port Configurations
Certificate request into their clipboard and then send it to the CA. Takes the user to the Import Certificate page where they can import and paste the raw text from a CA issued Certificate. NI-3101-SIG Signature Series NetLinx Integrated Controller Disabling the HTTP Port requires that an... - Page 81 Encryption option Software & Hardware Username and Password are required when enabled FIG. 48 Port Communication Settings NI-3101-SIG Signature Series NetLinx Integrated Controller Telnet Port SSH Port HTTP Port HTTP/SSL Port 1319 ICSP Port FTP Port NetLinx Master NetLinx Security within the Web Server...
-
Page 82: Modifying The Server Port Settings
• The default port value is 1319. • This type of communication is used by the various AMX product for communication amongst themselves. Some examples would be: NetLinx Studio communicating with a Master (for firmware or file information updates) and TPDesign4 communicating with a touch panel (for panel page and firmware updates). - Page 83 If the Online Tree contents do not refresh within a few minutes, press the browser’s Refresh button and reconnect to the Master. NI-3101-SIG Signature Series NetLinx Integrated Controller NetLinx Security within the Web Server Description The port value used by web browser to securely communicate between the web server UI and the target Master.
-
Page 84: Ssl Server Certificate Creation Procedures
1. Navigate to the Server Certificate page by clicking System Settings > Manage System > Server > Create SSL Certificate to open the Server Certificate page (FIG. 49). FIG. 49 Create an SSL Certificate dialog Server Certificate - available actions NI-3101-SIG Signature Series NetLinx Integrated Controller... - Page 85 Organization Name Organizational Unit City/Location State/Province Country Name Action NI-3101-SIG Signature Series NetLinx Integrated Controller NetLinx Security within the Web Server Description Updates the target Master with the information entered on this page. • This process can take a few minutes.
-
Page 86: Server - Display Ssl Server Certificate Information
10. Choose Self Generate Certificate from the drop-down list. certificate is generated and installed into the Master in one step. 11. Click Update to save the new encrypted certificate information to the Master. When this request is submitted, the NI-3101-SIG Signature Series NetLinx Integrated Controller... -
Page 87: Server - Regenerating An Ssl Server Certificate Request
This domain name must be associated to a resolvable URL Address when creating a request for a purchased certificate. The address does not need to be resolvable when obtaining a free certificate. NI-3101-SIG Signature Series NetLinx Integrated Controller NetLinx Security within the Web Server... - Page 88 This refreshed the Server Certificate page and if the certificate request was successful, displays a "Certified request generated" message. 12. Follow the exporting and importing an SSL certificate procedures outlined within the following section. NI-3101-SIG Signature Series NetLinx Integrated Controller...
-
Page 89: Common Steps For Requesting A Certificate From A Ca
Certificate section on page 81 for the procedures necessary to generate the certificate text file. 6. Follow the procedures outlined in the following section to export the data to the CA. NI-3101-SIG Signature Series NetLinx Integrated Controller NetLinx Security within the Web Server... -
Page 90: Server - Exporting An Ssl Certificate Request
YOU CANNOT REQUEST ANOTHER CERTIFICATE UNTIL THE PREVIOUS REQUEST HAS BEEN FULFILLED. Doing so voids any information received from the previously requested certificate and it becomes nonfunctional if attempted to be used. Certificate text field NI-3101-SIG Signature Series NetLinx Integrated Controller... -
Page 91: Server - Importing A Ca Created Ssl Certificate
Server Certificate. This public key is based off the submitted Master key from the original request. Regenerating a previously requested and installed certificate invalidates the previously purchased certificate because the Master Key has been changed. NI-3101-SIG Signature Series NetLinx Integrated Controller NetLinx Security within the Web Server Certificate text field... -
Page 92: Manage System - Device Menu Buttons
3. Click the Network Settings button to open the Network Settings dialog (FIG. 52). This dialog allows a user to set up the network settings for the specified device. The fields are populated with the current settings when initially loaded. FIG. 52 Network Settings dialog NI-3101-SIG Signature Series NetLinx Integrated Controller... - Page 93 Master, the browser is directed back to the Manage WebControl Connections page. If security is enabled, the browser is directed to the initial Username/Password page to enter personal access information. NI-3101-SIG Signature Series NetLinx Integrated Controller NetLinx Security within the Web Server Description Use this field to view/edit the target Master's current Host Name.
-
Page 94: Device Menu - Developing A Url List
4. Add a new URL to the list by pressing the New button, which opens the Add New URL dialog. 5. Enter either an IP Address or a resolvable name (ex: www.amx.com) into the URL field. 6. Enter the Port number used to connect to the other device within the Port field. The default port provided in 1319, which is used for ICSP communication. -
Page 95: Device Menu - Changing The Device Number
Device Number dialog The current device number is also shown just below the System menu buttons. 4. Enter a new numeric value into the New Device Number field. NI-3101-SIG Signature Series NetLinx Integrated Controller NetLinx Security within the Web Server Current... -
Page 96: Device Menu - Controlling Or Emulating A Device
4. Click the Refresh button to update the information on-screen. Device Menu - Running a Diagnostic Filter Refer to the procedures outlined within theManage System - Diagnostics section on page 70 for more information. NI-3101-SIG Signature Series NetLinx Integrated Controller... -
Page 97: System Settings - Manage License
System Settings - Add New License Key page 3. Enter the Product ID (certificate number) provided with the product into the Product ID fields. NI-3101-SIG Signature Series NetLinx Integrated Controller NetLinx Security within the Web Server New button allows for the... -
Page 98: Removing A License
NetLinx Security within the Web Server 4. Contact the AMX Sales department with both the product serial number (or certificate number) and the serial number of target Master to register your product and in turn receive the necessary Key information (typically 32 to 36 digits in length) which is then entered into the Key fields on this page. -
Page 99: System Settings - Manage Netlinx Devices
Refresh List: A large number of NDP-capable devices on the network can result in a large amount of network traffic occurring at the same time. NI-3101-SIG Signature Series NetLinx Integrated Controller NetLinx Security within the Web Server Description Clicking this button causes the entries to be temporarily deleted... - Page 100 Master. • Lost: Indicates that the device has tried to establish communication with it's associated or “bound” Master, but was after a period of time, unable to establish communication. NI-3101-SIG Signature Series NetLinx Integrated Controller...
-
Page 101: Manage Netlinx Devices - Displaying Ndp-Capable Devices
Master whose pages are currently being viewed (displayed as This Master within the Status column). - Once this button is pressed, the device then shows up as Bound (within the Status column). NI-3101-SIG Signature Series NetLinx Integrated Controller NetLinx Security within the Web Server Expanded listing of a Master containing... -
Page 102: Manage Netlinx Devices - Obtaining Netlinx Device Information
(00:90:9f:90...). If this device is ever unbound from this Master (using the Unbind button), its Master MAC Address would be left blank. of the Master. NI-3101-SIG Signature Series NetLinx Integrated Controller NetLinx Master’s associated property information (displayed via a mouse-over popup dialog) NDP device’s associated... -
Page 103: System Settings - Manage Other Devices - Dynamic Device Discovery
Navigation frame). This page (FIG. 63) (within build 323 or higher) is used as the entry point for the management of all 3rd party Dynamically Discovered Devices. FIG. 63 System Settings - Manage Other Devices page NI-3101-SIG Signature Series NetLinx Integrated Controller NetLinx Security within the Web Server Links to additional DDD pages... - Page 104 • When the Enable Auto Bind option is not selected, no auto-binding activity takes place and all binding of the newly discovered devices must be accomplished manually via the Web control interfaceManage Other Devices - Manage Device Bindings section on page 102. NI-3101-SIG Signature Series NetLinx Integrated Controller...
- Page 105 Clicking this button causes the current selected checkbox values to be saved into the system. Internet (either AMX's site or a device specified site) for a device’s compatible Duet modules. This capability is automatically disabled if the Master does not have Internet connectivity.
- Page 106 Delete Selected Archive Selected Select File to Upload FIG. 64 System Settings - AMX License Agreement page Description • Clicking this button deletes a selected module from the /unbound directory. Any corresponding module within the /bound directory will NOT be deleted. Bound modules must be...
-
Page 107: What Is Dynamic Device Discovery
Binding: Device Discovery: SDK Class: Polling: NI-3101-SIG Signature Series NetLinx Integrated Controller NetLinx Security within the Web Server Description • A Duet Device (41000-42000) that is used as a control interface to a physical device. This is also referred to as the Duet virtual device. -
Page 108: What Is The Difference Between Program And Run-Time Defined Binding
(including the defined "friendly name"), the Duet virtual D:P:S, and the associated Duet Device SDK class (indicating the type of the device). This information would have been pre-coded into the NetLinx file currently on the target Master (FIG. 65). NI-3101-SIG Signature Series NetLinx Integrated Controller... -
Page 109: Configuring Application-Defined Devices
Static Bound application devices specify both a Duet virtual device and its associated Device SDK class type, as well as a NetLinx physical device port to which the application device is ALWAYS associated (i.e. statically bound). NI-3101-SIG Signature Series NetLinx Integrated Controller DUET_DEV_POLLED ). Sample code can be found within the DEFINE_START... - Page 110 Physical Device column. If an associated Duet module has been started to communicate with the device, Dynamic application devices (Bind/Unbind) Static bound application devices (blank/Release) Device’s associated property information (displayed via a mouse-over popup dialog) NI-3101-SIG Signature Series NetLinx Integrated Controller...
- Page 111 (Duet virtual device). If the Cancel button is selected, the binding activity is then aborted. - A mouse-over popup dialog is provided to display the properties associated with each discovered physical device that is listed (FIG. 67). NI-3101-SIG Signature Series NetLinx Integrated Controller Discovered physical device properties...
-
Page 112: Manage Other Devices Menu - Viewing Discovered Devices
Internet or from the physical device itself, provided the device has an inboard HTTP or FTP server. If Module Search via Internet is NOT enabled, the search does NOT query the AMX online database nor will it pull any manufacturer specified URLs that do not match the IP Address of the physical device itself. - Page 113 Master. These modules will remain resident in the /unbound directory until they are manually deleted via the Manage Other Devices main web page. Refer to theSystem Settings - Manage Other Devices - Dynamic Device Discovery Pages section on page 97. NI-3101-SIG Signature Series NetLinx Integrated Controller NetLinx Security within the Web Server...
-
Page 114: Manage Other Devices Menu - Creating A New User-Defined Device
DocumentCamera SlideProjector HVAC Switcher Keypad Text Keypad Light Monitor Utility Motor MultiWindow VideoConferencer PoolSpa VideoProcessor PreAmpSurroundSoundProcessor VideoProjector Receiver VideoWall Security System VolumeController Sensor Device Weather SettopBox NI-3101-SIG Signature Series NetLinx Integrated Controller List of discovered physical devices (manually entered info) -
Page 115: How Do I Write A Program That Uses Dynamic Device Discovery
Determine whether the physical device D:P:S should be polled to discover the connected devices. Only serial ports should be polled. Polled is a boolean integer which is part of the NetLinx AXI file. NI-3101-SIG Signature Series NetLinx Integrated Controller NetLinx Security within the Web Server DEV netlinxDevice,... -
Page 116: How Do I Configure A Run-Time Installation
- The location of these modules can be either indeterminate (in which case they will reside on the amx.com website) or in some cases be required by the manufacturer to reside in their own specific source location (such as the manufacturer’s own website or found within the target unit itself). -
Page 117: Accessing An Ssl-Enabled Master Via An Ip Address
(ex: https://198.198.99.99). This https is used to communicate with the target Master via the pre-configured HTTPS/SSL Port. 3. Press Enter to begin the communication process between the target Master and your computer. NI-3101-SIG Signature Series NetLinx Integrated Controller NetLinx Security within the Web Server... - Page 118 Security window of the Security tab, and there is a problem with the site’s certificate. Problems with the certificate can result from: The default AMX certificate, self generated, or self-signed certificate has not been approved by a CA. The above mentioned certificates are not part of that computer’s web browser list of trusted sites.
- Page 119 17. Click the save password check mark field to have the browser remember this password during consecutive login sessions. 18. Click OK to access the target Master. 19. The first page displayed within the open browser window is the Manage WebControl Connections page. NI-3101-SIG Signature Series NetLinx Integrated Controller NetLinx Security within the Web Server...
-
Page 120: Using Your Netlinx Master To Control The G4 Panel
If the Master has been previously configured for secured communication, click OK to accept the AMX SSL certificate (if SSL is enabled) and then enter a valid username and password into the fields within the Login dialog. 4. Click OK to enter the information and proceed to the Master’s Manage WebControl Connections window. - Page 121 The G4 WebControl application is sent by the panel to the computer that is used for communication. Once the application is installed, this popup no longer appears. This popup only appears if connecting to the target panel using a different computer. NI-3101-SIG Signature Series NetLinx Integrated Controller NetLinx Security within the Web Server Compatible...
-
Page 122: What To Do When A Certificate Expires
Refer to theServer - Creating a Request for an SSL Certificate section on page 81 for more information on how to request an externally generated certificate. IP Address of touch panel - obtained from IP Settings section of the panel’s System Connection page NI-3101-SIG Signature Series NetLinx Integrated Controller... -
Page 123: Netlinx Security With A Terminal Connection
The user has access to the ICSP data encryption functionality. Enabling encryption of ICSP data requires that both: - AMX hardware or software communicating with the target Master provide a valid username and password. - All communication is encrypted. -
Page 124: Initial Setup Via A Terminal Connection
The 'help security' and 'setup security' functions are only available via a direct RS232/USB connection. They are not available under telnet (such as via a TCP/IP (Winsock) connection). Logout and close secure session Access the security setup menus NI-3101-SIG Signature Series NetLinx Integrated Controller... -
Page 125: Option 1 - Set System Security Options For Netlinx Master (Security Options Menu)
If NetLinx Master security is not enabled, you will see the following: NetLinx Master security is Disabled Do you want to enable security for the NetLinx Master? (y or n): NI-3101-SIG Signature Series NetLinx Integrated Controller NetLinx Security with a Terminal Connection Enter... - Page 126 Any changes made to the Master, from within the web browser are instantly reflected within the Terminal session without the need to reboot. is selected (from the Select to change current security option listing), the <Enter> NI-3101-SIG Signature Series NetLinx Integrated Controller to exit the menu and return to...
-
Page 127: Option 2 - Display System Security Options For Netlinx Master
Security Menu and make changes to the Master’s security parameters. This selection enables/disables security of ICSP data being transmitted between the target Master and external AMX components (software and hardware such as TPD4 and a Modero Touch Panel). This selection enables/disables the need to require encryption of the ICSP communicated data. -
Page 128: Option 4 - Edit User
Security Setup prompt (at the bottom of the Main Security Menu) to edit ) that you want to edit, and press by itself to exit the menu and return to the <Enter> NI-3101-SIG Signature Series NetLinx Integrated Controller "). A username techpubs to display the Edit User Menu... - Page 129 The above listing displays the current access rights. Entering a selection value simply toggles the access right selected (if for example you enter 4, the HTTP Access rights toggle from disabled to enabled upon a refresh of the listing). NI-3101-SIG Signature Series NetLinx Integrated Controller NetLinx Security with a Terminal Connection Description This selection prompts you to enter the new password (twice) for the user.
-
Page 130: Option 5 - Delete User
This selection enables/disables the need to require encryption of the ICSP communicated data. If enabled: - All communicating AMX components must authenticate with a valid username and password before beginning communication with the Master. - All communication must be encrypted. -
Page 131: Option 6 - Show The List Of Authorized Users
Access is limited to the user (i.e. doc:user) directory of the Master. All subdirectories of the user directory can be granted access. NI-3101-SIG Signature Series NetLinx Integrated Controller NetLinx Security with a Terminal Connection... - Page 132 All files in the user1 and its sub-directories are granted access. and its subdirectories are granted access. results.txt is a file in the user directory and access is granted to that file. NI-3101-SIG Signature Series NetLinx Integrated Controller...
-
Page 133: Option 8 - Edit Group
1. Type 8 and <Enter> at the Security Setup prompt (at the bottom of the Main Security Menu) to edit an existing group account. A sample session response is: Select from the following list: 1) administrator 2) Group 1 3) Group 2 Select group -> NI-3101-SIG Signature Series NetLinx Integrated Controller NetLinx Security with a Terminal Connection... -
Page 134: Option 9 - Delete Group
Telnet Timeout value, in seconds. A sample session response is: Specify Telnet Timeout in seconds: 2. Enter the number of seconds before you want The Telnet session to timeout, and press <Enter> to return to the Security Setup Menu. NI-3101-SIG Signature Series NetLinx Integrated Controller... -
Page 135: Option 12 - Display Telnet Timeout In Seconds
Master is rebooted and the web browser connection is refreshed. Any changes made to the Master, from within the web browser are instantly reflected within the Terminal session without the need to reboot. NI-3101-SIG Signature Series NetLinx Integrated Controller NetLinx Security with a Terminal Connection... -
Page 136: Main Security Menu
NetLinx Master. This selection allows you to display the time a telnet session waits for a user to login. NI-3101-SIG Signature Series NetLinx Integrated Controller... -
Page 137: Default Security Configuration
The NetLinx user account is created to be compatible with previous NetLinx Master firmware versions. The administrator group account cannot be deleted or modified. NI-3101-SIG Signature Series NetLinx Integrated Controller NetLinx Security with a Terminal Connection Description When changes are made to the security settings of the Master, they are initially only changed in RAM and are not automatically saved permanently into flash. -
Page 138: Help Menu
Pings an address (IP or URL). Specify -a option for reverse lookup. Displays a list of program modules loaded. Pulses the specified channel. Reboots the device. Releases the current DHCP lease. Sets the Master-Master route mode. NI-3101-SIG Signature Series NetLinx Integrated Controller... - Page 139 SHOW ROUTE SHOW SYSTEM <S> TCP LIST TIME URL LIST <D:P:S> NI-3101-SIG Signature Series NetLinx Integrated Controller NetLinx Security with a Terminal Connection Description Sends the specified command to the device. The Command uses NetLinx string syntax. • Ex: send_command 1:1:1,"'This is a test',13,10"...
-
Page 140: Logging Into A Session
NetLinx Security with a Terminal Connection Logging Into a Session Until Telnet security is enabled, a session will begin with a welcome banner. Welcome to NetLinx v3.01.320 Copyright AMX Corp. 1999-2005 > The welcome banner is not displayed for Terminal sessions. -
Page 141: Logout
>setup security You are not authorized to access security commands If a user is authorized, or if Configuration Security is not enabled, the Main Security Menu will be displayed. NI-3101-SIG Signature Series NetLinx Integrated Controller NetLinx Security with a Terminal Connection... - Page 142 NetLinx Security with a Terminal Connection NI-3101-SIG Signature Series NetLinx Integrated Controller...
-
Page 143: Programming
NetLinx identifiers, warning on variable type conversions, and stricter syntax rules. For more information on NetLinx standards and conversion recommendations, go to www.amx.com and click on Dealers > Tech Center > Tech Notes. You can either search for the documents (such as NetLinx Programming Standards and Converting Axcess Code to NetLinx Code) or Tech Notes (TN numbers: 186, 249, 261, and 310). - Page 144 The combination of Name/Description, IP Address/URL, and IP Port are used to determine each unique listing. Example: SEND_COMMAND 0:1:0,"'G4WC "Bedroom",192.168.1.2,5900,1'" Adds the BEDROOM control device using the IP Address of 192.168.1.2. Syntax: SEND_COMMAND <D:P:S>,"'~IGNOREEXTERNALCLOCKCOMMANDS'" Example: SEND_COMMAND 0:1:0,"'~IGNOREEXTERNALCLOCKCOMMANDS'" NI-3101-SIG Signature Series NetLinx Integrated Controller...
-
Page 145: Master Ip Local Port Send_Commands
Only the Device number can be changed on the Controllers using the ID button. Port and System can not be defined. NI-3101-SIG Signature Series NetLinx Integrated Controller Description This is only available for Type 2 and Type 3 Local Ports. Type 2 and Type 3 are referring to the protocol type that is part of the IP_CLIENT_OPEN call (4th parameter). -
Page 146: Device:port:system (D:p:s)
16-bit integer represents the system number (0 = this system) 115200 (default) None None NI-4x00 & NI-3x00) Port Assignments Serial Relays I/Os Count NI-3101-SIG Signature Series NetLinx Integrated Controller Ports 1 - 7 Port 8 Ports 9 -16 Port 17 8 relays and 8 I/O's... - Page 147 DEVICE STATUS <D:P:S> DISK FREE DNS LIST <D:P:S> ECHO OFF ECHO ON GET DEVICE HOLDOFF NI-3101-SIG Signature Series NetLinx Integrated Controller Description Displays the current date and day of the week. Example: >DATE 10/31/2004 Wed Sets the Master to holdoff devices and not allow them to report online until the NetLinx program has completed executing the DEFINE_START section.
- Page 148 MSG On sets the terminal program to display all messages generated by the Master. MSG OFF disables the display. Example: > MSG ON Extended diagnostic information messages turned on. > MSG OFF Extended diagnostic information messages turned off. NI-3101-SIG Signature Series NetLinx Integrated Controller...
- Page 149 PASS <D:P:S or NAME> PING <IP ADDRESS> PROGRAM INFO NI-3101-SIG Signature Series NetLinx Integrated Controller Description Turns off a channel on a device. The device can be on any system the Master you are connected to can reach. You can specify the device number, port, and system, or the name of the device that is defined in the DEFINE_DEVICE section of the program.
- Page 150 You can specify the device number, port, and system; or the name of the device defined in the DEFINE_DEVICE section of the NetLinx Program. The data of the string is entered with NetLinx string syntax. NI-3101-SIG Signature Series NetLinx Integrated Controller...
- Page 151 SET DUET MEMORY SET ETHERNET MODE <CMD> SET FTP PORT NI-3101-SIG Signature Series NetLinx Integrated Controller Description Prompts you to enter the new date for the Master. When the date is set on the Master, the new date will be reflected on all devices in the system that have clocks (i.e.
- Page 152 Enter Gateway IP: 192.168.21.2 You have entered: Host Name MLK_INSTRUCTOR Type DHCP Gateway IP 192.168.21.2 Is this correct? Type Y or N and Enter -> y Settings written. Device must be rebooted to enable new settings. NI-3101-SIG Signature Series NetLinx Integrated Controller...
- Page 153 Configuration Port Commands (Cont.) Command SET LOG COUNT SET QUEUE SIZE SET SSH PORT SET TELNET PORT NI-3101-SIG Signature Series NetLinx Integrated Controller Description Sets the number of entries allowed in the message log. Example: >SET LOG COUNT Current log count = 1000...
- Page 154 Type A and Enter to Add a URL or Enter to exit. -> a Enter URL -> 192.168.21.200 Enter Port or hit Enter to accept default (1319) -> Enter Type (Enter for permanent or T for temporary) -> URL Added successfully. NI-3101-SIG Signature Series NetLinx Integrated Controller...
- Page 155 Configuration Port Commands (Cont.) Command SHOW BUFFERS SHOW COMBINE SHOW DEVICE <D:P:S> NI-3101-SIG Signature Series NetLinx Integrated Controller Description Displays a list of various message queues and the number of buffers in each queue Example: show buffers Thread Queued ----------- ---- ---- ----...
- Page 156 16: 11-01-2001 THU 14:05:51 Interpreter CIpEvent::OnLine 5001:12:50 17: 11-01-2001 THU 14:05:51 Interpreter CIpEvent::OnLine 5001:11:50 18: 11-01-2001 THU 14:05:51 Interpreter CIpEvent::OnLine 5001:10:50 19: 11-01-2001 THU 14:05:51 Interpreter CIpEvent::OnLine 5001:9:50 20: 11-01-2001 THU 14:05:51 Interpreter CIpEvent::OnLine 5001:8:50 NI-3101-SIG Signature Series NetLinx Integrated Controller...
- Page 157 SHOW MAX BUFFERS SHOW MEM SHOW NOTIFY SHOW REMOTE SHOW ROUTE NI-3101-SIG Signature Series NetLinx Integrated Controller Description Displays a list of various message queues and the maximum number of message buffers that were ever present on the queue. Example:...
- Page 158 Displays the list of URL addresses programmed in the Master (or another system). Example: >URL LIST The following URLs exist in the URL connection list ->Entry 0-192.168.13.65:1319 IP=192.168.13.65 Entry 1-192.168.13.200:1319 IP=192.168.13.200 State=Issue Connect NI-3101-SIG Signature Series NetLinx Integrated Controller FWID Version 00256 v2.10.75 00257 v2.00.77 00258 v2.00.76...
-
Page 159: Esc Pass Codes
If an ALT 255 is entered, two 255 characters are sent (per the Telnet RAFT). If the code to go back to command mode is entered (ALT 29 which is ^]), the character is not sent, but Telnet command mode is entered. NI-3101-SIG Signature Series NetLinx Integrated Controller Description Exit Pass Mode: Typing a plus (shift =) followed by another plus followed by an ESC (the escape key) followed by another escape exits the pass mode. -
Page 160: Led Disable/Enable Send_Commands
(default setting). When activity occurs on a port(s) or Controller, the LEDs illuminate. Syntax: SEND_COMMAND <DEV>,'LED-EN' Example: SEND_COMMAND System_1,'LED-EN' Enables the System_1 Controller's LEDs. Reflects the state of the CTS input if a 'CTSPSH' command was sent to the port. NI-3101-SIG Signature Series NetLinx Integrated Controller... -
Page 161: Rs-232/422/485 Send_Commands
Disable Pushes, Releases, and Status information to be reported via channel 255. NI-3101-SIG Signature Series NetLinx Integrated Controller Description Disables 9-bit in 232/422/455 mode. By default, this returns the communication settings on the serial port to the last programmed parameters. This command works in conjunction with the 'B9MON' command. - Page 162 Enables sending incoming received characters to the Master. This command is automatically sent by the Master when a 'CREATE_BUFFER' program instruction is executed. Syntax: SEND_COMMAND <DEV>,"'RXON'" Example: SEND_COMMAND RS232_1,"'RXON'" Sets the RS232_1 device to transmit received characters to the Master. NI-3101-SIG Signature Series NetLinx Integrated Controller...
- Page 163 Stop and clear all characters waiting in the transmit out buffer and stops transmis- sion. XOFF Disable software handshaking (default). NI-3101-SIG Signature Series NetLinx Integrated Controller Description Syntax: SEND_COMMAND <DEV>,"'SET BAUD <baud>,<parity>,<data>,<stop> Variables: baud = baud rate is: 115200. parity = N (none), O (odd), E (even), M (mark), S (space).
-
Page 164: Rs-232/422/485 Send_String Escape Sequences
= 1 - 255. Measured in 1 millisecond increments. Example: SEND_STRING RS232_1,"27,19,10" Inserts a 10 millisecond delay before transmitting characters to the RS232_1 device. Syntax: SEND_STRING <DEV>,"27,20,0" Example: SEND_STRING RS232_1,"27,20,0" Sets the RTS hardware handshake's output to high on the RS232_1 device. NI-3101-SIG Signature Series NetLinx Integrated Controller... -
Page 165: Ir / Serial Ports Channels
IR ports - Ports 9 - 16 (NI-4X000/3X00) and Ports 5 - 8 (NI-2X00). The NI series of NetLinx Masters support Serial control via the IR port when using firmware version 300 or greater. NI-3101-SIG Signature Series NetLinx Integrated Controller Description Syntax: SEND_STRING <DEV>,"27,20,1"... -
Page 166: Ir/Serial Send_Commands
You can set the Pulse and Wait times with the 'CTON' and 'CTOF' commands. Syntax: SEND_COMMAND <DEV>,"'CP',<code>" Variable: code = IR port's channel value 0 - 252 (253 - 255 reserved). Example: SEND_COMMAND IR_1,"'CP',2" Clears the active/buffered commands and pulses IR_1 port's channel 2. NI-3101-SIG Signature Series NetLinx Integrated Controller... - Page 167 IR commands being output on the designated port. NI-3101-SIG Signature Series NetLinx Integrated Controller Description Off time settings are stored in non-volatile memory. This command sets the delay time between pulses generated by the 'CH' or 'XCH' send commands in tenths of seconds.
- Page 168 You can only use the 'PON' and 'POF' commands when an IR device has a linked I/O channel. Channel 255 changes are disabled after receipt of this command. Syntax: SEND_COMMAND <DEV>,"'PON'" Example: SEND_COMMAND IR_1,"'PON'" Sends power up IR commands 27 or 9 to the IR_1 port. NI-3101-SIG Signature Series NetLinx Integrated Controller...
- Page 169 = N (none), O (odd), E (even), M (mark), S (space). data = 7 or 8 data bits. stop = 1 and 2 stop bits. Note: AMX does not recommend using a cable longer than 10 feet (3.05 meters) for the IR Ports. Example: SEND_COMMAND IR_1,"'SET BAUD 9600,N,8,1'"...
- Page 170 = IR code value 1 - 252 (253-255 reserved). Example: SEND_COMMAND IR_1, "'SP',25" Pulses IR code 25 on IR_1 device. Syntax: SEND_COMMAND <DEV>,"'XCH <channel>'" Variable: channel = 0 - 999. Example: For detailed usage examples, refer to the 'XCHM' command. NI-3101-SIG Signature Series NetLinx Integrated Controller...
- Page 171 IR/Serial Send_Commands (Cont.) Command XCHM Changes the IR output pat- tern for the 'XCH' send command. NI-3101-SIG Signature Series NetLinx Integrated Controller Description Syntax: SEND_COMMAND <DEV>,"'XCHM <extended channel mode>'" Variable: extended channel mode = 0 - 4. Example: SEND_COMMAND IR_1,"'XCHM 3'"...
-
Page 172: Input/Output Send_Commands
= Input channel 1 - 8. state = Active state HIGH or LOW (default). Example: SEND_COMMAND IO,"'SET INPUT 1 HIGH'" Sets the I/O channel to detect a high state change, and disables output on the channel. NI-3101-SIG Signature Series NetLinx Integrated Controller... -
Page 173: Troubleshooting
Masters, open different instances of NetLinx Studio and assign each Master its own System value. • Example: A site has an NXC-ME260/64 and an NI-3101-SIG. In order to work with both units. The ME260/64 can be assigned System #1 and the NI-3101-SIG can then be assigned System #2 using two open sessions of NetLinx Studio. - Page 174 • Verify the USB connectors are securely inserted into their respective ports on both the rear Configuration Port (on the NI) and on the PC. • The NI-3101-SIG is configured to a fixed Baud Rate of 115200. The benefit of setting the Ethernet mode is to keep the Master (NI Controller) from having to auto negotiate with the Network.
- Page 175 Troubleshooting NI-3101-SIG Signature Series NetLinx Integrated Controller...
- Page 176 It’s Your World - Take Control™ 3000 RESEARCH DRIVE, RICHARDSON, TX 75082 USA • 800.222.0193 • 469.624.8000 • 469-624-7153 fax • 800.932.6993 technical support • www.amx.com...