Table of Contents
Advertisement
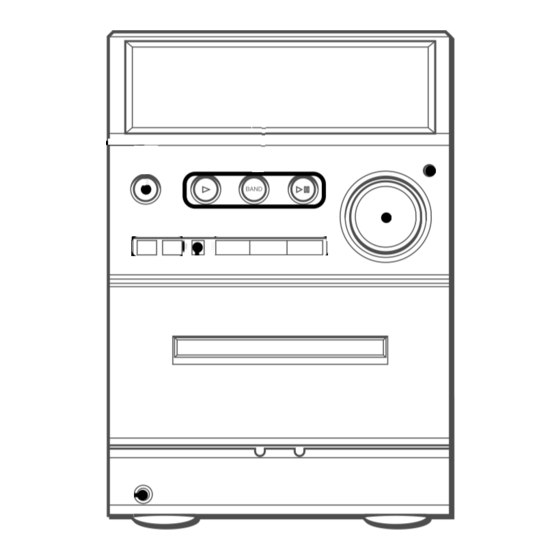
CD Stereo System
XR-EM30
U
Owner's record
For your convenience, record the model number and serial
number (you will find them on the rear of your set) in the space
provided below. Please refer to them when you contact your
Aiwa dealer in case of difficulty.
Model No.
Serial No. (Lot No.)
For assistance and information
(United States and Puerto Rico)
8C-CL6-903-01
020220BCK-H-BF
OPERATING INSTRUCTIONS
MANUAL DE INSTRUCCIONES
MODE D'EMPLOI
En
(English)
E
(Español)
F
(Français)
Advertisement
Table of Contents

Related Manuals for Aiwa XR-EM30


Summary of Contents for Aiwa XR-EM30
- Page 1 For your convenience, record the model number and serial number (you will find them on the rear of your set) in the space provided below. Please refer to them when you contact your Aiwa dealer in case of difficulty. Model No. Serial No. (Lot No.)
-
Page 2: Important Safety Instructions
WARNING To reduce the risk of fire or electric shock, do not expose this appliance to rain or moisture. CAUTION RISK OF ELECTRIC SHOCK DO NOT OPEN “CAUTION:TO REDUCE THE RISK OF ELECTRIC SHOCK, DO NOT REMOVE COVER (OR BACK). NO USER-SERVICEABLE PARTS INSIDE. -
Page 3: Table Of Contents
Outdoor Antenna Power lines - An outside antenna system should not be located in the vicinity of overhead power lines or other electric light or power circuits, or where it can fall into such power lines or circuits. When installing an outside antenna system, extreme care should be taken to keep from touching such power lines or circuits as contact with them might be fatal. -
Page 4: Preparations
PREPARATIONS Connection Plug in the AC power cord to the AC outlet after all other connections are made. 1 Connect the speakers to the main unit. Connect the right speaker to the SPEAKERS R terminals and the left to the SPEAKERS L terminals. The speaker cords with the stripes go to the 0 terminals. -
Page 5: Parts And Controls
PARTS AND CONTROLS Main unit: front/rear 1 cTAPE (REC MUTE) Starts playback. Also used to enter 4-second blank spaces during recording. TUNER/AUX/BAND Selects Radio function and the radio band. Also selects the function of external equipment connected to AUX IN jacks. Starts and pauses CD play. - Page 6 Remote control Buttons with the same or similar names on the main unit basically have the same function. 1 POWER 2 0–10, +10 CD: selects a track of the specified number. Radio: tunes in the station with the specified preset number.
-
Page 7: Adjustments Before Operation
ADJUSTMENTS BEFORE OPERATION TAPE, TUNER/AUX/BAND, POWER 6STANDBY/ON DISPLAY Power Turning the unit on Press POWER 6 STANDBY/ON (POWER on the remote control). Alternatively, press TAPE, TUNER/AUX/BAND (TUNER/BAND or AUX on the remote control) or CD. Playback will start automatically if a disc or tape is loaded. Turning the unit off Press POWER 6STANDBY/ON again. -
Page 8: Cd Operations
CD OPERATIONS DISPLAY This unit plays back finalized CD-R/RW discs as well as audio CDs. Playing a CD 1 Press OPEN to open the disc compartment. Place a disc with the label side up. Then close the disc compartment by pressing OPEN. 2 Press E to start play. -
Page 9: Programmed Play
Programmed play Plays back up to 30 selected tracks in programmed order. 1 Hold down SHIFT and press PROGRAM on the remote control in stop mode. "PRGM" flashes on the display. 2 Press the numbered buttons on the remote control to program a track. -To select the 25th track, press +10, +10 and 5. -
Page 10: Radio Operations
RADIO OPERATIONS TUNER/ AUX/BAND POWER Manual tuning 1 Press TUNER/AUX/BAND (TUNER/BAND on the remote control) repeatedly to select a band. 2 Press f or g repeatedly to tune in a station. "TUNE" is displayed when a station is tuned in. "1"... -
Page 11: Sound Adjustments
Adjustments To switch to monaural FM reception Hold down SHIFT and press TUNER MODE on the remote control so that "MONO" is displayed. To cancel, repeat the above so that "STEREO" is displayed. Tip: When FM stereo reception is poor, switching to monaural reduces noise. -
Page 12: Tape Playback
TAPE PLAYBACK REC/ REC PAUSE SYNCHRO Playback Use only type I (normal) tapes. 1 Press zPUSH EJECT to open the cassette holder. 2 Insert the tape. Insert with the exposed side down and the side to be played facing out from the unit, and press zPUSH EJECT to close the cassette holder. -
Page 13: Tape Recording
TAPE RECORDING Basic recording Use only type I (normal) tapes. 1 Press zPUSH EJECT to open the cassette holder. 2 Insert the recording tape. Insert with the exposed side down, and the side to be recorded on facing out from the unit. Press zPUSH EJECT to close the cassette holder. -
Page 14: Programmed Edit Recording
REC/ REC PAUSE Edited CD recording AI Edit Recording Preparation Prepare a tape that is longer than the CD length. When recording a whole CD, AI Edit Recording takes the length of your tape into account and rearranges the recording order of the tracks if necessary, so that no track is cut short at the end of the side. - Page 15 8 Hold down SHIFT and press CD EDIT/CHECK once to switch back to side A. 9 Press REC/REC PAUSE once. The tape is rewound to the beginning of side A. "REC MUTE" flashes on the display and the lead segment is played through for 10 seconds, and recording starts.
-
Page 16: Timer Operations
TIMER OPERATIONS POWER 6STANDBY/ON Sleep timer Turns off the unit automatically after a specified time. 1 Hold down SHIFT and press SLEEP on the remote control. "5" and "SLP" is displayed. 2 Within 6 seconds, press f or g repeatedly to set the sleep timer duration. -
Page 17: Timer Recording
Timer recording Timer recording is available only for TUNER and AUX (with an external timer) sources. 1 Hold down SHIFT and press TIMER on the remote control repeatedly so that "5 REC" is displayed. 2 Within 6 seconds, press SET. 3 Press f or g to set the timer-on time, and press SET. -
Page 18: Reference
REFERENCE Care and maintenance Occasional care and maintenance of the unit and the software are needed to optimize the performance of your unit. To clean the cabinet Use a soft and dry cloth. If the unit surfaces are extremely dirty, use a soft cloth lightly moistened with mild detergent solution. -
Page 19: Specifications
Specifications MAIN UNIT CX-LEM30 TUNER FM tuning range 87.5 MHz to 108 MHz FM usable sensitivity (IHF) 13.2 dBf FM antenna terminal 75 ohms (unbalanced) AM tuning range 530 kHz to 1710 kHz (10 kHz step) 531 kHz to 1602 kHz (9 kHz step) AM usable sensitivity 350 µV/m AM antenna... - Page 20 Printed in China...