Table of Contents
Advertisement
Advertisement
Table of Contents

Related Manuals for Airlink101 AR335W


Summary of Contents for Airlink101 AR335W
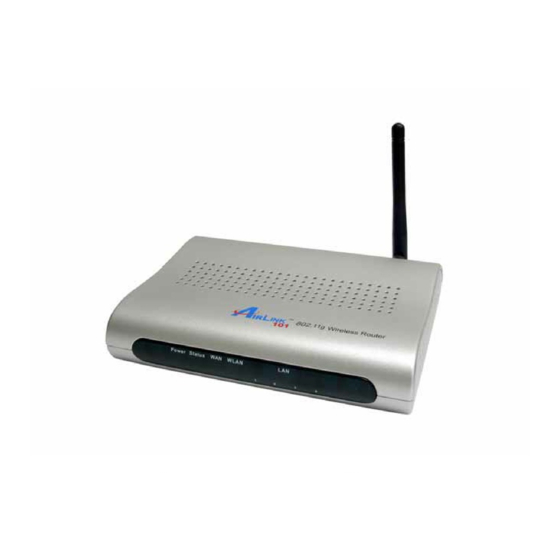
- Page 1 802.11g Wireless Broadband Router Model # AR335W User’s Manual Ver. 1A...
-
Page 2: Table Of Contents
1. Introduction... 4 2. Connecting the Router ... 5 3. Verifying Connection to the Router... 6 4. Configuring the Router ... 9 Cable Modem... 10 DSL ... 10 5. Connecting to the Router Wirelessly ... 12 6. Web Configuration Utility ... 13 6.1 Setup ... - Page 3 6.7.2 Local Network ... 39 6.7.3 Wireless Network... 40 7. Troubleshooting ... 41 Federal Communication Commission Interference Statement ... 42 Industry Canada Statement ... 43 Technical Support ... 44...
-
Page 4: Introduction
1. Introduction Congratulations on your purchase of this 802.11g Wireless Broadband Router. This product is specifically designed for Small Office and Home Office needs. It provides a complete SOHO solution for Internet surfing and is easy to configure and operate even for non-technical users. -
Page 5: Connecting The Router
2. Connecting the Router Note: Prior to connecting the router, be sure to power off your computer, DSL/Cable modem, and the router. You should setup the router with a wired connection first before attempting to setup any wireless connection. Step 1 Connect one end of a network cable to the WAN port of the router and connect the other end of the cable to the DSL/Cable modem. -
Page 6: Verifying Connection To The Router
3. Verifying Connection to the Router Step 1 Go to Start, Run, type command (for Windows 95/98/ME) or cmd (for Windows 2000/XP) and click OK. You will see the command prompt as below. Step 2 Type ping 192.168.1.1 and press Enter. You should get four reply responses back. - Page 7 Step 5 Type ipconfig/renew and press Enter. You should get an IP address of 192.168.1.x (where x is a number between 2 - 254). Proceed to Section 4, Configure the Router. If you don’t get an IP address, reset the router by holding in the reset button on the back of the router for 10 seconds while it is ON and try ipconfig/renew again.
- Page 8 Step 8 After your IP address is released, click Renew. You should get an IP address of 192.168.1.x (where x is a number between 2 - 254). If you don’t get an IP address, reset the router by holding in the reset button on the back of the router for 10 seconds while it is ON and try Renew again.
-
Page 9: Configuring The Router
4. Configuring the Router Step 1 Open the web browser and type 192.168.1.1 in the URL Address field and press Enter. Step 2 Enter admin for both the username and password fields and click Login. Step 3 Select the proper region, North America or South America, and click Apply. Warning: This device requires that the user or installer properly selects the current region of operation before using this device. -
Page 10: Cable Modem
Incorrectly selecting the current region of operation may result in illegal operation and may cause harmful interference to other systems. The user is obligated to ensure the device is operating according to the channel limitations, indoor/outdoor restrictions and license requirements for the current country of operation. Cable Modem For most cable modem users, you should be able to connect to the Internet without any configuration. - Page 11 Step 2 Enter your username and password provided by your ISP. Note: Depending on the ISP, you may need to include the domain name with your username. Example: username@sbcglobal.net...
-
Page 12: Connecting To The Router Wirelessly
Step 3 Click Apply and OK to save the settings. If you have trouble connecting to the Internet, please refer to the Troubleshooting section at the end of this manual. 5. Connecting to the Router Wirelessly Below are the default wireless settings of the router. You must configure your wireless network card to the same settings in order to establish a wireless connection to the router. -
Page 13: Web Configuration Utility
6. Web Configuration Utility This router has a built-in web configuration utility that you can use to configure the router’s settings. Simply log in to the router using your computer’s web browser. 6.1 Setup 6.1.1 Internet Setup This is the default screen when you log in to the router’s web configuration utility. You can setup your Internet connection here. -
Page 14: Network Setup
6.1.2 Network Setup Network Setup allows manually configuring TCP/IP and DHCP settings. Assigning Static DHCP Settings Step 1 Select Enabled in the DHCP Server drop-down menu Step 2 Select a computer name from the drop-down menu or enter a name associated with this Static IP Address Step 3 Enter the Static IP Address in the IP Address field... -
Page 15: Ddns
6.1.3 DDNS Dynamic DNS (DDNS) allows any user who wishes to access your server to reach it by a registered DNS name instead of an IP address. Before you enable DDNS, you need to register an account with one of the DDNS providers listed in the drop-down menu. To Enable DDNS, select the DDNS provider you have registered with and enter the required fields. -
Page 16: Time Settings
6.1.4 Time Settings Time Settings allow you to configure the router clock. Click Apply and OK to save the settings. -
Page 17: Wireless
6.2. Wireless 6.2.1 Basic Wireless Settings You can configure the router’s basic wireless settings on this screen. Mode: Choose from Mixed (g/b), Wireless-11g Only, Wireless 11b Only, or Disabled to stop wireless function. Network Name (SSID): You can change the router’s SSID in this field. Once you have changed the SSID, your network clients need to re-connect themselves using the new SSID. -
Page 18: Wireless Security
6.2.2 Wireless Security You can configure wireless security such as WEP or WPA encryption on this screen. Note: It is recommended that you use WPA-PSK or WPA2-PSK encryption over WEP if your wireless clients support it. All of the wireless clients must use the same security settings in order to connect to the router. -
Page 19: Wpa-Psk/Wp2-Psk
Note: HEX number is a number from 0 to 9 and a letter from A to F. ASCII is any number or letter. Default Key: Select a key to be the active key. Click Apply and OK to save the settings. WPA-PSK/WP2-PSK To enable WPA, select WPA-PSK or WPA2-PSK from the Security Mode. -
Page 20: Wpa With Radius
WPA with RADIUS If you are using a RADIUS server in your network for authentication, you may choose WPA or WPA2 from the Security Mode. Encryption Methods: Select either TKIP or AES as the encryption method. RADIUS Server: Enter the IP Address of your RADIUS server. RADIUS Port: Enter the port number of your RADIUS server. -
Page 21: Wireless Mac Filter
Check/Uncheck the Enable box to enable or disable this function 6.2.3 Wireless MAC Filter You can restrict certain wireless clients from accessing the router by specifying their MAC address and enabling access restriction. Select Enabled from the drop-down menu and choose whether the specified wireless clients will be prevented or permitted to access the wireless network. -
Page 22: Advanced Wireless Settings
6.2.4 Advanced Wireless Settings You can configure various advanced wireless settings on this screen. Transmission Rate: Select from Auto, 1, 2, 5.5, 6, 9, 11, 12, 18, 24, 36, 48 and 54 Mbps. Transmission Power: Select from full, half, quarter, eighth, min. CTS Protection Mode: Select from disable, enable, auto. -
Page 23: Security
6.3 Security 6.3.1 Firewall Block WAN Ping: Enable or Disable. SPI Mode: Select to enable or disable Stateful Packet Inspection. Click Apply and OK to save the settings. 6.3.2 VPN Passthrough You can select to enable or disable the passthrough of IPSec, L2TP, and/or PPTP. Click Apply and OK to save the settings. -
Page 24: Access Restrictions
6.4 Access Restrictions You can setup policies that deny or allow specific clients to access the Internet based on IP address, MAC address, URL, Domain or a specified time. 6.4.1 IP Filters Set up router filter policies based on IP addresses. Description: Enter a name for the policy. -
Page 25: Mac Filters
6.4.2 MAC Filters Setup policies that deny or allow specific clients to access the Internet based on MAC addresses. Enter Description Name: Enter a name for the policy. MAC Address: Enter a MAC address DHCP Client: Select DHCP client on your network. To view all the policies, click the Summary button. -
Page 26: Url Blocking
6.4.3 URL Blocking You can block the specified clients from accessing certain websites by URL Enter the URL or the Keyword you wish to block. Click Apply and OK to save the settings. -
Page 27: Domain Blocking
6.4.4 Domain Blocking Specify the domains to deny or allow internet access. -
Page 28: Schedule
6.4.5 Schedule Select a time range in which the specified clients can access the Internet by Day and Time. -
Page 29: Applications & Gaming
6.5 Applications & Gaming 6.5.1 Port Range Forwarding If you want to host a FTP server or online gaming, you must open up ports on the router. This page allows you to setup port forwarding for the specified applications. Before using forwarding, you should assign static IP addresses to the designated PCs. Click Apply and OK to save the settings. -
Page 30: Port Range Triggering
6.5.2 Port Range Triggering Port triggering allows the router to keep track of outgoing data for specific port numbers. The router remembers which computer sends out what data, so when the requested data returns through the router, the data is sent back to the proper computer by way of IP address and port mapping rules. -
Page 31: Dmz
6.5.3 DMZ DMZ (De-Militarized Zone) Host is a host without the protection of the router’s firewall. It allows a computer to be exposed to unrestricted two-way communication with the Internet. You should only use this feature when the Port Forwarding function fails to make an application work. -
Page 32: Administration
6.6 Administration 6.6.1 Management The Management screen allows you to change the router’s login password as well as other administrative settings. Router Password: Set the router’s login password. Remote Router Access: Select to enable or disable remote management/upgrade of the router. You can allow remote management from any IP Address or a specified IP Address as well as the port number. -
Page 33: Log
6.6.2 Log You can choose to enable or disable logging of your network activity on this screen. Email Address: Specify an email address to send the log file. Send Mail Now: Send the log file to the specified the email address. Save Log File to Local Hard Drive: Take the log in router memory and store it into a log file. -
Page 34: Diagnostics
6.6.3 Diagnostics The Diagnostics screen allows you to perform Ping tests. Ping Test: Enter the IP or URL Address you wish to ping and click Ping. -
Page 35: Factory Defaults
6.6.4 Factory Defaults The Factory Defaults screen allows you to set all the router’s settings to the factory default. Click on the Factory Defaults button to restore all the settings to default. -
Page 36: Firmware Upgrade
6.6.5 Firmware Upgrade The Firmware Upgrade screen allows you to upgrade the router’s firmware. You may download the updated firmware from the Airlink101 website www.airlink101.com Click on Browse to browse to the new firmware, and click Apply. Note: Do not power off the router during the firmware upgrading, otherwise your router may be damaged permanently. -
Page 37: Restart
6.6.6 Restart The Restart page allows you to restart the router without restoring the settings to factory default. Click on the Restart button to restart the router. -
Page 38: Status
6.7 Status 6.7.1 Router The Router screen displays the router status information including the firmware version. Click on the Refresh button to reload the screen. -
Page 39: Local Network
6.7.2 Local Network The Local Network screen displays the local area network status information. Click on the DHCP Client Table to display a list of DHCP clients in your network. -
Page 40: Wireless Network
6.7.3 Wireless Network The Wireless Network screen displays the wireless network status information. -
Page 41: Troubleshooting
7. Troubleshooting If you have trouble connecting to the Internet, try the following steps. Step 1 Power off the Cable/DSL modem, router, and computer and wait for 5 minutes. Step 2 Turn on the Cable/DSL modem and wait for the lights on the modem to settle down. -
Page 42: Federal Communication Commission Interference Statement
Federal Communication Commission Interference Statement This equipment has been tested and found to comply with the limits for a Class B digital device, pursuant to Part 15 of the FCC Rules. These limits are designed to provide reasonable protection against harmful interference in a residential installation. This equipment generates, uses and can radiate radio frequency energy and, if not installed and used in accordance with the instructions, may cause harmful interference to radio communications. -
Page 43: Industry Canada Statement
Industry Canada Statement This device complies with RSS-210 of the Industry Canada Rules. Operation is subject to the following two conditions: 1) this device may not cause interference and 2) this device must accept any interference, including interference that may cause undesired operation of the device This device has been designed to operate with an antenna having a maximum gain of 2dBi. -
Page 44: Technical Support
Technical Support E-mail: support@airlink101.com Toll Free: 1-888-746-3238 Web Site: www.airlink101.com *Theoretical maximum wireless signal rate based on IEEE standard 802.11g specifications. Actual data throughput will vary. Network conditions and environmental factors, including volume of network traffic, building materials and construction, mix of wireless products used, radio frequency interference (e.g., cordless telephones and microwaves) as well as network overhead lower actual data throughput rate.