Aiphone GH-1KD Installation Manual
Apartment intercom system
Hide thumbs
Also See for GH-1KD:
- Installation and operation manual (47 pages) ,
- Specification (2 pages) ,
- Comparison chart (1 page)
Advertisement
0706 A
GH SERIES
Apartment Intercom System
QuikStart
Installation Guide
ATTENTION:
This is an abbreviated Installation Manual, addressing Wiring and Programming of the GH System
only. The complete GH System Installation and Operation Manual is located on the CD that comes
with the GH-BC Bus Control Unit. Access the PDF file from the CD and print the entire manual if a
hard copy is needed. If installing a digital entry system, the program for loading names and numbers
for each tenant is also located on the CD.
ABBREVIATED INSTALLATION & OPERATION MANUAL
- 1 -
Advertisement
Table of Contents

Related Manuals for Aiphone GH-1KD


Summary of Contents for Aiphone GH-1KD
- Page 1 0706 A GH SERIES Apartment Intercom System QuikStart Installation Guide ATTENTION: This is an abbreviated Installation Manual, addressing Wiring and Programming of the GH System only. The complete GH System Installation and Operation Manual is located on the CD that comes with the GH-BC Bus Control Unit.
-
Page 2: Standard System
GH-RY Light control Timer Light Door release Entrance station Cable: 1P x 2, 2-conductor cable solid copper & non-braided, polyethylene insulation Use Aiphone Wire #872002 for Audio, Aiphone Wire #871802 for Video. Trunk line No.1 1Px2 1Px2 GH-4Z 1Px2 1Px2... - Page 3 Wiring Divided cabling with GH-4Z GH-1KD 1Px2 Doorbell 1Px2 Doorbell GH-1MD GH-BC Distribution point Light control Orange Timer Blue Orange GH-RY White Light GH-DA R1 R2 ELB ELC ELM RY RY GH-NS CN100 GH-10K Entrance station Trunk line No.1 GH-4Z...
-
Page 4: System Configurations
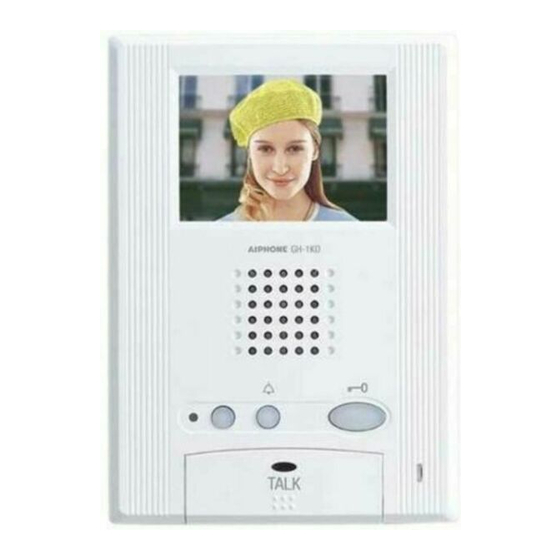
Max. 25 / Trunk [10] GH-1KD GH-4Z Max. 6 [10] GH-1KD [10] GH-1KD GH-4Z Max. 6 [10] GH-1KD GH-1AD [12] GH-1MD [13] GH-1KD + GH-HS GH-VBC GH-VBC GH-1KD / GH-4Z 150 m 150 m PS-2410DIN [10] GH-1KD [10] GH-1KD [10] GH-1KD [10] GH-1KD... - Page 5 [9] 4-way video junction unit GH-4Z [10] Color video residential station GH-1KD [11] Audio residential station GH-1AD [12] Black &White video residential station GH-1MD [13] Color video residential station +handset (option) GH-1KD + GH-HS e. Security Guard Station [14] Security guard station GH-MK Entrance Station...
- Page 6 GH-MK Max. 2 GH-VA + GH-DA + GH-NS, GH-10K GH-VA GH-DA Max. 8 (3 per trunk) GH-MK Max. 2 GH-VBX GH-BC GH-BCX GH-BC PS-2410LC PS-2410LD PS-2410DIN - 6 - GH-VBC GH-BC GH-1KD / GH-4Z Max. 125 Max. 25 / Trunk...
-
Page 7: Wiring Distance
Expanded System Configuration Diagram 1. Common trunk line #1, 2 2. Sub trunk line #1 - 4 Sub trunk line #2 - #4 are the same as #1. Maximum 125 units per sub trunk line. (1) Audio signal line (2) Video signal line (3) Power supply line a. -
Page 8: Mounting The Entrance Station
Do not mount the back box on a surface that is recessed by 15 mm (1/2") or more from the external surface of the wall. 6 GH-SW modules can be used. If you would like to connect 7 modules or more, please contact Aiphone. - Page 9 GH-DA GH-DA GH-SW GH-DA Mounting the Entrance Station (2) 1. Remove the terminal cover. 2. From the speech module to the next module, insert the attached connector into the socket. Make sure to run the cable under the terminal cover for protection. 3.
-
Page 10: Optional Handset
Failure to do so could result in pinching that may damage the wiring. NOTES: To remove the terminal block, slide the terminal block and pull it out. (GH-1AD, GH-1KD) 83.5mm (3-5/16") 60mm (2-3/8") Optional Handset... - Page 11 WIRING GH-VA #2 - #5 GH-NS #2 - #5 GH-NS #1 + – A1A2 GH-10K #1 CN100 1 2 3 4 GH-DA #2 - #5 GH-MK GH-MK #1 1 2 3 4 1 2 3 4 PS-2410LC PS-2410LD GH-VA #1 + –...
- Page 12 R1 R2 R1 R2 C K KE Standard System (2) Station-to-Station Wiring [1] Residential station GH-1KD, GH-1AD • There can be a maximum of 25 stations per system. • For the terminating residential station, set the setting switch to "A".
- Page 13 GH-4Z GH-4Z GH-4Z GH-VBC GH-BC GH-4Z GH-4Z GH-1KD - 13 - B1 B2 R1 R2 C CE K KE B1, B2 Do not remove the wires! R1, R2 IN OUT R1R2 R1R2 C CE K KE R1, R2 IN OUT...
- Page 14 GH-VA #1 GH-DA #1 1 2 3 4 1 2 3 4 1 2 3 4 1 2 3 4 1 2 3 4 1 2 3 4 1 2 3 4 1 2 3 4 GH-VA #2 - #8 GH-DA #2 - #8 GH-MK...
-
Page 15: Setting Up The System
PROGRAMMING GH-BC GH-NS GH-SW GH-SW GH-NS GH-DA Setting up the System 1. Make sure that all units are installed and wired properly. Turn on the power switch to GH-BC. When the system includes GH- NS, program the resident information (names and room numbers) in advance. -
Page 16: Programming (Gh-Ns)
GH-NS Enter Program Mode DISPLAY YOUR OPERATION WELCOME RE-ENTER ID CODE ID CODE = + 4 digit Select Menu & Quit DISPLAY SELECT LANGUAGE MENU SELECT LANGUAGE CHANGE ID CODE ACCESS CODE RESIDENT INFO SET TIMER DECIDE & NEXT CHANGE GREETING TRANSFER DATA SCROLL SPEED QUIT... - Page 17 DISPLAY YOUR OPERATION SELECT LANGUAGE DECIDE & NEXT MENU ENGLISH FRANCAIS BACKWARD DEUTSCH ESPANOL NEDERLANDS SELECT LANGUAGE ENGLISH DECIDE & BACK DISPLAY YOUR OPERATION CHANGE ID CODE DECIDE & NEXT Enter new ID code CHANGE ID CODE 1111 INITIAL ID CHANGE ID CODE 0123 DECIDE &...
- Page 18 GH-MK Enter Program Mode DISPLAY YOUR OPERATION AIPHONE RE-ENTER ID CODE INITIAL ID CODE ID CODE = + 4 digit Select Menu & Quit DISPLAY SELECT LANGUAGE MENU SELECT LANGUAGE CHANGE ID CODE RESIDENT INFO SET TIMER PROGRAMMING DECIDE & NEXT...
- Page 19 DISPLAY YOUR OPERATION SELECT LANGUAGE DECIDE & NEXT MENU ENGLISH FRANCAIS BACKWARD DEUTSCH ESPANOL NEDERLANDS SELECT LANGUAGE ENGLISH DECIDE & BACK DISPLAY YOUR OPERATION CHANGE ID CODE DECIDE & NEXT Enter new ID code CHANGE ID CODE 1111 INITIAL ID NEW ID (4-digit) CHANGE ID CODE 0123...
-
Page 20: Technical Precautions
(Box depth: 44mm (1-3/4")) GH-1MD: Approx. 980 g (2.2 lbs.) GH-1AD: Approx. 330 g (0.7 lbs.) GH-1KD: Approx. 400 g (0.9 lbs.) GH-BC: Approx. 450 g (1.0 lbs.) GH-VBC: Approx. 250 g (0.6 lbs.) GH-4Z: Approx. 190 g (0.4 lbs.) GH-MK: Approx.