Table of Contents

Related Manuals for ActionTec R1020S(U)


Summary of Contents for ActionTec R1020S(U)
-
Page 1: Table Of Contents
System Requirements ll. Contacting Technical Support lll. Introduction to the Home Gateway lV. Before you Connect the Home Gateway V. Connecting the Actiontec Wireless-Ready Home Gateway VI. Configuring the Actiontec Wireless-Ready Home Gateway Basic Setup Status Screen VII. Advanced Configuration of the Wireless-Ready Home Gateway... -
Page 2: Introduction
Broadband modem. This easy to use product is perfect for the home office or small busi- ness. If you would like to take your computing to the next level then the Actiontec Wireless-Ready Home Gateway is the key to your success. -
Page 3: Lll. Introduction To The Home Gateway
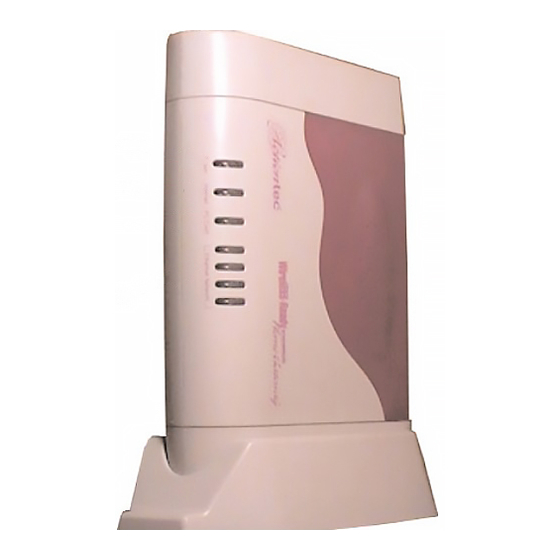
Introduction to the Home Gateway Description of the LEDs and Reset Switch Power LED: If it is off then there is no power to the Home Gateway or a critical error has occurred. (Contact Technical Support if this happens) If it is Rapidly Flashing, then the Home Gateway is initializing. - Page 4 For a listing of the information required for the major broadband ISP’s, please visit the following Website and select your specific ISP. Please make sure that you have this information available when you configure the Actiontec Wireless-Ready Home Gateway. HTTP://www.actiontec.com/support/homegateway/index.html...
- Page 5 Some broadband providers use single words to direct the connection to their E-mail or web servers (i.e. web, mail, pop3, www). If your ISP uses single words rather than a whole internet address (pop.mail.actiontec.com), or IP address (24.55.224.34), then you will need the full address information to configure your internet browser and/or E- mail clients.
- Page 6 3. In the Network window under the configuration tab select TCP/IP. Click Properties. If there is not a listing for TCP/IP, then refer to Appendix B for instal- lation instructions now. If there are no Ethernet Adapters listed, then refer to the Ethernet card manufacturer for installation instructions.
- Page 7 7. Click on the WINS Configuration tab. Make sure that the Use DHCP for WINS Resolution circle is selected. (This is the default setting) The Disable WINS Resolution circle may also be selected for proper functioning. 8. Click OK and you will be back on the Network Configuration screen. Click the Identification tab and enter the information for each field.
- Page 8 Configuring Your Internet Browser If “Internet Explorer” is your default browser: 1. Click Start, click Settings, select Control Panel. 2. Double click Internet Options, select the Connections tab. 3. Click LAN Settings. Remove any checks from the 3 boxes and click OK. 4.
-
Page 9: Connecting The Actiontec Wireless-Ready Home Gateway
10. Once the Home Gateway is initialized, turn on your PC and wait for it to fully ini- tialize. 11. Enter your network login name and password. The hardware setup is now finished, and you are ready to configure your Actiontec Wireless-Ready Home Gateway. Connecting the Actiontec Wireless-Ready Home Gateway... -
Page 10: Configuring The Actiontec Wireless-Ready Home Gateway
Configuring the Actiontec Wireless-Ready Home Gateway Basic Setup Follow the step below to configure your Home Gateway: Open your Internet Web Browser and in the address bar type: http://192.168.0.1 and then press the <Enter> key. 2. When the web page is loaded, the following screen will appear. Click Setup/Configuration. -
Page 11: Status Screen
Note: If your Cable ISP does not require a host or domain name then leave the fields blank. 7. Your Actiontec Wireless-ready Home Gateway is now finished with the configura- tion process. Click Save and Restart. 8. A congratulations screen will announce the end of the Basic Setup. - Page 12 This is the IP address that the Home Gateway uses to send all requests to the Internet. DNS #1 This is the primary Domain Name Server address. This is like a telephone book Configuring the Actiontec Wireless-Ready Home Gateway of all internet addresses. DNS #2 This is the secondary Domain Name Server address.
-
Page 13: Advanced Configuration Of The Wireless-Ready Home Gateway
Advanced Configuration of the Wireless-Ready Home Gateway The Advanced Setup section allows advanced users to configure such features as the wireless settings. The following sections explain each feature you can configure in the advanced setup section. Open your Internet Web Browser and in the address bar type: http://192.168.0.1 and then press the <Enter>... -
Page 14: Wan Ip Address
Wan IP Address This screen allows you to manually set up your Home Gateway. The following are three methods by which your ISP will assign an IP Address to your Home Gateway. Note: Some DSL providers use PPPoE to establish communication with an end user, while others use static IP. -
Page 15: Wireless Settings
Wireless PC Cards to the same ESSID value. (For the Actiontec 802.11b Wireless PC Card the ESSID value should be the same as the SSID value) This will enable the Wireless PC Cards to communicate with your Home Gateway. -
Page 16: Lan Ip Address
LAN IP Address This is the IP Address of the Home Gateway as seen on the internal LAN. It is recommended that you keep the default settings, but if you need to change them then be sure to verify the DHCP Server range is within the same subnet. DHCP Server Your Home Gateway has a built-in Dynamic Host Configuration Protocol (DHCP) Server that can automatically assign an IP Address to each computer on your network. -
Page 17: Website Blocking
(Computer). It is recommended that if you need to open more than 10 ports at once to use DMZ hosting instead. For a listing of commonly used programs and their port numbers refer to Appendix C or the Actiontec web site. DMZ Hosting DMZ hosting is used to support online gaming and Internet confrencing services. -
Page 18: Mac Address Cloning
unable to access your network resources while in the DMZ. It is recommended to place the computer in the DMZ mode only as long as it is necessary. You will also be unable to access your network resources. WARNING: This computer will be vulnerable to outside hackers while in the DMZ mode. - Page 19 3. Click the Restore Default Settings button. Vlll Upgrading your Firmware From time to time, Actiontec will post firmware upgrades to enhance your Home Gateway’s usability. To upgrade your Home Gateway’s firmware: 1. Click on Utilities 2. Click on Upgrade Firmware. Follow the onscreen instructions.
-
Page 20: Glossary
Troubleshooting There is a connection failure to Home the Gateway. Make sure that the Wireless Access Point and the Gateway are properly installed, the LAN connections are correct and the power is on. Next, confirm that your PC and the Wireless Access Point and Gateway are on the same network segment. If you are not sure, let the PC get the IP address automatically by initiating the DHCP function. - Page 21 ESSID (Extended Service Set Identifier) You must have the same ESSID entered into the gateway and each of its wireless clients. The ESSID is a unique identifier for your wireless network. Ethernet Ethernet networks are connected by cables and hubs, and move data around. This is a standard for computer networks.
-
Page 22: Specifications
Specifications Model Number: GE204000-01 Standards: IEEE 802.3 (10BaseT), IEEE 802.3u (100BaseTX), IEEE 802.11b (Wireless) Protocol: CSMA/CD Ports WAN: One 10Base-T RJ-45 Port for Cable/DSL Modem LAN: Four 10/100 RJ-45 Switched Ports, One Shared Uplink Port Speed: WAN - 10Mbps, Switch - 10/100Mbps (Half Duplex) 20/200 (Full Duplex) Wireless (See Below) Cabling Type: 10BaseT: UTP/STP Category 3 or 5... - Page 23 Click the Services tab, and make sure the following default services are listed. These are installed by default when you initially installed TCP/IP. Note that not all of the servic- es listed below are required for the Actiontec Home Gateway. For additional informa- tion, refer to your NT Workstation documentation or Microsoft support services.
- Page 24 TCP/IP Properties, IP Addressing, DHCP With the TCP/IP Protocol highlighted, click Properties, and then click the IP Address tab and click Obtain an IP Address from a DHCP Server. Click the Advanced tab to verify that DHCP is enabled. XlII Appendix A DNS and Host Name Settings Click the DNS tab to display the host name properties.
- Page 25 Routing Configuration Click the Routing tab, and then verify that the Enable IP Forwarding is not checked. Click OK to return to the Network dialog box. XlII Appendix A Adapter Settings Click the Adapters tab, and then verify that your Ethernet Card is listed. If your card is not listed, please add it.
- Page 26 Click OK, then click Close and restart your computer when prompted. Protocols Select All Protocols from the drop down list in the Bindings tab. (This is not the same as the Protocols tab) Expand all entries by clicking on plus (+) signs TCP/IP Protocol should be bound to the adapter WINS Client (TCP/IP) should be bound to the adapter XlII...
- Page 27 Note: As with all software, you should consult your users manual or the help files for detailed information. Actiontec provides the information that follows as a guideline only. Windows 2000 installs with the default TCP/IP configuration. If you have a new machine with Windows 2000, or have just installed the Operating System, you simply need to connect your machine to your Home Gateway.
- Page 28 Appendix A Configuring TCP/IP For Macintosh As with all software, you should consult your users manual or the Macintosh help files for detailed information. Actiontec provides the information that follows as a guideline only. Configuring Open Transport 2.5.2 To configure Open Transport: 1.
- Page 29 5. Make sure the Use 802.3 option is unchecked. 6. Disregard any # in the IP Address field. This will be correct after your first con- nection. 7. Click the Options button and set TCP/IP to Active. Uncheck the option Load only when needed, and click OK when finished.
- Page 30 4. In the following screen please select File and printer sharing for Microsoft Networks from the given list. Click OK. 5. In the “File and Print Sharing” screen make sure that both of the selections have a check mark beside them. If they do not, please click on the box next to each state- ment and then click OK.
- Page 31 your computer restarts you will be asked to supply a User Name and Password. Enter whatever you would like but be sure to write down these values, as they will enable you to access your network. 9. After your computer has restarted and you entered a password and user name, you must enable a file or drive for sharing.
- Page 32 11. Next you need to share your printer. On your desktop, click Start, click Settings, and then select Printers. 12. Right click on the printer you want to share. Select “Sharing” from the given list. Appendix B 13. The next step will be to enable the sharing by selecting the “Share As” button. It will automatically insert a default name for the Share Name.
- Page 33 3. In the “Computer Name:” box type a name that is different from your other PC’s on your network. Then, in the “Workgroup” box type the name that you are using to identify your network. This will be the same on each computer on your network. Click OK and you will return to the “Network Properties”...
- Page 34 2. In the drop-down menu after Connect via, choose Ethernet or Ethernet Built-In. 3. Close the Appletalk window by clicking the small box in the upper left corner. 4. You may be asked to save changes to your Appletalk setting. If so, click the OK but- ton.
- Page 35 IP/TV Cisco IP/TV 2.0.0 None Laplink Lotus Notes NetMeeting Microsoft NetMeeting 2.1 & 2.11 None Host must be on the LAN side and PC Anywhere client IP set. RealPlayer RealPlayer G2 None Remote Anything Need to set the mobile option to be Shiva VPN 2233 /client IP your public IP address.
- Page 36 Appendix D To determine the MAC address of an installed Ethernet card on Windows 95/98: 1. Click the Start menu 2. Select Run 3. In the text field type: winipcfg 4. Click OK 5. An IP Configuration window will appear 6.
- Page 37 Notes: Notes:...