Table of Contents
Advertisement
Quick Links
QUICK SET-UP
The following steps will quickly lead you through set-up and
adjustments for the projector connected to a single
computer. For connection to a second computer, please
consult the Making the Connections section. The sequence
numbers refer to the drawing of the quick set-up.
SETTING UP
POWER OFF (1)
Switch off all equipment before
connecting.
COMPUTER (2)
Connect the computer to the
SOURCE 1 connector using the
computer cable and applicable
computer and monitor adapters if
needed.
SOUND (3)
Connect sound from the computer
using a standard 3.5-mm stereo
jack line cable (not supplied).
MOUSE (4)
Connect the mouse cable to the
MOUSE 1 connector of the
projector. Use an applicable mouse
adapter at the computer end.
MAINS (5)
Connect the power cords to the
various equipment.
POWER ON (6)
First push the POWER button on
the keyboard or the remote control.
Secondly start the source
equipment to facilitate correct
recognition of the projector as a
peripheral unit to the computer.
ENGLISH
USE
ZOOM , FOCUS AND POSITION
Zoom the lens for desired image size,
focus the lens for an optically sharp
image and tilt the unit using the
integral adjustable feet to position the
image on screen.
RESET
Press RESET to automatically adjust
for position, width and stability.
RESET is automatically invoked when
a new source is connected.
CONTRAST AND BRIGHTNESS
Adjust CONTRAST and
BRIGHTNESS as preferred.
Advertisement
Table of Contents

Related Manuals for Ask Proxima Impression A9


Summary of Contents for Ask Proxima Impression A9
- Page 1 QUICK SET-UP The following steps will quickly lead you through set-up and adjustments for the projector connected to a single computer. For connection to a second computer, please consult the Making the Connections section. The sequence numbers refer to the drawing of the quick set-up. SETTING UP POWER OFF (1) Switch off all equipment before...
- Page 2 1 & 6 1 & 6...
-
Page 3: Table Of Contents
USER GUIDE TABLE OF CONTENTS 1 INTRODUCTION ... 5 2 SYMBOL DESCRIPTIONS ... 6 3 SAFETY INSTRUCTIONS ... 7 4 MAIN FEATURES... 11 5 SUPPLIED MATERIAL ... 12 5.1 STANDARD MATERIAL ... 12 5.2 OPTIONAL MATERIAL... 12 6 MAKING THE CONNECTIONS ... 13 7 IMAGE ADJUSTMENTS... - Page 4 USER GUIDE XGA LCD PROJECTOR This publication is printed on recycled paper The information contained in this User Guide, and the products described herein are subjected to change without prior notice.
-
Page 5: Introduction
USER GUIDE XGA LCD PROJECTOR 1 INTRODUCTION Thank you for purchasing this state of the art XGA high brightness projector! For long and lasting, safe and secure operation, please read this user guide, and follow the instructions given. Failing to do so may cause product failure that could void any warranties given, and in some cases be harmful and dangerous to people. -
Page 6: Symbol Descriptions
USER GUIDE 2 SYMBOL DESCRIPTIONS DANGEROUS VOLTAGE This symbol indicates the presence of high voltages inside the product. High voltages may constitute electric shock and may be lethal. WARNING This symbol alerts the user of important operating, maintenance (servicing) and safety-related instructions. This symbol indicates hot surfaces. -
Page 7: Safety Instructions
USER GUIDE 3 SAFETY INSTRUCTIONS The following list of instructions is provided to ensure safe and risk free use and operation of the projector. Failing to read and follow these instructions may void any warranties and may also cause personal injury and material damage. - Page 8 USER GUIDE projector to a switched mains power supply, and switch off when not in use, for maximum protection against fire. Switching off using the remote control only puts the projector in a standby (sleep) mode with live internal voltages. 10.
- Page 9 USER GUIDE using a power cord compatible with the local electrical voltage. Never operate the projector outside the electrical voltage specification. If you are unsure about the type of electrical service at your location, please consult your dealer or local Power Company. 14.
- Page 10 USER GUIDE 23. LIFTING AND MOVING - Let the projector cool down before moving. Disconnect the power cord and all other cables. Carry the unit by the handle provided. The projector should preferably be transported in a suitable case. XGA LCD PROJECTOR...
-
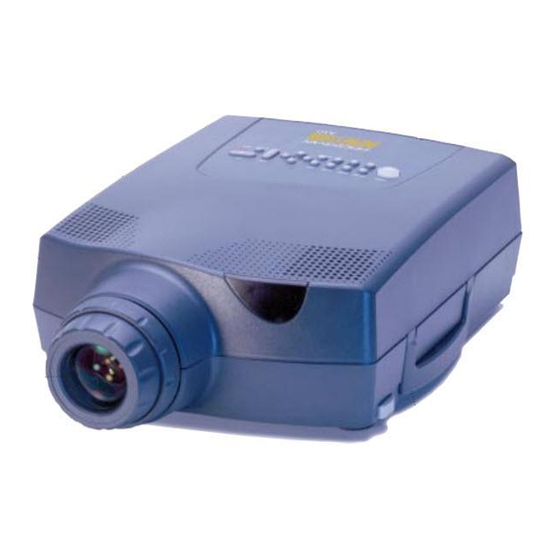
Page 11: Main Features
USER GUIDE 4 MAIN FEATURES The unit employs the following important features that in total provide you with a highly functional and powerful projector: High brightness image Compact, light and portable Automatic adjustments/set-up User replaceable UHP-lamp True XGA 1024 x 768 resolution 640 x 480 to 1280 x 1024 image compatibility 16.7 million colors Stereo sound... -
Page 12: Supplied Material
USER GUIDE 5 SUPPLIED MATERIAL STANDARD MATERIAL A complete set includes the following components: 1. LCD Projector 2. Computer cable 3. Mouse Cable 4. Mouse Adapter PS/2 5. Mouse Adapter PC (Y-Split) The standard material is subject to change without prior notice OPTIONAL MATERIAL Optional cables, adapters and accessories are available. -
Page 13: Making The Connections
USER GUIDE 6 MAKING THE CONNECTIONS The projector may be connected to different equipment. The following sections describe in detail how to connect to these systems. See the illustration on the rear of the quick set-up card on how the various system parts connect together. - Page 14 USER GUIDE 3. SOUND. The computer cable has a sound input branch at the projector end. Connect sound from the computer using a standard 3.5-mm stereo jack line cable (not supplied), or use the additional sound inputs (AUDIO 1 for SOURCE 1 or AUDIO 2 for SOURCE 2).
- Page 15 USER GUIDE MOUSE 2 USB. Connect an optional USB cable directly to the USB port on the projector and the computer. RS 232. Connect an RS 232 cable, which is fitted with a 9-pin DSUB connector, but has no branch for the local computer mouse.
-
Page 16: Image Adjustments
USER GUIDE 7 IMAGE ADJUSTMENTS This section will aid in adjusting a stable, flicker-free image for best viewing results. Use the remote control or the projector keypad to adjust settings, either directly or through the menu system. The following list aids in a trouble free set-up of the projector. Try using a patterned background (tiles, checkerboard pattern etc) when adjusting the image. - Page 17 USER GUIDE correctly, see FREQUENCY, POSITION and TUNE below. RESET is automatically activated when a new source is connected. 3. CONTRAST and BRIGHTNESS may be adjusted according to your personal taste, the image and the viewing conditions. The controls are directly accessible on the remote control and on the projector keyboard.
-
Page 18: Using The Projector
USER GUIDE 8 USING THE PROJECTOR The projector has a set of features and functions you should familiarize with in order to get the most out of using the unit. REMOTE CONTROL The remote control is used to adjust the projector for the best possible image, either directly or through the menu system. - Page 19 USER GUIDE In the menu system, the trackball is used for navigation between the different alternatives, and when a function is selected, the trackball is used for adjustment of that function. The following table describes each key in detail. Some functions are memorized, while other functions are only momentary.
- Page 20 USER GUIDE REMOTE FUNCTION CONTROL KEYS SOURCE Selects between SOURCE 1 and SOURCE 2 as 1&2 the active source. POINTER Applies a trackball-controlled pointer to the screen. ZOOM Press to zoom in on the image. Use the trackball or the cursor keys on the projector keyboard to zoom in or out.
-
Page 21: Projector Keyboard
USER GUIDE PROJECTOR KEYBOARD The keypad on the projector gives access to all controls, either directly or through the menu system. MENU POWER CONTRAST BRIGHT VOLUME SOURCE KEYBOARD FUNCTION KEYS POWER Turns the projector on or into standby mode. Switches the projection lamp off, but leaves power on to the rest of the projector. - Page 22 USER GUIDE INDICATORS FUNCTION POWER NO LIGHT indicates that the unit power cord is disconnected. GREEN FLASHING indicates that the POWER key has been pressed and the fan is starting. GREEN indicates that the unit is operational. YELLOW indicates that the unit is in standby mode (switched off using the remote control or the keypad) ALARM RED indicates lamp lifetime overdue.
-
Page 23: The Menu System
USER GUIDE THE MENU SYSTEM The menu system is designed to gain access to functions not often used, as opposed to frequently used features that are directly available through the remote control and the projector keypad. The following description assumes that you have chosen your mother tonge under OPTIONS (LANGUAGE). -
Page 24: The Set-Up Menu Selections
USER GUIDE 8.3.1 THE SET-UP MENU SELECTIONS SETUP TUNE PICTURE FREQUENCY SOUND POSITION OPTIONS REAR HELP CEILING COLOR TEMP. FACTORY RESET TUNE is used to stabilize the image. An untuned image can be seen as sideways instability or “ swimming” . FREQUENCY is provided to adjust image width. -
Page 25: The Sound Selections
USER GUIDE 8.3.2 THE SOUND SELECTIONS SETUP PICTURE SOUND TREBLE OPTIONS BASS HELP BALANCE MUTE EXTERNAL TREBLE controls the higher sound range. BASS controls the lower sound range. BALANCE controls the sound balance between the two stereo speakers. MUTE switches the sound on/off separately for each source. EXTERNAL toggles between internal speakers and the audio line output. -
Page 26: The Options Selections
USER GUIDE 8.3.3 THE OPTIONS SELECTIONS SETUP PICTURE SOUND OPTIONS ZOOM HELP HIDE OSD SOURCE SEARCH POWER MANAGEMENT RS232 TRACKBALL SENS. LANGUAGE POINTER MASK SPLIT SCREEN SERVICE ZOOM Press to zoom in on the image. Use the trackball or the cursor keys on the projector keyboard to zoom in or out. - Page 27 USER GUIDE HIDE OSD switches the on-screen echoing of controls on and off. This setting only affects the direct control operations, not the menu system. This setting is not memorized. SOURCE SEARCH is a toggle function that controls whether the projector shall automatically search for an active source or not.
-
Page 28: The Help Selections
USER GUIDE TRACKBALL SENSITIVITY. Controls the response of the remote control trackball in the menu system. (It does not affect the response of the computer mouse. Please adjust mouse sensitivity on the computer). FAST, MEDIUM and SLOW are available options. LANGUAGE. -
Page 29: Ceiling Mounting
USER GUIDE XGA LCD PROJECTOR 9 CEILING MOUNTING The projector is prepared for ceiling mounting. As opposed to desktop use, ceilings vary in height and material. Also considerations must be made with respect to signal and power wiring. SELECTING A MOUNT Various mounting systems are available from different sources. -
Page 30: Mounting In The Ceiling
USER GUIDE MOUNTING IN THE CEILING An improperly mounted projector is a potential danger to people and equipment. A projector and mount falling down may cause personal injury and material damage. Such damage caused by bad workmanship in mounting and operation may lead to legal action and should be avoided. -
Page 31: Trouble-Shooting
USER GUIDE 10 TROUBLE-SHOOTING This is a checklist to help you pinpoint any problem that may arise. Check the symptoms carefully if you experience any problem. The cure may be at your fingertips! Always check that the red LED indicator in the front of the projector flashes when a key on the remote control is pressed. - Page 32 USER GUIDE SYMPTOM SOLUTION The whole Adjust the frequency and tuning settings image appears (instability), or the image position settings to be unstable (misalignment). or misplaced Check that you are using a source with compatible resolution. The projector may be connected to a source with a non-standard computer (or video card).
- Page 33 USER GUIDE SYMPTOM SOLUTION The desktop Remember that the mouse must be connected mouse is not before the computer source is switched on. working MOUSE 1 works together with SOURCE 1, and MOUSE 2 works together with SOURCE 2. Are the mouse cable and mouse adapter connections secure? Check the mouse driver settings on the computer You must boot the computer after the cable has...
-
Page 34: Maintenance
USER GUIDE 11 MAINTENANCE The projector needs very little maintenance in order to function properly. 11.1 GENERAL Use a damp cloth to wipe off dust on the exterior. Clean the lens with a damp, non-abrasive cloth, using just water or a standard lens cleaning solution available from photographic dealers. - Page 35 USER GUIDE To change lamp, unscrew the lamp lid. A safety switch will cut off the power supply to the lamp completely. Unscrew the lamp holder, fold out the handle and pull out the old lamp holder. Insert a new lamp. Projector seen from below Projector lamp assembly XGA LCD PROJECTOR...
-
Page 36: The Remote Control
USER GUIDE Push the lamp holder all the way until it positively stops and mount the screw. Fold the handle and remount the lamp lid. Mount all screws well. Use only original lamp and holder as specified. The lamp is individually adjusted with the holder to maintain optimum illumination. -
Page 37: Technical Data
USER GUIDE 12 TECHNICAL DATA The technical data given in this section was correct at the time of going to print, but may change without prior notice in order to improve product performance. This projector is designed for indoor use and should not be operated or stored in conditions outside the general environmental limits given in section below, as this may lead to permanent damage and will violate any warranties. -
Page 38: Projector Unit
USER GUIDE 12.2 PROJECTOR UNIT PROJECTOR DIMENSIONS (H x W x L) PROJECTOR WEIGHT PROJECTION LENS IMAGE SIZE PROJECTION DISTANCE ANTI-KEYSTONE CORRECTION PROJECTION LAMP LIGHT OUTPUT LIGHT VALVE COLOR RESOLUTION CONTRAST RATIO PIXEL RESOLUTION DEFECTIVE PIXELS VIDEO FREQUENCY HORIZONTAL SYNC VERTICAL SYNC COMPUTER INPUT AUDIO INPUT... -
Page 39: Remote Control
USER GUIDE 12.4 REMOTE CONTROL UNIT SIZE (H x W x L) 20 x 50 x 190 mm / 0.78 x 1.97 x 7.48 inch UNIT WEIGHT 100 g / 0.22 lb. (with batteries) BATTERIES 4 pcs LR03/AAA 1.5V penlight FUNCTIONAL RANGE 15 m (50 ft)/Using cable 20 m (66 ft) COMPATIBILITY... -
Page 40: Projection Distances
USER GUIDE 12.6 PROJECTION DISTANCES The following table shows the combinations of projection distances and screen sizes that are possible. MINIMUM WIDE DISTANCE 1.20m/ 47 ” 4.00m/ 157 ” DIAGONAL 0.74m/ 29” 2.48m/ 98” WIDTH 0.60m/ 24” 1.98m/ 78” HEIGHT 0.45m/ 18”... -
Page 41: Connectors
USER GUIDE 13 CONNECTORS The pinouts of all the connector ports is described in this section. AUDIO OUT REMOTE RS-232 USB MOUSE 2 MOUSE 1 Connector panel Do not connect any devices or cables other than those supplied with the projector into the connector ports on the projector unit, even if the connector ports appear identical, as this voids any warranty and may cause permanent damage to the projector. -
Page 42: Mouse 1
USER GUIDE 13.2 MOUSE 1 This port is used to relay mouse signals (Serial RS 232, PS/2 and Mac) from the projector to the computer. 8 PIN MINIDIN FEMALE (FRONT VIEW) 13.3 AUDIO 1 & 2 These ports are used for additional sound inputs. 3.5 mm JACK (FRONT VIEW) -
Page 43: Remote
USER GUIDE 13.6 REMOTE This connector is used for remote control cable (20 m). 2.5 mm JACK (FRONT VIEW) XGA LCD PROJECTOR SIGNAL RING + 5V STEM... -
Page 44: Environmental Handling
USER GUIDE XGA LCD PROJECTOR 14 ENVIRONMENTAL HANDLING Care has been taken in the manufacture of this projector so that environmental stress and pollution has been minimized. No CFCs are used during the manufacture of the unit. Where possible, recyclable materials have been used to minimize the environmental impact. -
Page 45: Fcc Statement
USER GUIDE 15 FCC STATEMENT This equipment complies with the limits for a Class A computing device, pursuant to Subpart J of Part 15 of FCC rules. Only peripherals (computer input/output devices, terminals, printers, etc.) certified to comply with the Class A limits may be attached to a computer that complies with Class A limits.