
Related Manuals for Kenwood KVT-M700


Summary of Contents for Kenwood KVT-M700
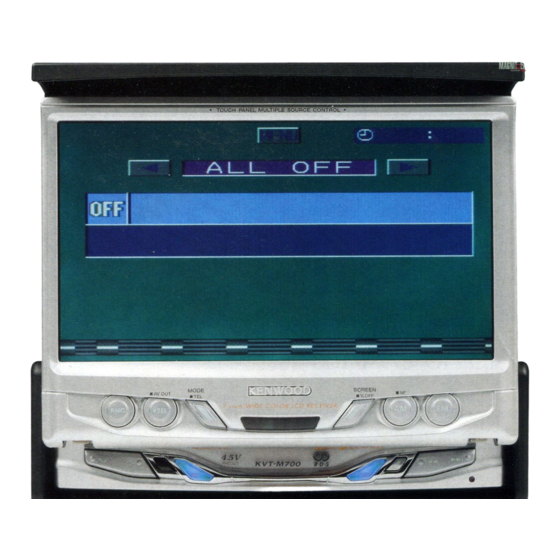
- Page 1 7-Inch WIDE SCREEN MONITOR-RECEIVER KVT-M700 INSTRUCTION MANUAL © PRINTED IN JAPAN B64-2138-00/01 (E/DT)
-
Page 2: Table Of Contents
Contents Before Use ...4 • Safety Precautions • About RDS Monitor Control Function...5 • Opening the Monitor • Closing the Monitor • Power Off • Switching the Monitor’s Picture • Switching the TV/Video Screen Mode • Switching the AV Output •... - Page 3 FM/AM Tuner Control Function ...22 • Selecting the FM Band • Selecting the AM Band • Tuning • Station Preset Memory • Preset Tuning • Auto Memory Entry • Seek Mode • Monaural Reception • Local Seek • Traffic Information •...
-
Page 4: Before Use
(e.g., coins or metal tools) inside the unit. • If the unit starts to emit smoke or strange smells, turn off the power immediately and consult your Kenwood dealer. • Do not touch the liquid crystal fluid if the LCD is damaged or broken due to shock. -
Page 5: Monitor Control Function
Monitor Control Function FNC V.SEL MODE Opening the Monitor 1 Set the vehicle’s parking brake. 2 Press the [OPEN] button. The monitor will open. • The gear shift lever or other parts may interfere with the monitor when it opens. If so, move the gear shift lever (being sure to do so safely) before operating the set. -
Page 6: Switching The Tv/Video Screen Mode
Monitor Control Function V.SEL MODE Screen Mode • FULL • NORMAL • JUST • ZOOM yyyy ;;;; • CINEMA yyyy ;;;; Switching the TV/Video Screen Mode Press the [MODE] button. Each time the button is pressed the screen mode switches as follows: Display "FULL"... -
Page 7: Angle Control Screen
Angle Control Screen A N G L E C T R L A N G L E S L I D E A U T O O P E N - C L O S E O F F Adjusting the Angle Position [ANGLE] The monitor slants back one step: Touch the [3] button. -
Page 8: Menu Function
Menu Function On Screen Control F M 3 1 0 8 . 5 F M - I N F O Control Screen M E N U T U N E R F M 3 9 2 . 5 F M - I N F O LOUD LIST INFO... -
Page 9: Setup Function
Setup Function Setup Menu Screen M E N U S O U N D S E T U P T O U C H C L O C K S Y S T E M S Y S T E M C O D E S O U R C E Selecting the Touch Panel Adjustment Screen... -
Page 10: Setup Menu Screen
Setup Function Code Security Screen T h e s y s f o r s i g n a l . i n p u t S E C U R I T Y Mask Key Because authorization by the Mask Key is required when it's removed from the vehicle, personalizing this unit by using the Mask Key is a help in preventing theft. -
Page 11: Av Setup Screen
AV Setup Screen A V - N A V A V - A U T O O F F R G B O F F A V - A V 1 A V 2 Setting the AV IN-1 Mode [AV-IN1] Touch Setting [7NAV]... -
Page 12: System Setup Function
[7ON] Announcement function is on [7OFF] Announcement function is off This function available when the KENWOOD navigation unit is connected to the I/F terminal. Sound Attenuate [NAV GUIDE] The rear speaker sound is attenuate during the navigation voice output time. -
Page 13: Exit The System Setup Screen
Exit the System Setup Screen Touch the [RTN] button. Return to the setup menu screen. -
Page 14: Tuner Setting Function
Tuner Setting Function Tuner Setting Menu Screen M E N U S O U N D S E T U P R D S D A B S O U R C E Selecting the RDS Setting Screen Touch the [RDS] button. (☛... -
Page 15: Tuner Setting Menu Screen
Region Restrict Function [REG] You can choose whether or not to restrict the RDS channels, received with the AF function for a particular network, to a specific region. Touch Setting [7ON] Region restrict function is turned on [7OFF] Region restrict function is turned off Sometimes stations in the same network broadcast different programs or use different program service names. -
Page 16: Sound Control Function
Sound Control Function Sound Control Menu Screen M E N U S O U N D S E T U P A U D I O S Y S S E L T O N E S O U R C E Selecting the Audio Setting Screen Touch the [AUDIO] button.(☛... -
Page 17: Volume Offset
Audio Setting Screen-2 S Y S T E M S Y S T E M Q E x O F F 2 Z O N E O F F A U D I O Volume Offset [V OFFSET] Each source's volume can be set as a difference from the basic volume. -
Page 18: Speaker Select Screen
Sound Control Function Speaker Select Screen S P E i n c h WO O t y p e S E L Speaker & Woofer Setting Fine-tuning so that the System Q value is optimal when setting the speaker and woofer type. Touch the [2] or [3] button. -
Page 19: Tone Control (System Qex Set To On)
Tone Control Screen -1 (Ex:ON) B A S B A S S B A S E V E L B A S T O N E Tone Control Screen -2 (Ex:ON) M I D T R E M I D L E V E L T R E M I D... -
Page 20: Source Control Function
Source Control Function (Common operation) On Screen Control F M 3 1 0 8 . 5 F M - I N F O SRC MODE Displaying the On Screen Control Selecting the On Screen Control Press the [FNC] button to switch the on screen control display. -
Page 21: Tel Mute
TEL Mute The audio system automatically mutes when a call comes in. When a call comes in "CALL" is displayed. The audio system pauses. Listening to the audio during a call Press the [SRC] button. The "CALL" display disappears and the audio system comes back ON. -
Page 22: Fm/Am Tuner Control Function
FM/AM Tuner Control Function On Screen Control F M 3 1 0 8 . 5 F M - I N F O Selecting the FM Band Press/ touch the [FM] button. Each time the button is pressed/ touched it switches between the FM1, FM2, and FM3 bands. -
Page 23: Traffic Information
Control Screen -2 M E N U T U N E R F M 3 9 2 . 5 F M - I N F O MANU NEWS MONO LIST INFO TI VOL SEEK MONO Traffic Information Switching to traffic information automatically when a traffic bulletin starts even when you aren't listening to the radio. -
Page 24: Fm/Am List Screen
FM/AM Tuner Control Function FM/AM List Screen F M 1 9 2 . 5 N A M E # # # # # N A M E # # # # # 1 7 5 . 5 M H z # # # # N A M E # # # # # N A M E # # # # # N A M E # # # # #... -
Page 25: Av Control Function
AV Control Function On Screen Control A U T O 2 T V 1 W I D E C I N E M A T V 1 N A M E Selecting the On Screen Control Touch the centre part. If you make no button operation for 10 seconds, the on screen control is automatically cancelled. -
Page 26: Auto Memory Entry
AV Control Function Control Screen-1 M E N U T V 1 N A M E MANU Control Screen-2 M E N U T V 1 N A M E MANU LIST SEEK NAME Auto Memory Entry Putting stations with good reception in the memory automatically. -
Page 27: Cd Player Control Function
CD Player Control Function On Screen Control Track 1 2 D N P S # # # # # # # # # # # Pause and play Touch the [38] button. Each time the button is touched it pauses and plays. Fast Forwarding and Reversing Fast Forwarding Hold down on the [¢] button. -
Page 28: Disc Changer Control Function
Disc Changer Control Function On Screen Control D – Disc 5 - Track D I S C T E X T # # # # DREP Pause and play Touch the [38] button. Each time the button is touched it pauses and plays. Fast Forwarding and Reversing Fast Forwarding: Hold down on the [¢] button. -
Page 29: Switching To The Disc List Screen
Control Screen-2 M E N U D I S C - C Disc 5 - Track D I S C T E X T # # # # LIST INFO NAME Switching Display Touch the [DISP] button. Each time the button is touched the display switches as shown below. -
Page 30: Name Set Function
Name Set Function Name Set Screen N A M E # P R E S E T # Ä ä N A M E S E T Station Name Preset (SNPS)/ Disc Name Preset (DNPS) 1 Move the cursor to the enter character position Touch the [<] or [>] button. -
Page 31: Other Option Control Function
Other Option Control Function 7 DAB Tuner Control DAB Tuner Setting Screen-1 D A B P R I O R I T Y O F F D R C R E G O F F T R A F F I C T R A V E L O F F W A R N I N G... -
Page 32: Switching The Pre-Set Band
Other Option Control Function 7 DAB Tuner Control On Screen Control BAND D A B 1 1 4 5 1 . 0 E N S E M B L E L A B E L # # Refer to the KTC-9090DAB's instruction manual for DAB tuner features. -
Page 33: Switching Display
Control Screen-2 M E N U D A B 1 4 5 1 . 0 7 E N S E M B L E L A B E L # # AUTO1 NEWS BAND INFO TI VOL SEEK LANG Switching Display Touch the [DISP] button. -
Page 34: Language Filter Screen
Other Option Control Function 7 DAB Tuner Control Language Filter Screen B B C N a t i o n a l B B C D i g i t a l L A N G S E A R C H Language Filter Screen Selection the Language Touch the [2] or [3] button. -
Page 35: External Display Control
7 External Display Control External Display Control Screen E X T . D I S P L A Y <Refer to the KPA-SD100 instruction manual for details on external box functions> Switching the Display Touch the [2] or [3] button. Exit the External Display Control Screen Touch the [RTN] button. -
Page 36: Remote Control Function
Remote Control Function TUNE DISC TRACK AM– ¢ DIRECT V.SEL AV OUT V.SEL Loading and Replacing the Batteries for the Remote 2 CAUTION Do not set the remote on hot places such as above the dashboard. 1. Use two "AAA" batteries. Slide the cover while pressing downwards to remove it as illustrated. -
Page 37: Selecting The Video
AV Control Function 3 Selecting the Preset Band Press the [FM+ ] button. Each time the button is pressed the preset band switches between the TV1 and TV2. This function available during the KTC-V500E is connected. 3 Selecting the Video Press the [AM–] button. -
Page 38: Installation
7. Reconnect the - terminal of the battery. 8. Press the reset button. • If your car is not prepared for this special connection-system, consult your KENWOOD dealer. • Only use antenna conversion adapters (ISO-JASO) when the antenna cord has an ISO plug. - Page 39 Installation for Monitor Unit When mounting the main unit after checking the operation, close the monitor first. Make sure that the unit is installed securely in place. If the unit is unstable, it may malfunction. Metal mounting strap (commercially available) Screw (M4X6) (commercially available)
- Page 40 Installation Installation for Receiver unit ■ Securing to audio board Attach the installation brackets to the sides of the hideaway unit using the sems bolts (M4 × 8 mm). Use the tapping screw (ø4 × 16 mm) to secure the hideaway unit to the audio board. Do not install the unit under the carpet.
- Page 41 Removing Monitor Unit ■ Removing the Hard Rubber Frame < for Accessory E > Engage the catch pins on the removal tool and remove the two locks on the lower level. Lower the frame and pull it forward as shown in the figure.
- Page 42 Installation Connection When detaching the connection cable, use the accessory tool (Accessory-K) as shown in the diagram. Accessory B To parking brake detection switch harness of car For the sake of safety, be sure to connect the parking sensor. Antenna Conversion Adaptor (ISO–JASO) (Accessory D) Antenna Cord (Accessory C) Antenna Cord (ISO) Connector Function Guide...
- Page 43 Connect to the terminal that is grounded when either the telephone rings or during conversation. To connect the KENWOOD navigation system, consult your navigation manual. To "EXT.AMP.CONT." terminal of the amplifier having the external amp control function.
- Page 44 Installation Connection for AV Equipments Receiver Unit (Rear side) Navigation Unit Connection cable (Provided with the Navigation Unit) Audio/Visual Output • Visual output (Yellow) • Audio left output (White) •Audio right output (Red) Audio/Visual input 2 • Visual input (Yellow) •...
-
Page 45: Troubleshooting Guide
Troubleshooting Guide What might appear to be a malfunction in your unit may just be the result of slight misoperation or miswiring. Before calling service, first check the following table for possible problems. General ? The power does not turn ON.01 ✔... - Page 46 Troubleshooting Guide Disc source "AUX" is displayed without achieving External disc control mode.50 ✔ O-N switch is set to "O" side. ☞ Set the switch to "N" side. ✔ Unsupported disc changer is connected.51 ☞ Connect the supported disc changer. (page 4) The specified disc does not play, but another one plays instead.52 ✔...
- Page 47 The following messages are displayed when certain problems are occurring in your system. Take the recommended actions. EJECT: No disc magazine has been loaded in the changer. The disc magazine is not completely loaded. ➪ Load the disc magazine properly. No CD in the unit.
-
Page 48: Specifications
Specifications Specifications subject to change without notice. Monitor Section Picture size ...7.0 inches wide (154.1 mm x 87.0 mm) Display system ...Transparent TN LCD panel Drive system...TFT active matrix system Number of pixels ...336.960 pixels (480 H x 234 V x RGB) Effective pixels ...99.99% Pixel arrangement ...RGB striped arrangement Back lighting ...Cold cathode tube...