Table of Contents
Advertisement
Quick Links
Hi-Fi VCR & DVD VIDEO RECORDER
D-VR5SU
OWNER'S MANUAL
©2006 Toshiba Corporation
This device does not tape-record copy protected DVD Video Discs.
2J40101A Cover
DIGITAL VIDEO
1
Additional information
3/4/06, 10:42 AM
Introduction
2
Various settings
24
Disc playback
34
Tape playback
49
Recording
53
Editing the disc
63
Dubbing
78
82
Advertisement
Table of Contents

Related Manuals for Toshiba D-VR5SU


Summary of Contents for Toshiba D-VR5SU
- Page 1 Hi-Fi VCR & DVD VIDEO RECORDER D-VR5SU OWNER’S MANUAL ©2006 Toshiba Corporation This device does not tape-record copy protected DVD Video Discs. 2J40101A Cover DIGITAL VIDEO 3/4/06, 10:42 AM Introduction Various settings Disc playback Tape playback Recording Editing the disc...
-
Page 2: Introduction
Introduction SAFTY PRECAUTIONS CAUTION RISK OF ELECTRIC SHOCK DO NOT OPEN CAUTION: TO REDUCE THE RISK OF ELECTRIC SHOCK, DO NOT REMOVE COVER (OR BACK). NO USER-SERVICEABLE PARTS INSIDE. REFER SERVICING TO QUALIFIED SERVICE PERSONNEL. WARNING: TO REDUCE THE RISK OF FIRE OR ELECTRIC SHOCK, do not expose this appliance to rain or moisture. -
Page 3: Important Safeguards
IMPORTANT SAFEGUARDS 1. READ INSTRUCTIONS All the safety and operating instructions should be read before the unit is operated. 2. RETAIN INSTRUCTIONS The safety and operating instructions should be retained for future reference. 3. HEED WARNINGS All warnings on the unit and in the operating instructions should be adhered to. 4. - Page 4 Introduction IMPORTANT SAFEGUARDS 13. LIGHTNING To protect your unit from a lightning storm, or when it is left unattended and unused for long periods of time, unplug it from the wall outlet and disconnect the antenna or cable system. This will prevent damage to the unit due to lightning and power line surges.
- Page 5 IMPORTANT SAFEGUARDS 19. REPLACEMENT PARTS When replacement parts are required, be sure the service technician uses replacement parts specified by the manufacturer or those that have the same characteristics as the original part. Unauthorized substitutions may result in fire, electric shock or other hazards. 20.
-
Page 6: Table Of Contents
Introduction Contents Introduction • SAFTY PRECAUTIONS ... 2 • IMPORTANT SAFEGUARDS ... 3 • Contents ... 6 • Features ... 8 • Disc ... 9 Handling discs ... 9 Discs which can be played back ... 9 Discs on which video can be recorded ... 10 DVD-RAM ... - Page 7 Contents Tape playback • Loading and unloading a cassette tape ... 49 • Cassette tape playback ... 50 • Special playback ... 51 Picture search ... 51 Still picture ... 51 Slow motion ... 51 Frame by frame picture ... 51 Adjusting tracking condition ...
-
Page 8: Features
Introduction Features Not only can you playback and record video tapes, but you can also playback DVD discs or make recordings using DVD-RAM, DVD-RW or DVD-R discs with this unit. In addition, you can enjoy editing the programs you record. Playback function A realistic, powerful, Movie Theater sound When connected to Dolby Digital and DTS compliant... -
Page 9: Disc
Because of problems and errors that can occur during the creation of DVD and CD Software and/or the manu- facture of DVD and CD discs, Toshiba cannot assure that the DVD player will successfully play every disc bear- ing DVD and CD logos. If you happen to experience any difficulty playing a DVD and/or CD disc on this DVD player, please contact Toshiba Customer Service. -
Page 10: Discs On Which Video Can Be Recorded
Introduction Disc Discs on which video can be recorded To record video with this unit, use the discs below: Media type DVD-RAM Ver.2.0 Ver.2.1 DVD-RW Ver.1.0, Ver.1.1, Ver.1.2 Ver.1.1 CPRM support Ver.1.2 CPRM support (1~6x SPEED) DVD-R Ver.2.0, Ver.2.1 (1~16x SPEED) DVD-RAM •... -
Page 11: Disc Playback In Other Players
Playback). Some of the functions described in this owner’s manual may not work with some discs. • Toshiba is not liable for any damage or loss caused directly or indirectly by the malfunction of this DVD/ VCR, including, without limitation, any one of the following: •... -
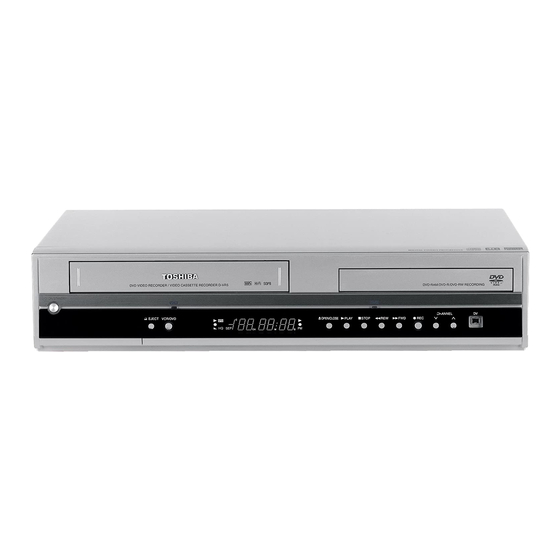
Page 12: Parts And Functions
Introduction Parts and functions Front * This unit has a door on the front panel. Please open it to access the S-VIDEO jack and the AUDIO (L/R)/VIDEO IN (INPUT 2) jacks. VCR/DVD button VCR indicator ON/STANDBY button Cassette Loading Slot EJECT button S-VIDEO IN (INPUT 2) jack AUDIO (L/R) IN... -
Page 13: Display Window
Parts and functions Display window Display Lights during video tape playback. Video tape is temporarily stopped. Lights during video tape recording. Progressive scanning mode. Timer recording display. XP/SP/LP/SLP 4 DVD recording modes. XP, SP, LP or SLP can be selected in turn by pressing the REC MODE/SPEED repeatedly. SP/SLP 2 VCR recording modes. -
Page 14: Remote Control
Introduction Parts and functions Remote control 2J40101A P12-22 OPEN/CLOSE Opens or Closes the tray. EJECT Ejects the cassette tapes PROG Activates the progressive scanning mode. HDMI HDMI output on/off. TV/VIDEO Select to operate TV/VIDEO ON/STANDBY Turns power on/off. Direct channel selection of TV Setting input Entering a password INSTANT REPLAY... -
Page 15: Power Source
Parts and functions Inserting Batteries into the Remote Control: Open the battery compartment cover in the direction of the ar- row. Caution: Never throw batteries into a fire. Notes: • Be sure to use AAA size batteries. • Dispose of batteries in a designated disposal area. •... -
Page 16: Antenna Connections
Introduction Antenna connections If you are using an antenna system, follow these instructions. If you are using a Cable TV subscriber, skip ahead to page 18 for the proper connections. ANTENNA TO DVD/VCR CONNECTION The DVD/VCR must be connected “between” the antenna and the TV. First, disconnect the antenna from the TV and connect it to the DVD/VCR. - Page 17 Antenna connections DVD/VCR TO TV CONNECTION After you have connected the antenna to the DVD/VCR, you must connect the DVD/VCR to the TV. Below are 3 common methods of connecting your DVD/VCR to a TV. Find the type of TV you are using and follow the connection diagram.
-
Page 18: Cable Tv Connections
Introduction Cable TV connections Many cable companies offer services permitting reception of extra channels including pay or subscription chan- nels. This DVD/VCR has an extended tuning range and can be tuned to most cable channels without using a cable company supplied converter box, except for those channels which are intentionally scrambled. If you subscribe to a special channel which is scrambled, you must have a descrambler box for proper reception. - Page 19 Cable TV connections IMPORTANT: Make sure the TV/CABLE menu option is set to the “CABLE” mode. This DVD/VCR cannot receive scrambled programs since it does not contain a descrambler. In order to receive scrambled programs, your existing descrambler must be used. Descrambler boxes are available from cable companies. Consult your local cable company for more information concerning connection to their descrambler equipment.
-
Page 20: Connections With The Tv Or Audio
Introduction Connections with the TV or audio component The exact arrangement you use to interconnect various video and audio components to the DVD/VCR is dependent on the model and features of each component. Check the Owner’s Manual provided with each component for the location of video and audio inputs and outputs. - Page 21 Connections with the TV or audio component Connect to a TV with HDMI output HDMI stands for High Definition Multimedia Interface. HDMI transfers digital audio and uncompressed digital video on a single cable. As a result, audio cables and video cables don’t need to be connected separately to a device.
- Page 22 Introduction Connections with the TV or audio component Connect to a stereo amplifier with audio output You can enjoy high quality audio by connecting the audio output to your amplifier. Connect the audio output jacks to any line-level inputs (such as AUX, DVD, CD, etc.) of an audio amplifier. Audio (L) output DVD/VCR Audio (R) output...
-
Page 23: Auto Clock Setting
Auto clock setting / Setting the video channel NOTES: • When shipped from factory, the video channel is set to CH 3. • If the unit does not operate prop- erly, or there is no key operation from the unit and/or the remote control: Static electricity, etc., may affect the operation. -
Page 24: Various Settings
Various settings SETUP MENU The SETUP MENU consists of several menus where you can make various settings concerning lan- guage, audio functions, and images. In addition, this menu includes a clock, channel and other things that require setting just after purchase. For details of each menu, see the corresponding section in this chapter. -
Page 25: Setting The Language
Setting the language You can choose the language of the menu screen, DVD menu, DVD audio and subtitles. Preparation: • Turn ON the TV and set it to the video input mode. • Select “LANGUAGE” from “SYSTEM SETUP”. For the procedure, see steps 1 to 3 in “Using the SETUP MENU”... -
Page 26: Setting The Parental Control
Various settings Setting the parental control Some discs are specified as not suitable for chil- dren. This unit can prevent playback of such discs. Preparation: • Turn ON the TV and set it to the video input mode. • Select “PARENTAL” from “SYSTEM SETUP”. For the procedure, see steps 1 to 3 in “Using the SETUP MENU”... -
Page 27: Setting The Clock
Setting the clock The clock is set to the correct time automatically, but it can also be set manually. The clock can be set for daylight saving time and time zone. Preparation: • Turn ON the TV and set it to the video input mode. •... -
Page 28: Setting The Disc
Various settings Setting the disc You can format, protect, or finalize a disc. Preparation: • Turn ON the TV and set it to the video input mode. • Select “DISC SETUP” from “SYSTEM SETUP”. For the procedure, see steps 1 to 3 in “Using the SETUP MENU”... -
Page 29: Protect Disc
Setting the disc / Other NOTES: • During finalizing, the cursor will move repeatedly. When the finalization finished, “FINALISING COM- PLETED PRESS ENTER” will appear. Press ENTER to clear the screen. • The finalization process may require a few minutes to about 1 hour according to disc type or the amount of free space on the disc. -
Page 30: Setting The Screen
Various settings Setting the screen This section describes settings about the screen. Preparation: • Turn ON the TV and set it to the video input mode. • Select “AV SETUP 1” from “AV SETUP”. For the pro- cedure, see steps 1 to 3 in “Using the SETUP MENU” on page 24. -
Page 31: Setting The Image Quality
Setting the image quality / Setting the audio This section describes image quality settings. Preparation: • Turn ON the TV and set it to the video input mode. • Select “AV SETUP 2” in “AV SETUP”. For the procedure, see steps 1 to 3 in “Using the SETUP MENU”... -
Page 32: Sap (Second Audio Program)
Various settings Setting the audio / Setting the recording SAP (Second Audio Program) This unit is fitted with an SAP broadcast system that enables you to switch to a second audio program while viewing a selected channel. This function applies only when the program is broad- cast in multiple languages through the SAP broadcast system. -
Page 33: Setting The Channel
Setting the channel / Setting other items This DVD/VCR is equipped with a channel memory feature that allows you to skip channels up or down to the next channel set in memory, hence skip over unwanted channels. Before selecting channels, they must be pro- grammed into the DVD/VCR’s memory. -
Page 34: Disc Playback
Disc playback Playback procedure NOTES: • If a non-compatible disc is loaded, “IN- CORRECT DISC”, “REGION CODE ERROR” or “PARENTAL ERROR” will appear on the TV screen according to the type of loaded disc. In this case, check your disc again (See pages 9 and 26). •... -
Page 35: Playback By Selecting A Title
Playback by selecting a title When playing back a recorded disc, you can display the title menu and select the title to be played back. NOTE: When a disc that has been recorded in the Video mode is finalized, the title menu is automatically changed that can be played back even with other DVD players. -
Page 36: Checking Media Information
Disc playback Checking media information Various information on the loaded disc can be displayed on the TV screen. NOTES: • The displayed information varies with the type of media. • Some information may not appear due to media type or operating conditions. -
Page 37: Special Playback
Special playback NOTE: There may be a slight de- lay between pressing the button and the function activation. NOTES: • The unit is capable of holding a still video image or On screen display image on your television screen indefi- nitely. -
Page 38: Instant Skip
Disc playback Instant skip / Locating a specific scene 2J40101A P34-40 Instant skip Use this function to skip commercials while you playback. Press INSTANT SKIP during playback. The time jumps to a point approx. 30 seconds later and playback re- sumes. -
Page 39: Repeat Playback
Repeat playback NOTES: • Some discs may not work with the repeat operation. • In A-B repeat mode, subtitles near point A or B may not appear. • A-B repeat does not work during the Title and the Chapter repeat playback. -
Page 40: Title Selection
Disc playback Title selection / DVD menu NOTES: • Depending on the DVD, you may not be able to select the title, and a “title menu” may simply be called a “menu” or “title” in the instructions supplied with the disc. •... -
Page 41: Changing Angles
Changing angles / Zooming / Karaoke playback NOTES: • Depending on the DVD, you may not be able to change the angles even if multi-angles are recorded on the disc. • You can use the Pause, Slow, Search or Skip feature in the zoom mode. -
Page 42: Changing Soundtrack Language
Disc playback Changing soundtrack language / Subtitles / To turn off the PBC (VIDEO CD Version 2.0) NOTES: • If the desired language is not heard after pressing the button several times, the language is not recorded on the disc. •... -
Page 43: Various Operations On Cd
Various operations on CD This section describes the TRACK INFO screen where music CDs or Video CDs can be played back using the various operations. NOTES: • In case the disc includes more than 10 tracks, you can turn to the next or the previous page. - Page 44 Disc playback Various operations on CD NOTE: When recording on a CD-R/CD-RW in the MP3 or WMA modes, “RAN- DOM PLAY” and “TIME SEARCH” will not appear in the menu list. 2J40101A P41-47 Random playback Press to select “RANDOM PLAY” from the menu list and press ENTER.
-
Page 45: Mp3/Wma/Jpeg/Divx
MP3/WMA/JPEG/DivX MP3 and WMA files can be played back. You can also display JPEG/ ® DivX files on the TV screen and enjoy them. Some discs may not play due to the condition of the recording. Limitations on MP3/WMA/ JPEG/DivX ®... - Page 46 Please be advised that you must obtain permission from the applicable copyright owners to download copyrighted content, including music files, in any format, including the MP3 and WMA formats, prior to the downloading thereof. Toshiba has no right to grant and does not grant permission to download any coprighted content.
- Page 47 MP3/WMA/JPEG/DivX JPEG CD JPEG files must have the extension letters “.jpe”, “.jpeg” or “.jpg”. 2J40101A P41-47 ® playback Playing back JPEG files Press to select JPEG file. • In case the disc includes more than 10 files, you can turn to the next or the previous page.
- Page 48 Disc playback MP3/WMA/JPEG/DivX ® DivX video specifications • DivX ® file must have the extension letters “.avi” “.div” or “.divx” • DivX® version: DivX® 3, 4, 5, and 6 (specifically 3.1.1, 4.1.2, 5.0.2, 5.0.5, 5.1.1, 5.2.1, 6.0 at Home Theater profile). Audio format: MPEG1 Layer2 (MP2), MPEG1 Layer3(MP3) Bit rate: 8kbps - 320kbps...
-
Page 49: Loading And Unloading A Cassette Tape
Tape playback Loading and unloading a cassette tape Use only video cassette tapes marked • Cassettes marked “VHS” (or “S-VHS”) can be used with this video cassette recorder However, S-VHS recording is not possible with this model. • This model is equipped with SQPB (S-VHS QUASI PLAYBACK) that makes it possible to playback S-VHS recordings with regular VHS resolution. -
Page 50: Tape Playback
Tape playback Cassette tape playback NOTES: • This VCR selects the playback tape speed SP, LP or SLP auto- matically. • It is impossible to switch to the VCR mode during DVD playback. 2J40101A P48-55 Preparation: • Turn ON the TV and set to the video input mode. •... -
Page 51: Special Playback
Special playback Picture search Reverse picture search function Press REW x 1 or x 2 during the playback. Forward picture search function Press F.FWD x 1 or x 2 during the playback. To return to playback: Press PLAY. SPEED SEARCH TIMES PICTURE SEARCH SPEED TAPE SPEED PRESS ONCE... -
Page 52: Zero Return Function
Tape playback ZERO RETURN function / Video index search system ZERO RETURN function This function makes tape rewind- ing stop at the counter “00:00:00” position automatically. NOTES for Counter Display: • If you rewind the tape beyond “00:00:00”, a minus sign (“–”) will be displayed in front of the time. -
Page 53: Read This Before Recording On Disc
Recording Read this before recording on disc This section explains what you must know to record onto a disc. Read it before attempting to record. NOTE: Should a power failure occur or the AC cord plug be disconnected while recording, editing, initializing, finaliz- ing or any other function, the program being recorded will be lost or the disc may not be playable. -
Page 54: Images That Cannot Be Recorded
Recording Read this before recording on disc The unauthorized recording, use, distribution, or revision of television programs, videotapes, DVDs and other materials, is prohibited under the Copyright Laws of the United States and other countries, and may subject you to civil and/or criminal liability. -
Page 55: Recording A Tv Program
Recording a TV program You can record programs you watch on TV onto video tapes or DVDs. NOTES: • When recording onto a DVD, it takes some time from when you press REC/OTR until recording actually starts. Press REC/OTR slightly earlier before the preferred starting point. - Page 56 Recording Recording a TV program Auto Rewind feature This VCR will automatically rewind the tape when the tape has ended (except during OTR and TIMER REC). It will also eject the tape. NOTES: • If the disc space become full, the recording is stopped and “Disc is full”...
-
Page 57: One-Touch Timer Recording (Otr)
One-touch Timer Recording (OTR) The One-touch Timer Recording feature provides a simple and con- venient way to make a timed re- cording. NOTE: If you wish to watch the DVD play- back during the VCR OTR, press DVD to change to DVD mode and perform the DVD playback. -
Page 58: Timer Recording
Recording Timer recording The timer recording system allows you to select the date, time and channel and record the desired pro- grams. Up to 12 timer programs within a month can be stored in this unit. NOTE: If a recordable tape is not inserted or no disc space is available, the timer record indicator “... - Page 59 Timer recording NOTES: • If you select timer recording on a specified date only one time, select “ONCE” in the “TYPE” for recording. You can record same days of every week or from Monday to Friday using the item “TYPE”. The items you can select are as follows: ONCE: Recording on the selected “DATE”...
- Page 60 Recording Timer recording NOTES: • Recording starts a few seconds be- fore the preset starting time. • You cannot use the timer recording for the both DVD and VCR at the same time. • You can playback the DVD during the VCR timer recording, and you can playback the VCR during the DVD timer recording.
-
Page 61: Chase Playback
Chase Playback You can begin playback from the beginning of a program currently being recorded. You will find this function of great advantage on long programs, as you do not have to wait for the end of recording to begin playback. NOTES: •... -
Page 62: Stereo Recording And Playback
Recording Stereo recording and playback The VHS Hi-Fi audio system per- mits high fidelity recording of MTS STEREO TV broadcasts. NOTES: • When playing back a video tape or disc that is not recorded in Hi-Fi stereo mode, the audio will auto- matically be monaural. -
Page 63: Editing The Disc
Editing the disc Editing the disc This section explains how to edit the recorded contents on DVD- RWs. However, the items that you can edit vary with the recording formats. In VR mode, you can edit various title menus, whereas in Video mode, you can edit only a few items. -
Page 64: Editing A Playlist
Editing the disc Editing a playlist You can create and edit the playlist based on the original title. NOTES: • A playlist can only be created with a DVD-RAM or a DVD-RW in VR mode. You cannot create a playlist with a DVD-RW in Video mode, nor with a DVD-R. -
Page 65: Changing A Title Name
Editing a playlist NOTES: • The title name can be a maximum of 64 characters. Long names will be shortened in the title menu. • For using the keyboard screen, see “Changing a disc name” (page 76). 2J40101A P63-71 Changing a title name Press TITLE MENU to display the title menu. -
Page 66: Erasing A Scene (Edit Title)
Editing the disc Editing a playlist 2J40101A P63-71 Erasing a scene (Edit title) You can erase an unnecessary scene from the created playlist. When you erase the scene from the playlist, the scene is not erased from the original title. Press TITLE MENU to display the title menu. - Page 67 Editing a playlist NOTE: It is no problem to omit the proce- dures for confirming the scene or adjusting start and end points. 2J40101A P63-71 Press to select “SET START” at the start point of the scene that you want to erase and press ENTER. (To set the start point easily, search the start point while “SET START”...
-
Page 68: Combining The Title
Editing the disc Editing a playlist 2J40101A P63-71 Combining the title You can create a playlist by combining the several original titles or playlists. To combine the titles, it is necessary to create a playlist at first. By combining the titles in the playlist, a playlist where several titles are combined is created. -
Page 69: Erasing A Playlist
Editing a playlist 2J40101A P63-71 Erasing a playlist You can erase the created playlist. Even if you erase the playlist, the original title will not be erased. Press TITLE MENU to display the title menu. Select the playlist that you want to erase. •... -
Page 70: Editing An Original Title
Editing the disc Editing an original title In VR mode, you can edit various items, whereas in Video mode, you can only edit the title names. NOTES: • You can automatically add a chap- ter mark in recording. For more in- formation, see page 32. -
Page 71: Combining Chapters
Editing an original title NOTE: Chapter marks that have been added automatically in the erasing of a scene procedure (page 73) cannot be erased. 2J40101A P63-71 When the scene you want to add a chapter mark, press ENTER. The playback is paused and the position of the added chapter mark appears green. -
Page 72: Changing An Original Title Name
Editing the disc Editing an original title NOTE: The title name can be a maximum of 64 characters in VR mode and a maximum of 30 characters in Video mode. Long names will be shortened in the title menu. 2J40101A P72-81 COMBINE CHAPTERS NAME 11/25/2003 10:03 PM CHAPTER... -
Page 73: Erasing A Scene (Edit Title)
Editing an original title NOTES: • If the scene is erased from the original title, the created playlist is erased. • Disc space will only be freed up if scenes lasting several minutes are deleted. • A chapter mark is automatically added at the location of the erased scene. -
Page 74: Erasing An Original Title
Editing the disc Editing an original title NOTE: If the original title is erased the cre- ated playlist is also erased. 2J40101A P72-81 Erasing an original title You can erase an original title. Erasing the title deletes both the title and the recording saved under that title name. -
Page 75: Changing A Disc Name
Changing a disc name You can change a disc name from the title menu. NOTES: • The disc name can be a maximum of 30 characters. Long names will be shortened in the title menu. • For using the keyboard screen, see “Using the keyboard screen”... -
Page 76: Using The Keyboard Screen
Editing the disc Changing a disc name Using the keyboard screen This section explains the function of the keyboard screen and how to input characters. The disc name and the title name can be changed using the keyboard screen. Keyboard screen types The keyboard screen has three types of “Letters”, “Num- bers”... - Page 77 Changing a disc name Erasing a character You can erase the input character. Erasing method 1 Press to select “Back”. Press ENTER. The last input character will be erased. To erase the characters continuously, press ENTER repeatedly. The input characters will be erased from the last to the top one by one.
-
Page 78: Dubbing
Dubbing Dubbing a tape onto a disc You can record video or audio on a video tape onto a disc. NOTES: • Dubbing cannot be accomplished when - a copy protected tape is used. - disc protection is set. - disc has no recording space. - HDMI mode is active. -
Page 79: Dubbing A Disc Onto A Tape
Dubbing a disc onto a tape You can record both video and audio from a disc to a video tape. When a disc with a copy guard is used, a distorted image is re- corded onto the video tape. NOTES: •... -
Page 80: Dubbing Using Other Equipment
Dubbing Dubbing using other equipment You can connect another VCR or camcorder to dubbing. Typical connection: When using this unit as a recording device Playback VCR To Audio (R) OUT To Video OUT To Audio (L) OUT AUDIO/VIDEO cord (supplied) Recording VCR To Video IN To Audio (R) IN... - Page 81 Dubbing using other equipment You can connect a DV format digital video camera to the DV IN terminal to record from it. NOTES: • The DV terminal of this recorder supports only input from a DV format digital video camera. It cannot output to a connected device.
-
Page 82: Glossary
Additional information Glossary A-B Repeat Playback Playback that repeats between two set points, A and angle Recorded onto some DVD discs are scenes which have been simultaneously shot from a number of dif- ferent angles (the same scene is shot from the front, from the left side, from the right side, etc.). - Page 83 Glossary parental control settings Level 1: Adult discs and general discs (R-rated discs included) cannot be played back. Level 2 to 3: Adult discs and R-rated discs cannot be played back. Level 4 to 7: Adult discs cannot be played back. (Level 4 to 7 discs contain content chil- dren age 15 and younger may not see.) Level 8:...
-
Page 84: Language Code List
Additional information Language code list Enter the appropriate code number for the initial settings “DVD MENU”, “AUDIO” and/or “SUBTITLE” (see page 25). Language Name Code Language Name Code Language Name Code Language Name Code Abkhazian 1112 Fiji Afar 1111 Finnish Afrikaans 1116 French Albanian... -
Page 85: Problems And Troubleshooting
Problems and troubleshooting Use the following check list for troubleshooting when you have problems with your unit. Consult your local dealer or service outlet if problems persist. Be sure all connections are properly made when using with other units. SYMPTOMS DVD/VCR DVD/VCR does not operate. -
Page 86: Video Head Cleaning
Additional information Problems and troubleshooting / Video head cleaning SYMPTOMS TV recording does not work. Timer recording does not work. Noise bars on screen. OTHER No picture, or screen is blurred or divided into two parts. No 4:3 (16:9) picture No on-screen display Nothing appears in the display window No surround sound... -
Page 87: Error/Warning Message List
Error/Warning message list ERROR/WARNING MESSAGE Power ON SYSTEM ERROR PLEASE WAIT SYSTEM ERROR PLEASE WAIT DISC CHECKING SYSTEM ERROR DISC MIGHT BE FAILED PRESS ENTER/SELECT Playback NO DISC REGION CODE ERROR INCORRECT DISC - C104, C105, C106, C107 Recording NO DISC PROCESSING PLEASE WAIT RECORDING INTERRUPTED -... -
Page 88: Specifications
Additional information Specifications GENERAL Power supply: AC 120V 60Hz Power consumption: Operation: 29W Standby: 2.5W (if display window is off.) Weight: 11.0 lbs (5.0 kg) Dimensions: Width : 16-15/16 inches (430 mm) Height : 3-5/8 inches (91.5 mm) Depth : 13-3/16 inches (335.5 mm) Operating temperature: 41°F to 95°F (5°C to 35°C) Operating humidity:... -
Page 89: Limited Warranty
Limited United States Warranty Digital Audio Video ("DAV") Product - Depot Repair Warranty Toshiba America Consumer Products, L.L.C. ("TACP") makes the following limited warranties to original consumers in the United States. THESE LIMITED WARRANTIES EXTEND TO THE ORIGINAL CONSUMER PURCHASER OR ANY PERSON RECEIVING THIS DAV PRODUCT AS A GIFT FROM THE ORIGINAL CONSUMER PURCHASER AND TO NO OTHER PURCHASER OR TRANSFEREE. - Page 90 DAV Product to the Depot Warranty Repair Center specified by the TACP Consumer Solutions Center. For additional information, visit TACP's website: www.tacp.toshiba.com ALL WARRANTIES IMPLIED BY THE LAW OF ANY STATE OF THE U.S.A., INCLUDING THE IMPLIED WARRANTIES OF MERCHANTABILITY AND FITNESS...
- Page 91 Memo 2J40101A P88-BACK 3/4/06, 10:46 AM...
- Page 92 Printed in Thailand J2J40101A SH 06/02 2J40101A P88-BACK 3/4/06, 10:46 AM...