Samsung DVD-V4600 Instruction Manual
Hide thumbs
Also See for DVD-V4600:
- Instruction manual (40 pages) ,
- Manual de instrucciones (20 pages) ,
- Service manual (56 pages)
Table of Contents
Advertisement
Advertisement
Table of Contents

Related Manuals for Samsung DVD-V4600


Summary of Contents for Samsung DVD-V4600
- Page 1 Instruction Manual DVD-V4600 www.samsungusa.com...
- Page 2 Remote Control Overview...
-
Page 3: Important Safety Instructions
RISK OF ELECTRIC SHOCK DO NOT OPEN CAUTION: TO REDUCE THE RISK OF ELECTRIC SHOCK, DO NOT REMOVE COVER (OR BACK). NO USER SERVICEABLE PARTS INSIDE. REFER SERVICING TO QUALIFIED SERVICE PERSONNEL. Note to CATV system installer: This reminder is provided to call CATV system installer's attention to Article 820-40 of the National Electrical Code (Section 54 of Canadian Electrical Code, Part I) that provides guidelines for proper ground- ing and, in particular, specifies that the cable ground shall be connected to the grounding system of the building as close to the point of cable entry as practical. -
Page 4: Table Of Contents
Table of Contents Safety Important Safety Instructions ... . . 2 Welcome Feature Summary ..... 4 Disc Type and Characteristics . -
Page 5: Feature Summary
SOUND • DTS disc Play Region Number Both the DVD player and the discs are coded by region. These regional codes must match in order for the disc to play. If the codes do not match, the disc will not play. -
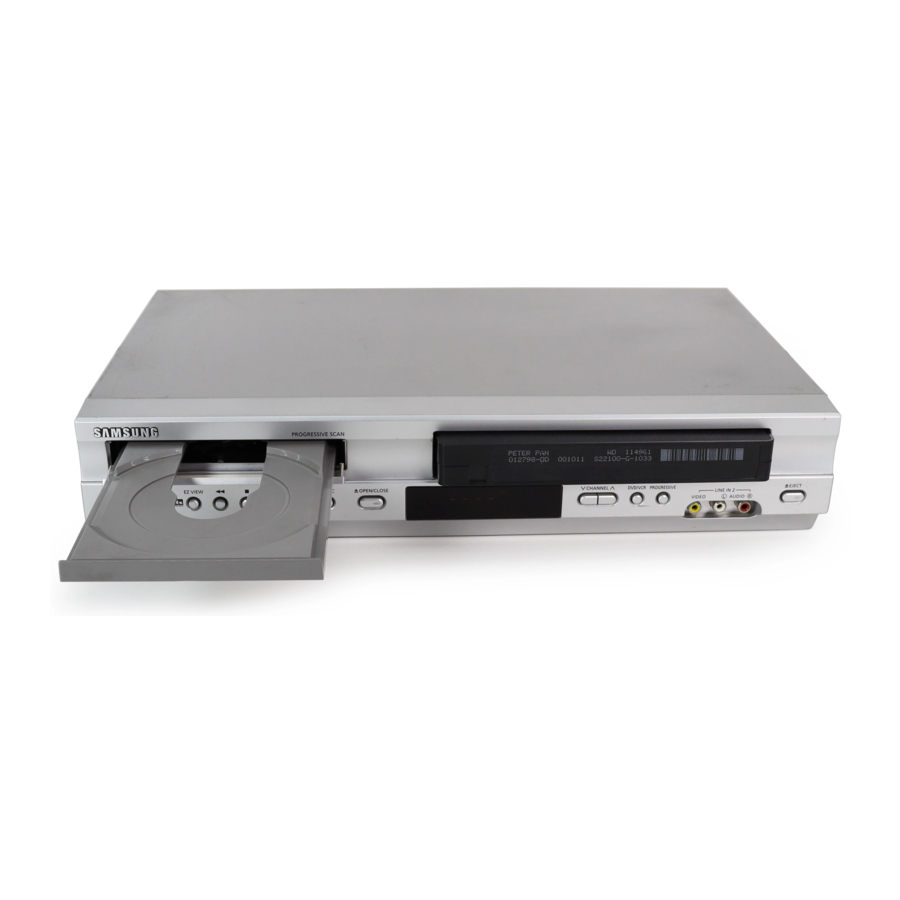
Page 6: Front Panel Overview
Front Panel Overview 9 10 11 DVD DECK DVD OPEN/CLOSE VCR DECK VCR EJECT POWER EZ VIEW Rear Panel S-VIDEO OUT AUDIO LINE OUT TO TV (S-VIDEO OR COMPONENT) DIGITAL AUDIO OUT(COAXIAL) Unpack When you unpack the DVD-VCR, please check the following list of items is included in the packing case. DVD-VCR RCA cable for Audio/Video connection... -
Page 7: Front Panel Display
Front Panel Display When the light is on, DVD is operating. The time, counter position, time remaining or current deck status is indicated. VCR is activated. DVD or CD media is loaded. VHS videotape is loaded. Insert Batteries into Remote •... -
Page 8: Stereo Connections
S-Video/Component Video Connections (for DVD) Use the S-Video or Component Video connection method only for the DVD player. The VCR can still be viewed through RF or line input mode on your TV. To activate your alternative (S-Video or Component) video selection, follow the “Alt Video Out”... -
Page 9: Monitor Tv Connections
You can connect a wide variety of audio/video equipment to your DVD-VCR, including: • An additional VCR • Laser Disc Player • DVD Player • Camcorder • Satellite Receiver • Video Game Since all of these devices use essentially the same connections, they will be described together. -
Page 10: A/V Receiver Connections
A/V Receiver Connections To take full advantage of the movie theater experience that DVD offers, you may want to connect your DVD- VCR to a complete Surround Sound system, including an A/V Receiver and six Surround Sound speakers. Before You Begin... •... -
Page 11: Basic Vcr Operation
Basic VCR Operation To play a standard VHS videotape, just insert it into the VCR deck and press the PLAY button. You can turn on the Auto Play to enable the VCR deck to play automatically when you insert a videotape that is missing the Record Safety Tab. -
Page 12: Menu Language
Menu Language To change the on-screen MENU language to English, French or Spanish, follow these steps. 1 Open “MENU” Press the MENU button while the DVD is in Stop or Play mode. 2 Select “SETUP” Using the UP/DOWN buttons, move the selection bar to “SETUP”... -
Page 13: Tuner Band Setting
Tuner Band Setting This feature allows you to manually set the DVD-VCR’s tuner band to Antenna or Cable, whichever you connected to the Antenna In jack during initial setup. • Use this setting only if Auto Setup detected the incorrect tuner band, i.e. channels are coming in on the wrong channel numbers. -
Page 14: Auto Channel Memory
Auto Channel Memory Auto Channel Memory will automatically seek and store all active channels in your area. 1 Open “MENU” With the DVD in Stop or Play mode, press the MENU button. 2 Select “SETUP” Using the UP/DOWN buttons, move the selection bar to “SETUP”... -
Page 15: Front Panel Dimmer
Front Panel Dimmer You can set the Front Panel Display to be bright all the time, dim all the time, dim during power off. 1 Open “ MENU” With the DVD in Stop or Play mode, press the MENU button. 2 Select “SETUP”... -
Page 16: Disc Menu Language
Disc Menu Language To set the Disc Menu Language to your preferred language, follow these steps. If your preferred language is available on a DVD, your Disc Menu Language will automatically be set to the language you choose. 1 Open “MENU” Press the MENU button while the DVD is in Stop mode. -
Page 17: Subtitle Language
Subtitle Language To set the Subtitle Language to your preferred language, follow these steps. If your preferred language is available on a DVD, your Subtitle Language will automatically be set to the language you choose. 1 Open “MENU” Press the MENU button while the DVD is in Stop mode. -
Page 18: Dts
If your A/V receiver is equipped with a DTS decoder, your DVD-VCR can output DTS digital sound, but you MUST enable this feature in the menu system. NOTE: Select “On” ONLY if you have connected a DTS-equipped A/V receiver to the Digital audio Out (coaxial) on the DVD-VCR rear panel. -
Page 19: Pcm Down Sampling
: On TV Aspect Ratio Set the aspect ratio (length x width) of your TV screen so the DVD player will display movies at the appropriate size for your television. Choose from standard, letterbox, or widescreen format. 1 Open “MENU”... -
Page 20: Black Level
TV using the S-VIDEO OUT or COMPONENT VIDEO OUT jacks. • Use the S-Video or Component Video connection method only for the DVD player. The tuner and VCR can still be viewed through the RF or line outputs. 1 Open “MENU”... -
Page 21: Parental
Alt Video Out • Press the PROGRESSIVE button on the front panel in stop mode if you have a Progressive scan TV only. Otherwise, the picture will be disturbed. Display Setup Parental Rating Control is a password protected system that allows you to block playback of DVDs based on their content. -
Page 22: Special Playback Features
Parental 5 Enter Password Use the numeric buttons (0-9) on the remote control to enter the 4-digit password. • Write your password down, and keep it in a safe place in case you need to change your settings later. 6 Select “Rating Level” Move the selection bar to “Rating Level,”... -
Page 23: Disc Menu Navigation
Special Playback Features 5 Stop/Resume • Press the STOP button once to stop playback. To resume the DVD/CD from the point where the disc stopped, press the ❿ll (PLAY/PAUSE) button. • Press the (STOP) button twice to completely stop playback. The next time you press (PLAY/PAUSE), the disc will start over from the beginning. -
Page 24: Title/Chapter/Time Selection
EZ View • Screen Fit The top and bottom of the screen are cut off and the full screen appears. The picture will look vertically stretched. • Zoom Fit The top, bottom, left and right of the screen are cut off and the central portion of the screen is enlarged. -
Page 25: Angle View
Title/Chapter/Time Selection ➢ To make the screen disappear, press the INFO button again. To access the desired title when there is more than Title one in the disc. For example, if there is more than one movie on a DVD, each movie will be identified. Most DVD discs are recorded in chapters so that Chapter you can quickly find a specific passage. -
Page 26: Subtitle
Subtitle Some DVDs provide subtitles in one or more languages. You can use the SUBTITLE button to quickly view and change settings. 1 Open Subtitle Menu During playback, press the SUBTITLE button. 2 Set Subtitle Language Use the LEFT/RIGHT buttons to select from the available subtitle languages. -
Page 27: Repeat Chapter/Title
Repeat Chapter/Title You can repeat a single chapter or a complete title. 1 Open Repeat Menu Press the REPEAT button while in Play mode to open the Repeat menu. • The current Repeat mode will be highlighted. 2 Select “Chapter / Track” Use the LEFT/RIGHT buttons to select “Chapter/ Track”. -
Page 28: Bookmarks
Bookmarks Up to three Bookmarks can be inserted for a given DVD, allowing you to quickly jump to your favorite scene or song. 1 Open Bookmark Menu During playback, press the MARK button on the remote control. The “MARK” header will be displayed on the screen. 2 Select Bookmark Placeholder Use the LEFT/RIGHT buttons to move to one of the three bookmark placeholders (- - -). -
Page 29: Special Vcr Playback Features
Special VCR Playback Features While a videotape is playing, you can enjoy a variety of special playback features, including Still, Frame Advance, Skip, Repeat, and more. Press the Play button again to resume normal playback. 1 Pause In Play mode, press ❿ll (PLAY/PAUSE) to still a single frame. -
Page 30: Auto Play
Auto Play If you want your videotapes to play automatically when you insert them, turn on Auto Play. NOTE: Only tapes that are missing the Record Safety Tab will play automatically when inserted. 1 Open the “MENU” With the VCR in Stop or Play mode, press the MENU button. -
Page 31: Variable Search System
Press the (REC) button on the remote control or front panel. For options while recording is in progress, see “Special Recording Features”. ➢ Recording from the DVD player to the VCR is not possible. 4 Pause/Resume Recording Press the ❿ll (PLAY/PAUSE) button. -
Page 32: Special Recording Features
Special Recording Features While a recording is in progress, you can watch a different channel, watch a DVD, or add recording time in 30-minute increments. 1 To Watch a different Channel Make sure that you connect the DVD-VCR to the TV using an RF cable. -
Page 33: Record Speed
Record Speed You can slow down the recording speed from SP to SLP in order to fit six hours of programming on a T-120 tape. 1 Start Recording Follow the Basic Recording instructions on page 30. 2 Set Record Speed Press the SPEED button on the remote control to set the Record Speed to one of the following options:... -
Page 34: Function(Vcr)
Function (VCR) 1 Open “MENU” In the DVD in Stop or Play mode, press the MENU button. 2 Select “FUNCTION” Use the UP/DOWN buttons to highlight “FUNCTION” then press the ENTER button. 3 Select “VCR Function” Using the UP/DOWN buttons to highlight “VCR Function”... -
Page 35: Technical Specifications
Technical Specifications acxz AUDIO Inputs VIDEO AUDIO AUDIO (DVD only) VIDEO Outputs VIDEO (DVD only) VIDEO SYSTEM AUDIO TRACK PLAY/RECORD TIME FF/REW TIME HEADS WOW & FLUTTER FREQ. RESPONSE DISC COMPATIBILITY FREQ. RESPONSE S/N RATIO DYNAMIC RANGE POWER REQUIREMENT 120V AC, 60 Hz, 25 watts ENVIRONMENT SYSTEM WEIGHT... -
Page 36: Limited Warranty To Original Purchaser
Transportation of the product to and from the service center is the responsibility of the purchaser. SAMSUNG will repair or replace this product, at our option and at no charge as stipulated herein, with new or reconditioned parts or products if found to be defective during the limited warranty period specified above. All replaced parts and products become the property of SAMSUNG and must be returned to SAMSUNG. - Page 37 ELECTRONICS SAMSUNG ELECTRONICS AMERICA, INC. HEADQUARTERS 105 Challenger Road, Ridgefield Park, N.J. 07660-0511 TEL: 1-800-SAMSUNG SERVICE DIVISION 400 Valley Road, Suite 201, Mount Arlington, NJ 07856 1-800-SAMSUNG (1-800-726-7864) www.SAMSUNGUSA.com AK68-00522A...