Samsung ML-1450 User Manual
Hide thumbs
Also See for ML-1450:
- Manual del usuario (206 pages) ,
- Quick manual (2 pages) ,
- User manual (206 pages)
Table of Contents
Advertisement
Quick Links
Advertisement
Table of Contents
Troubleshooting

Related Manuals for Samsung ML-1450


Summary of Contents for Samsung ML-1450
- Page 3 Contents STEP 1 STEP 2 STEP 3 STEP 4 STEP 5 STEP 6 STEP 7 –––––––––––––––––––––––––––––––––––––––––––– ––––––––––––––––––––––––––––––––––––––––– –––––––––––––––––––––––––––––––––– ––––––––––––––––––––––––––– –––––––––––––––––––––––––––––––––––––––––– ––––––––––––––––––––––––––––––––––– –––––––––––––––––––––––––––––––––– ––––––––––––––––––––––––– ––––––––––––––––––––––––––––––– ––––––––––––––––––––––––––––––––––––––– ––––––––––––––––––––––––––––––––––––––––– –––––––––––––––––––––––––––– ––––––––––––––––––––––––––––––––––– ––––––––––––––––––––––––––––––––––––––––––––––– –––––––––––––––––––––––––––––––––––––– –––––––––––––––––––––––––––––––––––––––––– –––––––––––––––––––––––––––––––––– –––––––––––––––––––––––––––––––– ––––––– ––––––––––––––...
- Page 4 ––––––––––––––––––––––––––––––––––––––– –––––––––––––––––––––––––––––––––––– –––––––––– – ––––––––––––––––––––––––––––––––––– –––––––––– ––––––––––––––––––––––––––––––––––––––––– –––––––––––––––––––––––––––––––––––––––––– ––––––––––––––––––––––––––––––– ––––––––––––––––––––––––––––––––––––– –––––––––––––––––––––––––––––––––––––– ––––––––––––– ––––––––––––––––––––––––––––––––– ––––––––––––––––––––––––––––––– ––––––––––––––––––––––––––––––––––––––– –––––––––––––––––––––––––––––––––– ––––––––––––––––––––––––– ––––––––––––––––––––––––––––––––––––– ––––––––––––––––––––––––––––––––––––––– –––––––––––––––––––––––––––– ––––––––––––––––––––––––––– –––––––––––––––––––––––––––––– ––––––––––––––––––––––––––––– ––––––––––––––––––––––––––––––––...
- Page 5 Contents (continued) –––––––––––––––––––––––––––––––– ––––––––––––––––––––––––––––––––– ––––––––––––––––––––––––––––––– ––––––––––––––––––––––––––––––––––– –––––––––––––––––––––––––––––––––––– –––––––––––––––– ––––––––––––––––––––––––––––––––––––––– –––––––––––––––––––––––––––––– –––––––––––––– –––––––––––––––––––––––––––––––––– –––––––––––––...
- Page 6 –––––––––––––– –––––––––––––––––– E.2 ––––––––––––– –––––––––––––––––––––––––––––––––––––––––– ––––––––––––––––––––––– –––––––––––––––––––––––––––––– ––––––––––––––––––––––––––––––––––––––––– –––––––––––––––––––––––––––––...
-
Page 7: Environmental And Safety Consideration
Environmental and Safety Consideration Laser Safety Statement Never operate or service the printer with the protective cover removed from Laser/Scanner assembly. The reflected beam, although invisible, can damage your eyes. -
Page 8: Ozone Safety
Environmental and Safety Consideration Ozone Safety OZONE Power Saver... -
Page 9: Radio Frequency Emissions
Environmental and Safety Consideration Radio Frequency Emissions Changes or modifications not expressly approved by the manufacturer responsible for compliance could void the user’s authority to operate the equipment. - Page 10 Environmental and Safety Consideration Approvals and Certifications EC Certification Certification to 1999/5/EC Radio Equipment & Telecommunications Terminal Equipment Directive (FAX)
- Page 11 Environmental and Safety Consideration...
- Page 12 Environmental and Safety Consideration...
- Page 13 HAPTER Introduction Introduction...
-
Page 14: Special Features
Special Features Print with excellent quality and high speed Flexible paper handling Create professional documents NTRODUCTION... - Page 15 Special Features Save time and money Expand the printer capacity NTRODUCTION...
- Page 16 Special Features Print in various environments Printer Features NTRODUCTION...
-
Page 17: Printer Components
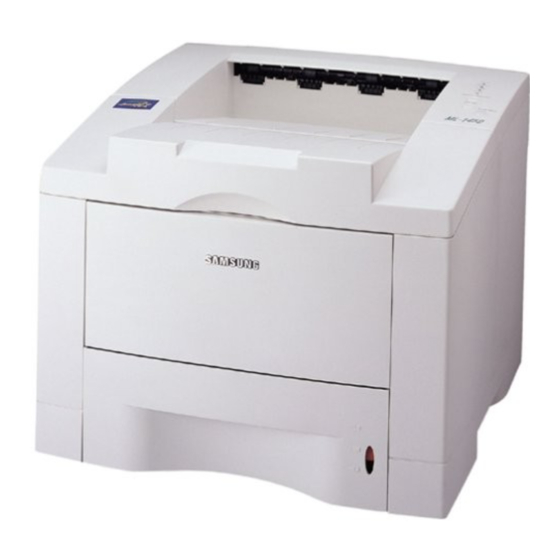
Printer Components Front View NTRODUCTION... -
Page 18: Rear View
Printer Components Rear View NTRODUCTION... -
Page 19: Your Printer
HAPTER Setting Up Setting Up Your Printer Your Printer step 1 step 2 step 3 step 4 step 5 step 6 step 7... -
Page 20: Unpack Your Printer
Unpack Your Printer ETTING RINTER... -
Page 21: Selecting A Location
Unpack Your Printer Selecting a Location ETTING RINTER... -
Page 22: Install The Toner Cartridge
Install the Toner Cartridge ETTING RINTER... - Page 23 Install the Toner Cartridge ETTING RINTER...
-
Page 24: Load Paper
Load Paper ETTING RINTER... - Page 25 Load Paper To Change Paper Size in Tray ETTING RINTER...
- Page 26 Load Paper ETTING RINTER...
-
Page 27: Connect To The Computer With A Parallel Cable
Connect to the Computer with a Parallel Cable ETTING RINTER... -
Page 28: Turn On The Printer
Turn on the Printer Print a Demo Page! ML-1450 Series Laser Beam Printer Excellent Performance, High quality Robust Network connectivity ETTING RINTER... -
Page 29: Install The Printer Software
Install the Printer Software PostScript Printer Description (PPD) file 2.10 ETTING RINTER... -
Page 30: Before Installing The Printer Software
Install the Printer Software Before Installing the Printer Software 2.11 ETTING RINTER... -
Page 31: Installing The Printer Software From The Cd-Rom
Install the Printer Software Installing the Printer Software from the CD-ROM 2.12 ETTING RINTER... - Page 32 Install the Printer Software 2.13 ETTING RINTER...
- Page 33 Install the Printer Software 2.14 ETTING RINTER...
-
Page 34: Printer Driver Features
Install the Printer Software Printer Driver Features 2.15 ETTING RINTER... -
Page 35: Software Installation Tips
Install the Printer Software Software Installation Tips 2.16 ETTING RINTER... -
Page 36: Installing Usb Driver In Windows 98/Me
Installing USB Driver Note: Connecting the printer to the USB port of the computer requires a certified USB cable. You will need to buy the USB 1.0 or 1.1 compliant cable. Installing USB driver in Windows 98/Me 1. Connect printer with USB cable and install USB driver 2.17... - Page 37 Installing USB Driver 2.18 ETTING RINTER...
- Page 38 Note: If you already installed the printer driver, the International Setup Version screen doesn’t appear. Installing USB Driver 2.19 ETTING RINTER...
- Page 39 Installing USB Driver 2.20 ETTING RINTER...
-
Page 40: Printer Port
2. Check your PC printer port Notes: • If you want to use your printer with the Parallel cable, remove the USB cable and connect the Parallel cable. Then reinstall the printer driver. • If your printer doesn’t work properly, reinstall the printer driver. Installing USB Driver 2.21 ETTING... -
Page 41: Installing Usb Driver In Windows 2000/Xp
Installing USB Driver Installing USB driver in Windows 2000/XP 1. Connect printer with USB cable 2.22 ETTING RINTER... - Page 42 2. Install USB driver Note: If the New Hardware Found box appears during the installation procedure, click the x in the upper right corner of the box, or click Cancel. Installing USB Driver 2.23 ETTING RINTER...
- Page 43 Installing USB Driver 2.24 ETTING RINTER...
- Page 44 3. Check your PC printer port Note: If your printer stop the connecting with USB cable, the printer driver icon is faded. Notes: • If you want to use your printer with the Parallel cable, remove the USB • If your printer doesn’t work properly, reinstall the printer driver. cable and connect the Parallel cable.
-
Page 45: Frequently Asked Questions About Usb
Installing USB Driver Frequently Asked Questions About USB 2.26 ETTING RINTER... - Page 46 Installing USB Driver 2.27 ETTING RINTER...
- Page 47 HAPTER Using the Using the Control Panel Control Panel...
-
Page 48: Control Panel Buttons
Control Panel Buttons Cancel/Reprint Demo Toner Save Cancel job Cancel/Reprint Error Note: If the Cancel/Reprint button is accidentally pushed, the job must be reprinted. There is no undo function. Reprint last page of the job Cancel/Reprint SING THE ONTROL ANEL... - Page 49 Control Panel Buttons SING THE ONTROL ANEL Print demo page and configuration sheet Demo Demo Start manual feeding Manual Feed Cleaning the inside of the printer Demo Toner Save Toner Save Paper Source Demo...
-
Page 50: Control Panel Lights
Control Panel Lights Error Light status legend Control Panel Light Message Ready Mode Data Demo SING THE ONTROL ANEL... - Page 51 Control Panel Lights SING THE ONTROL ANEL Processing Cancel/Reprint Data Data Cancel/Reprint Paper out Manual feed mode Manual Feed Paper...
- Page 52 Control Panel Lights Paper out in the manual feed mode Demo Printing in the manual feed mode SING THE ONTROL ANEL...
-
Page 53: Print Media
HAPTER Print Media Print Media... -
Page 54: Choosing Paper And Other Media
Choosing Paper and Other Media CAUTION: Using media that does not confirm to the specification listed in the paper specification can cause problems that may require service. This service is not covered by the warranty or service agreements. RINT EDIA... -
Page 55: Media Sizes And Capacities
Choosing Paper and Other Media Media Sizes and Capacities RINT EDIA... -
Page 56: Paper Guidelines
Choosing Paper and Other Media Paper Guidelines RINT EDIA... -
Page 57: Selecting The Output Tray
Selecting the Output Tray Printing to the Top Output Tray œ œ œ œ Printing to the Rear Output Tray œ œ œ œ RINT EDIA (Face down) (Face up) Note: Some special transparencies may have stacking problem by curl. In that case, please use the face down tray. - Page 58 Note: The capacity of the rear output tray is the same as that of the Multi-Purpose Tray. If the tray is overloaded with printed pages, it may fall from the printer. Remove the pages so that the tray is not overloaded. Selecting the Output Tray RINT EDIA...
-
Page 59: Loading Paper
Loading Paper œ œ ¤ ¤ ¤ ¤ œ œ ¤ ¤ ¤ ¤ œ œ œ œ Using Tray 1 or the Optional Tray 2 RINT EDIA... -
Page 60: Using The Multi-Purpose Tray
Loading Paper Using the Multi-Purpose Tray œ œ œ œ RINT EDIA... - Page 61 Loading Paper To load paper in the Multi-Purpose Tray: RINT EDIA...
- Page 62 Note: Make sure that you have not loaded too much print media. The stack should be under the stack height limit mark. The print media buckles if you load a stack that is too deep, or push it in too far.
-
Page 63: Using The Manual Feed
Loading Paper Using the Manual Feed 4.10 RINT EDIA... - Page 64 Loading Paper 4.11 RINT EDIA...
-
Page 65: Printing On Envelopes
Printing on Envelopes Guidelines 4.12 RINT EDIA... - Page 66 Printing on Envelopes 4.13 RINT EDIA...
-
Page 67: Printing On Labels
Printing on Labels Guidelines Note: To prevent them from sticking together, remove label sheet from the output tray as they are printed out. 4.14 RINT EDIA... -
Page 68: Printing On Transparencies
Printing on Transparencies Guidelines Notes: • To prevent transparencies from sticking together, remove them from the output tray as they are printed. • Place transparencies on a flat surface after removing them from the printer. 4.15 RINT EDIA... -
Page 69: Printing On Preprinted Paper
Printing on Preprinted Paper Guidelines 4.16 RINT EDIA... -
Page 70: Printing On Card Stock Or Custom-Sized Media
Printing on Card Stock or Custom-sized Media Guidelines Note: If the size of your print media is not listed in the Paper Size box in the Paper tab of the printer driver properties, select Custom Paper and set the paper size manually. 4.17 RINT EDIA... -
Page 71: Printing Tasks
HAPTER Printing Tasks Printing Tasks... -
Page 72: Printing A Document
Printing a Document RINTING ASKS... - Page 73 Printing a Document RINTING ASKS...
- Page 74 Printing a Document œ œ œ œ œ œ œ œ RINTING ASKS...
- Page 75 Printing a Document Notes: To make your changes permanent Start Settings Printers Samsung ML-1450 Series Properties RINTING ASKS...
-
Page 76: Canceling A Print Job
Printing a Document Canceling a Print Job Printing Help RINTING ASKS... -
Page 77: Using Toner Save Mode
Using Toner Save Mode RINTING ASKS... -
Page 78: Printing On Both Sides Of The Paper
Printing on Both Sides of the Paper Note: Flip on Long Edge Type Type Output Mode Multiple Pages per Side, Scaling Printing Fit to Page Note: Multi-Purpose Tray (Manual Duplexing) you must use the RINTING ASKS... - Page 79 Printing on Both Sides of the Paper (Manual Duplexing) œ œ œ œ œ œ œ œ ➛ ➛ ¤ ¤ ¤ ¤ ➛ ➛ ¤ ¤ ¤ ¤ œ œ œ œ RINTING ASKS...
- Page 80 Note: Printing on Both Sides of the Paper (Manual Duplexing) Note: (left edge toward the printer) (top edge toward the printer) Face Up Tray Do not (right edge toward the printer) (bottom edge toward the printer) RINTING ASKS...
-
Page 81: Printing Multiple Pages On One Sheet Of Paper
rinting Multiple Pages on One Sheet of Paper œ¤ œ¤ 5.10 RINTING ASKS (N-Up Printing) -
Page 82: Scaling Your Document
Scaling Your Document œ ❷ 5.11 RINTING ASKS... -
Page 83: Fitting Your Document To A Selected Paper Size
Fitting Your Document To a Selected Paper Size 5.12 RINTING ASKS... -
Page 84: Printing Booklets
Printing Booklets œ œ œ œ Note: must use the Multi-Purpose Tray œ œ œ œ Note: 5.13 RINTING ASKS... - Page 85 Printing Booklets œ œ ¤ ¤ œ œ ¤ ¤ 5.14 RINTING ASKS...
- Page 86 Note: Face Up tray Do not œ œ œ œ œ œ œ œ Printing Booklets œ œ ¤ ¤ œ œ ¤ ¤ œ œ œ œ 5.15 RINTING ASKS...
-
Page 87: Printing Posters
Printing Posters œ œ œ œ 5.16 RINTING ASKS... - Page 88 Printing Poster ➛ ➛ ¤ ¤ ¤ ¤ ➛ ➛ ¤ ¤ ¤ ¤ ➛ ➛ ¤ ¤ ¤ ¤ ➛ ➛ ¤ ¤ ¤ ¤ œ œ ¤ ¤ ¤ ¤ œ œ ¤ ¤ ¤ ¤ œ œ ¤ ¤ ¤ ¤ œ...
-
Page 89: Setting Graphic Properties
Setting Graphic Properties Resolution 5.18 RINTING ASKS... - Page 90 Setting Graphic Properties SRT Mode Darkness Dark Text All Text to Black 5.19 RINTING ASKS...
- Page 91 Setting Graphic Properties Reprint Reprint When Jam Power Save Mode 5.20 RINTING ASKS...
-
Page 92: Printing Watermarks
Printing Watermarks 5.21 RINTING ASKS... - Page 93 Printing Watermarks 5.22 RINTING ASKS...
- Page 94 Printing Watermarks 5.23 RINTING ASKS...
-
Page 95: Using Page Overlay
Using Page Overlay Dear ABC Regards 5.24 RINTING ASKS... - Page 96 Using Page Overlay Save Using Page Overlay 5.25 RINTING ASKS...
- Page 97 Using Page Overlay 5.26 RINTING ASKS...
- Page 98 Using Page Overlay 5.27 RINTING ASKS...
-
Page 99: Printing On Different Paper For The First Page
Printing on Different Paper for the First Page 5.28 RINTING ASKS... -
Page 100: Reprinting The Last Page
Reprinting the Last Page 5.29 RINTING ASKS... - Page 101 HAPTER Maintaining Maintaining Your Printer Your Printer...
-
Page 102: Maintaining Toner Cartridge
Maintaining Toner Cartridge Toner cartridge storage The printer warranty does not cover damage caused by using a refilled cartridge. Toner cartridge life expectancy Recycling toner cartridge Toner Save Saving toner Toner Save Mode AINTAINING RINTER... -
Page 103: Redistributing Toner
Toner Cartridge Redistributing Toner CAUTIONS: • Avoid reaching too far into the printer. The fusing area may be hot. • To prevent damage to the toner cartridge, do not expose it to light for more than a few minutes. Note: If the toner gets on your clothing, wipe it off with a dry cloth and wash clothing in cold water. - Page 104 Toner Cartridge If the print remains light AINTAINING RINTER...
-
Page 105: Cleaning The Printer
Cleaning the Printer Notes: • Do not use ammonia-based cleaners or volatile solvents such as thinner, on or around the printer. These can damage the printer. • While cleaning the inside of the printer, be careful not to touch the transfer roller (located underneath the toner cartridge ). - Page 106 Cleaning the Printer Printing a cleaning sheet Demo AINTAINING RINTER...
-
Page 107: Problem Solving
HAPTER Problem Solving Problem Solving... -
Page 108: Troubleshooting Checklist
Troubleshooting Checklist Check Solution Data Demo Error ROBLEM OLVING... -
Page 109: Solving General Printing Problems
Solving General Printing Problems Possible Cause Solution Problem Samsung ML-1450 Series Samsung ML-1450 Series PS Demo Manual Data ROBLEM OLVING... - Page 110 Solving General Printing Problems Possible Cause Problem Solution Paper Start Settings Printers Properties Details Spool Settings ROBLEM OLVING...
- Page 111 Solving General Printing Problems Solution Possible Cause Problem ROBLEM OLVING...
- Page 112 Solving General Printing Problems Solution Possible Cause Problem LPT1 Enter ROBLEM OLVING...
-
Page 113: Printing Special Pages
Printing Special Pages Demo Page ML-1450 Series Laser Beam Printer Excellent Performance, High quality Robust Network connectivity Compatibility Configuration Sheet Samsung ML-1450 Series Cleaning Sheet ROBLEM OLVING Demo Demo Demo Note: The cartridge cleaning process takes some time. To stop the printing, turn the power off. -
Page 114: Clearing Paper Jams
Clearing Paper Jams Paper Error Output Area Note: Paper jams in this area may result in loose toner on the page. If you get any toner on your clothes, wash them in cold water because hot water will set the toner into the fabric. ROBLEM OLVING... - Page 115 Clearing Paper Jams ROBLEM OLVING...
- Page 116 Make sure that you click the right end of the roller back in place. Error Note: If the Paper and the Error lights do not turn off, there is still jammed paper inside the printer. Check the input area and the inside of the printer. Clearing Paper Jams ROBLEM OLVING...
-
Page 117: Input Area
Clearing Paper Jams Input Area Note: If paper has entered the toner cartridge area, follow the instructions on remove such jams from the inside of the printer than the paper input area. Note: If the paper is jammed in the paper feed area and cannot be accessed from inside the printer, remove Tray 1 from the printer and carefully pull... - Page 118 Note: If the Paper and the Error lights do not turn off, there is still jammed paper inside the printer. Check the inside of the printer. Clearing Paper Jams 7.11 ROBLEM OLVING...
-
Page 119: Inside The Printer
Clearing Paper Jams Inside the Printer Note: Paper jams in this area may result in loose toner on the page. If you get any toner on your clothes, wash them in cold water because hot water will set the toner into the fabric. CAUTION: To prevent damage to the toner cartridge, do not expose it to light for more than a few minutes. - Page 120 Note: If the toner cartridge is difficult to reinstall, make sure the guide feed has been flipped back down into position. Note: If you have the optional Tray 2 installed, and cannot find the jammed paper in the output or input area, or inside the printer, the paper jam may have occurred in the optional Tray 2. See next page to clear the jammed paper in the optional tray.
-
Page 121: In The Optional Tray
Clearing Paper Jams In the Optional Tray 2 7.14 ROBLEM OLVING... -
Page 122: Tips For Avoiding Paper Jams
Clearing Paper Jams Tips for Avoiding Paper Jams Load Paper 7.15 ROBLEM OLVING... -
Page 123: Solving Print Quality Problems
Solving Print Quality Problems Print Quality Checklist Solving Print Quality Problems Problem Light or faded print AaBb BbCc AaBb BbCc AaBb BbCc AaBb BbCc AaBb BbCc 7.16 ROBLEM OLVING Solution AaBbCc AaBbCc AaBbCc AaBbCc AaBbCc... - Page 124 Problem Toner specks AaBbCc AaBbCc AaBbCc AaBbCc AaBbCc Dropouts AaBbCc AaBbCc AaBbCc AaBbCc AaBbCc AaBbCc AaBbCc AaBbCc AaBbCc AaBbCc Vertical lines AaBbCc AaBbCc AaBbCc AaBbCc AaBbCc AaBbCc AaBbCc AaBbCc AaBbCc AaBbCc Solving Print Quality Problems Solution AaBbCc AaBbCc AaBbCc AaBbCc AaBbCc ROBLEM 7.17...
- Page 125 Solving Print Quality Problems AaBbCc AaBbCc AaBbCc AaBbCc AaBbCc Problem Gray background AaBbCc AaBbCc AaBbCc AaBbCc BbCc AaBbCc BbCc BbCc Toner smear Repetitive vertical defects AaBbCc AaBbCc AaBbCc AaBbCc AaBbCc 7.18 ROBLEM OLVING Solution AaBbCc AaBbCc AaBbCc AaBbCc AaBbCc AaBbCc AaBbCc AaBbCc AaBbCc...
- Page 126 AaBbCc AaBbCc AaBbCc AaBbCc AaBbCc Problem Background scatter AaBbCc AaBbCc AaBbCc AaBbCc AaBbCc Misformed characters Page skew Solving Print Quality Problems Solution AaBbCc AaBbCc AaBbCc AaBbCc AaBbCc AaBbCc AaBbCc AaBbCc AaBbCc AaBbCc Demo ROBLEM 7.19 OLVING...
- Page 127 Solving Print Quality Problems AaBbCc AaBbCc AaBbCc Problem AaBbCc AaBbCc AaBbCc AaBbCc Curl or wave AaBbCc AaBbCc AaBbCc Wrinkles or creases Back of printouts dirty Black pages 7.20 ROBLEM OLVING AaBbCc Solution AaBbCc AaBbCc AaBbCc AaBbCc AaBbCc AaBbCc AaBbCc AaBbCc AaBbCc AaBbCc...
- Page 128 AaBbCc AaBbCc Problem Loose toner AaBbCc AaBbCc AaBbCc AaBbCc AaBbCc Character Voids Horizontal stripes AaBbCc AaBbCc AaBbCc AaBbCc AaBbCc Solving Print Quality Problems Solution ROBLEM OLVING 7.21...
-
Page 129: Troubleshooting Error Messages
Troubleshooting Error Messages Printer Light Patterns Light status legend Power off Paper out Paper 7.22 ROBLEM OLVING... - Page 130 Troubleshooting Error Messages Paper out in the manual feed mode Demo Paper jam Door open, no toner cartridge 7.23 ROBLEM OLVING...
- Page 131 Troubleshooting Error Messages Memory out Cancel/Reprint System error 7.24 ROBLEM OLVING...
-
Page 132: Common Windows Problems
Common Windows Problems Problem Possible Cause and Solution Data Note: Refer to Microsoft Windows 9x, Me, NT 4.0, 2000 or XP documentation that came with your PC for further information on Windows error messages. 7.25 ROBLEM OLVING... -
Page 133: Common Macintosh Problems
Common Macintosh Problems Problems in the Chooser Problem Chooser Select a PostScript Printer Chooser 7.26 ROBLEM OLVING Possible Cause and Solution Extensions Systems Network AppleTalk Control Panel Panels Apple Data Chooser AppleTalk Zones AppleTalk Chooser Control Chooser Active... -
Page 134: Printing Errors
Common Macintosh Problems Printing Errors Possible Cause and Solution Problem Background Printing Chooser Print Monitor Background Printing 7.27 ROBLEM OLVING... -
Page 135: Troubleshooting Ps Errors
Troubleshooting PS Errors Note: To receive a printed or screen displayed message when PS errors occur, open the Print Options dialog box and click the desired selection next to the PostScript errors section. Problem 7.28 ROBLEM OLVING Possible Cause PostScript Advanced Installed Solution... - Page 136 Troubleshooting PS Errors Memo 7.29 ROBLEM OLVING...
-
Page 137: Specifications
PPENDIX Specifications Specifications... -
Page 138: Printer Specifications
Printer Specifications Specification and Description Item Up to 1,200 x 1,200 dpi effective output PECIFICATIONS... -
Page 139: Paper Specifications
Paper Specifications Overview Notes: CAUTION: PECIFICATIONS... -
Page 140: Supported Sizes Of Paper
Paper Specifications Supported Sizes of Paper Tray 1 or Optional Tray 2 Dimensions Weight Capacity Multi-Purpose Tray Dimensions Weight Capacity Note: PECIFICATIONS... -
Page 141: Guidelines For Using Paper
Paper Specifications Guidelines for Using Paper Problem with Paper Solution Symptom Notes: PECIFICATIONS... -
Page 142: Paper Output Capacity
Paper Specifications Paper Specifications Category Specifications Paper Output Capacity Output Tray Capacity PECIFICATIONS... -
Page 143: Printer And Paper Storage Environment
Paper Specifications Printer and Paper Storage Environment PECIFICATIONS... - Page 144 Paper Specifications Envelopes Weight: Construction: Condition: Temperature: Size: Maximum Minimum Notes: PECIFICATIONS...
- Page 145 Paper Specifications Envelopes with Double Side Seams Envelopes with Adhesive Strips or Flaps Envelope Margins Envelope Storage PECIFICATIONS Type of Address Minimum Notes: Maximum...
- Page 146 Labels Transparencies CAUTIONS: Adhesives: Arrangement: Curl: Condition: CAUTION: Paper Specifications PECIFICATIONS...
- Page 147 PPENDIX Using Your Using Your Printer with Printer with a Macintosh a Macintosh...
-
Page 148: Macintosh Installation
Macintosh Installation System Requirements Macintosh Hardware Requirement Macintosh System Requirement Printer Hardware Requirement SING RINTER WITH A ACINTOSH... -
Page 149: Connecting To Macintosh
Macintosh Installation Connecting To Macintosh USB Connection SING RINTER WITH A ACINTOSH Note: If you are using a USB hub, connect the printer’s cable to the first tier of the hub or the printer may malfunction. If the printer doesn’t work with the hub, connect it directly to the USB port. -
Page 150: Network Connection
Network Connection Note: You must configure your printer for the network. For information about configuring your printer, refer to the Network User’s Guide. Macintosh Installation SING RINTER WITH A ACINTOSH... - Page 151 Macintosh Installation Installing Software for Macintosh SING RINTER WITH A ACINTOSH...
-
Page 152: Using Qpdl Driver
Using QPDL Driver Installing QPDL Driver on the USB-connected Macintosh Installing QPDL Driver on the network-connected Macintosh SING RINTER WITH A ACINTOSH... -
Page 153: Printing From A Macintosh
Using QPDL Driver Printing from a Macintosh SING RINTER WITH A ACINTOSH... - Page 154 Using QPDL Driver SING RINTER WITH A ACINTOSH...
- Page 155 Using QPDL Driver SING RINTER WITH A ACINTOSH...
-
Page 156: Advanced Printing
Using QPDL Driver Advanced Printing Darkness/Quality Layout SING RINTER WITH A ACINTOSH... -
Page 157: Background Printing
Using QPDL Driver Color œ œ Background Printing Paper Source B.10 SING RINTER WITH A ACINTOSH... -
Page 158: Using Ps Driver
Using PS Driver Installing PPD file on the USB-connected Macintosh Note: The position of Desktop Printer Utility may vary depending to the MAC OS. SING RINTER WITH A ACINTOSH B.11... -
Page 159: Installing Ppd File On The Network-Connected Macintosh
Using PS Driver Installing PPD file on the network-connected Macintosh B.12 SING RINTER WITH A ACINTOSH... - Page 160 Using PS Driver Printing from a Macintosh B.13 SING RINTER WITH A ACINTOSH...
- Page 161 PPENDIX Printing from Printing from DOS Applications DOS Applications...
-
Page 162: About Remote Control Panel For Dos
DOS software programs. If your DOS software program does not include a printer driver for your Samsung printer, contact the manufacturer of the software program or use one of the alternate printer drivers. DOS A... -
Page 163: Installing The Remote Control Panel For Dos Users
Installing the Remote Control Panel for DOS Users DOS A RINTING FROM PPLICATIONS... - Page 164 Installing the Remote Control Panel for DOS Users DOS A RINTING FROM PPLICATIONS...
-
Page 165: Uninstall Remote Control Panel
Installing the Remote Control Panel for DOS Users Uninstall Remote Control Panel DOS A RINTING FROM PPLICATIONS... -
Page 166: Selecting Print Settings
Selecting Print Settings DOS A RINTING FROM PPLICATIONS... - Page 167 Selecting Print Settings DOS A RINTING FROM PPLICATIONS...
- Page 168 Selecting Print Settings DOS A RINTING FROM PPLICATIONS...
- Page 169 Selecting Print Settings DOS A RINTING FROM PPLICATIONS...
- Page 170 Selecting Print Settings DOS A RINTING FROM PPLICATIONS...
- Page 171 Selecting Print Settings C.10 DOS A RINTING FROM PPLICATIONS...
- Page 172 Selecting Print Settings C.11 DOS A RINTING FROM PPLICATIONS...
- Page 173 PPENDIX Using Windows Using Windows PostScript Driver PostScript Driver...
-
Page 174: Setting Your Printer With The Ps Option
Setting Your Printer with the PS Option Installing PPD Files Notes: • Installing the PostScript printer driver may require the use of the operating system files on the original CD-ROM or diskette that came with your system. • If you have a PostScript 3 driver and want to use it, you must install the PostScript 3 PPD which is also provided on the ML-1450 series CD-ROM. - Page 175 Installing PPD Files Installing PS driver in Windows 95/98/Me/NT SING INDOWS CRIPT RIVER...
- Page 176 Installing PPD Files SING INDOWS CRIPT RIVER...
- Page 177 Installing PPD Files Note: When you install the driver, if the dialog box prompting you to insert the Windows CD appears, insert the Windows CD-ROM shipped with your printer into your CD-ROM drive. Click Browse, and then select CD-ROM drive or click OK. SING INDOWS CRIPT...
- Page 178 Installing PPD Files SING INDOWS CRIPT RIVER...
- Page 179 Installing PPD Files Installing PS driver in Windows 2000/XP SING INDOWS CRIPT RIVER...
- Page 180 Installing PPD Files SING INDOWS CRIPT RIVER...
- Page 181 Installing PPD Files Uninstall PS Driver SING INDOWS CRIPT RIVER...
-
Page 182: Accessing The Ps Printer Driver Features
Accessing the PS Printer Driver Features Opening the Printer Properties Window SING INDOWS CRIPT RIVER... - Page 183 PPENDIX Using Your Using Your Printer on Printer on a Network a Network...
-
Page 184: About Sharing The Printer On A Network
About Sharing the Printer on a Network Locally Shared Network-Connect Printing Across a Network SING THE RINTER ON A ETWORK... -
Page 185: Setting Up A Locally Shared Printer
Setting Up a Locally Shared Printer Windows 98/Me SING THE RINTER ON A ETWORK Setting Up Host Computer Start Network File and Print Sharing Start Printers Properties Printer Sharing Setting Up Client PC Start Port Start Printer Details Control Panel Settings Shared As Explorer. - Page 186 Windows NT/2000/XP Setting Up a Locally Shared Printer Setting Up Host Computer Start Start Printer Shared Shared As Share this printer Share Name Shared Name Settings Printers Printers and Faxes Sharing. SING THE RINTER ON A ETWORK...
- Page 187 Setting Up a Locally Shared Printer SING THE RINTER ON A ETWORK Setting Up Client PC Start Start Start Printer Ports Local port Enter a port name Close Apply Explorer. Settings Printers Printers and Faxes Properties. Add Port New Port...
-
Page 188: Setting Up A Network-Connected Printer
Setting Up a Network-Connected Printer SING THE RINTER ON A ETWORK... -
Page 189: Printer Options
PPENDIX Printer Options Printer Options... - Page 190 Precautions DISCONNECT THE POWER CORD: DISCHARGE STATIC ELECTRICITY: RINTER PTIONS...
-
Page 191: Memory And Postscript Simms
Memory and PostScript SIMMs Notes: RINTER PTIONS... - Page 192 Memory and PostScript SIMMs DRAM MODULE FLASH-ROM MODULE RINTER PTIONS...
- Page 193 Memory and PostScript SIMMs Note: RINTER PTIONS...
-
Page 194: Network Interface Card
Network Interface Card RINTER PTIONS... - Page 195 Network Interface Card Note: RINTER PTIONS...
-
Page 196: Paper Tray
Paper Tray 2 support unit paper tray Note: label RINTER PTIONS... - Page 197 Paper Tray 2 Note: RINTER PTIONS...
- Page 198 Paper Tray 2 Memo RINTER PTIONS...
- Page 199 PPENDIX Using Your Using Your Printer in Linux Printer in Linux...
-
Page 200: Linux Driver Installation
Linux Driver Installation Installation 1. Mount the CD-ROM drive. 2. Install setup script. Note: To mount the CD-ROM drive, you must be a super user or must be authorized to mount the CD-ROM by the super user. If you fail to mount the CD-ROM drive, ask the system administrator. - Page 201 Linux Driver Installation 3. Set up the printer filter. SING RINTER IN INUX printtool Local Printer Info Names/Spool Directory/File Limit in Kb/Printer Device Select Samsung Printer PCL5e Compatible Quit Input Filter PrintTool...
- Page 202 INDEX Numeric NDEX...
- Page 203 INDEX paper jam NDEX...
- Page 204 INDEX driver paper NDEX...
- Page 205 INDEX postscript 3 emulation NDEX problem, solving paper tray remote control panel...
- Page 206 Visit us at: http://www.samsungprinter.com Rev. 2.00 Home...