ZyXEL Communications ZyWALL 2 Plus User Manual
Interned security appliance
Hide thumbs
Also See for ZyWALL 2 Plus:
- User manual (678 pages) ,
- Quick start manual (137 pages) ,
- Firmware release notes (43 pages)

Related Manuals for ZyXEL Communications ZyWALL 2 Plus


Summary of Contents for ZyXEL Communications ZyWALL 2 Plus
- Page 1 ZyWALL 2 Plus Internet Security Appliance User’s Guide Version 4.03 12/2007 Edition 1 www.zyxel.com...
-
Page 3: About This User's Guide
Help us help you. Send all User Guide-related comments, questions or suggestions for improvement to the following address, or use e-mail instead. Thank you! The Technical Writing Team, ZyXEL Communications Corp., 6 Innovation Road II, Science-Based Industrial Park, Hsinchu, 300, Taiwan. E-mail: techwriters@zyxel.com.tw ZyWALL 2 Plus User’s Guide About This User's Guide... -
Page 4: Document Conventions
Syntax Conventions • The ZyWALL 2 Plus may be referred to as the “ZyWALL”, the “device” or the “system” in this User’s Guide. • Product labels, screen names, field labels and field choices are all in bold font. - Page 5 Icons Used in Figures Figures in this User’s Guide may use the following generic icons. The ZyWALL icon is not an exact representation of your device. ZyWALL Server Telephone ZyWALL 2 Plus User’s Guide Computer Notebook computer DSLAM Firewall Switch...
-
Page 6: Safety Warnings
• Do not use the device outside, and make sure all the connections are indoors. There is a remote risk of electric shock from lightning. This product is recyclable. Dispose of it properly. Safety Warnings ZyWALL 2 Plus User’s Guide... -
Page 7: Table Of Contents
Bandwidth Management ... 351 DNS ... 365 Remote Management ... 377 UPnP ... 399 Custom Application ... 409 ALG Screen ...411 Logs and Maintenance ... 417 Logs Screens ... 419 Maintenance ... 447 ZyWALL 2 Plus User’s Guide Contents Overview Contents Overview... - Page 8 Firmware and Configuration File Maintenance ... 571 System Maintenance Menus 8 to 10 ... 587 Remote Management ... 595 Call Scheduling ... 599 Troubleshooting and Specifications ... 603 Troubleshooting ... 605 Product Specifications ... 613 Appendices and Index ... 619 ZyWALL 2 Plus User’s Guide...
-
Page 9: Table Of Contents
2.4.1 Title Bar ... 54 2.4.2 Main Window ... 55 2.4.3 HOME Screen: Router Mode 2.4.4 HOME Screen: Bridge Mode ... 57 2.4.5 Navigation Panel ... 60 ZyWALL 2 Plus User’s Guide Table of Contents ... 55 Table of Contents... - Page 10 4.5.3 Assign Bob’s Computer a Specific IP Address ... 123 4.5.4 Create a Content Filter Policy for Bob ... 123 4.5.5 Set the Content Filter Schedule ... 124 4.5.6 Block Categories of Web Content for Bob ... 125 ... 64 ... 65 ZyWALL 2 Plus User’s Guide...
- Page 11 7.4 Bridge Port Roles ... 149 Chapter 8 WAN Screens... 151 8.1 WAN Overview ... 151 8.2 TCP/IP Priority (Metric) ... 151 8.3 WAN Route ... 151 8.4 WAN IP Address Assignment ... 153 ZyWALL 2 Plus User’s Guide Table of Contents...
- Page 12 10.5 WLAN Port Roles ... 187 Part III: Security... 189 Chapter 11 Firewall... 191 11.1 Firewall Overview ... 191 11.2 Packet Direction Matrix ... 192 11.3 Packet Direction Examples ... 193 11.3.1 To VPN Packet Direction ... 195 ... 184 ZyWALL 2 Plus User’s Guide...
- Page 13 Chapter 13 Content Filtering Reports... 245 13.1 Checking Content Filtering Activation ... 245 13.2 Viewing Content Filtering Reports ... 245 13.3 Web Site Submission ... 250 ZyWALL 2 Plus User’s Guide ... 208 ... 212 ... 227 ... 240 Table of Contents...
- Page 14 14.17.3 Hub-and-spoke VPN Requirements and Suggestions ... 294 Chapter 15 Certificates ... 295 15.1 Certificates Overview ... 295 15.1.1 Advantages of Certificates ... 296 15.2 Self-signed Certificates ... 296 ... 270 ... 278 ... 281 ... 283 ... 285 ZyWALL 2 Plus User’s Guide...
- Page 15 17.1.5 Port Restricted Cone NAT ... 334 17.1.6 NAT Mapping Types ... 334 17.2 Using NAT ... 335 17.2.1 SUA (Single User Account) Versus NAT ... 335 ZyWALL 2 Plus User’s Guide ... 303 ... 314 ... 316 Table of Contents...
- Page 16 19.11 Configuring Summary ... 357 19.12 Configuring Class Setup ... 358 19.12.1 Bandwidth Manager Class Configuration ... 359 19.12.2 Bandwidth Management Statistics 19.13 Bandwidth Manager Monitor ... 363 Chapter 20 DNS ... 365 ... 362 ZyWALL 2 Plus User’s Guide...
- Page 17 21.10 Secure FTP Using SSH Example ... 389 21.11 Telnet ... 390 21.12 Configuring TELNET ... 390 21.13 FTP ... 391 21.14 SNMP ... 392 21.14.1 Supported MIBs ... 393 ZyWALL 2 Plus User’s Guide ... 372 Table of Contents...
- Page 18 24.5 SIP ... 413 24.5.1 STUN ... 413 24.5.2 SIP ALG Details ... 413 24.5.3 SIP Signaling Session Timeout ... 414 24.5.4 SIP Audio Session Timeout ... 414 24.6 ALG Screen ... 414 ... 399 ... 401 ZyWALL 2 Plus User’s Guide...
- Page 19 26.11 Backup and Restore ... 459 26.11.1 Backup Configuration ... 460 26.11.2 Restore Configuration ... 460 26.11.3 Back to Factory Defaults ... 461 26.12 Restart Screen ... 461 26.13 Diagnostics ... 462 Part VI: SMT... 465 ZyWALL 2 Plus User’s Guide Table of Contents...
- Page 20 30.4 TCP/IP and DHCP Ethernet Setup Menu ... 492 30.4.1 IP Alias Setup ... 495 Chapter 31 Internet Access ... 497 31.1 Introduction to Internet Access Setup ... 497 31.2 Ethernet Encapsulation ... 497 31.3 Configuring the PPTP Client ... 499 ZyWALL 2 Plus User’s Guide...
- Page 21 36.1.2 Applying NAT ... 521 36.2 NAT Setup ... 523 36.2.1 Address Mapping Sets ... 523 36.3 Configuring a Server behind NAT ... 528 36.4 General NAT Examples ... 530 36.4.1 Internet Access Only ... 530 ZyWALL 2 Plus User’s Guide Table of Contents...
- Page 22 40.2 System Status ... 559 40.3 System Information and Console Port Speed ... 561 40.3.1 System Information ... 561 40.3.2 Console Port Speed ... 562 40.4 Log and Trace ... 562 40.4.1 Viewing Error Log ... 562 ZyWALL 2 Plus User’s Guide...
- Page 23 System Maintenance Menus 8 to 10... 587 42.1 Command Interpreter Mode ... 587 42.1.1 Command Syntax ... 588 42.1.2 Command Usage ... 588 42.2 Call Control Support ... 589 42.2.1 Budget Management ... 589 ZyWALL 2 Plus User’s Guide Table of Contents...
- Page 24 Appendix B Pop-up Windows, JavaScripts and Java Permissions ... 637 Appendix C IP Addresses and Subnetting ... 645 Appendix D Common Services ... 653 Appendix E Importing Certificates ... 657 Appendix F Legal Information ... 669 Appendix G Customer Support ... 673 ZyWALL 2 Plus User’s Guide...
- Page 25 Table of Contents Index... 679 ZyWALL 2 Plus User’s Guide...
- Page 26 Table of Contents ZyWALL 2 Plus User’s Guide...
-
Page 27: List Of Figures
Figure 36 SECURITY > VPN > VPN Rules (IKE)> Add Network Policy ... 93 Figure 37 SECURITY > FIREWALL > Rule Summary ... 94 Figure 38 SECURITY > FIREWALL > Rule Summary > Edit: Allow ... 95 ZyWALL 2 Plus User’s Guide... - Page 28 Figure 78 SECURITY > CONTENT FILTER > General ... 121 Figure 79 SECURITY > CONTENT FILTER > Policy ... 122 Figure 80 SECURITY > CONTENT FILTER > Policy > External Database (Default) ... 122 Figure 81 HOME > DHCP Table ... 123 ZyWALL 2 Plus User’s Guide...
- Page 29 Figure 122 NETWORK > WLAN > Port Roles: Change Complete ... 188 Figure 123 Default Firewall Action ... 191 Figure 124 SECURITY > FIREWALL > Default Rule (Router Mode) ... 192 ZyWALL 2 Plus User’s Guide ... 155 ... 166 ...
- Page 30 Figure 164 Blue Coat: Report Home ... 248 Figure 165 Global Report Screen Example ... 249 Figure 166 Requested URLs Example ... 250 Figure 167 Web Page Review Process Screen ... 251 ... 193 ... 196 ... 199 ... 213 ZyWALL 2 Plus User’s Guide...
- Page 31 Figure 208 SECURITY > CERTIFICATES > Trusted Remote Hosts ... 315 Figure 209 SECURITY > CERTIFICATES > Trusted Remote Hosts > Details ... 317 Figure 210 SECURITY > CERTIFICATES > Trusted Remote Hosts > Import ... 319 ZyWALL 2 Plus User’s Guide...
- Page 32 Figure 249 Replace Certificate ... 384 Figure 250 Device-specific Certificate ... 384 Figure 251 Common ZyWALL Certificate ... 384 Figure 252 SSH Communication Over the WAN Example ... 385 Figure 253 How SSH Works ... 385 ZyWALL 2 Plus User’s Guide...
- Page 33 Figure 292 Configuration Upload Successful ... 460 Figure 293 Network Temporarily Disconnected ... 460 Figure 294 Configuration Upload Error ... 461 Figure 295 Reset Warning Message ... 461 Figure 296 MAINTENANCE > Restart ... 462 ZyWALL 2 Plus User’s Guide...
- Page 34 Figure 336 Menu 11.1.4: Remote Node Filter (Ethernet Encapsulation) ... 516 Figure 337 Menu 11.1.4: Remote Node Filter (PPPoE or PPTP Encapsulation) ... 517 Figure 338 Menu 11.1.5: Traffic Redirect Setup ... 517 Figure 339 Menu 12: IP Static Route Setup ... 519 ZyWALL 2 Plus User’s Guide...
- Page 35 Figure 378 Protocol and Device Filter Sets ... 552 Figure 379 Filtering LAN Traffic ... 554 Figure 380 Filtering DMZ Traffic ... 554 Figure 381 Filtering Remote Node Traffic ... 555 Figure 382 Menu 22: SNMP Configuration ... 557 ZyWALL 2 Plus User’s Guide...
- Page 36 Figure 423 Applying Schedule Set(s) to a Remote Node (PPPoE) ... 601 Figure 424 Applying Schedule Set(s) to a Remote Node (PPTP) ... 602 Figure 425 Console/Dial Backup Cable DB-9 End Pin Layout ... 616 ZyWALL 2 Plus User’s Guide...
- Page 37 Figure 464 Security Certificate ... 657 Figure 465 Login Screen ... 658 Figure 466 Certificate General Information before Import ... 658 Figure 467 Certificate Import Wizard 1 ... 659 Figure 468 Certificate Import Wizard 2 ... 659 ZyWALL 2 Plus User’s Guide...
- Page 38 Figure 478 Personal Certificate Import Wizard 5 ... 666 Figure 479 Personal Certificate Import Wizard 6 ... 666 Figure 480 Access the ZyWALL Via HTTPS ... 666 Figure 481 SSL Client Authentication ... 667 Figure 482 ZyWALL Secure Login Screen ... 667 ZyWALL 2 Plus User’s Guide...
-
Page 39: List Of Tables
Table 35 NETWORK > WAN > Traffic Redirect ... 165 Table 36 NETWORK > WAN > Dial Backup ... 166 Table 37 NETWORK > WAN > Dial Backup > Edit ... 169 Table 38 NETWORK > DMZ ... 172 ZyWALL 2 Plus User’s Guide... - Page 40 Table 79 SECURITY > CERTIFICATES > My Certificates > Export ... 303 Table 80 SECURITY > CERTIFICATES > My Certificates > Import ... 304 Table 81 SECURITY > CERTIFICATES > My Certificates > Import: PKCS#12 ... 305 ZyWALL 2 Plus User’s Guide...
- Page 41 Table 121 ADVANCED > REMOTE MGMT > SSH ... 387 Table 122 ADVANCED > REMOTE MGMT > TELNET ... 390 Table 123 ADVANCED > REMOTE MGMT > FTP ... 391 Table 124 SNMP Traps ... 393 ZyWALL 2 Plus User’s Guide...
- Page 42 Table 163 MAC-address-to-port Mapping Table ... 453 Table 164 MAINTENANCE > Device Mode (Router Mode) ... 455 Table 165 MAINTENANCE > Device Mode (Bridge Mode) ... 456 Table 166 MAINTENANCE > Firmware Upload ... 458 Table 167 Restore Configuration ... 460 ZyWALL 2 Plus User’s Guide...
- Page 43 Table 206 SNMP Configuration Menu Fields ... 557 Table 207 SNMP Traps ... 558 Table 208 System Maintenance: Status Menu Fields ... 560 Table 209 Fields in System Maintenance: Information ... 562 Table 210 System Maintenance Menu Syslog Parameters ... 564 ZyWALL 2 Plus User’s Guide...
- Page 44 Table 234 Subnet 4 ... 650 Table 235 Eight Subnets ... 650 Table 236 24-bit Network Number Subnet Planning ... 651 Table 237 16-bit Network Number Subnet Planning ... 651 Table 238 Commonly Used Services ... 654 ZyWALL 2 Plus User’s Guide...
-
Page 45: Introduction And Registration
Introduction and Registration Getting to Know Your ZyWALL (47) Introducing the Web Configurator (51) Wizard Setup (69) Tutorials (89) Registration (127) -
Page 47: Getting To Know Your Zywall
(company network, or your cable or DSL modem for example). Connect computers or servers to the LAN ports for shared Internet access. The ZyWALL guarantees not only high speed Internet access, but secure internal network protection and traffic management as well. ZyWALL 2 Plus User’s Guide for a complete list of features. -
Page 48: Vpn Application
• SNMP. The device can be monitored by an SNMP manager. See the SNMP chapter in this User’s Guide. • Vantage CNM (Centralized Network Management). The device can be remotely managed using a Vantage CNM server. (Chapter 41 on page 571) ZyWALL 2 Plus User’s Guide... -
Page 49: Good Habits For Managing The Zywall
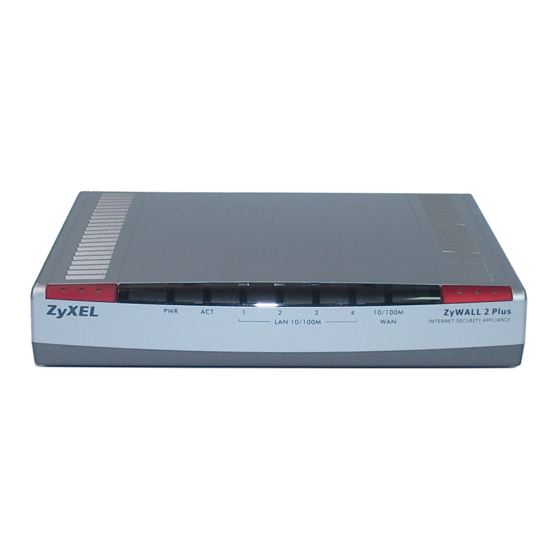
Table 1 Front Panel LEDs COLOR Green Green LAN 10/100 Green Orange ZyWALL 2 Plus User’s Guide Chapter 1 Getting to Know Your ZyWALL STATUS DESCRIPTION The ZyWALL is turned off. The ZyWALL is ready and running. Flashing The ZyWALL is restarting. - Page 50 The WAN connection is not ready, or has failed. The ZyWALL has a successful 10Mbps WAN connection. Flashing The 10M WAN is sending or receiving packets. The ZyWALL has a successful 100Mbps WAN connection. Flashing The 100M WAN is sending or receiving packets. ZyWALL 2 Plus User’s Guide...
-
Page 51: Introducing The Web Configurator
3 Type "192.168.1.1" as the URL. 4 Type "1234" (default) as the password and click Login. In some versions, the default password appears automatically - if this is the case, click Login. ZyWALL 2 Plus User’s Guide Introducing the Web Configurator... -
Page 52: Figure 4 Change Password Screen
The management session automatically times out when the time period set in the Administrator Inactivity Timer field expires (default five minutes). Simply log back into the ZyWALL if this happens to you. Figure 8 on page 55). ZyWALL 2 Plus User’s Guide... -
Page 53: Resetting The Zywall
This is an example Xmodem configuration upload using HyperTerminal. Figure 6 Example Xmodem Upload 6 After successful firmware upload, enter "atgo" to restart the router. ZyWALL 2 Plus User’s Guide Chapter 2 Introducing the Web Configurator Type the configuration file’s location, or click Browse to search for it. -
Page 54: Navigating The Zywall Web Configurator
DESCRIPTION Wizard: Click this icon to open one of the web configurator wizards. See on page 69 Help: Click this icon to open the help page for the current screen. for more information. Chapter 3 ZyWALL 2 Plus User’s Guide... -
Page 55: Main Window
Click the field label to go to the screen where you can specify a name for this ZyWALL. Model This is the model name of your ZyWALL. Bootbase Version This is the bootbase version and the date created. ZyWALL 2 Plus User’s Guide Chapter 2 Introducing the Web Configurator... - Page 56 Idle (line (ppp) idle), Dial (starting to trigger a call) or Drop (dropping a call) if you’re using PPPoE encapsulation. IP/Netmask This shows the port’s IP address and subnet mask. Section 2.3 on page 53). ZyWALL 2 Plus User’s Guide...
-
Page 57: Home Screen: Bridge Mode
ZyWALL, you also need to assign your computer a static IP address in the same subnet as the ZyWALL's IP address in order to access the ZyWALL. ZyWALL 2 Plus User’s Guide Chapter 2 Introducing the Web Configurator... -
Page 58: Figure 9 Web Configurator Home Screen In Bridge Mode
This field displays how long the ZyWALL has been running since it last started up. The ZyWALL starts up when you turn it on, when you restart it (MAINTENANCE > Restart), or when you reset it (see Section 2.3 on page 53). ZyWALL 2 Plus User’s Guide... - Page 59 This is the predefined interval that a bridge waits to get a Hello message (BPDU) from the root bridge. Forward Delay This is the forward delay interval. Bridge Port This is the port type. Port types are: WAN, LAN, DMZ and WLAN. ZyWALL 2 Plus User’s Guide Chapter 2 Introducing the Web Configurator...
-
Page 60: Navigation Panel
The following table lists the features available for each device mode. Not all ZyWALLs have all features listed in this table. Table 5 Bridge and Router Mode Features Comparison FEATURE Internet Access Wizard VPN Wizard DHCP Table System Statistics Registration Bridge BRIDGE MODE ROUTER MODE ZyWALL 2 Plus User’s Guide... -
Page 61: Table 6 Screens Summary
Static DHCP IP Alias Port Roles BRIDGE Bridge Port Roles ZyWALL 2 Plus User’s Guide Chapter 2 Introducing the Web Configurator BRIDGE MODE ROUTER MODE FUNCTION This screen shows the ZyWALL’s general device and network status information. Use this screen to access the wizards, statistics and DHCP table. - Page 62 Use this screen to view and manage the list of the trusted CAs. Use this screen to view and manage the certificates belonging to the trusted remote hosts. Use this screen to view and manage the list of the directory servers. ZyWALL 2 Plus User’s Guide...
- Page 63 UPnP UPnP Ports Custom APP Custom APP ZyWALL 2 Plus User’s Guide Chapter 2 Introducing the Web Configurator FUNCTION Use this screen to configure the local user account(s) on the ZyWALL. Configure this screen to use an external server to authenticate wireless and/or VPN users.
-
Page 64: Port Statistics
This screen allows you to reboot the ZyWALL without turning the power off. Use this screen to have the ZyWALL generate and send diagnostic files by e-mail and/or the console port. Click this label to exit the web configurator. ZyWALL 2 Plus User’s Guide... -
Page 65: Dhcp Table Screen
This is the index number of the host computer. IP Address This field displays the IP address relative to the # field listed above. Host Name This field displays the computer host name. ZyWALL 2 Plus User’s Guide Chapter 2 Introducing the Web Configurator... -
Page 66: Vpn Status
This field displays the IP address of the computer using the VPN IPSec feature of your ZyWALL. Remote Network This field displays IP address (in a range) of computers on the remote network behind the remote IPSec router. ZyWALL 2 Plus User’s Guide... -
Page 67: Bandwidth Monitor
LABEL Interface Class Budget (kbps) Current Usage (kbps) ZyWALL 2 Plus User’s Guide Chapter 2 Introducing the Web Configurator DESCRIPTION Select an interface from the drop-down list box to view the bandwidth usage of its bandwidth classes. This field displays the name of the bandwidth class. - Page 68 Select a number of seconds or None from the drop-down list box to update all screen statistics automatically at the end of every time interval or to not update the screen statistics. Click this button to update the screen’s statistics immediately. ZyWALL 2 Plus User’s Guide...
-
Page 69: Wizard Setup
Use VPN Setup to configure a VPN connection that uses a pre-shared key. If you want to set the rule to use a certificate, please go to the VPN screens for configuration. See 3.3 on page Figure 14 Wizard Setup Welcome ZyWALL 2 Plus User’s Guide Wizard Setup o open the Wizard Setup Welcome mode). -
Page 70: Internet Access
Table 11 ISP Parameters: Ethernet Encapsulation LABEL DESCRIPTION ISP Parameters for Internet Access Encapsulation You must choose the Ethernet option when the WAN port is used as a regular Ethernet. Otherwise, choose PPPoE or PPTP for a dial-up connection. ZyWALL 2 Plus User’s Guide... -
Page 71: Pppoe Encapsulation
Point-to-Point Protocol over Ethernet (PPPoE) functions as a dial-up connection. PPPoE is an IETF (Internet Engineering Task Force) standard specifying how a host personal computer interacts with a broadband modem (for example DSL, cable, wireless, etc.) to achieve access to high-speed data networks. ZyWALL 2 Plus User’s Guide Chapter 3 Wizard Setup... -
Page 72: Figure 16 Isp Parameters: Pppoe Encapsulation
Select Dynamic If your ISP did not assign you a fixed IP address. This is the Assignment default selection. Select Static If the ISP assigned a fixed IP address. The fields below are available only when you select Static. ZyWALL 2 Plus User’s Guide... -
Page 73: Pptp Encapsulation
Virtual Private Network (VPN) using TCP/ IP-based networks. PPTP supports on-demand, multi-protocol, and virtual private networking over public networks, such as the Internet. The ZyWALL supports one PPTP server connection at any given time. ZyWALL 2 Plus User’s Guide Chapter 3 Wizard Setup... -
Page 74: Figure 17 Isp Parameters: Pptp Encapsulation
Select Nailed-Up if you do not want the connection to time out. Type the time in seconds that elapses before the router automatically disconnects from the PPTP server. Type the (static) IP address assigned to you by your ISP. ZyWALL 2 Plus User’s Guide... -
Page 75: Internet Access Wizard: Second Screen
Click Next to go to the screen where you can register your ZyWALL and activate the free content filtering trial application. Otherwise, click Skip to display the congratulations screen and click Close to complete the Internet access setup. Figure 18 Internet Access Wizard: Second Screen ZyWALL 2 Plus User’s Guide Chapter 3 Wizard Setup... -
Page 76: Internet Access Wizard: Registration
ZyWALL before you can activate trial application of service like content filtering. If you want to activate a standard service with your iCard’s PIN number (license key), use the REGISTRATION > Service screen. Figure 18 on page 75), the following screen ZyWALL 2 Plus User’s Guide... -
Page 77: Figure 20 Internet Access Wizard: Registration
After you fill in the fields and click Next, the following screen shows indicating the registration is in progress. Wait for the registration progress to finish. ZyWALL 2 Plus User’s Guide DESCRIPTION If you select Existing myZyXEL.com account, only the User Name and Password fields are available. -
Page 78: Figure 21 Internet Access Wizard: Registration In Progress
Figure 23 Internet Access Wizard: Registration Failed If the ZyWALL has been registered, the Device Registration screen is read-only and the Service Activation screen appears indicating what trial applications are activated after you click Next. ZyWALL 2 Plus User’s Guide... -
Page 79: Vpn Wizard Gateway Setting
VPN tunnel. Click VPN Setup in the Wizard Setup Welcome screen VPN configuration wizard. The first screen displays as shown next. ZyWALL 2 Plus User’s Guide Chapter 3 Wizard Setup (Figure 14 on page 69) to open the... -
Page 80: Vpn Wizard Network Setting
Click Next to continue. 3.4 VPN Wizard Network Setting Use this screen to name the VPN network policy (IPSec SA) and identify the devices behind the IPSec routers at either end of a VPN tunnel. ZyWALL 2 Plus User’s Guide... -
Page 81: Figure 27 Vpn Wizard: Network Setting
Subnet Mask range of computers on the LAN behind your ZyWALL. When the Local Network field is configured to Subnet, this is a subnet mask on the LAN behind your ZyWALL. ZyWALL 2 Plus User’s Guide Chapter 3 Wizard Setup... -
Page 82: Vpn Wizard Ike Tunnel Setting (Ike Phase 1)
3.5 VPN Wizard IKE Tunnel Setting (IKE Phase 1) Use this screen to specify the authentication, encryption and other settings needed to negotiate a phase 1 IKE SA. Figure 28 VPN Wizard: IKE Tunnel Setting ZyWALL 2 Plus User’s Guide... -
Page 83: Vpn Wizard Ipsec Setting (Ike Phase 2)
3.6 VPN Wizard IPSec Setting (IKE Phase 2) Use this screen to specify the authentication, encryption and other settings needed to negotiate a phase 2 IPSec SA. ZyWALL 2 Plus User’s Guide secure gateway must have the same negotiation mode. Chapter 3 Wizard Setup... -
Page 84: Figure 29 Vpn Wizard: Ipsec Setting
A short SA Life Time increases security by forcing the two VPN gateways to update the encryption and authentication keys. However, every time the VPN tunnel renegotiates, all users accessing remote resources are temporarily disconnected. ZyWALL 2 Plus User’s Guide... -
Page 85: Vpn Wizard Status Summary
3.7 VPN Wizard Status Summary This read-only screen shows the status of the current VPN setting. Use the summary table to check whether what you have configured is correct. Figure 30 VPN Wizard: VPN Status ZyWALL 2 Plus User’s Guide Chapter 3 Wizard Setup... -
Page 86: Table 19 Vpn Wizard: Vpn Status
This is the key group you chose for phase 1 IKE setup. This is the length of time before an IKE SA automatically renegotiates. This is a pre-shared key identifying a communicating party during a phase 1 IKE negotiation. ZyWALL 2 Plus User’s Guide... -
Page 87: Vpn Wizard Setup Complete
Congratulations! You have successfully set up the VPN rule for your ZyWALL. If you already had VPN rules configured, the wizard adds the new VPN rule after the last existing VPN rule. Figure 31 VPN Wizard Setup Complete ZyWALL 2 Plus User’s Guide Chapter 3 Wizard Setup... - Page 88 Chapter 3 Wizard Setup ZyWALL 2 Plus User’s Guide...
-
Page 89: Tutorials
VPN tunnels to the FTP server. Furthermore, you can configure the firewall rule so that only the network behind device B can access the FTP server through a VPN tunnel (not other remote networks that have VPN tunnels with the ZyWALL). ZyWALL 2 Plus User’s Guide Tutorials... -
Page 90: Configuring The Vpn Rule
1 Click Security > VPN to open the following screen. Click the Add Gateway Policy icon. Figure 33 SECURITY > VPN > VPN Rules (IKE) 2 Use this screen to set up the connection between the routers. Configure the fields that are circled as follows and click Apply. ZyWALL 2 Plus User’s Guide... -
Page 91: Figure 34 Security > Vpn > Vpn Rules (Ike)> Add Gateway Policy
Chapter 4 Tutorials Figure 34 SECURITY > VPN > VPN Rules (IKE)> Add Gateway Policy 3 Click the Add Network Policy icon. ZyWALL 2 Plus User’s Guide... -
Page 92: Figure 35 Security > Vpn > Vpn Rules (Ike): With Gateway Policy Example
VPN network policy. • The firewall provides better security because it operates at layer 4 and checks traffic sessions. The VPN network policy only operates at layer 3 and just checks IP addresses and port numbers. ZyWALL 2 Plus User’s Guide... -
Page 93: Configuring The Firewall Rules
4.1.3.1 Firewall Rule to Allow Access Example Configure a firewall rule that allows FTP access from the VPN tunnel to the FTP server. ZyWALL 2 Plus User’s Guide Chapter 4 Tutorials... -
Page 94: Figure 37 Security > Firewall > Rule Summary
Figure 37 SECURITY > FIREWALL > Rule Summary 4 Configure the rule as follows and click Apply. The source addresses are the VPN rule’s remote network and the destination address is the LAN FTP server. ZyWALL 2 Plus User’s Guide... -
Page 95: Figure 38 Security > Firewall > Rule Summary > Edit: Allow
Chapter 4 Tutorials Figure 38 SECURITY > FIREWALL > Rule Summary > Edit: Allow 5 The rule displays in the summary list of VPN to LAN firewall rules. ZyWALL 2 Plus User’s Guide... -
Page 96: Figure 39 Security > Firewall > Rule Summary: Allow
VPN tunnels to access the LAN. 1 Click SECURITY > FIREWALL > Default Rule. 2 Configure the screen as follows and click Apply. Figure 40 SECURITY > FIREWALL > Default Rule: Block From VPN To LAN ZyWALL 2 Plus User’s Guide... -
Page 97: Using Nat With Multiple Public Ip Addresses
2 Configure NAT address mapping for other public IP addresses (1.2.3.5 and 1.2.3.6). 3 Configure NAT port forwarding to forward FTP traffic from the WAN to a specific computer on your local network. ZyWALL 2 Plus User’s Guide 1.2.3.4 to 1.2.3.7 192.168.1.1... -
Page 98: Configuring The Wan Connection With A Static Ip Address
4 In the WAN IP Address Assignment section, select Use Fixed IP Address and enter the first fixed public IP address (1.2.3.4 in this example). 5 Click Apply. PPPoE 1.2.3.4 1.2.3.5 1.2.3.6 1.2.3.7 1.2.3.89 255.255.255.0 exampleuser abcd1234 1.2.1.1 1.2.1.2 ZyWALL 2 Plus User’s Guide... -
Page 99: Figure 43 Tutorial Example: Wan Screen
DNS server the ZyWALL can query to resolve domain names. Figure 44 Tutorial Example: DNS > System 8 Select Public DNS Server and enter the first DNS server’s IP address given by your ISP. Click Apply. ZyWALL 2 Plus User’s Guide Chapter 4 Tutorials... -
Page 100: Figure 45 Tutorial Example: Dns > System Edit-1
To resolve a domain name, theZyWALL checks it against the name server record entries in the order that they appear in this list. Figure 46 Tutorial Example: DNS > System Edit-2 10 The DNS > System screen should look as shown. ZyWALL 2 Plus User’s Guide... -
Page 101: Public Ip Address Mapping
Figure 48 Tutorial Example: Status 4.2.3 Public IP Address Mapping To have the local computers and servers use specific WAN IP addresses, you need to map static public IP addresses to them. ZyWALL 2 Plus User’s Guide Chapter 4 Tutorials... -
Page 102: Figure 49 Tutorial Example: Mapping Multiple Public Ip Addresses To Inside Servers
The ZyWALL applies the rules in the order that you specify. You should put any one-to-one rules before a many-to-one rule. 1 Click ADVANCED > NAT. 2 Enable NAT and select Full Feature as you have multiple public IP addresses to map to private IP addresses. Click Apply. ZyWALL 2 Plus User’s Guide... -
Page 103: Figure 50 Tutorial Example: Nat > Nat Overview
Select the One-to-One type and enter 192.168.1.12 as the local start IP address and 1.2.3.5 as the global start IP address. Click Apply. ZyWALL 2 Plus User’s Guide ) in the Modify column to display the Address Chapter 4 Tutorials... -
Page 104: Figure 52 Tutorial Example: Nat Address Mapping Edit: One-To-One (1)
Select the Many-to-One type and enter 192.168.1.1 as the local start IP address, 192.168.1.254 as the local end IP address and 1.2.3.4 as the global start IP address. Click Apply. Figure 54 Tutorial Example: NAT Address Mapping Edit: Many-to-One ZyWALL 2 Plus User’s Guide... -
Page 105: Forwarding Traffic From The Wan To A Local Computer
(server mapping) rule. In this example, you want to forward FTP traffic using port 21 to the computer with the IP address of 192.168.1.39. ZyWALL 2 Plus User’s Guide Chapter 4 Tutorials Section 4.2.5 on page 107... -
Page 106: Figure 56 Tutorial Example: Forwarding Incoming Ftp Traffic To A Local Computer
3 Click the Port Forwarding tab. 4 Select the Active check box, enter a descriptive name (FTP for example), incoming port number (21) and 192.168.1.39 as the server IP address. Click Apply. ) to configure a server rule. ZyWALL 2 Plus User’s Guide... -
Page 107: Allow Wan-To-Lan Traffic Through The Firewall
Figure 59 Tutorial Example: Forwarding Incoming FTP Traffic to a Local Computer 1 Click SECURITY > FIREWALL. 2 Make sure the firewall is enabled and traffic from the WAN to the LAN is dropped. ZyWALL 2 Plus User’s Guide Chapter 4 Tutorials... -
Page 108: Figure 60 Tutorial Example: Firewall Default Rule
6 Configure a firewall rule to allow HTTP traffic from the WAN to the web server. Enter a descriptive name (W-L_Web for example). Select Any in the Destination Address(es) box and click Delete. Select Single Address as the destination address type. Enter 192.168.1.12 and click Add. ZyWALL 2 Plus User’s Guide... -
Page 109: Figure 62 Tutorial Example: Firewall Rule: Wan To Lan Address Edit For Web Server
Figure 62 Tutorial Example: Firewall Rule: WAN to LAN Address Edit for Web Server 7 Select HTTP(TCP:80) and HTTPS(TCP:443) in the Available Services box on the left, and click >> to add them to the Selected Service(s) box on the right. Click Apply. ZyWALL 2 Plus User’s Guide... -
Page 110: Figure 63 Tutorial Example: Firewall Rule: Wan To Lan Service Edit For Web Server
8 Click the insert icon to configure a firewall rule to allow traffic from the WAN to the mail server. Enter a descriptive name (W-L_Mail for example). Select Any in the Destination Address(es) box and click Delete. Select Single Address as the destination address type. Enter 192.168.1.13 and click Add. ZyWALL 2 Plus User’s Guide... -
Page 111: Figure 64 Tutorial Example: Firewall Rule: Wan To Lan Address Edit For Mail Server
9 Select Any(All) in the Available Services box on the left, and click >> to add it to the Selected Service(s) box on the right. Click Apply. Figure 65 Tutorial Example: Firewall Rule: WAN to LAN Service Edit for Mail Server ZyWALL 2 Plus User’s Guide... -
Page 112: Figure 66 Tutorial Example: Firewall Rule: Wan To Lan Address Edit For Ftp Server
Figure 66 Tutorial Example: Firewall Rule: WAN to LAN Address Edit for FTP Server 11Select FTP(TCP:20,21) in the Available Services box on the left, and click >> to add it to the Selected Service(s) box on the right. Click Apply. ZyWALL 2 Plus User’s Guide... -
Page 113: Figure 67 Tutorial Example: Firewall Rule: Wan To Lan Service Edit For Ftp Server
Chapter 4 Tutorials Figure 67 Tutorial Example: Firewall Rule: WAN to LAN Service Edit for FTP Server 12When you are done, the Rule Summary screen looks as shown. Figure 68 Tutorial Example: Firewall Rule Summary ZyWALL 2 Plus User’s Guide... -
Page 114: Testing The Connections
LAN traffic. See information about IP address mapping. When you finish configuration, the screen looks as shown. Section 4.2.2 on page 98), use the NAT > Address Section 4.2.3 on page 101 ZyWALL 2 Plus User’s Guide for more... -
Page 115: How To Manage The Zywall's Bandwidth
WWW or FTP traffic, you reserve 128 Kbps of bandwidth for outgoing VoIP traffic (from LAN to WAN) and higher priority than FTP or WWW traffic. ZyWALL 2 Plus User’s Guide Chapter 4 Tutorials Section 4.2.5 on page 107... -
Page 116: Configuring Bandwidth Management Rules
4 Select Priority-Based to have the ZyWALL give preference to bandwidth classes with higher priorities. 5 Deselect the Maximize Bandwidth Usage option to reserve bandwidth for traffic that is not defined in a bandwidth class. 6 Click Apply. 512 Kbps 128 Kbps 128 Kbps 128 Kbps ZyWALL 2 Plus User’s Guide... -
Page 117: Figure 71 Tutorial Example: Bandwidth Management Summary
10Enable this filter and select the SIP service. 11Leave the IP address and subnet mask fields blank, so that the filter will be applied to any outgoing traffic through the WAN port. Click Apply. ZyWALL 2 Plus User’s Guide Chapter 4 Tutorials... -
Page 118: Figure 73 Tutorial Example: Bandwidth Management Class Setup: Voip
12Click the Add Sub-Class button to create a rule for FTP traffic as follows. Click Apply. Figure 74 Tutorial Example: Bandwidth Management Class Setup: FTP 13Click the Add Sub-Class button to create a rule for WWW traffic as follows. Click Apply. ZyWALL 2 Plus User’s Guide... -
Page 119: Figure 75 Tutorial Example: Bandwidth Management Class Setup: Www
14When you are finished, the Class Setup screen looks as shown. Figure 76 Tutorial Example: Bandwidth Management Class Setup Done 15Use the Monitor screen to view the bandwidth usage and allotments for the WAN interface. ZyWALL 2 Plus User’s Guide Chapter 4 Tutorials... -
Page 120: Configuring Content Filtering
You must register for external content filtering before you can use it. Use the REGISTRATION screens (see account, register your device and activate the external content filtering service. Chapter 5 on page 127) to create a myZyXEL.com ZyWALL 2 Plus User’s Guide... -
Page 121: Block Categories Of Web Content
Here is how to block access to web pages by category of content. 1 Click SECURITY > CONTENT FILTER > Policy and then the external database icon next to the default policy. ZyWALL 2 Plus User’s Guide Chapter 4 Tutorials... -
Page 122: Figure 79 Security > Content Filter > Policy
Chapter 4 Tutorials Figure 79 SECURITY > CONTENT FILTER > Policy 2 Select Active. 3 Select the categories to block. 4 Click Apply. Figure 80 SECURITY > CONTENT FILTER > Policy > External Database (Default) ZyWALL 2 Plus User’s Guide... -
Page 123: Assign Bob's Computer A Specific Ip Address
ZyWALL applies the content filter policies in order, so make sure you add the new policy before the default policy. Figure 82 SECURITY > CONTENT FILTER > Policy 2 Select Active. 3 Give the policy a name. 4 Configure a single address of 192.168.1.33. ZyWALL 2 Plus User’s Guide Chapter 4 Tutorials... -
Page 124: Set The Content Filter Schedule
1 Click SECURITY > CONTENT FILTER > Policy and then the Bob policy’s schedule icon. Figure 84 SECURITY > CONTENT FILTER > Policy 2 Select Everyday and enter 12:00 to 13:00. 3 Click Apply. ZyWALL 2 Plus User’s Guide... -
Page 125: Block Categories Of Web Content For Bob
Figure 86 SECURITY > CONTENT FILTER > Policy 2 Select Active. 3 Select the categories to block. This is very similar to you do not select the arts and entertainment category. ZyWALL 2 Plus User’s Guide Chapter 4 Tutorials Section 4.5.2 on page 121, except... -
Page 126: Figure 87 Security > Content Filter > Policy > External Database (Bob)
Chapter 4 Tutorials 4 Click Apply. Figure 87 SECURITY > CONTENT FILTER > Policy > External Database (Bob) ZyWALL 2 Plus User’s Guide... -
Page 127: Registration
See the chapter about content filtering for more information. To use a subscription service, you have to register and activate the corresponding service at myZyXEL.com (through the ZyWALL). ZyWALL 2 Plus User’s Guide Registration http://www.myZyXEL.com... -
Page 128: Registration
Select your country from the drop-down box list. You can try trial service subscription. After the trial expires, you can buy an iCard and enter the license key in the REGISTRATION > Service screen to extend the service. ZyWALL 2 Plus User’s Guide... -
Page 129: Service
If you restore the ZyWALL to the default configuration file or upload a different configuration file after you register, click the Service License Refresh button to update license information. ZyWALL 2 Plus User’s Guide DESCRIPTION Select the check box to activate a trial. The trial period starts the day you activate the trial. -
Page 130: Figure 90 Registration > Service
If a standard service subscription runs out, you need to buy a new iCard (specific to your ZyWALL) and enter the new PIN number to extend the service. Click this button to renew service license information (such as the license key, registration status and expiration day). ZyWALL 2 Plus User’s Guide... -
Page 131: Network
Network LAN Screens (133) Bridge Screens (145) WAN Screens (151) DMZ Screens (171) Wireless LAN (181) -
Page 133: Lan Screens
6.2 IP Address and Subnet Mask Similar to the way houses on a street share a common street name, so too do computers on a LAN share one common network number. ZyWALL 2 Plus User’s Guide LAN Screens Chapter 8 on page 151... -
Page 134: Private Ip Addresses
Regardless of your particular situation, do not create an arbitrary IP address; always follow the guidelines above. For more information on address assignment, please refer to RFC 1597, Address Allocation for Private Internets and RFC 1466, Guidelines for Management of IP Address Space. ZyWALL 2 Plus User’s Guide... -
Page 135: Dhcp
2 and version 1, please see sections 4 and 5 of RFC 2236. The class D IP address is used to identify host groups and can be in the range 224.0.0.0 to 239.255.255.255. The address ZyWALL 2 Plus User’s Guide for the default IP pool range. Do not assign your LAN computers... -
Page 136: Wins
Click NETWORK > LAN to open the LAN screen. Use this screen to configure the ZyWALL’s IP address and other LAN TCP/IP settings as well as the built-in DHCP server capability that assigns IP addresses and DNS servers to systems that support DHCP client capability. ZyWALL 2 Plus User’s Guide... -
Page 137: Figure 92 Network > Lan
RIP multicast address and so will not receive the RIP packets. However, if one router uses multicasting, then all routers on your network must use multicasting, also. By default, RIP direction is set to Both and the Version set to RIP-1. ZyWALL 2 Plus User’s Guide Chapter 6 LAN Screens... - Page 138 Clear this check box to block all NetBIOS packets going from the LAN to the WLAN and from the WLAN to the LAN. Apply Click Apply to save your changes back to the ZyWALL. Reset Click Reset to begin configuring this screen afresh. ZyWALL 2 Plus User’s Guide...
-
Page 139: Lan Static Dhcp
00:A0:C5:00:00:02. To change your ZyWALL’s static DHCP settings, click NETWORK > LAN > Static DHCP. The screen appears as shown. Figure 93 NETWORK > LAN > Static DHCP ZyWALL 2 Plus User’s Guide Chapter 6 LAN Screens... -
Page 140: Lan Ip Alias
Type the IP address that you want to assign to the computer on your LAN. Alternatively, click the right mouse button to copy and/or paste the IP address. Click Apply to save your changes back to the ZyWALL. Click Reset to begin configuring this screen afresh. ZyWALL 2 Plus User’s Guide... -
Page 141: Figure 95 Network > Lan > Ip Alias
By default, RIP direction is set to Both and the Version set to RIP-1. Apply Click Apply to save your changes back to the ZyWALL. Reset Click Reset to begin configuring this screen afresh. ZyWALL 2 Plus User’s Guide Chapter 6 LAN Screens... -
Page 142: Lan Port Roles
ZyWALL’s DMZ IP address and MAC address. Select a port’s WLAN radio button to use the port as part of the WLAN. The port will use the ZyWALL’s WLAN IP address and MAC address. ZyWALL 2 Plus User’s Guide... -
Page 143: Figure 97 Port Roles Change Complete
After you change the LAN/DMZ/WLAN port roles and click Apply, please wait for few seconds until the following screen appears. Click Return to go back to the Port Roles screen. Figure 97 Port Roles Change Complete ZyWALL 2 Plus User’s Guide Chapter 6 LAN Screens... - Page 144 Chapter 6 LAN Screens ZyWALL 2 Plus User’s Guide...
-
Page 145: Bridge Screens
Figure 98 Bridge Loop: Bridge Connected to Wired LAN To prevent bridge loops, ensure that your ZyWALL is not set to bridge mode while connected to two wired segments of the same LAN or you enable RSTP in the Bridge screen. ZyWALL 2 Plus User’s Guide Bridge Screens... -
Page 146: Spanning Tree Protocol (Stp)
50 to 600 40 to 400 10 to 60 3 to 10 1 to 5 ALLOWED RANGE 1 to 65535 1 to 65535 1 to 65535 1 to 65535 1 to 65535 1 to 65535 ZyWALL 2 Plus User’s Guide... -
Page 147: Stp Port States
In bridge mode, if you need to let DHCP clients behind the ZyWALL use a DHCP server on the WAN, enable the default WAN to LAN firewall rule for the BOOTP_CLIENT service. ZyWALL 2 Plus User’s Guide Chapter 7 Bridge Screens... -
Page 148: Figure 99 Network > Bridge
If you have the IP address(es) of the DNS server(s), enter the DNS server's IP address(es) in the field(s) to the right. ZyWALL 2 Plus User’s Guide... -
Page 149: Bridge Port Roles
The radio buttons correspond to Ethernet ports on the front panel of the ZyWALL. On the ZyWALL, ports 1 to 4 are all LAN ports by default. ZyWALL 2 Plus User’s Guide DESCRIPTION Select the check box to activate RSTP on the ZyWALL. -
Page 150: Figure 100 Network > Bridge > Port Roles
Select a port’s DMZ radio button to use the port as part of the DMZ. Select a port’s WLAN radio button to use the port as part of the WLAN. Click Apply to save your changes back to the ZyWALL. Click Reset to begin configuring this screen afresh. ZyWALL 2 Plus User’s Guide... -
Page 151: Wan Screens
The dial-backup or traffic redirect routes cannot take priority over the WAN routes. 8.3 WAN Route Click NETWORK > WAN to open the Route screen. Use this screen to configure the priorities of the ZyWALL’s routes and settings for Windows Networking traffic. ZyWALL 2 Plus User’s Guide WAN Screens... -
Page 152: Figure 102 Network > Wan Route
Select this check box to forward NetBIOS packets from the WLAN to the WAN and WAN and WLAN from the WAN to the WLAN. Clear this check box to block all NetBIOS packets going from the WLAN to the WAN and from the WAN to the WLAN. ZyWALL 2 Plus User’s Guide... -
Page 153: Wan Ip Address Assignment
DNS server fields. 2 If your ISP dynamically assigns the DNS server IP addresses (along with the ZyWALL’s WAN IP address), set the DNS server fields to get the DNS server address from the ISP. ZyWALL 2 Plus User’s Guide 10.255.255.255 172.31.255.255 192.168.255.255... -
Page 154: Wan Mac Address
For ISPs (such as Telstra) that send UDP heartbeat packets to verify that the customer is still online, please create a WAN-to-WAN/ZyWALL firewall rule for those packets. Contact your ISP to find the correct port number. The screen shown next is for Ethernet encapsulation. 366). Section ZyWALL 2 Plus User’s Guide... -
Page 155: Figure 103 Network > Wan > Wan (Ethernet Encapsulation)
Type the authentication server IP address here if your ISP gave you one. Address This field is not available for Telia Login. Login Server Type the domain name of the Telia login server, for example login1.telia.com. (Telia Login only) ZyWALL 2 Plus User’s Guide Chapter 8 WAN Screens... - Page 156 Enable Multicast Select this check box to turn on IGMP (Internet Group Multicast Protocol). IGMP is a network-layer protocol used to establish membership in a Multicast group - it is not used to carry user data. ZyWALL 2 Plus User’s Guide...
-
Page 157: Pppoe Encapsulation
LAN do not need PPPoE software installed, since the ZyWALL does that part of the task. Furthermore, with NAT, all of the LANs’ computers will have access. The screen shown next is for PPPoE encapsulation. ZyWALL 2 Plus User’s Guide Chapter 8 WAN Screens... -
Page 158: Figure 104 Network > Wan > Wan (Pppoe Encapsulation)
Type the user name given to you by your ISP. Password Type the password associated with the user name above. Retype to Type your password again to make sure that you have entered is correctly. Confirm ZyWALL 2 Plus User’s Guide... - Page 159 Select this check box to turn on IGMP (Internet Group Multicast Protocol). IGMP is a network-layer protocol used to establish membership in a Multicast group - it is not used to carry user data. ZyWALL 2 Plus User’s Guide Chapter 8 WAN Screens Chapter 17 on page...
-
Page 160: Pptp Encapsulation
Virtual Private Network (VPN) using TCP/IP-based networks. PPTP supports on-demand, multi-protocol and virtual private networking over public networks, such as the Internet. The screen shown next is for PPTP encapsulation. ZyWALL 2 Plus User’s Guide... -
Page 161: Figure 105 Network > Wan > Wan (Pptp Encapsulation)
Type the user name given to you by your ISP. Password Type the password associated with the user name above. Retype to Confirm Type your password again to make sure that you have entered is correctly. ZyWALL 2 Plus User’s Guide Chapter 8 WAN Screens... - Page 162 When set to Both or In Only, the ZyWALL will incorporate RIP information that it receives. When set to None, the ZyWALL will not send any RIP packets and will ignore any RIP packets received. By default, RIP Direction is set to Both. 331. ZyWALL 2 Plus User’s Guide...
-
Page 163: Traffic Redirect
Traffic redirect forwards WAN traffic to a backup gateway when the ZyWALL cannot connect to the Internet through its normal gateway. Connect the backup gateway on the WAN so that the ZyWALL still provides firewall protection for the LAN. ZyWALL 2 Plus User’s Guide Chapter 8 WAN Screens... -
Page 164: Configuring Traffic Redirect
Figure 107 Traffic Redirect LAN Setup 8.9 Configuring Traffic Redirect To change your ZyWALL’s traffic redirect settings, click NETWORK > WAN > Traffic Redirect. The screen appears as shown. Figure 108 NETWORK > WAN > Traffic Redirect ZyWALL 2 Plus User’s Guide... -
Page 165: Configuring Dial Backup
Click Reset to begin configuring this screen afresh. 8.10 Configuring Dial Backup Click NETWORK > WAN > Dial Backup to display the Dial Backup screen. Use this screen to configure the backup WAN dial-up connection. ZyWALL 2 Plus User’s Guide Chapter 8 WAN Screens... -
Page 166: Figure 109 Network > Wan > Dial Backup
Type your password again to make sure that you have entered is correctly. Options are: CHAP/PAP - Your ZyWALL accepts either CHAP or PAP when requested by this remote node. CHAP - Your ZyWALL accepts CHAP only. PAP - Your ZyWALL accepts PAP only. ZyWALL 2 Plus User’s Guide... - Page 167 When set to Both or In Only, the ZyWALL will incorporate RIP information that it receives. Broadcast Dial Select this check box to forward the backup route broadcasts to the WAN. Backup Route ZyWALL 2 Plus User’s Guide Chapter 8 WAN Screens...
-
Page 168: Advanced Modem Setup
ZyWALL initiates the call. The dial backup connection never times out if you set this field to "0" (it is the same as selecting Always On). Click Apply to save your changes back to the ZyWALL. Click Reset to begin configuring this screen afresh. ZyWALL 2 Plus User’s Guide... -
Page 169: Response Strings
Type the AT Command string to drop a call. "~" represents a one second wait, for example, "~~~+++~~ath" can be used if your modem has a slow response time. Answer Type the AT Command string to answer a call. ZyWALL 2 Plus User’s Guide Chapter 8 WAN Screens... - Page 170 Type a number of seconds for the ZyWALL to wait between dropping a callback (sec) request call and dialing the corresponding callback call. Apply Click Apply to save your changes back to the ZyWALL. Cancel Click Cancel to exit this screen without saving. ZyWALL 2 Plus User’s Guide...
-
Page 171: Dmz Screens
DMZ ports. From the main menu, click NETWORK > DMZ to open the DMZ screen. The screen appears as shown next. ZyWALL 2 Plus User’s Guide DMZ Screens Appendix C on page 645 for information on IP... -
Page 172: Figure 111 Network > Dmz
RIP multicast address and so will not receive the RIP packets. However, if one router uses multicasting, then all routers on your network must use multicasting, also. By default, RIP direction is set to Both and the Version set to RIP-1. ZyWALL 2 Plus User’s Guide... - Page 173 Clear this check box to block all NetBIOS packets going from the WLAN to the DMZ and from the DMZ to the WLAN. Apply Click Apply to save your changes back to the ZyWALL. Reset Click Reset to begin configuring this screen afresh. ZyWALL 2 Plus User’s Guide Chapter 9 DMZ Screens...
-
Page 174: Dmz Static Dhcp
00:A0:C5:00:00:02. To change your ZyWALL’s static DHCP settings on the DMZ, click NETWORK > DMZ > Static DHCP. The screen appears as shown. Figure 112 NETWORK > DMZ > Static DHCP ZyWALL 2 Plus User’s Guide... -
Page 175: Dmz Ip Alias
Make sure that the subnets of the logical networks do not overlap. To change your ZyWALL’s IP alias settings, click NETWORK > DMZ > IP Alias. The screen appears as shown. ZyWALL 2 Plus User’s Guide Chapter 9 DMZ Screens Chapter 17 on page 331... -
Page 176: Figure 113 Network > Dmz > Ip Alias
By default, RIP direction is set to Both and the Version set to RIP-1. Click Apply to save your changes back to the ZyWALL. Click Reset to begin configuring this screen afresh. ZyWALL 2 Plus User’s Guide... -
Page 177: Dmz Public Ip Address Example
171) and configure the other subnet in the Network > DMZ > IP Alias screen (see Figure 9.4 on page configure NAT for the private DMZ IP addresses. ZyWALL 2 Plus User’s Guide 175) to use this kind of network setup. You also need to Chapter 9 DMZ Screens... -
Page 178: Dmz Port Roles
The radio buttons correspond to Ethernet ports on the front panel of the ZyWALL. On the ZyWALL, ports 1 to 4 are all LAN ports by default. Your changes are also reflected in the LAN and/or WLAN Port Roles screens. ZyWALL 2 Plus User’s Guide... -
Page 179: Figure 116 Network > Dmz > Port Roles
The port will use the ZyWALL’s WLAN IP address and MAC address. Apply Click Apply to save your changes back to the ZyWALL. Reset Click Reset to begin configuring this screen afresh. ZyWALL 2 Plus User’s Guide Chapter 9 DMZ Screens... - Page 180 Chapter 9 DMZ Screens ZyWALL 2 Plus User’s Guide...
-
Page 181: Wireless Lan
188) to set a port to be part of the WLAN and connect an access point (AP) to the WLAN interface. Click NETWORK > WLAN to open the WLAN screen to configure the IP address for ZyWALL’s WLAN interface, other TCP/IP and DHCP settings. ZyWALL 2 Plus User’s Guide Wireless LAN Figure 121 on... -
Page 182: Figure 117 Network > Wlan
However, if one router uses multicasting, then all routers on your network must use multicasting, also. By default, RIP direction is set to Both and the Version set to RIP-1. DMZ are on separate subnets. ZyWALL 2 Plus User’s Guide... - Page 183 Clear this check box to block all NetBIOS packets going from the WLAN to the DMZ and from the DMZ to the WLAN. Apply Click Apply to save your changes back to the ZyWALL. Reset Click Reset to begin configuring this screen afresh. ZyWALL 2 Plus User’s Guide Chapter 10 Wireless LAN...
-
Page 184: Wlan Static Dhcp
00:A0:C5:00:00:02. To change your ZyWALL’s WLAN static DHCP settings, click NETWORK >WLAN > Static DHCP. The screen appears as shown. Figure 118 NETWORK > WLAN > Static DHCP ZyWALL 2 Plus User’s Guide... -
Page 185: Wlan Ip Alias
Make sure that the subnets of the logical networks do not overlap. To change your ZyWALL’s IP alias settings, click NETWORK > WLAN > IP Alias. The screen appears as shown. ZyWALL 2 Plus User’s Guide Chapter 10 Wireless LAN... -
Page 186: Figure 119 Network > Wlan > Ip Alias
By default, RIP direction is set to Both and the Version set to RIP-1. Click Apply to save your changes back to the ZyWALL. Click Reset to begin configuring this screen afresh. ZyWALL 2 Plus User’s Guide... -
Page 187: Wlan Port Roles
The radio buttons correspond to Ethernet ports on the front panel of the ZyWALL. On the ZyWALL, ports 1 to 4 are all LAN ports by default. Your changes are also reflected in the LAN and DMZ Port Roles screen. ZyWALL 2 Plus User’s Guide Chapter 10 Wireless LAN... -
Page 188: Figure 121 Network > Wlan > Port Roles
Select a port’s WLAN radio button to use the port as part of the WLAN. The port will use the WLAN IP address. Click Apply to save your changes back to the ZyWALL. Click Reset to begin configuring this screen afresh. ZyWALL 2 Plus User’s Guide... -
Page 189: Security
Security Firewall (191) Content Filtering Screens (223) Content Filtering Reports (245) IPSec VPN (253) Certificates (295) Authentication Server (323) -
Page 191: Firewall
Messaging) session from the LAN to the WAN (1). Return traffic for this session is also allowed (2). However other traffic initiated from the WAN is blocked (3 and 4). Figure 123 Default Firewall Action ZyWALL 2 Plus User’s Guide Firewall... -
Page 192: Packet Direction Matrix
The ZyWALL’s packet direction matrix allows you to apply certain security settings (like firewall) to traffic flowing in specific directions. For example, click SECURITY > FIREWALL to open the following screen. This screen configures general firewall settings. Figure 124 SECURITY > FIREWALL > Default Rule (Router Mode) ZyWALL 2 Plus User’s Guide... -
Page 193: Packet Direction Examples
Firewall rules are grouped based on the direction of travel of packets to which they apply. This section gives some examples of why you might configure firewall rules for specific connection directions. ZyWALL 2 Plus User’s Guide Chapter 11 Firewall A specific interface or any of the ZyWALL’s VPN... - Page 194 You also need to configure NAT port forwarding (or full featured NAT address mapping rules) to allow computers on the WAN to access devices on the LAN. See an example. Section 11.5 on page Section 17.5.3 on page 341 ZyWALL 2 Plus User’s Guide...
-
Page 195: To Vpn Packet Direction
DMZ computers from going out through any of the ZyWALL’s VPN tunnels. Figure 126 From LAN to VPN Example ZyWALL 2 Plus User’s Guide By default the ZyWALL stops computers connected to the WAN from managing the ZyWALL or using the ZyWALL as a gateway to communicate with other computers on the WAN. -
Page 196: From Vpn Packet Direction
For example, by default the firewall allows traffic from any VPN tunnel to go to any of the ZyWALL’s interfaces, the ZyWALL itself and other VPN tunnels. You could edit the From VPN To LAN default firewall rule to silently block traffic from the VPN tunnels from going to the LAN computers. ZyWALL 2 Plus User’s Guide... -
Page 197: Figure 128 From Vpn To Lan Example
Figure 128 From VPN to LAN Example In order to do this, you would configure the SECURITY > FIREWALL > Default Rule screen as follows. Figure 129 Block VPN to LAN Traffic by Default Example ZyWALL 2 Plus User’s Guide... -
Page 198: From Vpn To Vpn Packet Direction
VPN tunnel or the ZyWALL itself. VPN traffic destined for the DMZ is allowed through. Figure 130 From VPN to VPN Example You would configure the SECURITY > FIREWALL > Default Rule screen as follows. for details). The ZyWALL decrypts the traffic and applies the ZyWALL 2 Plus User’s Guide... -
Page 199: Security Considerations
For example, if FTP ports (TCP 20, 21) are allowed from the Internet to the LAN, Internet users may be able to connect to computers with running FTP servers. 4 Does this rule conflict with any existing rules? ZyWALL 2 Plus User’s Guide Chapter 11 Firewall... -
Page 200: Firewall Rules Example
• or you configure a static DHCP entry for it so the ZyWALL always assigns it the same IP address (see Section 6.8 on page 139 DESTINATIO SCHEDULE SERVICE for information on static DHCP). ACTION Drop Allow ZyWALL 2 Plus User’s Guide... -
Page 201: Asymmetrical Routes
“triangle” route. This causes the ZyWALL to reset the connection, as the connection has not been acknowledged. You can have the ZyWALL permit the use of asymmetrical route topology on the network (not reset the connection). ZyWALL 2 Plus User’s Guide DESTINATIO SCHEDULE SERVICE... -
Page 202: Asymmetrical Routes And Ip Alias
Figure 134 Using IP Alias to Solve the Triangle Route Problem 11.7 Firewall Default Rule (Router Mode) Click SECURITY > FIREWALL to open the Default Rule screen. Use this screen to configure general firewall settings when the ZyWALL is set to router mode. ZyWALL 2 Plus User’s Guide... -
Page 203: Figure 135 Security > Firewall > Default Rule (Router Mode)
(not reset the connection). Note: Allowing asymmetrical routes may let traffic from the WAN go ZyWALL 2 Plus User’s Guide the ZyWALL are dropped when you apply your changes. directly to the LAN without passing through the ZyWALL. A better solution is to use IP alias to put the ZyWALL and the backup gateway on separate subnets. -
Page 204: Firewall Default Rule (Bridge Mode)
Section 11.1 on page 191 from the ZyWALL’s VPN tunnels. They do not apply to other VPN traffic for which the ZyWALL is not one of the gateways (VPN pass-through traffic). for more information about the firewall. ZyWALL 2 Plus User’s Guide... -
Page 205: Figure 136 Security > Firewall > Default Rule (Bridge Mode)
Denial of Service (DoS) attacks when the firewall is activated. Note: When you activate the firewall, all current connections through ZyWALL 2 Plus User’s Guide the ZyWALL are dropped when you apply your changes. Chapter 11 Firewall... -
Page 206: Firewall Rule Summary
Click SECURITY > FIREWALL > Rule Summary to open the screen. This screen displays a list of the configured firewall rules. from the ZyWALL’s VPN tunnels. They do not apply to other VPN traffic for which the ZyWALL is not one of the gateways (VPN pass-through traffic). ZyWALL 2 Plus User’s Guide... -
Page 207: Figure 137 Security > Firewall > Rule Summary
This field displays the default action you selected in the Default Rule screen for the packet direction displayed. ZyWALL 2 Plus User’s Guide for more information about the firewall. from the ZyWALL’s VPN tunnels. They do not apply to other VPN traffic for which the ZyWALL is not one of the gateways (VPN pass-through traffic). -
Page 208: Firewall Edit Rule
Use this screen to create or edit a firewall rule. Refer to the following table for information on the labels. Section 11.1 on page 191 Appendix D on page 653 for more information about the firewall. for a list ZyWALL 2 Plus User’s Guide... -
Page 209: Figure 138 Security > Firewall > Rule Summary > Edit
Chapter 11 Firewall Figure 138 SECURITY > FIREWALL > Rule Summary > Edit ZyWALL 2 Plus User’s Guide... -
Page 210: Table 51 Security > Firewall > Rule Summary > Edit
ZyWALL record these logs. Send Alert Select the check box to have the ZyWALL generate an alert when the rule is Message to matched. Administrator When Matched Appendix D on page 653 for a list of ZyWALL 2 Plus User’s Guide... -
Page 211: Anti-Probing
ZyWALL’s interfaces will respond to Ping requests and whether or not the ZyWALL is to respond to probing for unused ports. Figure 139 SECURITY > FIREWALL > Anti-Probing ZyWALL 2 Plus User’s Guide featured NAT address mapping rules) if you want to allow computers on the WAN to access devices on the LAN. -
Page 212: Firewall Thresholds
TCP reset packet for a blocked TCP packet (or an ICMP port-unreachable packet for a blocked UDP packets) or just drop the packets without sending a response packet. Click Apply to save your changes back to the ZyWALL. Click Reset to begin configuring this screen afresh. ZyWALL 2 Plus User’s Guide... -
Page 213: Threshold Values
Click SECURITY > FIREWALL > Threshold to bring up the next screen. The global values specified for the threshold and timeout apply to all TCP connections. Figure 141 SECURITY > FIREWALL > Threshold ZyWALL 2 Plus User’s Guide Chapter 11 Firewall... -
Page 214: Table 53 Security > Firewall > Threshold
Delete the oldest half open session when a new connection request comes. Deny new connection requests for the number of minutes that you specify (between 1 and 255). Click Apply to save your changes back to the ZyWALL. Click Reset to begin configuring this screen afresh. ZyWALL 2 Plus User’s Guide... -
Page 215: Service
Custom Service This table shows all configured custom services. This is the index number of the custom service. Service Name This is the name of the service. ZyWALL 2 Plus User’s Guide for more information about the firewall. Chapter 11 Firewall... -
Page 216: Firewall Edit Custom Service
Choose the IP protocol (TCP, UDP, TCP/UDP, ICMP or Custom) that defines your customized service from the drop down list box. If you select Custom, specify the protocol’s number. For example, ICMP is 1, TCP is 6, UDP is 17 and so on. ZyWALL 2 Plus User’s Guide... -
Page 217: My Service Firewall Rule Example
Figure 145 My Service Firewall Rule Example: Edit Custom Service 3 Click Rule Summary. Select WAN and LAN from the Packet Direction drop-down list boxes and click Refresh to display existing firewall rules for the selected direction of travel of packets. ZyWALL 2 Plus User’s Guide Chapter 11 Firewall... -
Page 218: Figure 146 My Service Firewall Rule Example: Rule Summary
Figure 147 My Service Firewall Rule Example: Rule Edit: Source and Destination Addresses 8 In the Edit Service section, use the arrows between Available Services and Selected Service(s) to configure it as follows. Click Apply when you are done. ZyWALL 2 Plus User’s Guide... - Page 219 Chapter 11 Firewall Custom services show up with an * before their names in the Services list boxes and the Rule Summary screen’s Service Type list box. ZyWALL 2 Plus User’s Guide...
-
Page 220: Figure 148 My Service Firewall Rule Example: Edit Rule: Service Configuration
Chapter 11 Firewall Figure 148 My Service Firewall Rule Example: Edit Rule: Service Configuration Rule 1 allows a My Service connection from the WAN to IP addresses 10.0.0.10 through 10.0.0.15 on the LAN. ZyWALL 2 Plus User’s Guide... -
Page 221: Figure 149 My Service Firewall Rule Example: Rule Summary: Completed
Chapter 11 Firewall Figure 149 My Service Firewall Rule Example: Rule Summary: Completed ZyWALL 2 Plus User’s Guide... - Page 222 Chapter 11 Firewall ZyWALL 2 Plus User’s Guide...
-
Page 223: Content Filtering Screens
You can have the ZyWALL block, block and/or log access to web sites based on these categories. The content filtering lookup process is described below. ZyWALL 2 Plus User’s Guide... -
Page 224: Content Filter General Screen
Use the REGISTRATION screens (see Chapter 5 on page 127) to create a myZyXEL.com account, register your device and activate the external content filtering service. Section 12.11 on page ZyWALL 2 Plus User’s Guide... -
Page 225: Figure 151 Security > Content Filter > General
Service General Setup Enable External Database Content Filtering ZyWALL 2 Plus User’s Guide Chapter 12 Content Filtering Screens DESCRIPTION Select this check box to enable the content filter. Content filtering works on HTTP traffic that is using TCP ports 80, 119, 3128 or 8080. - Page 226 3. Enter your ZyWALL's MAC address (in lower case) in the Name field. You can find this MAC address in the Service Management screen (Figure 161 on page 247). Type your myZyXEL.com account password in the Password field and click Submit. for details). ZyWALL 2 Plus User’s Guide...
-
Page 227: Content Filter Policy
You may find that a web site has not been accurately categorized or that a web site’s contents have changed and the content filtering category needs to be updated. See for how to submit the web site for review. ZyWALL 2 Plus User’s Guide Chapter 12 Content Filtering Screens DESCRIPTION This read-only field displays the status of your category-based content filtering (using an external database) service subscription. -
Page 228: Figure 152 Security > Content Filter > Policy
Click the delete icon to remove the content filter policy. You cannot delete the default policy. A window display asking you to confirm that you want to delete the policy. Note that subsequent policies move up by one when you take this action. ZyWALL 2 Plus User’s Guide... -
Page 229: Content Filter Policy: General
Table 58 SECURITY > CONTENT FILTER > Policy > General LABEL Active Policy Name ZyWALL 2 Plus User’s Guide Chapter 12 Content Filtering Screens DESCRIPTION Type the index number for where you want to put a content filter policy. For example, if you type 6, your new content filter policy becomes number 6 and the previous content filter policy 6 (if there is one) becomes content filter policy 7. -
Page 230: Content Filter Policy: External Database
Highlight an existing source or destination address from the Configured Address box and click Delete to remove it. Click Apply to save your customized settings and exit this screen. Click Cancel to exit this screen without saving. ZyWALL 2 Plus User’s Guide... -
Page 231: Figure 154 Security > Content Filter > Policy > External Database
Select All Categories Clear All Categories Adult/Mature Content Pornography ZyWALL 2 Plus User’s Guide Chapter 12 Content Filtering Screens DESCRIPTION This is the name of the content filter policy that you are configuring. Select this option to apply category based content filtering for this policy. - Page 232 Selecting this category excludes pages that provide information or arguments in favor of or against abortion, describe abortion procedures, offer help in obtaining or avoiding abortion, or provide information on the effects, or lack thereof, of abortion. ZyWALL 2 Plus User’s Guide...
- Page 233 Cultural/Charitable Organization Financial Services Brokerage/Trading Online Games ZyWALL 2 Plus User’s Guide Chapter 12 Content Filtering Screens DESCRIPTION Selecting this category excludes pages that distribute, promote, or provide hacking tools and/or information which may help gain unauthorized access to computer systems and/or computerized communication systems.
- Page 234 It also includes radio stations and magazines. It does not include pages that can be rated in other categories. Selecting this category excludes pages that promote interpersonal relationships. ZyWALL 2 Plus User’s Guide...
- Page 235 Online Storage Remote Access Tools Shopping Auctions Real Estate ZyWALL 2 Plus User’s Guide Chapter 12 Content Filtering Screens DESCRIPTION Selecting this category excludes pages containing personal, professional, or educational reference, including online dictionaries, maps, census, almanacs, library catalogues, genealogy-related pages and scientific information.
- Page 236 Selecting this category excludes pages designed specifically for children. Selecting this category excludes pages that provide online advertisements or banners. This does not include advertising servers that serve adult-oriented advertisements. ZyWALL 2 Plus User’s Guide...
-
Page 237: Content Filter Policy: Customization
240) first to configure the master lists of trusted (allowed) web sites, forbidden (blocked) web sites, and keywords. ZyWALL 2 Plus User’s Guide Chapter 12 Content Filtering Screens DESCRIPTION Selecting this category excludes pages of organizations that provide top-level domain pages, as well as web communities or hosting services. -
Page 238: Figure 155 Security > Content Filter > Policy > Customization
When this box is selected, the ZyWALL will permit Java, ActiveX and Cookies from sites on the Trusted Web Site list to the LAN. In certain cases, it may be desirable to allow Java, ActiveX or Cookies from sites that are known and trusted. ZyWALL 2 Plus User’s Guide... -
Page 239: Content Filter Policy: Schedule
Click SECURITY > CONTENT FILTER > Policy and then a policy’s schedule icon to display the following screen. Use this screen to set for which days and times the policy applies. ZyWALL 2 Plus User’s Guide Chapter 12 Content Filtering Screens DESCRIPTION This list displays the trusted host names you configured in the SECURITY >... -
Page 240: Content Filter Object
In the Begin Time and End Time fields, enter the time period(s), in 24-hour format, for individual day(s) of the week. Click Apply to save your settings and exit this screen. Click Cancel to exit this screen without saving. ZyWALL 2 Plus User’s Guide... -
Page 241: Figure 157 Security > Content Filter > Object
Trusted Web Sites Add Trusted Web Site Trusted Web Sites Delete ZyWALL 2 Plus User’s Guide Chapter 12 Content Filtering Screens DESCRIPTION These are sites that you want to allow access to, regardless of their content rating, can be allowed by adding them to this list. You can enter up to 32 entries. -
Page 242: Customizing Keyword Blocking Url Checking
Select a keyword from the Keyword List, and then click this button to delete it from that list. Click Apply to save your changes back to the ZyWALL. Click Reset to begin configuring this screen afresh. ZyWALL 2 Plus User’s Guide... -
Page 243: Full Path Url Checking
Please see Section 13.3 on page 250 categorized. ZyWALL 2 Plus User’s Guide Chapter 12 Content Filtering Screens for how to submit a web site that has been incorrectly command... -
Page 244: Figure 158 Security > Content Filter > Cache
This is a web site’s address that the ZyWALL previously checked with the external content filtering database. This is the number of hours left before the URL entry is discarded from the cache. Click the delete icon to remove the URL entry from the cache. ZyWALL 2 Plus User’s Guide... -
Page 245: Content Filtering Reports
Alternatively, you can also view content filtering reports during the free trial (up to 30 days). 1 Go to http://www.myZyXEL.com. 2 Fill in your myZyXEL.com account information and click Submit. ZyWALL 2 Plus User’s Guide on how to create a myZyXEL.com account, register your device... -
Page 246: Figure 159 Myzyxel.com: Login
ZyWALL using the Rename button in the Service Management screen (see on page 247). Figure 160 myZyXEL.com: Welcome 4 In the Service Management screen click Content Filter in the Service Name field to open the Blue Coat login screen. Figure 161 ZyWALL 2 Plus User’s Guide... -
Page 247: Figure 161 Myzyxel.com: Service Management
Type your myZyXEL.com account password in the Password field. 6 Click Submit. Figure 162 Blue Coat: Login 7 In the Web Filter Home screen, click the Reports tab. ZyWALL 2 Plus User’s Guide Chapter 13 Content Filtering Reports (Figure 161 on page 247). -
Page 248: Figure 163 Content Filtering Reports Main Screen
Run Report.The screens vary according to the report type you selected in the Report Home screen. 10 A chart and/or list of requested web site categories display in the lower half of the screen. ZyWALL 2 Plus User’s Guide... -
Page 249: Figure 165 Global Report Screen Example
Chapter 13 Content Filtering Reports Figure 165 Global Report Screen Example 11 You can click a category in the Categories report or click URLs in the Report Home screen to see the URLs that were requested. ZyWALL 2 Plus User’s Guide... -
Page 250: Web Site Submission
1 Log into the content filtering reports web site (see 2 In the Web Filter Home screen (see open the Web Page Review Process screen shown next. Section 13.2 on page Figure 163 on page 248), click Site Submissions to ZyWALL 2 Plus User’s Guide 245). -
Page 251: Figure 167 Web Page Review Process Screen
Chapter 13 Content Filtering Reports Figure 167 Web Page Review Process Screen 3 Type the web site’s URL in the field and click Submit to have the web site reviewed. ZyWALL 2 Plus User’s Guide... - Page 252 Chapter 13 Content Filtering Reports ZyWALL 2 Plus User’s Guide...
-
Page 253: Ipsec Vpn
The following figure provides one perspective of a VPN tunnel. Figure 168 VPN: Example The VPN tunnel connects the ZyWALL (X) and the remote IPSec router (Y). These routers then connect the local network (A) and remote network (B). ZyWALL 2 Plus User’s Guide IPSec VPN... -
Page 254: Ike Sa Overview
14.1.1.1 IP Addresses of the ZyWALL and Remote IPSec Router In the ZyWALL, you have to specify the IP addresses of the ZyWALL and the remote IPSec router to establish an IKE SA. Section 14.3.1.4 on page 260. Main mode is used ZyWALL 2 Plus User’s Guide... -
Page 255: Vpn Rules (Ike)
Figure 171 IPSec Fields Summary Click SECURITY > VPN to display the VPN Rules (IKE) screen. Use this screen to manage the ZyWALL’s list of VPN rules (tunnels) that use IKE SAs. ZyWALL 2 Plus User’s Guide Chapter 14 IPSec VPN... -
Page 256: Figure 172 Security > Vpn > Vpn Rules (Ike)
This is the remote network behind the remote IPsec router. Click this icon to display a screen in which you can associate a network policy to a gateway policy or move it to the recycle bin. ZyWALL 2 Plus User’s Guide... -
Page 257: Ike Sa Setup
ZyWALL. If the remote IPSec router rejects all of the proposals (for example, if the VPN tunnel is not configured correctly), the ZyWALL and remote IPSec router cannot establish an IKE SA. ZyWALL 2 Plus User’s Guide DESCRIPTION Click this icon to display a screen in which you can change the settings of a gateway or network policy. -
Page 258: Figure 174 Ike Sa: Main Negotiation Mode, Steps 3 - 4: Dh Key Exchange
Figure 175 IKE SA: Main Negotiation Mode, Steps 5 - 6: Authentication The ZyWALL and remote IPSec router use a pre-shared key in the authentication process, though it is not actually transmitted or exchanged. Section 14.3.1.1 on page 258 for more information about ZyWALL 2 Plus User’s Guide... -
Page 259: Table 65 Vpn Example: Matching Id Type And Content
14.3.1.2.1 Certificates It is also possible for the ZyWALL and remote IPSec router to authenticate each other with certificates. In this case, the authentication process is different. ZyWALL 2 Plus User’s Guide Chapter 14 IPSec VPN REMOTE IPSEC ROUTER Local ID type: IP Local ID content: 1.1.1.2... - Page 260 Step 1: The ZyWALL sends its proposals to the remote IPSec router. It also starts the Diffie- Hellman key exchange and sends its (unencrypted) identity to the remote IPSec router for authentication. Chapter 15 on page 295 Section 14.3.1.2 on ZyWALL 2 Plus User’s Guide...
-
Page 261: Additional Ipsec Vpn Topics
14.4 Additional IPSec VPN Topics This section discusses other IPSec VPN topics that apply to either IKE SAs or IPSec SAs or both. Relationships between the topics are also highlighted. ZyWALL 2 Plus User’s Guide Chapter 14 IPSec VPN Section 14.6.3... -
Page 262: Sa Life Time
(backup) VPN connection to another WAN interface on the remote IPSec router if the primary (regular) VPN connection goes down. In the following figure, if the primary VPN tunnel (A) goes down, the ZyWALL uses the redundant VPN tunnel (B). ZyWALL 2 Plus User’s Guide... -
Page 263: Encryption And Authentication Algorithms
• MD5 (Message Digest 5) produces a 128-bit digest to authenticate packet data. • SHA1 (Secure Hash Algorithm) produces a 160-bit digest to authenticate packet data. ZyWALL 2 Plus User’s Guide Chapter 14 IPSec VPN... -
Page 264: Vpn Rules (Ike) Gateway Policy Edit
VPN tunnel (My ZyWALL and Remote Gateway) and specifies the authentication, encryption and other settings needed to negotiate a phase 1 IKE SA. ) icon or the edit ( ) icon ZyWALL 2 Plus User’s Guide... -
Page 265: Figure 178 Security > Vpn > Vpn Rules (Ike) > Edit Gateway Policy
Chapter 14 IPSec VPN Figure 178 SECURITY > VPN > VPN Rules (IKE) > Edit Gateway Policy ZyWALL 2 Plus User’s Guide... -
Page 266: Table 67 Security > Vpn > Vpn Rules (Ike) > Edit Gateway Policy
WAN IP address or domain name (you cannot set either to 0.0.0.0). Type the WAN IP address or the domain name (up to 31 characters) of the backup IPSec router to use when the ZyWALL cannot connect to the primary remote gateway. for more ZyWALL 2 Plus User’s Guide... - Page 267 ZyWALL in the local Content field. Use up to 31 ASCII characters including spaces, although trailing spaces are truncated. The domain name or e-mail address is for identification purposes only and can be any string. ZyWALL 2 Plus User’s Guide Chapter 14 IPSec VPN...
- Page 268 5. Regardless of how you configure the ID Type and Content fields, two active IPSec SAs cannot have both the local and remote IP address ranges overlap between rules. Select this check box to activate extended authentication. ZyWALL 2 Plus User’s Guide...
- Page 269 VPN rule. Clear this to have the ZyWALL use only the configured phase 1 key groups and encryption and authentication algorithms when negotiating an IKE SA. ZyWALL 2 Plus User’s Guide Chapter 16 on page 323). Chapter 14 IPSec VPN...
-
Page 270: Ipsec Sa Overview
Click Apply to save your changes back to the ZyWALL. Click Cancel to exit this screen without saving. Section 14.15.1 on page 289 for an example of telecommuters sharing ) icon in the VPN Rules 256). Refer to Section 14.8 on page 278 ZyWALL 2 Plus User’s Guide... -
Page 271: Virtual Address Mapping
Computers on network Y use IP addresses 192.168.1.2 to 192.168.1.27 to access local network devices and IP addresses 10.0.0.2 to 10.0.0.4 to access the remote network devices. ZyWALL 2 Plus User’s Guide Chapter 14 IPSec VPN Section 14.6.2 on page 271) to Section 14.14 on page 286... -
Page 272: Active Protocol
ZyWALL or remote IPSec router. The header for the active protocol (AH or ESP) appears between the IP headers. IP Header Data Header IP Header AH/ESP Header Header IP Header AH/ESP IP Header Header ZyWALL 2 Plus User’s Guide Data Data Header... -
Page 273: Ipsec Sa Proposal And Perfect Forward Secrecy
A network policy identifies the devices behind the IPSec routers at either end of a VPN tunnel and specifies the authentication, encryption and other settings needed to negotiate a phase 2 IPSec SA. ZyWALL 2 Plus User’s Guide Chapter 14 IPSec VPN Section 14.3.1 on page 257), ) icon or a network policy’s edit... -
Page 274: Figure 181 Security > Vpn > Vpn Rules (Ike) > Edit Network Policy
Chapter 14 IPSec VPN Figure 181 SECURITY > VPN > VPN Rules (IKE) > Edit Network Policy ZyWALL 2 Plus User’s Guide... -
Page 275: Table 68 Security > Vpn > Vpn Rules (Ike) > Edit Network Policy
IP addresses of computers on your local network to other (virtual) IP addresses before sending the packets to the remote IPSec router. This translation hides the source IP addresses of computers in the local network. ZyWALL 2 Plus User’s Guide Chapter 14 IPSec VPN... - Page 276 Range Address, enter the beginning (static) IP address, in a range of computers on the LAN behind your ZyWALL. When the Address Type field is configured to Subnet Address, this is a (static) IP address on the LAN behind your ZyWALL. ZyWALL 2 Plus User’s Guide...
- Page 277 Select which hash algorithm to use to authenticate packet data in the IPSec SA. Algorithm Choices are SHA1 and MD5. SHA1 is generally considered stronger than MD5, but it is also slower. ZyWALL 2 Plus User’s Guide Chapter 14 IPSec VPN...
-
Page 278: Network Policy Port Forwarding
Clear this to have the ZyWALL use only the configured phase 2 encryption and authentication algorithms when negotiating an IPSec SA. Click Apply to save the changes. Click Cancel to discard all changes and return to the main VPN screen. ) icon in the VPN Rules (IKE) ZyWALL 2 Plus User’s Guide... -
Page 279: Figure 182 Security > Vpn > Vpn Rules (Ike) > Edit Network Policy > Port Forwarding
Click this button to save these settings. Reset Click this button to begin configuring this screen afresh. Cancel Click this button to return to the VPN-Network Policy -Edit screen without saving your changes. ZyWALL 2 Plus User’s Guide Chapter 14 IPSec VPN... -
Page 280: Network Policy Move
When there is a network policy in Recycle Bin, the Recycle Bin gateway policy automatically displays in the VPN Rules (IKE) screen. Click Apply to save the changes. Click Cancel to discard all changes and return to the main VPN screen. ZyWALL 2 Plus User’s Guide... -
Page 281: Ipsec Sa Using Manual Keys
You may want to configure a VPN rule that uses manual key management if you are having problems with IKE key management. ZyWALL 2 Plus User’s Guide for a graphical representation of the fields in the web Chapter 14 IPSec VPN... -
Page 282: Figure 184 Security > Vpn > Vpn Rules (Manual)
Click the delete icon to remove the VPN policy. A window displays asking you to confirm that you want to delete the VPN rule. When a VPN policy is deleted, subsequent policies move up in the page list. Click Add to add a new VPN policy. ZyWALL 2 Plus User’s Guide... -
Page 283: Vpn Rules (Manual) Edit
Select this check box to send NetBIOS packets through the VPN connection. ZyWALL 2 Plus User’s Guide for more information about IPSec SAs using manual keys. Chapter 14 IPSec VPN... - Page 284 LAN IP address when using traffic redirect. The VPN tunnel has to be rebuilt if this IP address changes. When the ZyWALL is in bridge mode, this field is read-only and displays the ZyWALL’s IP address. ZyWALL 2 Plus User’s Guide...
-
Page 285: Vpn Sa Monitor
VPN connections. A Security Association (SA) is the group of security settings related to a specific VPN tunnel. This screen displays active VPN connections. Use Refresh to display active VPN connections. ZyWALL 2 Plus User’s Guide Chapter 14 IPSec VPN... -
Page 286: Vpn Global Setting
Click Refresh to display the current active VPN connection(s). Select a security association index number that you want to disconnect and then click Disconnect. Section 14.6.2 on page Figure 187). For example, when you configure ZyWALL X, you 271). For example, you ZyWALL 2 Plus User’s Guide... -
Page 287: Figure 187 Overlap In A Dynamic Vpn Rule
In this case, if you want to send packets from network A to an overlapped IP (ex. 10.1.2.241) that is in the IP alias network M, you have to set Local and Remote IP Address Conflict Resolution to The Local Network. ZyWALL 2 Plus User’s Guide Chapter 14 IPSec VPN 0.0.0.0... -
Page 288: Figure 189 Security > Vpn > Global Setting
MSS for the TCP packets that are to be encrypted by VPN. Select User-Defined and specify a size from 0~1460 bytes. 0 has the ZyWALL use the auto setting. ZyWALL 2 Plus User’s Guide... -
Page 289: Telecommuter Vpn/Ipsec Examples
IPSec parameters but the local IP addresses (or ranges of addresses) should not overlap. Figure 190 Telecommuters Sharing One VPN Rule Example ZyWALL 2 Plus User’s Guide DESCRIPTION Select The Local Network to send packets destined for overlapping local and remote IP addresses to the local network (you can access the local devices but not the remote devices). -
Page 290: Telecommuters Using Unique Vpn Rules Example
Telecommuter B: 192.168.3.2 Telecommuter C: 192.168.4.15 192.168.1.10 Section 14.3.1.4 on page HEADQUARTERS Public static IP address 0.0.0.0 With this IP address only the telecommuter can initiate the IPSec tunnel. 192.168.1.10 Not Applicable 260), the ZyWALL can use ZyWALL 2 Plus User’s Guide... -
Page 291: Vpn And Remote Management
192.168.1.7. Someone in the remote network (B) can use a service (like HTTP for example) through the VPN tunnel to access the ZyWALL’s LAN interface. Remote management must also be configured to allow HTTP access on the ZyWALL’s LAN interface. ZyWALL 2 Plus User’s Guide Chapter 14 IPSec VPN HEADQUARTERS All Headquarters Rules: My ZyWALL: bigcompanyhq.com... -
Page 292: Hub-And-Spoke Vpn
Therefore, a hub-and-spoke VPN is more suitable when there is a minimum amount of traffic between spoke routers. shows some example network topologies. In the first (fully-meshed) ZyWALL 2 Plus User’s Guide... -
Page 293: Hub-And-Spoke Vpn Example
• Remote Gateway: 10.0.0.3 • Local IP address: 192.168.167.0~192.168.168.255 • Remote IP address: 192.168.169.0/255.255.255.0 Branch Office B: • Remote Gateway: 10.0.0.1 • Local IP address: 192.168.169.0/255.255.255.0 • Remote IP address: 192.168.167.0~192.168.168.255 ZyWALL 2 Plus User’s Guide Chapter 14 IPSec VPN... -
Page 294: Hub-And-Spoke Vpn Requirements And Suggestions
VPN rules in the spoke routers to use 0.0.0.0 (any) as the remote IP address. Make sure that your From VPN and To VPN firewall rules do not block the VPN packets. ZyWALL 2 Plus User’s Guide... -
Page 295: Certificates
A certification path is the hierarchy of certification authority certificates that validate a certificate. The ZyWALL does not trust a certificate if any certificate on its path has expired or been revoked. ZyWALL 2 Plus User’s Guide Certificates... -
Page 296: Advantages Of Certificates
2 Make sure that the certificate has a “.cer” or “.crt” file name extension. Figure 195 Certificates on Your Computer 3 Double-click the certificate’s icon to open the Certificate window. Click the Details tab and scroll down to the Thumbprint Algorithm and Thumbprint fields. ZyWALL 2 Plus User’s Guide... -
Page 297: Configuration Summary
Use the Trusted Remote Hosts screens to import self-signed certificates from trusted remote hosts. Use the Directory Servers screen to configure a list of addresses of directory servers (that contain lists of valid and revoked certificates). ZyWALL 2 Plus User’s Guide Chapter 15 Certificates... -
Page 298: My Certificates
My Certificate Import screen to import the certificate and replace the request. SELF represents a self-signed certificate. *SELF represents the default self-signed certificate, which the ZyWALL uses to sign imported trusted remote host certificates. CERT represents a certificate issued by a certification authority. ZyWALL 2 Plus User’s Guide... - Page 299 Click Create to go to the screen where you can have the ZyWALL generate a certificate or a certification request. Refresh Click Refresh to display the current validity status of the certificates. ZyWALL 2 Plus User’s Guide Chapter 15 Certificates...
-
Page 300: My Certificate Details
This field displays the identifying name of this certificate. If you want to change the name, type up to 31 characters to identify this certificate. You may use any character (not including spaces). These read-only fields display detailed information about the certificate. ZyWALL 2 Plus User’s Guide... - Page 301 You can copy and paste a certificate into an e-mail to send to friends or colleagues or you can copy and paste a certificate into a text editor and save the file on a management computer for later distribution (via floppy disk for example). ZyWALL 2 Plus User’s Guide Chapter 15 Certificates...
-
Page 302: My Certificate Export
Click Cancel to quit and return to the My Certificates screen. ZyWALL 2 Plus User’s Guide... -
Page 303: My Certificate Import
• PEM (Base-64) encoded PKCS#7: This Privacy Enhanced Mail (PEM) format uses 64 ASCII characters to convert a binary PKCS#7 certificate into a printable form. ZyWALL 2 Plus User’s Guide DESCRIPTION Binary X.509 is an ITU-T recommendation that defines the formats for X.509 certificates. -
Page 304: Figure 201 Security > Certificates > My Certificates > Import
Click Apply to save the certificate on the ZyWALL. Cancel Click Cancel to quit and return to the My Certificates screen. When you import a binary PKCS#12 format certificate, another screen displays for you to enter the password. ZyWALL 2 Plus User’s Guide... -
Page 305: My Certificate Create
Click SECURITY > CERTIFICATES > My Certificates > Create to open the My Certificate Create screen. Use this screen to have the ZyWALL create a self-signed certificate, enroll a certificate with a certification authority or generate a certification request. ZyWALL 2 Plus User’s Guide Chapter 15 Certificates... -
Page 306: Figure 203 Security > Certificates > My Certificates > Create (Basic)
Chapter 15 Certificates Figure 203 SECURITY > CERTIFICATES > My Certificates > Create (Basic) ZyWALL 2 Plus User’s Guide... -
Page 307: Figure 204 Security > Certificates > My Certificates > Create (Advanced)
LABEL Certificate Name Subject Information The fields below display when you click << Basic. ZyWALL 2 Plus User’s Guide DESCRIPTION Type up to 31 ASCII characters (not including spaces) to identify this certificate. Use these fields to record information that identifies the owner of the certificate. - Page 308 You can use up to 63 characters. Check with the certificate’s issuing certification authority for their interpretation in this field if you select to apply to a certification authority for a certificate. ZyWALL 2 Plus User’s Guide...
- Page 309 CA Server Address CA Certificate Enrollment via an RA ZyWALL 2 Plus User’s Guide DESCRIPTION Select a radio button to identify the certificate’s owner by IP address, domain name or e-mail address. Type the IP address (in dotted decimal notation), domain name or e-mail address in the field provided.
-
Page 310: Trusted Cas
Type the key that the certification authority gave you. You can use up to 31 ASCII printable characters. Spaces are allowed. Click Apply to begin certificate or certification request generation. Click Cancel to quit and return to the My Certificates screen. ZyWALL 2 Plus User’s Guide... -
Page 311: Figure 205 Security > Certificates > Trusted Cas
Click the delete icon to remove the certificate. A window displays asking you to confirm that you want to delete the certificates. Note that subsequent certificates move up by one when you take this action. ZyWALL 2 Plus User’s Guide Chapter 15 Certificates... -
Page 312: Trusted Ca Details
Click Import to open a screen where you can save the certificate of a certification authority that you trust, from your computer to the ZyWALL. Click this button to display the current validity status of the certificates. ZyWALL 2 Plus User’s Guide... -
Page 313: Table 84 Security > Certificates > Trusted Cas > Details
(the ZyWALL uses RSA encryption) and the length of the key set in bits (1024 bits for example). Subject Alternative This field displays the certificate’s owner‘s IP address (IP), domain name (DNS) Name or e-mail address (EMAIL). ZyWALL 2 Plus User’s Guide Chapter 15 Certificates... -
Page 314: Trusted Ca Import
ZyWALL to check the CRL that the certification authority issues before trusting a certificate issued by the certification authority. Click Cancel to quit and return to the Trusted CAs screen. ZyWALL 2 Plus User’s Guide... -
Page 315: Trusted Remote Hosts
You do not need to add any certificate that is signed by one of the certification authorities on the Trusted CAs screen since the ZyWALL automatically accepts any valid certificate signed by a trusted certification authority as being trustworthy. Figure 208 SECURITY > CERTIFICATES > Trusted Remote Hosts ZyWALL 2 Plus User’s Guide Chapter 15 Certificates... -
Page 316: Trusted Remote Host Certificate Details
Click Import to open a screen where you can save the certificate of a remote host (which you trust) from your computer to the ZyWALL. Click this button to display the current validity status of the certificates. ZyWALL 2 Plus User’s Guide... -
Page 317: Figure 209 Security > Certificates > Trusted Remote Hosts > Details
Refresh Certificate Information Type ZyWALL 2 Plus User’s Guide DESCRIPTION This field displays the identifying name of this certificate. If you want to change the name, type up to 31 characters to identify this key certificate. You may use any character (not including spaces). - Page 318 (via floppy disk for example). Section 15.3 on Section 15.3 on ZyWALL 2 Plus User’s Guide...
-
Page 319: Trusted Remote Hosts Import
Type in the location of the file you want to upload in this field or click Browse to find it. Browse Click Browse to find the certificate file you want to upload. ZyWALL 2 Plus User’s Guide DESCRIPTION Click Apply to save your changes back to the ZyWALL. You can only change the name of the certificate. -
Page 320: Directory Servers
This field displays the name used to identify this directory server. This field displays the IP address or domain name of the directory server. This field displays the port number that the directory server uses. This field displays the protocol that the directory server uses. ZyWALL 2 Plus User’s Guide... -
Page 321: Directory Server Add Or Edit
LDAP (Lightweight Directory Access Protocol) is a protocol over TCP that specifies how clients access directories of certificates and lists of revoked certificates. Server Address Type the IP address (in dotted decimal notation) or the domain name of the directory server. ZyWALL 2 Plus User’s Guide Chapter 15 Certificates... - Page 322 Type the password (up to 31 ASCII characters) from the entity maintaining the directory server (usually a certification authority). Click Apply to save your changes back to the ZyWALL. Click Cancel to quit configuring this screen and return to the Directory Servers screen. ZyWALL 2 Plus User’s Guide...
-
Page 323: Authentication Server
RADIUS is a simple package exchange in which the ZyWALL acts as a message relay between the client and the network RADIUS server. 16.1.3 Types of RADIUS Messages The following types of RADIUS messages are exchanged between the ZyWALL and the RADIUS server for user authentication: • Access-Request ZyWALL 2 Plus User’s Guide... -
Page 324: Local User Database
ZyWALL. The ZyWALL can use this list of user profiles to authenticate users. Use this screen to change your ZyWALL’s list of user profiles. ZyWALL 2 Plus User’s Guide... -
Page 325: Figure 213 Security > Auth Server > Local User Database
Enter a password up to 31 characters long for this user profile. Apply Click Apply to save your changes back to the ZyWALL. Reset Click Reset to begin configuring this screen afresh. ZyWALL 2 Plus User’s Guide Chapter 16 Authentication Server... -
Page 326: Radius
Enter the IP address of the external accounting server in dotted decimal notation. The default port of the RADIUS server for accounting is 1813. You need not change this value unless your network administrator instructs you to do so with additional information. ZyWALL 2 Plus User’s Guide... - Page 327 Table 92 SECURITY > AUTH SERVER > RADIUS LABEL Apply Reset ZyWALL 2 Plus User’s Guide DESCRIPTION Enter a password (up to 31 alphanumeric characters) as the key to be shared between the external accounting server and the ZyWALL. The key is not sent over the network. This key must be the same on the external accounting server and ZyWALL.
- Page 328 Chapter 16 Authentication Server ZyWALL 2 Plus User’s Guide...
-
Page 329: Advanced
Advanced Network Address Translation (NAT) (331) Static Route (347) Bandwidth Management (351) DNS (365) Remote Management (377) UPnP (399) ALG Screen (411) -
Page 331: Network Address Translation (Nat)
Local This refers to the packet address (source or destination) as the packet travels on the LAN. Global This refers to the packet address (source or destination) as the packet travels on the WAN. ZyWALL 2 Plus User’s Guide (NAT) -
Page 332: What Nat Does
Many-to-One and Many-to-Many Overload NAT mapping) in each packet and then forwards it to the Internet. The ZyWALL keeps track of the original addresses and port numbers so incoming reply packets can have their original values restored. The following figure illustrates this. ZyWALL 2 Plus User’s Guide... -
Page 333: Nat Application
LANs using IP alias) behind the ZyWALL can communicate with three distinct WAN networks. More examples follow at the end of this chapter. Figure 216 NAT Application With IP Alias ZyWALL 2 Plus User’s Guide Chapter 17 Network Address Translation (NAT) -
Page 334: Port Restricted Cone Nat
• Many to Many Overload: In Many-to-Many Overload mode, the ZyWALL maps the multiple local IP addresses to shared global IP addresses. • Many One to One: In Many-One-to-One mode, the ZyWALL maps each local IP address to a unique global IP address. ZyWALL 2 Plus User’s Guide... -
Page 335: Using Nat
IP addresses to multiple private LAN IP addresses of clients or servers using mapping types. Select either SUA or Full Feature in NAT Overview. ZyWALL 2 Plus User’s Guide Chapter 17 Network Address Translation (NAT) IP MAPPING... -
Page 336: Nat Overview Screen
The bar displays how many of the ZyWALL's possible address mapping rules are configured. The first number shows how many address mapping rules are configured on the ZyWALL. The second number shows the maximum number of address mapping rules that can be configured on the ZyWALL. ZyWALL 2 Plus User’s Guide... -
Page 337: Nat Address Mapping
9. In the set summary screen, the new rule will be rule 7, not 9. Now if you delete rule 4, rules 5 to 7 will be pushed up by 1 rule, so old rules 5, 6 and 7 become new rules 4, 5 and 6. ZyWALL 2 Plus User’s Guide Chapter 17 Network Address Translation (NAT) -
Page 338: Figure 219 Advanced > Nat > Address Mapping
0.0.0.0 is for a dynamic IP address from your ISP with Many-to-One and Server mapping types. Global End IP This is the ending Inside Global Address (IGA). This field is N/A for One-to-One, Many-to-One and Server mapping types. ZyWALL 2 Plus User’s Guide... -
Page 339: Nat Address Mapping Edit
Click the edit icon to display the NAT Address Mapping Edit screen. Use this screen to edit an address mapping rule. See mapping. Figure 220 ADVANCED > NAT > Address Mapping > Edit ZyWALL 2 Plus User’s Guide Chapter 17 Network Address Translation (NAT) Section 17.1 on page 331 for information on NAT and address... -
Page 340: Port Forwarding
This is the ending Inside Global IP Address (IGA). This field is N/A for One-to- One, Many-to-One and Server mapping types. Click Apply to save your changes back to the ZyWALL. Click Cancel to exit this screen without saving. ZyWALL 2 Plus User’s Guide... -
Page 341: Port Forwarding: Services And Port Numbers
WAN IP address. ZyWALL 2 Plus User’s Guide Chapter 17 Network Address Translation (NAT) for a list of commonly used services and port... -
Page 342: Port Forwarding Screen
The last port forwarding rule is reserved for Roadrunner services. The rule is activated only when you set the WAN Encapsulation to Ethernet and the Service Type to something other than Standard. for port numbers commonly used for particular services. ZyWALL 2 Plus User’s Guide... -
Page 343: Figure 223 Advanced > Nat > Port Forwarding
Enter the inside IP address of the server here. Address Apply Click Apply to save your changes back to the ZyWALL. Reset Click Reset to begin configuring this screen afresh. ZyWALL 2 Plus User’s Guide Chapter 17 Network Address Translation (NAT) -
Page 344: Port Triggering
The ZyWALL times out in three minutes with UDP (User Datagram Protocol) or two hours with TCP/IP (Transfer Control Protocol/Internet Protocol). Click ADVANCED > NAT > Port Triggering to open the following screen. Use this screen to change your ZyWALL’s trigger port settings. ZyWALL 2 Plus User’s Guide... -
Page 345: Figure 225 Advanced > Nat > Port Triggering
Type a port number or the ending port number in a range of port numbers. Apply Click Apply to save your changes back to the ZyWALL. Reset Click Reset to begin configuring this screen afresh. ZyWALL 2 Plus User’s Guide Chapter 17 Network Address Translation (NAT) - Page 346 Chapter 17 Network Address Translation (NAT) ZyWALL 2 Plus User’s Guide...
-
Page 347: Static Route
(R1). You create one static route to connect to services offered by your ISP behind router R2. You create another static route to communicate with a separate network behind a router (R3) connected to the LAN. Figure 226 Example of Static Routing Topology ZyWALL 2 Plus User’s Guide Static Route... -
Page 348: Ip Static Route
Click the edit icon to go to the screen where you can set up a static route on the ZyWALL. Click the delete icon to remove a static route from the ZyWALL. A window displays asking you to confirm that you want to delete the route. ZyWALL 2 Plus User’s Guide... -
Page 349: Ip Static Route Edit
Clear this check box to propagate this route to other hosts through RIP broadcasts. Apply Click Apply to save your changes back to the ZyWALL. Cancel Click Cancel to exit this screen without saving. ZyWALL 2 Plus User’s Guide Chapter 18 Static Route... - Page 350 Chapter 18 Static Route ZyWALL 2 Plus User’s Guide...
-
Page 351: Bandwidth Management
View your configured bandwidth classes and sub-classes in the Class Setup screen (see Section 19.12 on page 358 The total of the configured bandwidth budgets for sub-classes cannot exceed the configured bandwidth budget speed of the parent class. ZyWALL 2 Plus User’s Guide for details). Section 19.12.1... -
Page 352: Proportional Bandwidth Allocation
The following example table shows bandwidth allocations for application specific traffic from separate LAN subnets. Table 102 Application and Subnet-based Bandwidth Management Example TRAFFIC TYPE VoIP FROM SUBNET A FROM SUBNET B 64 Kbps 64 Kbps 64 Kbps 64 Kbps 64 Kbps 64 Kbps ZyWALL 2 Plus User’s Guide... -
Page 353: Scheduler
Do the following three steps to configure the ZyWALL to allow bandwidth for traffic that is not defined in a bandwidth filter. 1 Leave some of the interface’s bandwidth unbudgeted. ZyWALL 2 Plus User’s Guide Chapter 19 Bandwidth Management FROM SUBNET A... -
Page 354: Maximize Bandwidth Usage Example
355). Administration: 2048 kbps Sales: 2048 kbps Marketing: 2048 kbps Research: 2048 kbps Administration: Priority 4, 1024 kbps Sales: Priority 6, 3584 kbps Marketing: Priority 6, 3584 kbps Research: Priority 5, 2048 kbps ZyWALL 2 Plus User’s Guide... -
Page 355: Bandwidth Borrowing
Here is an example of bandwidth management with classes configured for bandwidth borrowing. The classes are set up based on departments and individuals within certain departments. ZyWALL 2 Plus User’s Guide Chapter 19 Bandwidth Management Administration: 1024 kbps Sales: 3072 kbps... -
Page 356: Maximize Bandwidth Usage With Bandwidth Borrowing
Speed setting) Administration: Borrowing Enabled Sales: Borrowing Disabled Marketing: Borrowing Enabled Research: Borrowing Enabled VoIP traffic (Service = SIP): 500 Kbps NetMeeting traffic (Service = H.323): 500 kbps FTP (Service = FTP): 500 Kbps PRIORITIES ZyWALL 2 Plus User’s Guide... -
Page 357: Configuring Summary
You can also set this number lower than the interface’s actual transmission speed. If you do not enable Maximize Bandwidth Usage, this will cause the ZyWALL to not use some of the interface’s available bandwidth. ZyWALL 2 Plus User’s Guide Chapter 19 Bandwidth Management Section 19.12 on page... -
Page 358: Configuring Class Setup
Setup. The screen is shown here with example classes. Figure 231 ADVANCED > BW MGMT > Class Setup 353. Section 19.7.4 on page to configure the speed of the interface). Configure Section 19.7 on 353) or you want to limit the speed of ZyWALL 2 Plus User’s Guide... -
Page 359: Bandwidth Manager Class Configuration
Summary screen to enable bandwidth management on an interface before you can configure classes for that interface. Click ADVANCED > BW MGMT > Class Setup > Add Sub-Class or Edit to open the following screen. Use this screen to add a child class. ZyWALL 2 Plus User’s Guide Chapter 19 Bandwidth Management... -
Page 360: Figure 232 Advanced > Bw Mgmt > Class Setup > Add Sub-Class
You must enter a value in at least one of the following fields (other than the Subnet Mask fields which are only available when you enter the destination or source IP address). Section 19.7.4 on page Table 108 on page ZyWALL 2 Plus User’s Guide... - Page 361 Source IP Address Source End Address / Subnet Mask Source Port ZyWALL 2 Plus User’s Guide DESCRIPTION This field simplifies bandwidth class configuration by allowing you to select a predefined application. When you select a predefined application, you do not configure the rest of the bandwidth filter fields (other than enabling or disabling the filter).
-
Page 362: Bandwidth Management Statistics
Enter the protocol ID (service type) number, for example: 1 for ICMP, 6 for TCP or 17 for UDP. Click Apply to save your changes back to the ZyWALL. Click Cancel to exit this screen without saving. PORT NUMBER 1723 ZyWALL 2 Plus User’s Guide... -
Page 363: Bandwidth Manager Monitor
Click ADVANCED > BW MGMT > Monitor to open the following screen. Use this screen to view the device’s bandwidth usage and allotments. Figure 234 ADVANCED > BW MGMT > Monitor ZyWALL 2 Plus User’s Guide Chapter 19 Bandwidth Management Monitor... -
Page 364: Table 113 Advanced > Bw Mgmt > Monitor
This field displays the amount of bandwidth allocated to the bandwidth class. This field displays the amount of bandwidth that each bandwidth class is using. Click Refresh to update the page. ZyWALL 2 Plus User’s Guide... -
Page 365: Dns
2 Use the DNS DHCP screen to configure the DNS server information that the ZyWALL sends to the DHCP client devices on the LAN, DMZ or WLAN. 3 Use the REMOTE MGMT DNS screen to configure the ZyWALL (in router mode) to accept or discard DNS queries. ZyWALL 2 Plus User’s Guide Section... -
Page 366: Address Record
A; one to branch office 2, one to branch office 3 and another to headquarters (HQ). In order to access computers that use private domain names on the HQ network, the ZyWALL at branch office 1 uses the Intranet DNS server in headquarters. ZyWALL 2 Plus User’s Guide... -
Page 367: Figure 235 Private Dns Server Example
20.6 System Screen Click ADVANCED > DNS to display the following screen. Use this screen to configure your ZyWALL’s DNS address and name server records. Figure 236 ADVANCED > DNS > System DNS ZyWALL 2 Plus User’s Guide Chapter 20 DNS... -
Page 368: Table 114 Advanced > Dns > System Dns
Enter the rule number where you want to put the record and click Insert to open a screen where you can configure a new name server record. Refer to 116 on page 370 for information on the fields. Table ZyWALL 2 Plus User’s Guide... -
Page 369: Figure 237 Advanced > Dns > Add (Address Record)
A domain zone is a fully qualified domain name without the host. For example, zyxel.com.tw is the domain zone for the www.zyxel.com.tw fully qualified domain name. ZyWALL 2 Plus User’s Guide for more on address records. Chapter 20 DNS... -
Page 370: Figure 238 Advanced > Dns > Insert (Name Server Record)
IP address. Private DNS Server entries with the IP address set to 0.0.0.0 are not allowed. Apply Click Apply to save your changes back to the ZyWALL. Cancel Click Cancel to exit this screen without saving. ZyWALL 2 Plus User’s Guide... -
Page 371: Figure 239 Advanced > Dns > Cache
DNS query failed. 20.8 Configure DNS Cache To configure your ZyWALL’s DNS caching, click ADVANCED > DNS > Cache. The screen appears as shown. Figure 239 ADVANCED > DNS > Cache ZyWALL 2 Plus User’s Guide Chapter 20 DNS... -
Page 372: Table 117 Advanced > Dns > Cache
This is the (resolved) IP address of a host. This field displays 0.0.0.0 for negative DNS resolution entries. This is the number of seconds left before the DNS resolution entry is discarded from the cache. Click the delete icon to remove the DNS resolution entry from the cache. ZyWALL 2 Plus User’s Guide... -
Page 373: Figure 240 Advanced > Dns > Dhcp
IP address of a computer in order to access it. Apply Click Apply to save your changes back to the ZyWALL. Reset Click Reset to begin configuring this screen afresh. ZyWALL 2 Plus User’s Guide Chapter 20 DNS... -
Page 374: Dynamic Dns
If you have a private WAN IP address, then you cannot use Dynamic DNS. 20.11 Configuring Dynamic DNS To change your ZyWALL’s DDNS, click ADVANCED > DNS > DDNS. The screen appears as shown. ZyWALL 2 Plus User’s Guide... -
Page 375: Figure 241 Advanced > Dns > Ddns
Check with your Dynamic DNS service provider to have traffic redirected to a URL (that you can specify) while you are off line. Wildcard Select the check box to enable DYNDNS Wildcard. ZyWALL 2 Plus User’s Guide Chapter 20 DNS... - Page 376 Note: The DDNS server may not be able to detect the proper IP address if there is an HTTP proxy server between the ZyWALL and the DDNS server. Click Apply to save your changes back to the ZyWALL. Click Reset to begin configuring this screen afresh. ZyWALL 2 Plus User’s Guide...
-
Page 377: Remote Management
The priorities for the different types of remote management sessions are as follows. 1 Console port 2 SSH ZyWALL 2 Plus User’s Guide Remote Management for details on configuring firewall rules. -
Page 378: Remote Management Limitations
ZyWALL a certificate. You must apply for a certificate for the browser from a CA that is a trusted CA on the ZyWALL. Please refer to the following figure. Chapter 15 on page 295 for more ZyWALL 2 Plus User’s Guide... -
Page 379: Figure 243 Https Implementation
21.3 WWW Configuration Click ADVANCED > REMOTE MGMT to open the WWW screen. Use this screen to configure the ZyWALL’s HTTP and HTTPS management settings. Figure 244 ADVANCED > REMOTE MGMT > WWW ZyWALL 2 Plus User’s Guide Chapter 21 Remote Management... -
Page 380: Table 120 Advanced > Remote Mgmt > Www
If you haven’t changed the default HTTPS port on the ZyWALL, then in your browser enter “https://ZyWALL IP Address/” as the web site address where “ZyWALL IP Address” is the IP address or domain name of the ZyWALL you wish to access. Appendix E on page 657 on importing ZyWALL 2 Plus User’s Guide... -
Page 381: Figure 245 Security Alert Dialog Box (Internet Explorer)
If Accept this certificate temporarily for this session is selected, then click OK to continue in Netscape. Select Accept this certificate permanently to import the ZyWALL’s certificate into the SSL client. ZyWALL 2 Plus User’s Guide Chapter 21 Remote Management... -
Page 382: Figure 246 Security Certificate 1 (Netscape)
HTTPS server certificate that your browser received. Do the following to check the common name specified in the certificate that your ZyWALL sends to HTTPS clients. • Click REMOTE MGMT. Write down the name of the certificate displayed in the Server Certificate field. for details. ZyWALL 2 Plus User’s Guide... -
Page 383: Figure 248 Example: Lock Denoting A Secure Connection
Figure 248 Example: Lock Denoting a Secure Connection Click Login and you then see the next screen. The factory default certificate is a common default certificate for all ZyWALL models. ZyWALL 2 Plus User’s Guide Chapter 21 Remote Management Figure 250 on page 384... -
Page 384: Figure 249 Replace Certificate
Certificates screen. You will see information similar to that shown in the following figure. Figure 250 Device-specific Certificate Click Ignore in the Replace Certificate screen to use the common ZyWALL certificate. You will then see this information in the My Certificates screen. Figure 251 Common ZyWALL Certificate ZyWALL 2 Plus User’s Guide... -
Page 385: Figure 252 Ssh Communication Over The Wan Example
Figure 252 SSH Communication Over the WAN Example 21.6 How SSH Works The following table summarizes how a secure connection is established between two remote hosts. Figure 253 How SSH Works 1 Host Identification ZyWALL 2 Plus User’s Guide Chapter 21 Remote Management... -
Page 386: Ssh Implementation On The Zywall
ZyWALL over SSH. 21.8 Configuring SSH Click ADVANCED > REMOTE MGMT > SSH to change your ZyWALL’s Secure Shell settings. It is recommended that you disable Telnet and FTP when you configure SSH for secure connections. ZyWALL 2 Plus User’s Guide... -
Page 387: Figure 254 Advanced > Remote Mgmt > Ssh
2 Configure the SSH client to accept connection using SSH version 1. 3 A window displays prompting you to store the host key in you computer. Click Yes to continue. ZyWALL 2 Plus User’s Guide Chapter 21 Remote Management Chapter 15 on page 295... -
Page 388: Figure 255 Ssh Example 1: Store Host Key
ZyWALL using SSH version 1. If this is the first time you are connecting to the ZyWALL using SSH, a message displays prompting you to save the host information of the ZyWALL. Type “yes” and press [ENTER]. Then enter the password to log in to the ZyWALL. ZyWALL 2 Plus User’s Guide... -
Page 389: Figure 257 Ssh Example 2: Log In
Warning: Permanently added '192.168.1.1' (RSA1) to the list of known hosts. Administrator@192.168.1.1's password: sftp> put firmware.bin ras Uploading firmware.bin to /ras Read from remote host 192.168.1.1: Connection reset by peer Connection closed ZyWALL 2 Plus User’s Guide Chapter 21 Remote Management... -
Page 390: Figure 259 Advanced > Remote Mgmt > Telnet
Choose Selected to just allow the computer with the IP address that you specify to access the ZyWALL using this service. Apply Click Apply to save your customized settings and exit this screen. Reset Click Reset to begin configuring this screen afresh. ZyWALL 2 Plus User’s Guide... -
Page 391: Figure 260 Advanced > Remote Mgmt > Ftp
Choose Selected to just allow the computer with the IP address that you specify to access the ZyWALL using this service. Apply Click Apply to save your customized settings. Reset Click Reset to begin configuring this screen afresh. ZyWALL 2 Plus User’s Guide Chapter 21 Remote Management... -
Page 392: Figure 261 Snmp Management Model
Examples of variables include such as number of packets received, node port status etc. A Management Information Base (MIB) is a collection of managed objects. SNMP allows a manager and agents to communicate for the purpose of accessing these objects. ZyWALL 2 Plus User’s Guide... -
Page 393: Supported Mibs
21.14.3 REMOTE MANAGEMENT: SNMP To change your ZyWALL’s SNMP settings, click ADVANCED > REMOTE MGMT > SNMP. The screen appears as shown. ZyWALL 2 Plus User’s Guide Chapter 21 Remote Management DESCRIPTION A trap is sent after booting (power on). -
Page 394: Figure 262 Advanced > Remote Mgmt > Snmp
Choose Selected to just allow the computer with the IP address that you specify to access the ZyWALL using this service. Apply Click Apply to save your customized settings. Reset Click Reset to begin configuring this screen afresh. ZyWALL 2 Plus User’s Guide... -
Page 395: Figure 263 Advanced > Remote Mgmt > Dns
If you allow your ZyWALL to be managed by the Vantage CNM server, then you should not configure the ZyWALL (using either the web configurator, SMT menus or commands) without notifying the Vantage CNM administrator. ZyWALL 2 Plus User’s Guide Chapter 21 Remote Management for more information. -
Page 396: Figure 264 Advanced > Remote Mgmt > Cnm
IP address of the Vantage server. If the Vantage CNM server is on a different subnet to the ZyWALL and is behind a NAT router, enter the WAN IP address of the NAT router here. ZyWALL 2 Plus User’s Guide... -
Page 397: Additional Configuration For Vantage Cnm
TCP ports 8080 (HTTP), 443 (HTTPS) and 20 and 21 (FTP). They must also forward UDP ports 1864 and 1865. ZyWALL 2 Plus User’s Guide DESCRIPTION The Encryption Algorithm field is used to encrypt communications between the ZyWALL and the Vantage CNM server. - Page 398 Chapter 21 Remote Management ZyWALL 2 Plus User’s Guide...
-
Page 399: Universal Plug And Play Overview
The automated nature of NAT traversal applications in establishing their own services and opening firewall ports may present network security issues. Network information and configuration may also be obtained and modified by users in some network environments. ZyWALL 2 Plus User’s Guide for further information about NAT. UPnP... -
Page 400: Figure 265 Advanced > Upnp
UPnP enabled application. Select this check box to allow traffic from UPnP-enabled applications to bypass the firewall. Clear this check box to have the firewall block all UPnP application packets (for example, MSN packets). ZyWALL 2 Plus User’s Guide... -
Page 401: Figure 266 Advanced > Upnp > Ports
Internal Port This field displays the port number on the Internal Client to which the ZyWALL should forward incoming connection requests. ZyWALL 2 Plus User’s Guide DESCRIPTION Click Apply to save your changes back to the ZyWALL. Click Reset to begin configuring this screen afresh. -
Page 402: Installing Upnp In Windows Example
Click Apply to save your changes back to the ZyWALL. Refresh Click Refresh update the screen’s table. 22.4 Installing UPnP in Windows Example This section shows how to install UPnP in Windows Me and Windows XP. ZyWALL 2 Plus User’s Guide... -
Page 403: Installing Upnp In Windows Me
Universal Plug and Play check box in the Components selection box. 4 Click OK to go back to the Add/ Remove Programs Properties window and click Next. 5 Restart the computer when prompted. ZyWALL 2 Plus User’s Guide Chapter 22 UPnP... -
Page 404: Installing Upnp In Windows Xp
This section shows you how to use the UPnP feature in Windows XP. You must already have UPnP installed in Windows XP and UPnP activated on the ZyXEL device. Make sure the computer is connected to a LAN port of the ZyXEL device. Turn on your computer and the ZyXEL device. ZyWALL 2 Plus User’s Guide... -
Page 405: Auto-Discover Your Upnp-Enabled Network Device
3 In the Internet Connection Properties window, click Settings to see the port mappings that were automatically created. ZyWALL 2 Plus User’s Guide Chapter 22 UPnP You may edit or delete the port mappings or click Add to manually add port mappings. -
Page 406: Web Configurator Easy Access
With UPnP, you can access the web-based configurator on the ZyXEL device without finding out the IP address of the ZyXEL device first. This is helpful if you do not know the IP address of the ZyXEL device. ZyWALL 2 Plus User’s Guide... - Page 407 Other Places. 4 An icon with the description for each UPnP-enabled device displays under Local Network. 5 Right-click the icon for your ZyXEL device and select Invoke. The web configurator login screen displays. ZyWALL 2 Plus User’s Guide Chapter 22 UPnP...
- Page 408 Chapter 22 UPnP 6 Right-click the icon for your ZyXEL device and select Properties. A properties window displays with basic information about the ZyXEL device. ZyWALL 2 Plus User’s Guide...
-
Page 409: Custom Application
Click ADVANCED > Custom APP to open the Custom Application screen. This screen only specifies what port numbers the ZyWALL checks for specific protocol traffic. Use other screens to enable or disable the monitoring of the protocol traffic. ZyWALL 2 Plus User’s Guide Custom Application... -
Page 410: Figure 267 Advanced > Custom App
Enter the ending port for the range that the ZyWALL is to monitor for this application. Apply Click Apply to save your changes back to the ZyWALL. Reset Click Reset to begin configuring this screen afresh. ZyWALL 2 Plus User’s Guide... -
Page 411: Alg Screen
ZyWALL determines from its inspection of the data payload of the application’s packets. The firewall rule is automatically deleted after the application’s traffic has gone through. ZyWALL 2 Plus User’s Guide ALG Screen... -
Page 412: Figure 268 H.323 Alg Example
H.323 signaling (1) and audio (2) sessions between H.323 devices A and B. Figure 268 H.323 ALG Example • The H.323 ALG operates on TCP packets with a port 1720 destination. • The ZyWALL allows H.323 audio connections. ZyWALL 2 Plus User’s Guide... -
Page 413: Stun
• The SIP ALG allows UDP packets with a port 5060 destination to pass through. • The ZyWALL allows SIP audio connections. The following example shows SIP signaling (1) and audio (2) sessions between SIP clients A and B and the SIP server (S). ZyWALL 2 Plus User’s Guide Chapter 24 ALG Screen... -
Page 414: Figure 269 Sip Alg Example
Click ADVANCED > ALG to open the ALG screen. Use the ALG screen to turn individual ALGs off or on and set the SIP timeout. If the ZyWALL provides an ALG for a service, you must enable the ALG in order to perform bandwidth management on that service’s traffic. ZyWALL 2 Plus User’s Guide... -
Page 415: Figure 270 Advanced > Alg
Enter the SIP signaling session timeout value. Apply Click Apply to save your changes back to the ZyWALL. Reset Click Reset to begin configuring this screen afresh. ZyWALL 2 Plus User’s Guide Chapter 24 ALG Screen... - Page 416 Chapter 24 ALG Screen ZyWALL 2 Plus User’s Guide...
-
Page 417: Logs And Maintenance
Logs and Maintenance Logs Screens (419) Maintenance (447) -
Page 419: Logs Screens
Click a column heading to sort the entries. A triangle indicates ascending or descending sort order. Figure 271 LOGS > View Log ZyWALL 2 Plus User’s Guide Logs Screens Section 25.5 on page 430 for example log message explanations. -
Page 420: Table 132 Logs > View Log
The NetBIOS packet was sent to the 172.16.255.255 subnet port 137. This was a NetBIOS UDP broadcast packet meant to discover devices on the network. Section 26.4 on page 449 Section 25.3 on page 422). source destination |172.16.255.255:137 ZyWALL 2 Plus User’s Guide Section 25.3 on page... -
Page 421: Figure 272 Myzyxel.com: Download Center
1 Go to http://www.myZyXEL.com and log in with your account. 2 Click Download Center and then Certificate Download. Figure 272 myZyXEL.com: Download Center 3 Click the link in the Certificate Download screen. ZyWALL 2 Plus User’s Guide Chapter 25 Logs Screens... -
Page 422: Figure 273 Myzyxel.com: Certificate Download
Alerts are e-mailed as soon as they happen. Logs may be e-mailed as soon as the log is full (see Log Schedule). Selecting many alert and/or log categories (especially Access Control) may result in many e-mails being sent. ZyWALL 2 Plus User’s Guide... -
Page 423: Figure 274 Logs > Log Settings
Chapter 25 Logs Screens Figure 274 LOGS > Log Settings ZyWALL 2 Plus User’s Guide... -
Page 424: Table 134 Logs > Log Settings
Select a location from the drop down list box. The log facility allows you to log the messages to different files in the syslog server. Refer to the documentation of your syslog program for more details. Select the categories of logs that you want to record. Logs include alerts. ZyWALL 2 Plus User’s Guide... -
Page 425: Configuring Reports
HTTP GET references to other web sites and the ZyWALL may count these as hits, thus the web hit count is not (yet) 100% accurate. Click LOGS > Reports to display the following screen. ZyWALL 2 Plus User’s Guide DESCRIPTION Select the categories of alerts for which you want the ZyWALL to instantly e- mail alerts to the e-mail address specified in the Send Alerts To field. -
Page 426: Figure 275 Logs > Reports
IP addresses. Refresh Click Refresh to update the report display. The report also refreshes automatically when you close and reopen the screen. Flush Click Flush to discard the old report data and update the report display. ZyWALL 2 Plus User’s Guide... -
Page 427: Figure 276 Logs > Reports: Web Site Hits Example
ZyWALL record and display the LAN, DMZ or WLAN IP addresses that the most traffic has been sent to and/or from and how much traffic has been sent to and/or from those IP addresses. ZyWALL 2 Plus User’s Guide Chapter 25 Logs Screens Table 139 on page... -
Page 428: Figure 277 Logs > Reports: Host Ip Address Example
In the Reports screen, select Protocol/Port from the Report Type drop-down list box to have the ZyWALL record and display which protocols or service ports have been used the most and the amount of traffic for the most used protocols or service ports. Table 139 on page 430). ZyWALL 2 Plus User’s Guide... -
Page 429: Figure 278 Logs > Reports: Protocol/Port Example
The count starts over at 0 if a protocol or port passes the bytes count limit (see ZyWALL 2 Plus User’s Guide Chapter 25 Logs Screens Table 139 on page... -
Page 430: Table 139 Report Specifications
The maximum number of NAT session table entries has been exceeded and the table is full. Starting Connectivity Monitor. The router got the time and date from the Daytime server. The router got the time and date from the time server. ZyWALL 2 Plus User’s Guide... - Page 431 Service upgrade successful Service refresh successful. Content Filter trial service activation successfully ZyWALL 2 Plus User’s Guide Chapter 25 Logs Screens DESCRIPTION The router got the time and date from the NTP server. The router was not able to connect to the Daytime server.
-
Page 432: Table 141 System Error Logs
The device blocked a session because the host's connections exceeded the maximum sessions per host. A packet from the WAN (TCP or UDP) matched a cone NAT session and the device forwarded it to the LAN. ZyWALL 2 Plus User’s Guide... -
Page 433: Table 143 Tcp Reset Logs
<Packet Direction>, <rule:%d>, <type:%d>, <code:%d> Triangle route packet forwarded: ICMP ZyWALL 2 Plus User’s Guide DESCRIPTION The router sent a TCP reset packet when a host was under a SYN flood attack (the TCP incomplete count is per destination host.) The router sent a TCP reset packet when the number of TCP incomplete connections exceeded the user configured threshold. -
Page 434: Table 146 Cdr Logs
The PPP connection’s Internet Protocol Control Protocol stage is opening. The PPP connection’s Link Control Protocol stage is closing. The PPP connection’s Internet Protocol Control Protocol stage is closing. DESCRIPTION UPnP packets can pass through the firewall. ZyWALL 2 Plus User’s Guide... -
Page 435: Table 149 Content Filtering Logs
[ TCP | UDP | IGMP | ESP | GRE | OSPF ] land ICMP (type:%d, code:%d) ZyWALL 2 Plus User’s Guide DESCRIPTION The content of a requested web page matched a user defined keyword. The web site is not in a trusted domain, and the router blocks all traffic except trusted domain sites. - Page 436 The firewall detected an ICMP smurf attack. The IP address in an FTP port command is different from the client IP address. It may be a bounce attack. The fragment packet size is smaller than the MTU size of output interface. ZyWALL 2 Plus User’s Guide...
-
Page 437: Table 151 Remote Management Logs
Rule [%s] sends an echo request to peer Rule [%s] receives an echo reply from peer ZyWALL 2 Plus User’s Guide DESCRIPTION Attempted use of FTP service was blocked according to remote management settings. Attempted use of TELNET service was blocked according to remote management settings. -
Page 438: Table 153 Ike Logs
LOG. Refer to RFC2408 – ISAKMP for a list of all ISAKMP payload types. The router received an IKE negotiation request from the peer address specified. The router started negotiation with the peer. The peer’s “Local IP Address” is invalid. ZyWALL 2 Plus User’s Guide... - Page 439 Rule [%d] Phase 2 protocol mismatch Rule [%d] Phase 2 encryption algorithm mismatch ZyWALL 2 Plus User’s Guide Chapter 25 Logs Screens DESCRIPTION The security gateway is set to “0.0.0.0” and the router used the peer’s “Local Address” as the router’s “Remote Address”.
- Page 440 The IP address for the domain name of the ZyWALL in the listed rule changed to the listed IP address. The listed tunnel will be deleted because the remote gateway’s IP address changed. The listed tunnel will be deleted because the ZyWALL’s IP address changed. ZyWALL 2 Plus User’s Guide...
-
Page 441: Table 154 Pki Logs
Cert trusted: <subject name> Due to <reason codes>, cert not trusted: <subject name> ZyWALL 2 Plus User’s Guide DESCRIPTION The SCEP online certificate enrollment was successful. The Destination field records the certification authority server IP address and port. The SCEP online certificate enrollment failed. The Destination field records the certification authority server’s IP address and port. -
Page 442: Table 155 Certificate Path Verification Failure Reason Codes
ACL set for packets traveling from the DMZ to the WAN. WAN to DMZ ACL set for packets traveling from the WAN to the DMZ. LAN to DMZ ACL set for packets traveling from the LAN to the DMZ. ZyWALL 2 Plus User’s Guide... -
Page 443: Table 157 Icmp Notes
Redirect datagrams for the Type of Service and Network Redirect datagrams for the Type of Service and Host Echo Echo message Time Exceeded ZyWALL 2 Plus User’s Guide DIRECTION DESCRIPTION LAN to LAN/ ACL set for packets traveling from the LAN to the LAN or ZyWALL the ZyWALL. - Page 444 Time to live exceeded in transit Fragment reassembly time exceeded Parameter Problem Pointer indicates the error Timestamp Timestamp request message Timestamp Reply Timestamp reply message Information Request Information request message Information Reply Information reply message ZyWALL 2 Plus User’s Guide...
-
Page 445: Table 158 Syslog Logs
Virus" encode="< uu | b64 >" ZyWALL 2 Plus User’s Guide Chapter 25 Logs Screens DESCRIPTION This message is sent by the system ("RAS" displays as the system name if you haven’t configured one) when the router generates a syslog. -
Page 446: Table 159 Rfc-2408 Isakmp Payload Types
The definition of messages and notes are defined in the Anti-Spam log descriptions. PAYLOAD TYPE Security Association Proposal Transform Key Exchange Identification Certificate Certificate Request Hash Signature Nonce Notification Delete Vendor ID ZyWALL 2 Plus User’s Guide... -
Page 447: Maintenance
Computer Name tab. Note the entry in the Full computer name field and enter it as the ZyWALL System Name. 26.2.1 General Setup Click MAINTENANCE to open the General screen. Use this screen to configure administrative and system-related information. ZyWALL 2 Plus User’s Guide Maintenance... -
Page 448: Figure 279 Maintenance > General Setup
Click Apply to save your changes back to the ZyWALL. Reset Click Reset to begin configuring this screen afresh. 26.3 Configuring Password Click MAINTENANCE > Password to open the following screen. Use this screen to change the ZyWALL’s management password. ZyWALL 2 Plus User’s Guide... -
Page 449: Figure 280 Maintenance > Password
To change your ZyWALL’s time and date, click MAINTENANCE > Time and Date. The screen appears as shown. Use this screen to configure the ZyWALL’s time based on your local time zone. ZyWALL 2 Plus User’s Guide Chapter 26 Maintenance... -
Page 450: Figure 281 Maintenance > Time And Date
When you set Time and Date Setup to Manual, enter the new date in this field and then click Apply. Select this radio button to have the ZyWALL get the time and date from the time server you specified below. ZyWALL 2 Plus User’s Guide... - Page 451 Germany's time zone is one hour ahead of GMT or UTC (GMT+1). Apply Click Apply to save your changes back to the ZyWALL. Reset Click Reset to begin configuring this screen afresh. ZyWALL 2 Plus User’s Guide Chapter 26 Maintenance...
-
Page 452: Figure 282 Synchronization In Process
When the System Time and Date Synchronization in Process screen appears, wait up to one minute. Figure 282 Synchronization in Process Click the Return button to go back to the Time and Date screen after the time and date is updated successfully. ZyWALL 2 Plus User’s Guide... -
Page 453: Figure 283 Synchronization Is Successful
The bridge gradually builds a host MAC-address-to-port mapping table such as in the following example, during the learning process. Table 163 MAC-address-to-port Mapping Table HOST MAC ADDRESS 00a0c5123456 00a0c5123478 (host A) 1 00a0c512349a 00a0c51234bc 00a0c51234de ZyWALL 2 Plus User’s Guide PORT Chapter 26 Maintenance... -
Page 454: Transparent Firewalls
DNS in router mode. These features allow you to set up private network. See available in router mode. The following applies when the ZyWALL is in router mode. Table 5 on page 60 in the user’s guide for a detailed list of other features ZyWALL 2 Plus User’s Guide... -
Page 455: Figure 285 Maintenance > Device Mode (Router Mode)
Click Reset to begin configuring this screen afresh. 26.9 Configuring Device Mode (Bridge) Click MAINTENANCE > Device Mode to open the following screen. Use this screen to configure your ZyWALL as a router or a bridge. ZyWALL 2 Plus User’s Guide Chapter 26 Maintenance... -
Page 456: Figure 286 Maintenance > Device Mode (Bridge Mode)
Select this radio button and click Apply to set the ZyWALL to router mode. Enter the IP address of your ZyWALL’ s LAN port in dotted decimal notation. 192.168.1.1 is the factory default. Enter the IP subnet mask of the ZyWALL’s LAN port. ZyWALL 2 Plus User’s Guide... -
Page 457: Figure 287 Maintenance > Firmware Upload
Click MAINTENANCE > F/W UPLOAD. Follow the instructions in this screen to upload firmware to your ZyWALL. Only upload firmware for your specific model! Figure 287 MAINTENANCE > Firmware Upload ZyWALL 2 Plus User’s Guide for upgrading firmware using FTP/TFTP commands. Chapter 26 Maintenance... -
Page 458: Figure 288 Firmware Upload In Process
After two minutes, log in again and check your new firmware version in the HOME screen. If the upload was not successful, the following screen will appear. Click Return to go back to the F/W Upload screen. ZyWALL 2 Plus User’s Guide... -
Page 459: Figure 290 Firmware Upload Error
Click MAINTENANCE > Backup & Restore. Information related to factory defaults, backup configuration, and restoring configuration appears as shown next. Figure 291 MAINTENANCE > Backup and Restore ZyWALL 2 Plus User’s Guide for transferring configuration files using FTP/TFTP commands. Chapter 26 Maintenance... -
Page 460: Figure 292 Configuration Upload Successful
Figure 292 Configuration Upload Successful The ZyWALL automatically restarts in this time causing a temporary network disconnect. In some operating systems, you may see the following icon on your desktop. Figure 293 Network Temporarily Disconnected ZyWALL 2 Plus User’s Guide... -
Page 461: Figure 294 Configuration Upload Error
Click MAINTENANCE > Restart. Click Restart to have the ZyWALL reboot. Restart is different to reset; (see configuration. ZyWALL 2 Plus User’s Guide for more information on the RESET button. Section 26.11.3 on page 461) reset returns the device to its default... -
Page 462: Figure 296 Maintenance > Restart
You may need to generate this file and send it to customer support during troubleshooting. Click MAINTENANCE > Diagnostics to open the following screen. The ZyWALL sends only one diagnosis mail within five minutes (unless you click Perform Diagnostics Now). ZyWALL 2 Plus User’s Guide... -
Page 463: Figure 297 Maintenance > Diagnostics
CPU utilization exceeds Periodic Diagnostics Diagnostics Frequency ZyWALL 2 Plus User’s Guide DESCRIPTION Select this option to turn on the diagnostics feature. Click this button to generate and send a diagnostic file immediately, instead of based on a time period or CPU usage level. - Page 464 Mail Sender field). Enter the password associated with the user name above. Click Apply to save your changes back to the ZyWALL. Click Reset to begin configuring this screen afresh. ZyWALL 2 Plus User’s Guide...
- Page 465 Introducing the SMT (467) SMT Menu 1 - General Setup (475) WAN and Dial Backup Setup (481) LAN Setup (491) Internet Access (497) DMZ Setup (501) Remote Node Setup (509) IP Static Route Setup (519) Network Address Translation (NAT) (521) Introducing the ZyWALL Firewall (539) Filter Configuration (541) SNMP Configuration (557)
-
Page 467: Introducing The Smt
27.2.1 Initial Screen When you turn on your ZyWALL, it performs several internal tests as well as line initialization. After the tests, the ZyWALL asks you to press [ENTER] to continue, as shown next. ZyWALL 2 Plus User’s Guide Introducing the SMT... -
Page 468: Figure 298 Initial Screen
Chapter 27 Introducing the SMT Figure 298 Initial Screen Copyright (c) 1994 - 2007 ZyXEL Communications Corp. initialize ch =0, ethernet address: 00:A0:C5:01:23:45 initialize ch =1, ethernet address: 00:A0:C5:01:23:46 initialize ch =2, ethernet address: 00:A0:C5:01:23:47 initialize ch =3, ethernet address: 00:A0:C5:01:23:48 initialize ch =4, ethernet address: 00:00:00:00:00:00 AUX port init . -
Page 469: Figure 300 Main Menu (Router Mode)
27.3.1 Main Menu After you enter the password, the SMT displays the ZyWALL Main Menu, as shown next. Figure 300 Main Menu (Router Mode) Copyright (c) 1994 - 2007 ZyXEL Communications Corp. Getting Started 1. General Setup 2. WAN Setup 3. -
Page 470: Figure 301 Main Menu (Bridge Mode)
Chapter 27 Introducing the SMT Figure 301 Main Menu (Bridge Mode) Copyright (c) 1994 - 2007 ZyXEL Communications Corp. Getting Started 1. General Setup 7. Wireless Setup The following table describes the fields in this menu. Table 170 Main Menu Summary... -
Page 471: Table 171 Smt Menus Overview
21 Filter and Firewall 21.1 Filter Setup Setup 21.2 Firewall Setup 22 SNMP Configuration 23 System Password ZyWALL 2 Plus User’s Guide Chapter 27 Introducing the SMT 1.1.1 DDNS Host Summary 1.1.1 DDNS Edit Host 3.2.1 IP Alias Setup 5.2.1 IP Alias Setup 7.2.1 IP Alias Setup... -
Page 472: Figure 302 Menu 23: System Password
Firmware 24.7.2 Upload System Configuration File 24.9.1 Budget Management 24.9.2 Call History Menu 23 - System Password Old Password= ? New Password= ? Retype to confirm= ? Enter here to CONFIRM or ESC to CANCEL: ZyWALL 2 Plus User’s Guide... -
Page 473: Resetting The Zywall
Note that as you type a password, the screen displays an “x” for each character you type. 27.5 Resetting the ZyWALL Section 2.3 on page 53 ZyWALL 2 Plus User’s Guide Chapter 27 Introducing the SMT for directions on resetting the ZyWALL. - Page 474 Chapter 27 Introducing the SMT ZyWALL 2 Plus User’s Guide...
-
Page 475: Figure 303 Menu 1: General Setup (Router Mode)
The domain name entered by you is given priority over the ISP assigned domain name. If you want to clear this field just press [SPACE BAR] and then [ENTER]. ZyWALL 2 Plus User’s Guide Menu 1 - General Setup... -
Page 476: Figure 304 Menu 1: General Setup (Bridge Mode)
Menu 1.1 - Configure Dynamic DNS (shown next). Menu 1 - General Setup IP Address= 0.0.0.0 IP Address= 0.0.0.0 IP Address= 0.0.0.0 Press ENTER to Confirm or ESC to Cancel: Table 172 on page 475). ZyWALL 2 Plus User’s Guide... -
Page 477: Figure 305 Menu 1.1: Configure Dynamic Dns
4 Press [SPACE BAR] and then [ENTER] to select Yes in the Edit Host field. Press [ENTER] to display Menu 1.1.1 - DDNS Host Summary. ZyWALL 2 Plus User’s Guide Chapter 28 SMT Menu 1 - General Setup Service Provider= WWW.DynDNS.ORG... -
Page 478: Figure 306 Menu 1.1.1: Ddns Host Summary
Select Next Page or Previous Page to view the next or previous page of DDNS hosts (respectively). Type the DDNS host index number you wish to edit or delete and then press [ENTER]. Select Rule= N/A ZyWALL 2 Plus User’s Guide... -
Page 479: Figure 307 Menu 1.1.1: Ddns Edit Host
IP address specified below. Only select Yes if the ZyWALL uses or is behind a static public IP address. ZyWALL 2 Plus User’s Guide Chapter 28 SMT Menu 1 - General Setup Menu 1.1.1 - DDNS Edit Host... - Page 480 When you have completed this menu, press [ENTER] at the prompt “Press ENTER to Confirm…” to save your configuration, or press [ESC] at any time to cancel. The IP address updates when you reconfigure menu 1 or perform DHCP client renewal. ZyWALL 2 Plus User’s Guide...
-
Page 481: Wan And Dial Backup Setup
Assigned By= Factory default IP Address= N/A Dial-Backup: Active= No Port Speed= 115200 AT Command String: Init= at&fs0=0 Edit Advanced Setup= No Press ENTER to Confirm or ESC to Cancel: ZyWALL 2 Plus User’s Guide Menu 2 - WAN Setup... -
Page 482: Table 177 Mac Address Cloning In Wan Setup
3 Menu 11.2 - Remote Node Profile (Backup ISP) as shown next Refer also to the section about traffic redirect for information on an alternate backup WAN connection. 29.4 Configuring Dial Backup in Menu 2 From the main menu, enter 2 to open menu 2. ZyWALL 2 Plus User’s Guide... -
Page 483: Figure 309 Menu 2: Dial Backup Setup
[ESC] at any time to cancel. 29.5 Advanced WAN Setup Consult the manual of your WAN device connected to your Dial Backup port for specific AT commands. ZyWALL 2 Plus User’s Guide Chapter 29 WAN and Dial Backup Setup Menu 2 - WAN Setup... -
Page 484: Figure 310 Menu 2.1: Advanced Wan Setup
WAN device. CLID is required for CLID authentication. Enter the keyword preceding the dialed number. Enter the keyword preceding the connection speed. Dial Timeout(sec)= 60 Retry Count= 0 Retry Interval(sec)= N/A Drop Timeout(sec)= 20 Call Back Delay(sec)= 15 ZyWALL 2 Plus User’s Guide... -
Page 485: Figure 311 Menu 11.2: Remote Node Profile (Backup Isp)
Authen= CHAP/PAP Pri Phone #= 0 Sec Phone #= Press ENTER to Confirm or ESC to Cancel: ZyWALL 2 Plus User’s Guide Chapter 29 WAN and Dial Backup Setup Menu 11.2 - Remote Node Profile (Backup ISP) Edit IP= No... -
Page 486: Table 181 Menu 11.3: Remote Node Profile (Backup Isp)
Once you have configured this menu, press [ENTER] at the message “Press ENTER to Confirm...” to save your configuration, or press [ESC] at any time to cancel. for more information. for more information. 599. Section 29.8 on Chapter Section 29.9 on page 489 ZyWALL 2 Plus User’s Guide... -
Page 487: Figure 312 Menu 11.2.2: Remote Node Network Layer Options
Enter a number from 1 to 15 to set this route’s priority among the ZyWALL’s routes. The smaller the number, the higher priority the route has. ZyWALL 2 Plus User’s Guide Chapter 29 WAN and Dial Backup Setup for a full discussion on this feature. -
Page 488: Editing Login Script
Second, the last set should match the final message sent by the server. For instance, if the server prints: login successful. Starting PPP... Section 6.5 on page 135 for more information on this ZyWALL 2 Plus User’s Guide... -
Page 489: Figure 313 Menu 11.2.3: Remote Node Script
You can specify up to four filter sets separated by commas, for example, 1, 5, 9, 12, in each filter field. Note that spaces are accepted in this field. Please refer to for more information on defining the filters. ZyWALL 2 Plus User’s Guide Chapter 29 WAN and Dial Backup Setup Menu 11.2.3 - Remote Node Script... -
Page 490: Figure 314 Menu 11.2.4: Remote Node Filter
Menu 11.2.4 - Remote Node Filter Input Filter Sets: Output Filter Sets: Call Filter Sets: protocol filters= device filters= protocol filters= device filters= protocol filters= device filters= Enter here to CONFIRM or ESC to CANCEL: ZyWALL 2 Plus User’s Guide... -
Page 491: Figure 315 Menu 3: Lan Setup
This menu allows you to specify the filter sets that you wish to apply to the LAN traffic. You seldom need to filter the LAN traffic, however, the filter sets may be useful to block certain packets, reduce traffic and prevent security breaches. ZyWALL 2 Plus User’s Guide LAN Setup Menu 3 - LAN Setup... -
Page 492: Figure 316 Menu 3.1: Lan Port Filter Setup
Menu 3.2 - TCP/IP and DHCP Ethernet Setup fields are available on all models. protocol filters= device filters= protocol filters= device filters= Menu 3 - LAN Setup Enter Menu Selection Number: as shown next. Not all ZyWALL 2 Plus User’s Guide... -
Page 493: Figure 318 Menu 3.2: Tcp/Ip And Dhcp Ethernet Setup
This field specifies the first of the contiguous addresses in the IP address pool. Size of Client IP This field specifies the size, or count of the IP address pool. Pool ZyWALL 2 Plus User’s Guide Menu 3.2 - TCP/IP and DHCP Ethernet Setup TCP/IP Setup: IP Address= 192.168.1.1 IP Subnet Mask= 255.255.255.0... -
Page 494: Table 185 Menu 3.2: Lan Tcp/Ip Setup Fields
The ZyWALL supports three logical LAN interfaces via its single physical Ethernet interface with the ZyWALL itself as the gateway for each LAN network. Press [SPACE BAR] to select Yes and then press [ENTER] to display menu 3.2.1 ZyWALL 2 Plus User’s Guide... -
Page 495: Figure 319 Menu 3.2.1: Ip Alias Setup
When you have completed this menu, press [ENTER] at the prompt [Press ENTER to Confirm…] to save your configuration, or press [ESC] at any time to cancel. ZyWALL 2 Plus User’s Guide Menu 3.2.1 - IP Alias Setup Chapter 30 LAN Setup... - Page 496 Chapter 30 LAN Setup ZyWALL 2 Plus User’s Guide...
-
Page 497: Figure 320 Menu 4: Internet Access Setup (Ethernet)
31.2 Ethernet Encapsulation If you choose Ethernet in menu 4 you will see the next menu. Figure 320 Menu 4: Internet Access Setup (Ethernet) ZyWALL 2 Plus User’s Guide Internet Access Menu 4 - Internet Access Setup ISP's Name= WAN_1... -
Page 498: Table 187 Menu 4: Internet Access Setup (Ethernet)
When you have completed this menu, press [ENTER] at the prompt “Press ENTER to Confirm…” to save your configuration, or press [ESC] at any time to cancel. Chapter 17 on page 331 for a more detailed discussion on the Network ZyWALL 2 Plus User’s Guide... -
Page 499: Figure 321 Internet Access Setup (Pptp)
PPTP server. 31.4 Configuring the PPPoE Client If you enable PPPoE in menu 4, you will see the next screen. ZyWALL 2 Plus User’s Guide Menu 4 - Internet Access Setup ISP's Name= ChangeMe Encapsulation= PPTP... -
Page 500: Figure 322 Internet Access Setup (Pppoe)
Retype to Confirm= ******** Idle Timeout= 100 IP Address Assignment= Dynamic IP Address= N/A IP Subnet Mask= N/A Gateway IP Address= N/A Network Address Translation= SUA Only Press ENTER to Confirm or ESC to Cancel: ZyWALL 2 Plus User’s Guide... -
Page 501: Figure 323 Menu 5: Dmz Setup
Figure 324 Menu 5.1: DMZ Port Filter Setup Menu 5.1 - DMZ Port Filter Setup Input Filter Sets: protocol filters= device filters= Output Filter Sets: protocol filters= device filters= Press ENTER to Confirm or ESC to Cancel: ZyWALL 2 Plus User’s Guide DMZ Setup... -
Page 502: Figure 325 Menu 5: Dmz Setup
Menu 5.2 - TCP/IP and DHCP Ethernet Setup TCP/IP Setup: IP Address= 10.2.3.4 IP Subnet Mask= 255.0.0.0 RIP Direction= Both Version= RIP-1 Multicast= None Edit IP Alias= No Press ENTER to Confirm or ESC to Cancel: as shown next. Section ZyWALL 2 Plus User’s Guide... -
Page 503: Figure 327 Menu 5.2.1: Ip Alias Setup
Outgoing protocol filters= N/A Enter here to CONFIRM or ESC to CANCEL: Refer to Table 186 on page 495 ZyWALL 2 Plus User’s Guide Chapter 36 on page for instructions on configuring IP alias parameters. Chapter 32 DMZ Setup 521) in menus... - Page 504 Chapter 32 DMZ Setup ZyWALL 2 Plus User’s Guide...
-
Page 505: Figure 328 Menu 7: Wlan Setup
Enter Menu Selection Number: From menu 7, select the submenu option 2. TCP/IP and DHCP Setup and press [ENTER]. The screen now displays Menu 7.2 - TCP/IP and DHCP Ethernet Setup ZyWALL 2 Plus User’s Guide Wireless Setup as shown next. -
Page 506: Figure 329 Menu 7.2: Tcp/Ip And Dhcp Ethernet Setup
TCP/IP Setup: IP Address= 0.0.0.0 IP Subnet Mask= 0.0.0.0 RIP Direction= Both Version= RIP-1 Multicast= None Edit IP Alias= No Press ENTER to Confirm or ESC to Cancel: Chapter 36 on page Section 521) in menus ZyWALL 2 Plus User’s Guide... -
Page 507: Figure 330 Menu 7.2.1: Ip Alias Setup
Figure 330 Menu 7.2.1: IP Alias Setup Enter here to CONFIRM or ESC to CANCEL: Refer to Table 186 on page 495 ZyWALL 2 Plus User’s Guide Menu 7.2.1 - IP Alias Setup IP Alias 1= No IP Address= N/A... - Page 508 Chapter 33 Wireless Setup ZyWALL 2 Plus User’s Guide...
-
Page 509: Figure 331 Menu 11: Remote Node Setup
2. -Dial (BACKUP_ISP, SUA) Enter Node # to Edit: 34.3 Remote Node Profile Setup The following explains how to configure the remote node profile menu. ZyWALL 2 Plus User’s Guide Remote Node Setup Chapter 29 on page Menu 11 - Remote Node Setup... -
Page 510: Figure 332 Menu 11.1: Remote Node Profile For Ethernet Encapsulation
Type your password again to make sure that you have entered it correctly. Confirm Menu 11.1 - Remote Node Profile Route= IP Bridge= Yes Edit IP= No Session Options: Schedules= Edit Filter Sets= No Edit Traffic Redirect= No Press ENTER to Confirm or ESC to Cancel: ZyWALL 2 Plus User’s Guide... -
Page 511: Pppoe Encapsulation
PPPoE encapsulation when you’re using the ZyWALL with a DSL modem as the WAN device. If you change the Encapsulation to PPPoE, then you will see the next screen. ZyWALL 2 Plus User’s Guide Chapter 34 Remote Node Setup 599. -
Page 512: Figure 333 Menu 11.1: Remote Node Profile For Pppoe Encapsulation
Allocated Budget(min)= 0 Period(hr)= 0 Schedules= Nailed-Up Connection= No Session Options: Edit Filter Sets= No Idle Timeout(sec)= 100 Edit Traffic Redirect= No Press ENTER to Confirm or ESC to Cancel: Table 190 on page 510. ZyWALL 2 Plus User’s Guide... -
Page 513: Table 191 Fields In Menu 11.1 (Pppoe Encapsulation Specific)
PPPoE connection. This option only applies when the ZyWALL initiates the call. 34.3.3 PPTP Encapsulation If you change the Encapsulation to PPTP in menu 11.1, then you will see the next screen. ZyWALL 2 Plus User’s Guide Chapter 34 Remote Node Setup for details on the Metric field. -
Page 514: Figure 334 Menu 11.1: Remote Node Profile For Pptp Encapsulation
Telco Option: Allocated Budget(min)= 0 Period(hr)= 0 Schedules= Nailed-Up Connection= No Session Options: Edit Filter Sets= No Idle Timeout(sec)= 100 Edit Traffic Redirect= No Press ENTER to Confirm or ESC to Cancel: 599. Chapter 44 ZyWALL 2 Plus User’s Guide... -
Page 515: Figure 335 Menu 11.1.2: Remote Node Network Layer Options For Ethernet Encapsulation
Many- One-to-One and Server. When you select Full Feature you must configure at least one address mapping set. Chapter 17 on page 331 ZyWALL 2 Plus User’s Guide Version= N/A for a full discussion on this feature. Chapter 34 Remote Node Setup... -
Page 516: Figure 336 Menu 11.1.4: Remote Node Filter (Ethernet Encapsulation)
Chapter 6 on page 133 541. For PPPoE or PPTP encapsulation, you have the protocol filters= device filters= protocol filters= device filters= for more information on RIP. The default for more information on this feature. ZyWALL 2 Plus User’s Guide... -
Page 517: Figure 337 Menu 11.1.4: Remote Node Filter (Pppoe Or Pptp Encapsulation)
Configuration Backup Gateway IP Address Metric ZyWALL 2 Plus User’s Guide DESCRIPTION Press [SPACE BAR] and select Yes (to enable) or No (to disable) traffic redirect setup. The default is No. Enter the IP address of your backup gateway in dotted decimal notation. - Page 518 Period field. Three to 50 is usually a good number. The WAN connection is considered "down" after the ZyWALL times out the number of times specified in the Fail Tolerance field. ZyWALL 2 Plus User’s Guide...
-
Page 519: Figure 339 Menu 12: Ip Static Route Setup
9. ________ 10. ________ 11. ________ 12. ________ Enter selection number: Now, enter the index number of the static route that you want to configure. ZyWALL 2 Plus User’s Guide IP Static Route Setup Menu 12 - IP Static Route Setup... -
Page 520: Figure 340 Menu 12. 1: Edit Ip Static Route
Once you have completed filling in this menu, press [ENTER] at the message “Press ENTER to Confirm…” to save your configuration, or press [ESC] to cancel. Section 8.2 on page 151). The smaller the number, the higher priority the route ZyWALL 2 Plus User’s Guide... -
Page 521: Sua (Single User Account) Versus Nat
You apply NAT via menus 4 or 11.1.2 as displayed next. The next figure shows you how to apply NAT for Internet access in menu 4. Enter 4 from the main menu to go to Menu 4 - Internet Access Setup. ZyWALL 2 Plus User’s Guide (NAT) Section 36.2.1 on page 523... -
Page 522: Figure 341 Menu 4: Applying Nat For Internet Access
Enter here to CONFIRM or ESC to CANCEL: Service Type= Standard My Login= N/A My Password= N/A Retype to Confirm= N/A Login Server= N/A Relogin Every (min)= IP Address= N/A IP Subnet Mask= N/A Gateway IP Address= N/A Version= N/A ZyWALL 2 Plus User’s Guide... -
Page 523: Figure 343 Menu 15: Nat Setup
DMZ, WLAN and LAN IP addresses must be on separate subnets. 36.2.1 Address Mapping Sets Enter 1 to bring up Menu 15.1 - Address Mapping Sets. ZyWALL 2 Plus User’s Guide Chapter 36 Network Address Translation (NAT) Section 36.2.1 on page 523 for further discussion). -
Page 524: Figure 344 Menu 15.1: Address Mapping Sets
Menu 15.1.255 is read-only. 1. NAT_SET 255. SUA (read only) Section 36.1.1 on page Local End IP Global Start IP --------------- --------------- 255.255.255.255 0.0.0.0 0.0.0.0 521). The fields in this Global End IP Type --------------- Server ZyWALL 2 Plus User’s Guide... -
Page 525: Table 197 Sua Address Mapping Rules
The entire set will be deleted if you leave the Set Name field blank and press [ENTER] at the bottom of the screen. ZyWALL 2 Plus User’s Guide Chapter 36 Network Address Translation (NAT) -
Page 526: Figure 346 Menu 15.1.1: First Set
Menu 15.1.1 - Address Mapping Rules Local End IP Global Start IP --------------- --------------- 255.255.255.255 0.0.0.0 0.0.0.0 Action= None Select Rule= N/A Press ENTER to Confirm or ESC to Cancel: Global End IP Type --------------- Server ZyWALL 2 Plus User’s Guide... -
Page 527: Figure 347 Menu 15.1.1.1: Editing/Configuring An Individual Rule In A Set
0.0.0.0 and the End IP as 255.255.255.255. This field is N/A for One-to-One and Server types. Global IP ZyWALL 2 Plus User’s Guide Chapter 36 Network Address Translation (NAT) Chapter 17 on page 331. Server allows you to specify multiple... -
Page 528: Figure 348 Menu 15.2: Nat Server Sets
Menu 15.2 - NAT Server Setup Default Server: 0.0.0.0 Act. Start Port End Port Select Rule= N/A Press ENTER to Confirm or ESC to Cancel: IP Address 0.0.0.0 0.0.0.0 0.0.0.0 0.0.0.0 0.0.0.0 0.0.0.0 0.0.0.0 0.0.0.0 0.0.0.0 0.0.0.0 ZyWALL 2 Plus User’s Guide... -
Page 529: Table 200 15.2.1: Nat Server Configuration
6 Press [ENTER] at the “Press ENTER to confirm …” prompt to save your configuration after you define all the servers or press [ESC] at any time to cancel. ZyWALL 2 Plus User’s Guide Chapter 36 Network Address Translation (NAT) 15.2.1 - NAT Server Configuration... -
Page 530: Figure 350 Menu 15.2: Nat Server Setup
Menu 15.2 - NAT Server Setup Default Server: 0.0.0.0 Act. Start Port End Port Select Rule= N/A Press ENTER to Confirm or ESC to Cancel: IP Address 192.168.1.33 0.0.0.0 0.0.0.0 0.0.0.0 0.0.0.0 0.0.0.0 0.0.0.0 0.0.0.0 0.0.0.0 0.0.0.0 ZyWALL 2 Plus User’s Guide... -
Page 531: Figure 352 Nat Example 1
Translation field. This is the Many-to-One mapping discussed in The SUA Only read-only option from the Network Address Translation field in menus 4 and 11.1.2 is specifically pre-configured to handle this case. ZyWALL 2 Plus User’s Guide Chapter 36 Network Address Translation (NAT) Section 36.4 on page... -
Page 532: Figure 354 Nat Example 2
Menu 15.2 - NAT Server Setup Default Server: 192.168.1.10 Rule Act. Start Port End Port Press ENTER to Confirm or ESC to Cancel: IP Address 0.0.0.0 192.168.1.33 0.0.0.0 0.0.0.0 0.0.0.0 0.0.0.0 0.0.0.0 0.0.0.0 0.0.0.0 0.0.0.0 Select Rule= N/A ZyWALL 2 Plus User’s Guide... -
Page 533: Figure 356 Nat Example 3
10.132.50.1 (our first IGA). (See 6 Repeat the previous step for rules 2 to 4 as outlined above. 7 When finished, menu 15.1.1 should look like as shown in ZyWALL 2 Plus User’s Guide Chapter 36 Network Address Translation (NAT) Figure 357 on page Figure 358 on page 534). -
Page 534: Figure 357 Example 3: Menu 11.1.2
IP Subnet Mask= N/A Gateway IP Addr= N/A Network Address Translation= SUA Only Metric= 2 Private= RIP Direction= None Version= N/A Multicast= None Type= One-to-One Local IP: Start= 192.168.1.10 = N/A Global IP: Start= 10.132.50.1 = N/A ZyWALL 2 Plus User’s Guide... -
Page 535: Figure 359 Example 3: Final Menu 15.1.1
Default Server: 0.0.0.0 Rule Act. ------------------------------------------------------ Select Command= None Press ENTER to Confirm or ESC to Cancel: ZyWALL 2 Plus User’s Guide Chapter 36 Network Address Translation (NAT) Menu 15.1.1 - Address Mapping Rules Local End IP Global Start IP --------------- --------------- 10.132.50.1... -
Page 536: Figure 361 Nat Example 4
After you’ve configured your rule, you should be able to check the settings in menu 15.1.1 as shown next. Menu 15.1.1.1 Address Mapping Rule Type= Many-One-to-One Local IP: Start= 192.168.1.10 = 192.168.1.12 Global IP: Start= 10.132.50.1 = 10.132.50.3 ZyWALL 2 Plus User’s Guide... -
Page 537: Figure 363 Example 4: Menu 15.1.1: Address Mapping Rules
2 If an application needs a continuous data stream, that port (range) will be tied up so that another computer on the LAN can’t trigger it. ZyWALL 2 Plus User’s Guide Chapter 36 Network Address Translation (NAT) Local End IP... -
Page 538: Figure 364 Menu 15.3.1: Trigger Port Setup
Menu 15.3 - Trigger Port Setup Incoming Name Start Port End Port 6970 7170 Press ENTER to Confirm or ESC to Cancel: FTP:21 Telnet:23 SMTP:25 POP3:110 Trigger Start Port End Port 7070 7070 PPTP:1723 ZyWALL 2 Plus User’s Guide... -
Page 539: Figure 365 Menu 21: Filter And Firewall Setup
[ENTER] to select Yes in the Active field to activate the firewall. The firewall must be active to protect against Denial of Service (DoS) attacks. Use the web configurator to configure firewall rules. ZyWALL 2 Plus User’s Guide 1. Filter Setup 2. Firewall Setup... -
Page 540: Figure 366 Menu 21.2: Firewall Setup
Active: Yes You can use the Web Configurator to configure the firewall. Press ENTER to Confirm or ESC to Cancel: Configure the firewall rules using the web configurator or CLI commands. Menu 21.2 - Firewall Setup ZyWALL 2 Plus User’s Guide... -
Page 541: Figure 367 Outgoing Packet Filtering Process
Figure 367 Outgoing Packet Filtering Process For incoming packets, your ZyWALL applies data filters only. Packets are processed depending upon whether a match is found. The following sections describe how to configure filter sets. ZyWALL 2 Plus User’s Guide Filter Configuration... -
Page 542: The Filter Structure Of The Zywall
The following figure illustrates the logic flow when executing a filter rule. See also on page 548 for the logic flow when executing an IP filter. Figure 373 ZyWALL 2 Plus User’s Guide... -
Page 543: Figure 368 Filter Rule Process
You can apply up to four filter sets to a particular port to block multiple types of packets. With each filter set having up to six rules, you can have a maximum of 24 rules active for a single port. ZyWALL 2 Plus User’s Guide... -
Page 544: Figure 369 Menu 21: Filter And Firewall Setup
5 Press [ENTER] at the message [Press ENTER to confirm] to open Menu 21.1.1 - Filter Rules Summary. 1. Filter Setup 2. Firewall Setup Menu 21.1 - Filter Set Configuration Filter Comments Set # ------ Comments ----------------- _______________ _______________ _______________ _______________ _______________ _______________ ZyWALL 2 Plus User’s Guide... -
Page 545: Figure 371 Menu 21.1.1: Filter Rules Summary
“N” means to check the next rule. The protocol dependent filter rules abbreviation are listed as follows: Table 203 Rule Abbreviations Used ABBREVIATION ZyWALL 2 Plus User’s Guide Menu 21.1.1 - Filter Rules Summary Filter Rules Enter Filter Rule Number (1-6) to Configure:... -
Page 546: Configuring A Filter Rule
Source: IP Addr= IP Mask= Port #= Port # Comp= None TCP Estab= N/A More= No Log= None Action Matched= Check Next Rule Action Not Matched= Check Next Rule Press ENTER to Confirm or ESC to Cancel: ZyWALL 2 Plus User’s Guide... -
Page 547: Table 204 Menu 21.1.1.1: Tcp/Ip Filter Rule
When you have Menu 21.1.1.1 - TCP/IP Filter Rule configured, press [ENTER] at the message “Press ENTER to Confirm” to save your configuration, or press [ESC] to cancel. This data will now be displayed on Menu 21.1.1 - Filter Rules Summary. ZyWALL 2 Plus User’s Guide Chapter 38 Filter Configuration... -
Page 548: Figure 373 Executing An Ip Filter
Chapter 38 Filter Configuration The following figure illustrates the logic flow of an IP filter. Figure 373 Executing an IP Filter ZyWALL 2 Plus User’s Guide... -
Page 549: Figure 374 Menu 21.1.1.1: Generic Filter Rule
0 to 8. Mask Enter the mask (in Hexadecimal notation) to apply to the data portion before comparison. Value Enter the value (in Hexadecimal notation) to compare with the data portion. ZyWALL 2 Plus User’s Guide Chapter 38 Filter Configuration Log= None... -
Page 550: Figure 375 Telnet Filter Example
5 Press [ENTER] at the message [Press ENTER to confirm] to open Menu 21.1.3 - Filter Rules Summary. 6 Enter 1 to configure the first filter rule (the only filter rule of this set). Make the entries in this menu as shown in the following figure. ZyWALL 2 Plus User’s Guide... -
Page 551: Figure 376 Example Filter: Menu 21.1.3.1
(n = F) if the action is not matched no matter whether there are more rules to be checked (there aren’t in this example). ZyWALL 2 Plus User’s Guide Menu 21.1.3.1 - TCP/IP Filter Rule IP Source Route= No IP Mask= 0.0.0.0... -
Page 552: Figure 378 Protocol And Device Filter Sets
• Packet filtering is a powerful tool, yet can be complex to configure and maintain, especially if you need a chain of rules to filter a service. • Packet filtering only checks the header portion of an IP packet. 555. ZyWALL 2 Plus User’s Guide... -
Page 553: Applying A Filter
This section shows you where to apply the filter(s) after you design it (them). The ZyWALL already has filters to prevent NetBIOS traffic from triggering calls, and block incoming Telnet, FTP and HTTP connections. ZyWALL 2 Plus User’s Guide Chapter 38 Filter Configuration... -
Page 554: Figure 379 Filtering Lan Traffic
Press ENTER to Confirm or ESC to Cancel: Menu 3.1 - LAN Port Filter Setup protocol filters= device filters= protocol filters= device filters= Menu 5.1 - DMZ Port Filter Setup protocol filters= device filters= protocol filters= device filters= ZyWALL 2 Plus User’s Guide... -
Page 555: Figure 381 Filtering Remote Node Traffic
Figure 381 Filtering Remote Node Traffic Menu 11.1.4 - Remote Node Filter Setup Input Filter Sets: protocol filters= device filters= Output Filter Sets: protocol filters= device filters= Press ENTER to Confirm or ESC to Cancel: ZyWALL 2 Plus User’s Guide Chapter 38 Filter Configuration... - Page 556 Chapter 38 Filter Configuration ZyWALL 2 Plus User’s Guide...
-
Page 557: Figure 382 Menu 22: Snmp Configuration
Trap Community Type the Trap community, which is the password sent with each trap to the SNMP manager. ZyWALL 2 Plus User’s Guide SNMP Configuration SNMP: Get Community= public Set Community= public Trusted Host= 0.0.0.0... -
Page 558: Table 207 Snmp Traps
(for example, download new files, CI command "sys reboot", etc.). A trap is sent with the message of the fatal code if the system reboots because of fatal errors. ZyWALL 2 Plus User’s Guide... -
Page 559: Figure 383 Menu 24: System Maintenance
To get to the System Status: 1 Enter number 24 to go to Menu 24 - System Maintenance. 2 In this menu, enter 1 to open System Maintenance - Status. ZyWALL 2 Plus User’s Guide System Status System Information and Console Port Speed... -
Page 560: Figure 384 Menu 24.1: System Maintenance: Status
This is the DHCP setting of the port listed on the left. 07:34:20 Mon. Sep. 17, 2007 Tx B/s Rx B/s Up Time 1:47:08 1:50:12 1:50:12 1:50:12 IP Mask DHCP 255.255.255.0 Client 255.255.255.0 Server 0.0.0.0 None 255.0.0.0 None ESC-Exit ZyWALL 2 Plus User’s Guide... -
Page 561: Figure 385 Menu 24.2: System Information And Console Port Speed
Menu 24.2.1 - System Maintenance - Information Name: zy2.zyxel.com Routing: IP ZyNOS F/W Version: V4.03(XU.0)b3 | 09/13/2007 Country Code: 255 ZyWALL 2 Plus User’s Guide Chapter 40 System Information & Diagnosis 1. System Information 2. Console Port Speed Ethernet Address: 00:13:49:00:00:01 IP Address: 192.168.1.1... -
Page 562: Figure 387 Menu 24.2.2: System Maintenance: Change Console Port Speed
This is the IP address of the ZyWALL in dotted decimal notation. This shows the IP mask of the ZyWALL. This field shows the DHCP setting of the ZyWALL. Console Port Speed: 9600 Press ENTER to Confirm or ESC to Cancel:Press ZyWALL 2 Plus User’s Guide... -
Page 563: Figure 388 Menu 24.3: System Maintenance: Log And Trace
Figure 390 Menu 24.3.2: System Maintenance: Syslog Logging Menu 24.3.2 - System Maintenance - Syslog Logging Press ENTER to Confirm or ESC to Cancel: ZyWALL 2 Plus User’s Guide Chapter 40 System Information & Diagnosis Please enter selection ERROR Wireless LAN init fail, code=15... -
Page 564: Table 210 System Maintenance Menu Syslog Parameters
Press [SPACE BAR] and then [ENTER] to select a location. The log facility allows you to log the messages to different files in the syslog server. Refer to the documentation of your syslog program for more details. ZyWALL 2 Plus User’s Guide... - Page 565 Mar 03 11:59:20 202.132.155.97 ZyXEL: GEN[00a0c5f502fnord010080] }S05>R01mF Mar 03 12:00:52 202.132.155.97 ZyXEL: GEN[ffffffffffff0080] }S05>R01mF Mar 03 12:00:57 202.132.155.97 ZyXEL: GEN[00a0c5f502010080] }S05>R01mF Mar 03 12:01:06 202.132.155.97 ZyXEL: IP[Src=192.168.2.33 Dst=202.132.155.93 TCP spo=01170 dpo=00021]}S04>R01mF ZyWALL 2 Plus User’s Guide Chapter 40 System Information & Diagnosis...
-
Page 566: Call-Triggering Packet
Call-Triggering Packet displays information about the packet that triggered a dial-out call in an easy readable format. Equivalent information is available in menu 24.1 in hex format. An example is shown next. :137 ->172.16.1.80 ->172.16.1.50 ->172.16.1.25 ZyWALL 2 Plus User’s Guide... -
Page 567: Figure 391 Call-Triggering Packet Example
1 From the main menu, select option 24 to open Menu 24 - System Maintenance. 2 From this menu, select option 4. Diagnostic. This will open Menu 24.4 - System Maintenance - Diagnostic. ZyWALL 2 Plus User’s Guide Chapter 40 System Information & Diagnosis Time: 17:02:44.262... -
Page 568: Figure 392 Menu 24.4: System Maintenance: Diagnostic
Enter 1 to ping any machine (with an IP address) on your LAN, DMZ, WLAN or WAN. Enter its IP address in the Host IP Address field below. Enter 2 to release your WAN DHCP settings. Figure ZyWALL 2 Plus User’s Guide... - Page 569 Reboot System Host IP Address Enter the number of the selection you would like to perform or press [ESC] to cancel. ZyWALL 2 Plus User’s Guide Chapter 40 System Information & Diagnosis DESCRIPTION Enter 3 to renew your WAN DHCP settings.
- Page 570 Chapter 40 System Information & Diagnosis ZyWALL 2 Plus User’s Guide...
-
Page 571: Introduction
If your (T)FTP client does not allow you to have a destination filename different than the source, you will need to rename them as the ZyWALL only recognizes “rom-0” and “ras”. Be sure you keep unaltered copies of both files for later use. ZyWALL 2 Plus User’s Guide Maintenance... -
Page 572: Table 212 Filename Conventions
Uploading the rom-0 file replaces the entire ROM file system, including your ZyWALL configurations, system-related data (including the default password), the error log and the trace log. This is the generic name for the ZyNOS firmware on the ZyWALL. DESCRIPTION *.rom *.bin ZyWALL 2 Plus User’s Guide... -
Page 573: Figure 394 Telnet Into Menu 24.5
“config.rom”. See earlier in this chapter for more information on filename conventions. 7 Enter “quit” to exit the ftp prompt. ZyWALL 2 Plus User’s Guide Chapter 41 Firmware and Configuration File Maintenance Menu 24.5 - Backup Configuration For details on backup using TFTP (note that you... -
Page 574: Figure 395 Ftp Session Example
The server requires a unique User ID and Password to login. Transfer files in either ASCII (plain text format) or in binary mode. Configuration and firmware files should be transferred in binary mode Specify the default remote directory (path). Specify the default local directory (path). ZyWALL 2 Plus User’s Guide... -
Page 575: Backup Configuration Using Tftp
Use “Send” to upload the file to the ZyWALL and “Fetch” to back up the file on your computer. Local File Enter the path and name of the firmware file (*.bin extension) or configuration file (*.rom extension) on your computer. ZyWALL 2 Plus User’s Guide Chapter 41 Firmware and Configuration File Maintenance... -
Page 576: Figure 396 System Maintenance: Backup Configuration
Figure 398 Backup Configuration Example Type a location for storing the configuration file or click Browse to look for one. Choose the Xmodem protocol. Then click Receive. to read about configurations that disallow TFTP and FTP ZyWALL 2 Plus User’s Guide... -
Page 577: Figure 399 Successful Backup Confirmation Screen
ZyWALL will automatically restart. 41.4.1 Restore Using FTP For details about backup using (T)FTP please refer to earlier sections on FTP and TFTP file upload in this chapter. ZyWALL 2 Plus User’s Guide Chapter 41 Firmware and Configuration File Maintenance... -
Page 578: Figure 400 Telnet Into Menu 24.6
16384 bytes sent in 0.06Seconds 273.07Kbytes/sec. ftp>quit Refer to Section 41.3.5 on page 574 over WAN. Menu 24.6 - Restore Configuration to read about configurations that disallow TFTP and FTP Then type "root" and ZyWALL 2 Plus User’s Guide... -
Page 579: Figure 402 System Maintenance: Restore Configuration
Menu 24.7.2 - System Maintenance - Upload System Configuration File (for console port). ZyWALL 2 Plus User’s Guide Chapter 41 Firmware and Configuration File Maintenance Type the configuration file’s location, or click Browse to search for it. -
Page 580: Figure 406 Telnet Into Menu 24.7.1: Upload System Firmware
(note that you must remain on this menu to upload system firmware using TFTP), please see your manual. Press ENTER to Exit: 41.5.2 Configuration File Upload You see the following screen when you Telnet into menu 24.7.2. ZyWALL 2 Plus User’s Guide... -
Page 581: Figure 407 Telnet Into Menu 24.7.2: System Maintenance
0”. Likewise “get rom-0 config.rom” transfers the configuration file on the ZyWALL to your computer and renames it “config.rom.” See earlier in this chapter for more information on filename conventions. 7 Enter “quit” to exit the ftp prompt. ZyWALL 2 Plus User’s Guide Chapter 41 Firmware and Configuration File Maintenance... -
Page 582: Figure 408 Ftp Session Example Of Firmware File Upload
TFTP client program. For UNIX, use “get” to transfer from the ZyWALL to the computer, “put” the other way around, and “binary” to set binary transfer mode. to read about configurations that disallow TFTP and FTP ZyWALL 2 Plus User’s Guide... -
Page 583: Figure 409 Menu 24.7.1 As Seen Using The Console Port
The procedure for other serial communications programs should be similar. 41.5.9 Example Xmodem Firmware Upload Using HyperTerminal Click Transfer, then Send File to display the following screen. ZyWALL 2 Plus User’s Guide Chapter 41 Firmware and Configuration File Maintenance... -
Page 584: Figure 410 Example Xmodem Upload
2 After the "Starting Xmodem upload" message appears, activate the Xmodem protocol on your computer. Follow the procedure as shown previously for the HyperTerminal program. The procedure for other serial communications programs should be similar. 3 Enter “atgo” to restart the ZyWALL. ZyWALL 2 Plus User’s Guide... -
Page 585: Figure 412 Example Xmodem Upload
Click Transfer, then Send File to display the following screen. Figure 412 Example Xmodem Upload After the configuration upload process has completed, restart the ZyWALL by entering “atgo”. ZyWALL 2 Plus User’s Guide Chapter 41 Firmware and Configuration File Maintenance... - Page 586 Chapter 41 Firmware and Configuration File Maintenance ZyWALL 2 Plus User’s Guide...
-
Page 587: Figure 413 Command Mode In Menu 24
Figure 413 Command Mode in Menu 24 Menu 24 - System Maintenance 10. Time and Date Setting 11. Remote Management Setup Enter Menu Selection Number: ZyWALL 2 Plus User’s Guide System Status System Information and Console Port Speed Log and Trace Diagnostic... -
Page 588: Figure 414 Valid Commands
A list of commands can be found by typing help or ? at the command prompt. Always type the full command. Type exit to return to the SMT main menu when finished. Figure 414 Valid Commands Copyright (c) 1994 - 2007 ZyXEL Communications Corp. ras> ? Valid commands are:... -
Page 589: Figure 415 Call Control
Figure 416 Budget Management Menu 24.9.1 - Budget Management Remote Node 1.ChangeMe 2.Dial Reset Node (0 to update screen): ZyWALL 2 Plus User’s Guide Chapter 42 System Maintenance Menus 8 to 10 Connection Time/Total Budget No Budget No Budget Elapsed Time/Total Period... -
Page 590: Figure 417 Call History
Menu 24.9.2 - Call History Rate #call EXAMPLE 5/10 means that 5 minutes out of a total allocation of 10 minutes have lapsed. 0.5/1 means that 30 minutes out of the 1-hour time period has lapsed. Total ZyWALL 2 Plus User’s Guide... -
Page 591: Figure 418 Menu 24: System Maintenance
Enter 10 to go to Menu 24.10 - System Maintenance - Time and Date Setting to update the time and date settings of your ZyWALL as shown in the following screen. ZyWALL 2 Plus User’s Guide Chapter 42 System Maintenance Menus 8 to 10... -
Page 592: Figure 419 Menu 24.10 System Maintenance: Time And Date Setting
If you use daylight savings time, then choose Yes. 09 : 24 : 26 2007 - 03 - 07 Jan. - 1st - Sun. - Jan. - 1st - Sun. - ZyWALL 2 Plus User’s Guide... - Page 593 Once you have filled in this menu, press [ENTER] at the message “Press ENTER to Confirm or ESC to Cancel“ to save your configuration, or press [ESC] to cancel. ZyWALL 2 Plus User’s Guide Chapter 42 System Maintenance Menus 8 to 10...
- Page 594 Chapter 42 System Maintenance Menus 8 to 10 ZyWALL 2 Plus User’s Guide...
-
Page 595: Chapter 43 Remote Management
To disable remote management of a service, select Disable in the corresponding Access field. Enter 11 from menu 24 to bring up Menu 24.11 - Remote Management Control. ZyWALL 2 Plus User’s Guide Remote Management for details on configuring firewall rules. -
Page 596: Figure 420 Menu 24.11 - Remote Management Control
Secure Client IP = 0.0.0.0 Port = 80 Access = LAN+WAN+DMZ+WLAN Secure Client IP = 0.0.0.0 Port = 161 Access = LAN+WAN+DMZ+WLAN Secure Client IP = 0.0.0.0 Port = 53 Access = LAN+WAN+DMZ+WLAN Secure Client IP = 0.0.0.0 ZyWALL 2 Plus User’s Guide... -
Page 597: Remote Management Limitations
5 There is already another remote management session with an equal or higher priority running. You may only have one remote management session running at one time. 6 There is a firewall rule that blocks it. ZyWALL 2 Plus User’s Guide Chapter 43 Remote Management Appendix E on page 657... - Page 598 Chapter 43 Remote Management ZyWALL 2 Plus User’s Guide...
-
Page 599: Figure 421 Schedule Setup
Set 2 will take precedence over set 3 and 4, and so on. You can design up to 12 schedule sets but you can only apply up to four schedule sets for a remote node. ZyWALL 2 Plus User’s Guide Call Scheduling Schedule... -
Page 600: Figure 422 Schedule Set Setup
If you selected Once in the How Often field above, then enter the date the set should activate here in year-month-date format. Weekdays: Date(yyyy-mm-dd)= 2000 - 01 - 01 Sunday= N/A Monday= N/A Tuesday= N/A Wednesday= N/A Thursday= N/A Friday= N/A Saturday= N/A ZyWALL 2 Plus User’s Guide... -
Page 601: Figure 423 Applying Schedule Set(S) To A Remote Node (Pppoe)
Authen= CHAP/PAP You can apply up to four schedule sets, separated by commas, for one remote node. Change the schedule set numbers to your preference(s). ZyWALL 2 Plus User’s Guide Menu 11.1 - Remote Node Profile Route= IP Edit IP= No... -
Page 602: Figure 424 Applying Schedule Set(S) To A Remote Node (Pptp)
Server IP Addr= Connection ID/Name= Route= IP Edit IP= No Telco Option: Allocated Budget(min)= 0 Period(hr)= 0 Schedules= 1,2,3,4 Nailed-up Connections= No Session Options: Edit Filter Sets= No Idle Timeout(sec)= 100 Edit Traffic Redirect= No ZyWALL 2 Plus User’s Guide... -
Page 603: Troubleshooting And Specifications
Troubleshooting and Specifications Troubleshooting (605) Product Specifications (613) -
Page 605: Troubleshooting
3 Inspect your cables for damage. Contact the vendor to replace any damaged cables. 4 Disconnect and re-connect the power adaptor to the ZyWALL. 5 If the problem continues, contact the vendor. ZyWALL 2 Plus User’s Guide Troubleshooting Section 1.5 on page... -
Page 606: Zywall Access And Login
136), enter the new one as the URL. I forgot the IP address for the ZyWALL. Appendix B on page 637. Appendix A on page 621. Your ZyWALL is a DHCP server Section 2.3 on page Section 2.3 Section 2.3 ZyWALL 2 Plus User’s Guide... - Page 607 Ignore the suggestions about your browser. I cannot use FTP to upload / download the configuration file. / I cannot use FTP to upload new firmware. ZyWALL 2 Plus User’s Guide Chapter 45 Troubleshooting I cannot see or access the Login screen in the web...
- Page 608 1 The ISP provides the WAN IP address after authenticating you. Authentication may be through the user name and password, the MAC address or the host name. I cannot see or access the Login screen in the web ZyWALL 2 Plus User’s Guide...
- Page 609 2 Check the signal strength. If the signal strength is low, try moving the ZyWALL closer to the AP if possible, and look around to see if there are any devices that might be ZyWALL 2 Plus User’s Guide Section 1.5 on page Section 1.5 on page...
-
Page 610: Wireless Router/Ap Troubleshooting
UPnP and refresh My Network Places > Local Network. 1 Disconnect the Ethernet cable from the ZyWALL’s LAN port or from your computer. 2 Re-connect the Ethernet cable. The Local Area Connection icon for UPnP disappears in the screen. ZyWALL 2 Plus User’s Guide... - Page 611 Restart your computer. I cannot open special applications such as white board, file transfer and video when I use the MSN messenger. 1 Wait more than three minutes. 2 Restart the applications. ZyWALL 2 Plus User’s Guide Chapter 45 Troubleshooting...
- Page 612 Chapter 45 Troubleshooting ZyWALL 2 Plus User’s Guide...
-
Page 613: Table 221 Hardware Specifications
FEATURE Default IP Address Default Subnet Mask Default Password DHCP Pool ZyWALL 2 Plus User’s Guide 181(W) x 128(D) x 36(H) mm 304g 12 V DC 1 A Auto-negotiating: 10 Mbps or 100 Mbps in either half-duplex or full-duplex mode. - Page 614 You can also include or exclude particular computers on your network from content filtering. You can also subscribe to category-based content filtering that allows your ZyWALL to check web sites against an external database. ZyWALL 2 Plus User’s Guide...
-
Page 615: Table 223 Feature And Performance Specifications
The console cable and dial backup cable each have an RJ-45 connector and a DB-9 connector. The pin layout for the DB-9 connector end of the cables is as follows. Pins 2,3 and 5 are used. ZyWALL 2 Plus User’s Guide Chapter 46 Product Specifications DESCRIPTION... -
Page 616: Figure 425 Console/Dial Backup Cable Db-9 End Pin Layout
Table 225 Dial Backup Cable Pin Assignments PIN DEFINITION RJ-45 END Table 226 Ethernet Cable Pin Assignments WAN / LAN ETHERNET CABLE PIN LAYOUT Straight-through (Switch) DB-9M (MALE) END DB-9M (MALE) END Crossover (Adapter) (Switch) (Switch) ZyWALL 2 Plus User’s Guide... -
Page 617: Wall-Mounting Instructions
ZyWALL with the connection cables. 5 Align the holes on the back of the ZyWALL with the screws on the wall. Hang the ZyWALL on the screws. ZyWALL 2 Plus User’s Guide Chapter 46 Product Specifications 1 OTD 1 IRD +... -
Page 618: Figure 426 Wall-Mounting Example
Chapter 46 Product Specifications Figure 426 Wall-mounting Example The following are dimensions of an M4 tap screw and masonry plug used for wall mounting. All measurements are in millimeters (mm). Figure 427 Masonry Plug and M4 Tap Screw ZyWALL 2 Plus User’s Guide... -
Page 619: Appendices And Index
VIII Appendices and Index The appendices provide general information. Some details may not apply to your ZyWALL. Setting up Your Computer’s IP Address (621) Pop-up Windows, JavaScripts and Java Permissions (637) IP Addresses and Subnetting (645) Common Services (653) Importing Certificates (657) Legal Information (669) Customer Support (673) Index (679) - Page 621 IP addresses that place them in the same subnet as the ZyWALL’s LAN port. Windows 95/98/Me Click Start, Settings, Control Panel and double-click the Network icon to open the Network window. ZyWALL 2 Plus User’s Guide Address...
-
Page 622: Figure 428 Windows 95/98/Me: Network: Configuration
2 Select Client and then click Add. 3 Select Microsoft from the list of manufacturers. 4 Select Client for Microsoft Networks from the list of network clients and then click 5 Restart your computer so the changes you made take effect. ZyWALL 2 Plus User’s Guide... -
Page 623: Figure 429 Windows 95/98/Me: Tcp/Ip Properties: Ip Address
• If you know your DNS information, select Enable DNS and type the information in the fields below (you may not need to fill them all in). ZyWALL 2 Plus User’s Guide Appendix A Setting up Your Computer’s IP Address... -
Page 624: Figure 430 Windows 95/98/Me: Tcp/Ip Properties: Dns Configuration
3 Select your network adapter. You should see your computer's IP address, subnet mask and default gateway. Windows 2000/NT/XP The following example figures use the default Windows XP GUI theme. 1 Click start (Start in Windows 2000/NT), Settings, Control Panel. ZyWALL 2 Plus User’s Guide... -
Page 625: Figure 431 Windows Xp: Start Menu
2 In the Control Panel, double-click Network Connections (Network and Dial-up Connections in Windows 2000/NT). Figure 432 Windows XP: Control Panel 3 Right-click Local Area Connection and then click Properties. ZyWALL 2 Plus User’s Guide Appendix A Setting up Your Computer’s IP Address... -
Page 626: Figure 433 Windows Xp: Control Panel: Network Connections: Properties
• If you have a dynamic IP address click Obtain an IP address automatically. • If you have a static IP address click Use the following IP Address and fill in the IP address, Subnet mask, and Default gateway fields. • Click Advanced. ZyWALL 2 Plus User’s Guide... -
Page 627: Figure 435 Windows Xp: Internet Protocol (Tcp/Ip) Properties
Automatic metric check box and type a metric in Metric. • Click Add. • Repeat the previous three steps for each default gateway you want to add. • Click OK when finished. ZyWALL 2 Plus User’s Guide Appendix A Setting up Your Computer’s IP Address... -
Page 628: Figure 436 Windows Xp: Advanced Tcp/Ip Properties
• If you know your DNS server IP address(es), click Use the following DNS server addresses, and type them in the Preferred DNS server and Alternate DNS server fields. If you have previously configured DNS servers, click Advanced and then the DNS tab to order them. ZyWALL 2 Plus User’s Guide... -
Page 629: Figure 437 Windows Xp: Internet Protocol (Tcp/Ip) Properties
Network Connections, right-click a network connection, click Status and then click the Support tab. Macintosh OS 8/9 1 Click the Apple menu, Control Panel and double-click TCP/IP to open the TCP/IP Control Panel. ZyWALL 2 Plus User’s Guide Appendix A Setting up Your Computer’s IP Address... -
Page 630: Figure 438 Macintosh Os 8/9: Apple Menu
2 Select Ethernet built-in from the Connect via list. Figure 439 Macintosh OS 8/9: TCP/IP 3 For dynamically assigned settings, select Using DHCP Server from the Configure: list. 4 For statically assigned settings, do the following: • From the Configure box, select Manually. ZyWALL 2 Plus User’s Guide... -
Page 631: Figure 440 Macintosh Os X: Apple Menu
• Select Automatic from the Location list. • Select Built-in Ethernet from the Show list. • Click the TCP/IP tab. 3 For dynamically assigned settings, select Using DHCP from the Configure list. ZyWALL 2 Plus User’s Guide Appendix A Setting up Your Computer’s IP Address... -
Page 632: Figure 441 Macintosh Os X: Network
Check your TCP/IP properties in the Network window. Linux This section shows you how to configure your computer’s TCP/IP settings in Red Hat Linux 9.0. Procedure, screens and file location may vary depending on your Linux distribution and release version. ZyWALL 2 Plus User’s Guide... -
Page 633: Figure 442 Red Hat 9.0: Kde: Network Configuration: Devices
2 Double-click on the profile of the network card you wish to configure. The Ethernet Device General screen displays as shown. Figure 443 Red Hat 9.0: KDE: Ethernet Device: General ZyWALL 2 Plus User’s Guide Appendix A Setting up Your Computer’s IP Address... -
Page 634: Figure 444 Red Hat 9.0: Kde: Network Configuration: Dns
• If you have a dynamic IP address, enter following figure shows an example. is the name of the Ethernet card). Open the eth0 in the dhcp BOOTPROTO= ZyWALL 2 Plus User’s Guide ifconfig- field. The... -
Page 635: Figure 446 Red Hat 9.0: Dynamic Ip Address Setting In Ifconfig-Eth0
Shutting down interface eth0: Shutting down loopback interface: Setting network parameters: Bringing up loopback interface: Bringing up interface eth0: ZyWALL 2 Plus User’s Guide Appendix A Setting up Your Computer’s IP Address in the static BOOTPROTO= directory. The following figure shows an example... -
Page 636: Figure 450 Red Hat 9.0: Checking Tcp/Ip Properties
UP BROADCAST RUNNING MULTICAST RX packets:717 errors:0 dropped:0 overruns:0 frame:0 TX packets:13 errors:0 dropped:0 overruns:0 carrier:0 collisions:0 txqueuelen:100 RX bytes:730412 (713.2 Kb) Interrupt:10 Base address:0x1000 [root@localhost]# HWaddr 00:50:BA:72:5B:44 Bcast:172.16.19.255 Mask:255.255.255.0 MTU:1500 Metric:1 TX bytes:1570 (1.5 Kb) ZyWALL 2 Plus User’s Guide... -
Page 637: Figure 451 Pop-Up Blocker
1 In Internet Explorer, select Tools, Pop-up Blocker and then select Turn Off Pop-up Blocker. Figure 451 Pop-up Blocker You can also check if pop-up blocking is disabled in the Pop-up Blocker section in the Privacy tab. 1 In Internet Explorer, select Tools, Internet Options, Privacy. ZyWALL 2 Plus User’s Guide... -
Page 638: Figure 452 Internet Options: Privacy
Alternatively, if you only want to allow pop-up windows from your device, see the following steps. 1 In Internet Explorer, select Tools, Internet Options and then the Privacy tab. 2 Select Settings…to open the Pop-up Blocker Settings screen. ZyWALL 2 Plus User’s Guide... -
Page 639: Figure 453 Internet Options: Privacy
3 Type the IP address of your device (the web page that you do not want to have blocked) with the prefix “http://”. For example, http://192.168.167.1. 4 Click Add to move the IP address to the list of Allowed sites. Figure 454 Pop-up Blocker Settings ZyWALL 2 Plus User’s Guide Appendix B Pop-up Windows, JavaScripts and Java Permissions... -
Page 640: Figure 455 Internet Options: Security
3 Scroll down to Scripting. 4 Under Active scripting make sure that Enable is selected (the default). 5 Under Scripting of Java applets make sure that Enable is selected (the default). 6 Click OK to close the window. ZyWALL 2 Plus User’s Guide... -
Page 641: Figure 456 Security Settings - Java Scripting
3 Scroll down to Microsoft VM. 4 Under Java permissions make sure that a safety level is selected. 5 Click OK to close the window. Figure 457 Security Settings - Java ZyWALL 2 Plus User’s Guide Appendix B Pop-up Windows, JavaScripts and Java Permissions... -
Page 642: Figure 458 Java (Sun)
Mozilla Firefox Mozilla Firefox 2.0 screens are used here. Screens for other versions may vary. You can enable Java, Javascripts and pop-ups in one screen. Click Tools, then click Options in the screen that appears. ZyWALL 2 Plus User’s Guide... -
Page 643: Figure 459 Mozilla Firefox: Tools > Options
Appendix B Pop-up Windows, JavaScripts and Java Permissions Figure 459 Mozilla Firefox: Tools > Options Click Content.to show the screen below. Select the check boxes as shown in the following screen. Figure 460 Mozilla Firefox Content Security ZyWALL 2 Plus User’s Guide... - Page 644 Appendix B Pop-up Windows, JavaScripts and Java Permissions ZyWALL 2 Plus User’s Guide...
-
Page 645: Introduction To Ip Addresses
Therefore, each octet has a possible range of 00000000 to 11111111 in binary, or 0 to 255 in decimal. The following figure shows an example IP address in which the first three octets (192.168.1) are the network number, and the fourth octet (16) is the host ID. ZyWALL 2 Plus User’s Guide... -
Page 646: Figure 461 Network Number And Host Id
For example, an “8-bit mask” means that the first 8 bits of the mask are ones and the remaining 24 bits are zeroes. OCTET: OCTET: OCTET: (192) (168) 11000000 10101000 00000001 11111111 11111111 11111111 11000000 10101000 00000001 ZyWALL 2 Plus User’s Guide 4TH OCTET 00000010 00000000 00000010... -
Page 647: Table 228 Subnet Masks
The following table shows some possible subnet masks using both notations. Table 230 Alternative Subnet Mask Notation ALTERNATIVE SUBNET MASK NOTATION 255.255.255.0 255.255.255.128 ZyWALL 2 Plus User’s Guide Appendix C IP Addresses and Subnetting 4TH OCTET OCTET OCTET 00000000 00000000... -
Page 648: Figure 462 Subnetting Example: Before Subnetting
The following figure shows the company network after subnetting. There are now two sub- networks, A and B. ALTERNATIVE LAST OCTET NOTATION (BINARY) 1100 0000 1110 0000 1111 0000 1111 1000 1111 1100 LAST OCTET (DECIMAL) ZyWALL 2 Plus User’s Guide... -
Page 649: Figure 463 Subnetting Example: After Subnetting
IP Address (Binary) Subnet Mask (Binary) Subnet Address: 192.168.1.0 Broadcast Address: 192.168.1.63 ZyWALL 2 Plus User’s Guide Appendix C IP Addresses and Subnetting - 2 or 62 hosts for each subnet (a host ID of all NETWORK NUMBER 192.168.1. 11000000.10101000.00000001. -
Page 650: Table 232 Subnet 2
192.168.1. 11000000.10101000.00000001. 11111111.11111111.11111111. Lowest Host ID: 192.168.1.193 Highest Host ID: 192.168.1.254 LAST FIRST ADDRESS ADDRESS LAST OCTET BIT VALUE 01000000 11000000 LAST OCTET BIT VALUE 10000000 11000000 LAST OCTET BIT VALUE 11000000 11000000 BROADCAST ADDRESS ZyWALL 2 Plus User’s Guide... -
Page 651: Table 236 24-Bit Network Number Subnet Planning
The following table is a summary for subnet planning on a network with a 16-bit network number. Table 237 16-bit Network Number Subnet Planning NO. “BORROWED” HOST BITS ZyWALL 2 Plus User’s Guide Appendix C IP Addresses and Subnetting LAST FIRST ADDRESS ADDRESS SUBNET MASK NO. - Page 652 For more information on address assignment, please refer to RFC 1597, Address Allocation for Private Internets and RFC 1466, Guidelines for Management of IP Address Space. SUBNET MASK NO. SUBNETS 255.255.255.252 (/30) 16384 255.255.255.254 (/31) 32768 NO. HOSTS PER SUBNET ZyWALL 2 Plus User’s Guide...
-
Page 653: Common Services
• If the Protocol is USER, this is the IP protocol number. • Description: This is a brief explanation of the applications that use this service or the situations in which this service is used. ZyWALL 2 Plus User’s Guide Common Services... -
Page 654: Table 238 Commonly Used Services
Microsoft Networks’ messenger service uses this protocol. 5190 An Internet chat program. A protocol for news groups. 2049 Network File System - NFS is a client/ server distributed file service that provides transparent file sharing for network environments. ZyWALL 2 Plus User’s Guide... - Page 655 TCP/UDP SNMP-TRAPS TCP/UDP SQL-NET TCP/UDP STRM WORKS SYSLOG TACACS ZyWALL 2 Plus User’s Guide Appendix D Common Services PORT(S) DESCRIPTION Network News Transport Protocol is the delivery mechanism for the USENET newsgroup service. Packet INternet Groper is a protocol that sends out ICMP echo requests to test whether or not a remote host is reachable.
- Page 656 Trivial File Transfer Protocol is an Internet file transfer protocol similar to FTP, but uses the UDP (User Datagram Protocol) rather than TCP (Transmission Control Protocol). 7000 Another videoconferencing solution. ZyWALL 2 Plus User’s Guide...
-
Page 657: Figure 464 Security Certificate
The following example procedure shows how to import the ZyWALL’s (self-signed) server certificate into your operating system as a trusted certification authority. 1 In Internet Explorer, double click the lock shown in the following screen. ZyWALL 2 Plus User’s Guide... -
Page 658: Figure 465 Login Screen
Appendix E Importing Certificates Figure 465 Login Screen 2 Click Install Certificate to open the Install Certificate wizard. Figure 466 Certificate General Information before Import 3 Click Next to begin the Install Certificate wizard. ZyWALL 2 Plus User’s Guide... -
Page 659: Figure 467 Certificate Import Wizard 1
Figure 467 Certificate Import Wizard 1 4 Select where you would like to store the certificate and then click Next. Figure 468 Certificate Import Wizard 2 5 Click Finish to complete the Import Certificate wizard. ZyWALL 2 Plus User’s Guide Appendix E Importing Certificates... -
Page 660: Figure 469 Certificate Import Wizard 3
Appendix E Importing Certificates Figure 469 Certificate Import Wizard 3 6 Click Yes to add the ZyWALL certificate to the root store. Figure 470 Root Certificate Store ZyWALL 2 Plus User’s Guide... -
Page 661: Figure 471 Certificate General Information After Import
Client Certificates to be active (see the Certificates chapter for details). Apply for a certificate from a Certification Authority (CA) that is trusted by the ZyWALL (see the ZyWALL’s Trusted CA web configurator screen). ZyWALL 2 Plus User’s Guide Appendix E Importing Certificates... -
Page 662: Figure 472 Zywall Trusted Ca Screen
The CA sends you a package containing the CA’s trusted certificate(s), your personal certificate(s) and a password to install the personal certificate(s). Installing the CA’s Certificate 1 Double click the CA’s trusted certificate to produce a screen similar to the one shown next. ZyWALL 2 Plus User’s Guide... -
Page 663: Figure 473 Ca Certificate Example
Double-click the personal certificate given to you by the CA to produce a screen similar to the one shown next 1 Click Next to begin the wizard. ZyWALL 2 Plus User’s Guide Appendix E Importing Certificates... -
Page 664: Figure 474 Personal Certificate Import Wizard 1
2 The file name and path of the certificate you double-clicked should automatically appear in the File name text box. Click Browse if you wish to import a different certificate. Figure 475 Personal Certificate Import Wizard 2 3 Enter the password given to you by the CA. ZyWALL 2 Plus User’s Guide... -
Page 665: Figure 476 Personal Certificate Import Wizard 3
Place all certificates in the following store and choose a different location. Figure 477 Personal Certificate Import Wizard 4 5 Click Finish to complete the wizard and begin the import process. ZyWALL 2 Plus User’s Guide Appendix E Importing Certificates... -
Page 666: Figure 478 Personal Certificate Import Wizard 5
2 When Authenticate Client Certificates is selected on the ZyWALL, the following screen asks you to select a personal certificate to send to the ZyWALL. This screen displays even if you only have a single certificate as in the example. ZyWALL 2 Plus User’s Guide... -
Page 667: Figure 481 Ssl Client Authentication
Appendix E Importing Certificates Figure 481 SSL Client Authentication 3 You next see the ZyWALL login screen. Figure 482 ZyWALL Secure Login Screen ZyWALL 2 Plus User’s Guide... - Page 668 Appendix E Importing Certificates ZyWALL 2 Plus User’s Guide...
-
Page 669: Legal Information
ZyXEL Communications Corporation. Published by ZyXEL Communications Corporation. All rights reserved. -
Page 670: Appendix F Legal Information
Material Authorization number (RMA). Products must be returned Postage Prepaid. It is recommended that the unit be insured when shipped. Any returned products without proof of purchase or those with an out-dated warranty will be repaired or replaced (at the discretion of ZyWALL 2 Plus User’s Guide... - Page 671 Registration Register your product online to receive e-mail notices of firmware upgrades and information at www.zyxel.com for global products, or at www.us.zyxel.com for North American products. ZyWALL 2 Plus User’s Guide...
- Page 672 Appendix F Legal Information ZyWALL 2 Plus User’s Guide...
-
Page 673: Customer Support
• Sales E-mail: sales@zyxel.com.tw • Telephone: +886-3-578-3942 • Fax: +886-3-578-2439 • Web: www.zyxel.com, www.europe.zyxel.com • FTP: ftp.zyxel.com, ftp.europe.zyxel.com • Regular Mail: ZyXEL Communications Corp., 6 Innovation Road II, Science Park, Hsinchu 300, Taiwan Costa Rica • Support E-mail: soporte@zyxel.co.cr • Sales E-mail: sales@zyxel.co.cr •... -
Page 674: Appendix G Customer Support
Appendix G Customer Support • Regular Mail: ZyXEL Communications, Czech s.r.o., Modranská 621, 143 01 Praha 4 - Modrany, Ceská Republika Denmark • Support E-mail: support@zyxel.dk • Sales E-mail: sales@zyxel.dk • Telephone: +45-39-55-07-00 • Fax: +45-39-55-07-07 • Web: www.zyxel.dk • Regular Mail: ZyXEL Communications A/S, Columbusvej, 2860 Soeborg, Denmark Finland •... - Page 675 Puchong Jaya, 47100 Puchong, Selangor Darul Ehsan, Malaysia North America • Support E-mail: support@zyxel.com • Support Telephone: +1-800-978-7222 • Sales E-mail: sales@zyxel.com • Sales Telephone: +1-714-632-0882 • Fax: +1-714-632-0858 • Web: www.zyxel.com ZyWALL 2 Plus User’s Guide Appendix G Customer Support...
- Page 676 Appendix G Customer Support • Regular Mail: ZyXEL Communications Inc., 1130 N. Miller St., Anaheim, CA 92806- 2001, U.S.A. Norway • Support E-mail: support@zyxel.no • Sales E-mail: sales@zyxel.no • Telephone: +47-22-80-61-80 • Fax: +47-22-80-61-81 • Web: www.zyxel.no • Regular Mail: ZyXEL Communications A/S, Nils Hansens vei 13, 0667 Oslo, Norway Poland •...
- Page 677 • Telephone: +44-1344-303044, 08707-555779 (UK only) • Fax: +44-1344-303034 • Web: www.zyxel.co.uk • FTP: ftp.zyxel.co.uk • Regular Mail: ZyXEL Communications UK Ltd., 11 The Courtyard, Eastern Road, Bracknell, Berkshire RG12 2XB, United Kingdom (UK) ZyWALL 2 Plus User’s Guide Appendix G Customer Support...
- Page 678 Appendix G Customer Support ZyWALL 2 Plus User’s Guide...
- Page 679 486, 512 backup configuration 460, 572 TFTP bandwidth class bandwidth filter bandwidth management address type ZyWALL 2 Plus User’s Guide Index bandwidth borrowing bandwidth class bandwidth filter 351, 360 class configuration class setup fairness-based scheduler maximize bandwidth usage...
- Page 680 Dynamic Host Configuration Protocol. See DHCP. DYNDNS Wildcard 366, 374 Encapsulating Security Payload. See ESP. encapsulation 498, 510, 514 and active protocol transport mode tunnel mode encryption algorithms 257, 263 and active protocol entering information and transport mode ZyWALL 2 Plus User’s Guide...
- Page 681 VPN 89, 93 service type SMT menus stateful inspection TCP maximum incomplete ZyWALL 2 Plus User’s Guide three-way handshake threshold when to use firmware file maintenance upload firmware upload flow control...
- Page 682 151, 349, 487, 513, 516, 520 multicast 135, 183, 488, 494, 516 myZyXEL.com nailed-up connection 134, 331, 340, 341, 487, 498, 515, 552, 652 and VPN 262, 270 application 154, 482 512, 514 ZyWALL 2 Plus User’s Guide...
- Page 683 51, 448, 468 path cost Perfect Forward Secrecy. see PFS. Diffie-Hellman key group ZyWALL 2 Plus User’s Guide PIN number ping Point-to-Point Protocol over Ethernet. See PPPoE Point-to-Point Tunneling Protocol. See PPTP. pool of IP addresses 135, 138...
- Page 684 SNMP community configuration GetNext manager 392, 393 password Trap trusted host source address 210, 230 Spanning Tree Protocol. See STP. how SSH works implementation stateful inspection firewall ZyWALL 2 Plus User’s Guide...
- Page 685 Daylight Saving Time resetting synchronization with server zone 451, 593 Time protocol time protocol Daytime Time time setting timeout ZyWALL 2 Plus User’s Guide system trace trademarks traffic redirect transparent firewall 57, 147, 456 triangle routes vs virtual interfaces trigger port forwarding Trivial File Transfer Protocol.
- Page 686 WINS 136, 138 WINS server wireless channel wireless LAN wireless security wizard setup WLAN IP alias setup TCP/IP setup www.dyndns.org Xmodem file upload protocol ZyNOS 562, 572 ZyWALL registration ZyXEL’s Network Operating System. See ZyNOS. ZyWALL 2 Plus User’s Guide...