Table of Contents
Advertisement
Advertisement
Table of Contents

Related Manuals for Bowflex ElitePlus


Summary of Contents for Bowflex ElitePlus
-
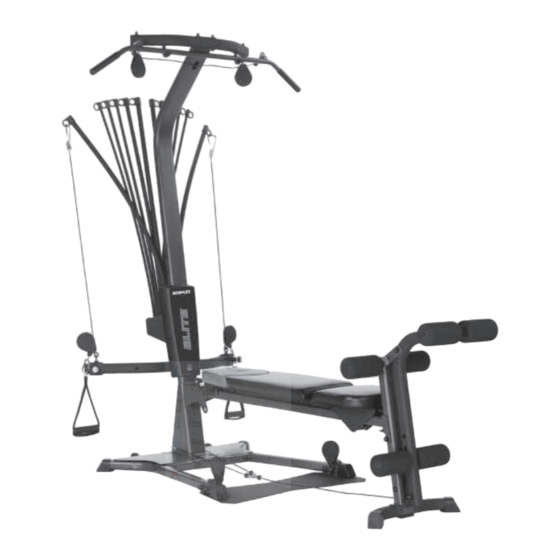
Page 1: Home Gym
The Bowflex Elite ™ ® Home Gym Assembly Instructions 51018 Rev AB (10/2004) - Page 2 CONGRATULATIONS on your commitment to improving your health and fitness! With the Bowflex you have everything you need to exceed all of your physical fitness, strength and health expectations! The Bowflex Elite home gym’s exceptional resistance and ® ™ quality is unmatched by any other single piece of home fitness equipment available.
-
Page 3: Basic Assembly Principles
3. When attaching two pieces, gently lift and look through the bolt holes to help guide the bolt through the holes. 4. As a general rule, and for all bolts and nuts on your Bowflex® Elite™ home gym, turn bolts or nuts toward the right to tighten and left to loosen. -
Page 4: Hardware Guide
Tools You Will Need You will need the following tools to complete the assembly of your Bowflex® Elite™ home gym. If you don’t have these tools, you can find them at any hardware or department store for a reasonable price. - Page 5 Step 1 - Attach the Lower Lat Tower to the Base Platform Locate the following items: • Item #1 - Lower Lat Tower • Item #2 - Base Platform • Item #H - (4) 3/8" X 3" Button Head Screws •...
- Page 6 Step 3 - Attach the Squat Platform to the Main Assembly Locate the following items: • From Step 2 - Base Platform/Lat Tower (Main) Assembly • Item #5 - Squat Platform • Item #I - (2) 3/8" X 3 1/4" Button Head Screws •...
-
Page 7: Assembly Guide
Step 4 - Attach the Chest Bar with Pulleys to the Main Assembly Locate the following items: • From Step 3 - Main Assembly • Item #6 - Chest Bar • Item #31 - Chest Pulleys • Item #K - (2) 3/8" X 5" Button Head Screws •... - Page 8 Step 6 - Attach the Seat Rail to the Seat Assembly Locate the following items: • From Step 5 - Seat Pad/Seat Bracket Assembly • Item #9 - Seat Rail Undo the twist ties from the Rail Pivot Bushings and remove the Bushings.
- Page 9 Step 8 - Attach the Rear Leg to the Seat Rail Figure 8 Locate the following items: • From Step 6 - Seat Rail Assembly • From Step 7 - Rear Leg Assembly • Item #J - (1) 3/8" X 4 1/4" Button Head Screw •...
- Page 10 Step 9 - Attach the Seat Rail to the Main Assembly Figure 9 Locate the following items: Main • From Step 4 - Main Assembly Assembly • From Step 8 - Seat Rail Assembly • Item #12 - Seat Rail Knob •...
- Page 11 Step 10 - Attach the Leg Extension Pivot Tube Locate the following items: • Item #13 - Leg Extension Pivot Tube • From Step 9 - Main Assembly • Item #30 - Lock Out Pin • Item #G - (1) 3/8" X 2 3/4" Button Head Screw •...
- Page 12 Assembly Guide Figure 12...
- Page 13 Assembly Guide Figure 13 Step 13 - Assemble the Leg Extension Seat Locate the following items: • Item #19 - Leg Extension Seat Pad • Item #21 - Leg Extension Seat Support Tube • Item #C - (4) 5/16" X 3/4" Button Head Screws •...
- Page 14 Assembly Guide Figure 14 Step 14 - Attach the Leg Extension Seat to the Main Leg Extension Seat Assembly Back Edge Locate the following items: • From Step 13 - Leg Extension Seat Assembly • From Step 12 - Main Assembly Support Tube Bracket Hooks The Leg Extension Seat Assembly is removable, and can be...
- Page 15 Step 16 - Attach the Upper Lat Tower to the Lower Locate the following items: • From Step 15 - Upper Lat Tower Assembly • From Step 14 - Main Assembly • Item #E - (6) 3/8" X 3/4" Button Head Screw •...
- Page 16 Step 18 - Attach the Rod Box Frame to the Lat Tower Locate the following items: • From Step 16 - Main Assembly • From Step 17 - Rod Box/Frame Assembly • Item #K - (2) 3/8" X 5" Button Head Screws •...
- Page 17 Figure 20 A-15...
- Page 18 Bench into the half hinge on the seat. To remove the Bench, lift up on the long portion and pull away from Seat. Steps 23 through 26 illustrate how to route and connect the Cables to your new Bowflex Elite ®...
- Page 19 Figure 26 - Squat Cables A-17...
- Page 20 1-800-605-3369 for assistance. ©2004 Nautilus Inc. All rights reserved. 1400 N.E. 136th Ave., Vancouver, WA 98684. Bowflex, Bowflex Elite, Power Rod and the Bowflex and Nautilus logos are either registered trademarks or trademarks of Nautilus, Inc.
- Page 23 Special Edition Includes: Dr. Ellington Darden’s Six Week Fast Fat Loss – Body Leanness Program The Bowflex Elite ™ ® Home Gym Owner’s Manual and Fitness Guide Written By: Tom Purvis RPT, RTS Registered Physical Therapist and founder of the...
-
Page 24: Table Of Contents
Lying Leg Extension Ankle Eversion Ankle Inversion Standing Hip Extension (Knee Flexed) Standing Hip Extension (Knee Stabilized) Standing Hip Abduction Seated Hip Adduction Seated Hip Abduction Standing Leg Kickback Muscle Chart Bowflex® Elite™ Home Gym Warranty Bowflex® Elite™ Home Gym Warranty Card... -
Page 25: Safety Precautions
Use only the Power Rods® that came with your Bowflex® Elite™ home gym. • Set up and use your Bowflex® Elite™ home gym on a hard, level surface. • Do not wear any loose or dangling clothing or jewelry while using the Bowflex®... -
Page 26: Get To Know Your Machine
You will not believe the amazing results your body will get with the Bowflex® Elite™ home gym! Please take your time to read through the entire manual and follow it carefully before attempting to use your Bowflex®... -
Page 27: How To Use Your Machine
Hooking up the closest rod first prevents rods from crossing over the top of one another. ® When You Are Not Using Your Bowflex® Elite™ home gym Disconnect the cables from the Power Rods your are not using your Bowflex gym. - Page 28 How to Use Your Machine The Workout Bench Your Bowflex® Elite™ home gym has a number of seat and bench positions: flat bench forward, flat bench back, 45° incline and free-sliding seat extension. To adjust the seat, pull out the Seat Rail Knob, then slide the seat to one of the three locking holes on the Seat Rail.
-
Page 29: Accessories And Equipment
• Before using the Lat Cross Bar, make sure that all fasteners are in place and tightened. • Make sure that the Lat Tower cables are securely fastened to the regular Bowflex® cables and the Bent Lat Bar, Squat Bar or Hand Grips. -
Page 30: Using Your Leg Press Belt And Squat Bar Pulleys
Leg Press Belt: The Leg Press Belt is used for the Leg Press exercise. • With the Bowflex® seat adjusted to the “free sliding” position (spring lock seat pin unlocked), the hand grips removed, and the desired amount of resistance hooked up, sit on the seat and position the leg press belt around your hips. -
Page 31: The Bowflex Body Leanness Program
The Bowflex Body Leanness Program By Ellington Darden, Ph.D. The following program was created by Dr. Ellington Darden. It contains a rigorous fitness and dietary program. Please consult your physician before beginning any fitness or dietary program. Some of the names of the exercises... - Page 33 Before beginning this program consult your physician or healthcare professional. Show this plan and your Bowflex your physician or healthcare professional. Only he or she can determine if this course is appropriate for your particular age and condition. If you experience any lightheadedness, dizziness, or shortness of breath while exercising, stop the movement and consult a physician.
- Page 34 That’s right. Similar results can be accomplished by you in six short weeks, which include just 18 workouts (3 per week) on the Bowflex® machine. Bowflex® was a significant part of the results. The exercises performed on it allowed the participants to build muscle, which accelerated their metabolisms, and produced faster and greater fat losses.
- Page 35 If you would like to measure your personal before-and- after results, there are several steps you need to take. It is important that you accurately perform each task, then at the end of the six-week program, repeat the process in the same manner.
- Page 36 Skinfold Measurements To accurately track your progress through this six-week program, it is necessary to take skinfold measurements. By measuring yourself in this way, you will be able to determine your lean-body mass and your body-fat percentage. The goal of this program is to increase your lean-body mass and decrease your body-fat percentage. Please read this section carefully.
- Page 37 Using Calipers When Measuring Skinfolds The procedure for measuring skinfold thickness is to grasp firmly with the thumb and forefinger a fold of skin and surface fat and pull it away from the underlying muscle. Take the caliper in your other hand and open the jaws.
-
Page 38: Determining Your Body Fat
Determining Your Body Fat To Use The Nomogram: 1) Locate the sum of your three skinfolds in the right column and mark it. 2) Locate your age in years on the far left column and mark it. 3) Connect the two marks with a straightedge. Where the straightedge intersects the line in the middle column appropriate to you, you will find your body-fat percentage. - Page 39 Calculating Lean Body Mass Now that you know your body-fat percentage, you can calculate your lean-body percentage. This will eventually show you how many pounds of muscle were added to your body, after completing the program. For Example: Before the program, Joe weighs 200 pounds (90.7 kg) and measures 30% fat, which amounts to 60 pounds (27.2 kg).
- Page 40 Percent Body Fat If you wish to send in your results to Bowflex, please send to: Bowflex Results, 1400 N.E. 136th Ave., Vancouver, WA. 98684. Or you may fax this sheet to Bowflex Results at 1-360-694-7755. Please include your name, address, and phone number.
-
Page 41: The Workouts
GUIDELINES Week 1&2 All exercises should be practiced with one set of 8 to 12 repetitions. The style of performance is very important. The movement for each repetition should be 4 seconds in the positive phase and 4 seconds in the negative. Keep the motion slow and smooth. - Page 42 You will be following a reduced-calorie nutrition program, which is divided into three two-week segments. The program is a proven method for achieving maximal fat loss over a six-week period. It consists of a carbohydrate-rich, descending-calorie eating plan, and a superhydration routine. Follow a Carbohydrate-Rich, Descending-Calorie Eating Plan: Approximately 60 percent of the daily calories should be from carbohydrates.
- Page 43 Superhydrate Your System Drinking plenty of water is essential to the success of this program. Drinking the recommended amount of water can seem like a challenge at first. Stick with it. Carry a large sports bottle or similar item with you throughout the day.
- Page 44 The menus in the Bowflex eating plan are designed for maximum fat-loss effectiveness and nutritional value. For best results, follow them exactly. Every attempt has been made to utilize current popular brand names and accurate calorie counts, which are listed in the menus. But as you probably realize the products are sometimes changed or discontinued.
- Page 45 The Eating Plan - Breakfast = 300 calories Choice of bagel, cereal or shake. Bagel 1 plain bagel, Sarah Lee (frozen) (210) 3/4 oz. light cream cheese (45) 1/2 C. orange juice, fresh or frozen (55) Any beverage without calories, caffeine, or sodium, such as decaffeinated coffee or tea.
- Page 46 The Eating Plan - Breakfast = 300 calories Choice of bagel, cereal or shake. Bagel 1 plain bagel, Sarah Lee (frozen) (210) 21 g light cream cheese (45) 120 ml orange juice, fresh or frozen (55) Any beverage without calories, caffeine, or sodium, such as decaffeinated coffee or tea.
- Page 47 Quantities needed for listed items will depend on your specific selections. Review your choices and adjust the shopping list accordingly. It may be helpful for you to photocopy this list each week before doing your shopping. Staples Orange juice, skim milk, whole-wheat bread, Promise Ultra Vegetable Oil Spread, Italian fat-free dressing, Dijon mustard, safflower oil, noncaloric beverages (tea, decaffeinated coffee, diet soft drinks, water).
- Page 48 Your teenage son and daughter, however, could follow the Bowflex exercise routines. Q. I’m afraid that I might get large, unfeminine muscles from some of the Bowflex exercises you recommend in this course. What can I do to prevent this from happening? A.
- Page 49 – but not excessively large – and larger muscles will make your body firmer and more shapely. Q. Why is it so important I perform the Bowflex exercises with a 4-second count on the lifting and lowering? A.
- Page 50 That level is your daily calorie requirement. Naturally, you’ll be able to consume other foods than those listed in the Bowflex eating plan. By then, however, you should know the value of being a smart shopper and a wise eater. Read labels. Compare nutritional information.
-
Page 51: Exercise Log
Please feel free to make copies of this chart to continue your exercise log. EXERCISE Sets Bench Press Reps Resistance Sets Reps Resistance Sets Reps Resistance Sets Reps Resistance Sets Reps Resistance Sets Reps Resistance Sets Reps Resistance Sets Reps Resistance Sets Reps... -
Page 52: Define Your Goals
Your body will do what you train it to do. That’s why it’s important to define your goals and focus them. Here are some fitness components that will help you define your goals and choose your fitness program. Muscle Strength is the maximum force that you can exert against resistance at one time. - Page 53 Design Your Own Program You may want to design your own personal program specifically geared to your goals and lifestyle. Designing a program is easy, as long as you follow the guidelines below. Understand fitness and its components: Improperly designed programs can be dangerous. Take some time to review this manual as well as other fitness guides.
-
Page 54: Warm Up / Cool Down
Warming Up We recommend that you warm up by doing light stretching and performing light exercises ® on the Bowflex Elite home gym. ™ Cooling Down An essential part of the exercise routine is the cool down. -
Page 55: Chest Exercises
Bench Press Muscles worked: Pectoralis Major; Deltoids; Triceps Bench Position: 45˚ incline Accessory: Hand Grips Pulleys: Chest Bar Success Tips • Maintain a 90° angle between upper arms and torso throughout motion. • Keep chest muscles tightened. Limit and control your range of motion. •... -
Page 56: Decline Bench Press
Decline Bench Press Muscles worked: Pectoralis Major; Deltoids; Triceps Bench Position: 45˚ incline Accessory: Hand Grips Pulleys: Chest Bar Success Tips • Maintain a 90° angle between your upper arms and torso at the start of the motion, and slightly less than 90° at the finish. •... -
Page 57: Decline Chest Fly
Decline Chest Fly Muscles worked: Pectoralis Major; Anterior Deltoid Bench Position: 45˚ incline Accessory: Hand Grips Pulleys: Chest Bar Success Tips • Maintain a 60-90° angle between upper arms and torso during exercise. • Keep chest muscles tightened. Limit and control your range of motion. -
Page 58: Resisted Punch
Resisted Punch Muscles worked: Anterior Deltoid; Triceps Bench Position: Flat Bench Back Accessory: Hand Grips Pulleys: Chest Bar Success Tips • Maintain an upright, erect posture as your trunk rotates with the punch. • Keep knees bent and feet on floor. •... -
Page 59: Shoulder Exercises
Rear Deltoid Rows Muscles worked: Rear and Middle Deltoids; Posterior Rotator Cuff; Upper Latissimus; Teres Major; Trapezius; Rhomboids Bench Position: Flat Bench Back Accessory: Hand Grips Pulleys: Chest Bar Success Tips • Maintain a 90° angle between your upper arms and torso during motion. •... -
Page 60: Seated Shoulder Press
Seated Shoulder Press Muscles worked: Front Deltoids; Upper Trapezius; Triceps Bench Position: Flat Bench Back Accessory: Hand Grips Pulleys: Chest Bar Success Tips • Keep knees bent and feet on floor. • Do not increase the arch in your lower back as you raise your arms, but keep your spine steady and tight. -
Page 61: Shoulder Extension
Shoulder Extension Muscles worked: Latissimus Dorsi; Teres Major; Rear Deltoid; Middle Trapezius; Rhomboids; Triceps Bench Position: Flat Bench Back Accessory: Hand Grips Pulleys: Chest Bar Success Tips • Keep knees bent and feet flat on floor. • Keep your lats tightened throughout the motion. -
Page 62: Scapular Protraction
Scapular Protraction Muscles worked: Serratus Anteriors Bench Position: 45˚ incline Accessory: Hand Grips Pulleys: Chest Bar Success Tips • Keep knees bent and feet flat on floor. Lean head back against the bench. • Keep your spine aligned and a slight arch in your lower back. -
Page 63: Lying Front Shoulder Raise
Lying Front Shoulder Raise Muscles worked: Front and Middle Deltoids Bench Position: Flat Bench Back Accessory: Hand Grips Pulleys: Chest Bar Success Tips • Keep knees bent and feet flat on floor. • Keep abdominals tight and maintain good spinal alignment. •... -
Page 64: Shoulder Rotator Cuff
Shoulder Rotator Cuff Muscles worked: Subscapularis Bench Position: Flat Bench Forward Accessory: Hand Grips Pulleys: Chest Bar Success Tips • Keep knees bent and feet flat on floor. Lean head back against the bench. • Keep your spine aligned and a slight arch in your lower back. -
Page 65: Seated Lateral Shoulder Raise
Seated Lateral Shoulder Raise Muscles worked: Supraspinatus; Middle Deltoids; Trapezius Bench Position: Flat Bench Forward Accessory: Hand Grips Pulleys: Chest Bar Success Tips • Keep knees bent and feet flat on floor. • Keep abdominals tight and maintain good spinal alignment. •... -
Page 66: Back Exercises
Muscles worked: Latissimus Dorsi; Teres Major; Rear Deltoids Bench Position: Flat Bench Forward Accessory: Hand Grips Pulleys: Chest Bar Success Tips • Keep knees bent and feet flat on floor. Lean head back against the bench. • Keep your spine aligned, abs tight and a slight arch in your lower back. -
Page 67: Pulldowns
Pulldowns Muscles worked: Latissimus Dorsi; Teres Major; Rear Deltoids; Biceps Bench Position: Flat Bench Forward Accessory: Bent Lat Bar Pulleys: Lat Tower Success Tips • Keep knees bent and feet flat on floor. • To determine the appropriate grip width for you, hold your arms straight out to your sides at shoulder height. -
Page 68: Lying Lat Fly
Muscles worked: Latissimus Dorsi; Teres Major; Rear Deltoids; Biceps Bench Position: Flat Bench Back Accessory: Shoulder Cuff Pulleys: Chest Bar Success Tips • Keep knees bent and feet flat on floor. • Keep your lats tightened throughout entire motion. • Keep your spine aligned, abs tight and a slight arch in your lower back. -
Page 69: Seated Lat Rows
Seated Lat Rows Muscles worked: Latissimus Dorsi; Teres Major; Rear Deltoids; Biceps Bench Position: Flat Bench Back Accessory: Hand Grips Pulleys: Chest Bar Success Tips • Keep knees bent and feet flat on floor. • Do not bend your torso forward. •... -
Page 70: Bent Over Row
Muscles worked: Latissimus Dorsi; Teres Major; Rear Deltoids; Biceps Bench Position: Removed Accessory: Squat Bar Attachment Pulleys: Squat Pulley Frame Success Tips • Keep knees bent and feet flat on floor. • Do not bend your torso forward. • Keep your chest lifted and maintain spinal alignment. -
Page 71: Arm Exercises
Muscles worked: Triceps Bench Position: Removed Accessory: Bent Lat Bar Pulleys: Lat Tower Success Tips • Keep your upper arms motionless and your wrists straight. • Keep your chest lifted, abs tight and maintain a slight arch in lower back. •... -
Page 72: French Press
French Press Muscles worked: Triceps Bench Position: Flat Bench Back Accessory: Hand Grips Pulleys: Chest Bar Success Tips • Keep your upper arms motionless and your wrists straight. • Keep your chest lifted and maintain spinal alignment, keeping a very slight arch in your lower back. -
Page 73: Cross Triceps Extension
Muscles worked: Triceps Bench Position: 45˚ incline Accessory: Hand Grips Pulleys: Chest Bar Success Tips • Keep your upper arm motionless and your wrists straight. • Keep your chest lifted, pinch your shoulder blades together and maintain a slight arch in lower back. •... -
Page 74: Seated Triceps Extension
Seated Triceps Extension Muscles worked: Triceps Bench Position: Flat Bench Back Accessory: Hand Grips Pulleys: Chest Bar Success Tips • Keep knees bent, feet flat on the floor. • Lay your head back against the bench. • Keep your chest lifted, shoulders pinched together, and a very slight arch in your lower back. -
Page 75: Seated Biceps Curl
Seated Biceps Curl Muscles worked: Biceps Bench Position: Flat Bench Back Accessory: Hand Grips Pulleys: Chest Bar Success Tips • Keep your upper body motionless and your wrists straight. • Keep your chest lifted, trunk muscles tight and maintain a slight arch in lower back. -
Page 76: Seated Wrist Extension
Muscles worked: Forearms Bench Position: Flat Bench Back Accessory: Hand Grips Pulleys: Chest Bar Success Tips • Move slowly and keep tension in the back of the forearms at all times. • Keep your chest lifted, trunk muscles tightened, and a very slight arch in your lower back. -
Page 77: Reverse Curl
Reverse Curl Muscles worked: Brachialis; Brachioradialis; Biceps Bench Position: Removed Accessory: Hand Grips Pulleys: Chest Bar Success Tips • Keep your upper body motionless, elbows at your sides and your wrists straight. • Keep your trunk muscles tight and maintain a slight arch in lower back. Muscles worked: Forearms Bench Position:... -
Page 78: Standing Wrist Extension
Muscles worked: Forearms; Brachialis Bench Position: Removed Accessory: Hand Grips Pulleys: Chest Bar Success Tips • Move slowly and keep tension in the wrists at all times. • Keep your chest lifted, trunk muscles tightened, and a very slight arch in your lower back. -
Page 79: Abdominal Exercises
Muscles worked: Rectus Abdominus Bench Position: Flat Bench Back Accessory: None Pulleys: None Success Tips • Keep your upper body, knees and hips stationary. Relax your neck. • Tighten your abs before you move. • Allow exhalation up and inhalation down without exaggerating breathing. -
Page 80: Seated (Resisted) Abdominal Crunch
Seated (Resisted) Abdominal Crunch Muscles worked: Rectus Abdominus; Obliques Bench Position: 45˚ incline Accessory: Hand Grips Pulleys: Chest Bar Success Tips • Do not lift your head or chin—your head should follow the rib motion rather than lead it. Maintain normal neck posture. -
Page 81: Trunk Rotation
Muscles worked: Rectus Abdominus; Obliques; Serratus Anterior Bench Position: Flat Bench Back Accessory: None Pulleys: Success Tips • Keep chest lifted, shoulders pinched, abs tight and slight arch in lower back. • This exercise must be performed correctly—failure to do so could result in injury. -
Page 82: Leg Extension
Muscles worked: Quadriceps Bench Position: Leg Extension Seat Accessory: None Pulleys: Leg Extension Leg Extension: Engaged Success Tips • Use slow, controlled motion—do not “kick” into the extension. • Do not let your knees rotate outward during the exercise. Keep kneecaps pointing up and straight forward. -
Page 83: Ankle Eversion
Muscles worked: Peroneals Bench Position: Flat Bench Forward Accessory: Ankle Cuff Pulleys: Chest Bar Pulleys Success Tips • Movement should occur only at the ankle—keep the rest of your body motionless. • Keep abs tight and do not lift your hips or excessively arch your back. -
Page 84: Standing Hip Extension (Knee Flexed)
Standing Hip Extension Muscles worked: Gluteus Maximus Bench Position: Removed Accessory: Ankle Cuff Pulleys: Chest Bar Success Tips • Keep your chest lifted, spine aligned, abs tight and a very slight arch in your lower back. • Do not bend from waist or lower back. Standing Hip Extension Muscles worked: Gluteus Maximus;... -
Page 85: Standing Hip Abduction
Muscles worked: Gluteus Maximus Bench Position: Removed Accessory: Ankle Cuff Pulleys: Chest Bar Success Tips • Keep your chest lifted, spine aligned, abs tight and a slight arch in your lower back. • Do not bend from waist or lower back. •... -
Page 86: Seated Hip Abduction
Muscles worked: Piriformis; Gluteus Maximus Bench Position: Flat Bench Forward Accessory: Ankle Cuff Pulleys: Chest Bar Success Tips • Keep your spine straight and your hips level—do not raise your hips during motion. • Use only a small range of motion. •... -
Page 87: Muscle Chart
Sternocleidomastoid Pectoralis Major Anterior Deltoid Medial Deltoid Biceps Brachialis External Obliques Brachioradialis Pronator Teres Flexor Carpi Radialis Tensor Fasciae Latae Iliopsoas Pectineus Rectus Femoris Vastus Lateralis Vastus Medialis Peroneus Longus Extensor Digitorum Longus Tibialis Anterior Muscle Chart Trapezius Serratus Anterior Rectus Abdominus Flexor Digitorum Superficialis... -
Page 88: Bowflex® Elite™ Home Gym Warranty
What Does This Warranty Cover? Nautilus warrants to the original purchaser of the Bowflex® Elite home gym that the Bowflex® Elite ™ free from defects in materials and workmanship, when used for the purpose intended, under normal conditions. This warranty is extended only to the original purchaser and is not transferable or applicable to any other person. -
Page 89: Bowflex® Elite™ Home Gym Warranty Card
© 2004, Nautilus Inc. All Rights Reserved. 1400 N.E. 136th Ave., Vancouver, WA 98684. Bowflex, Bowflex Elite, Power Rod and the Bowflex and Nautilus logos are either registered trademarks or trademarks of Nautilus Inc. - Page 90 What Is Covered Nautilus warrants to the original purchaser of the Bowflex ® Elite™ home gym that the Bowflex ® Elite™ home gym is free from defects in materials or workmanship, with the exceptions stated below. This warranty is not transferable or...
- Page 92 1-800-605-3369 for assistance. ©2004 Nautilus Inc. All rights reserved. 1400 N.E. 136th Ave., Vancouver, WA 98684. Bowflex, Bowflex Elite, Power Rod and the Bowflex and Nautilus logos are either registered trademarks or trademarks of Nautilus, Inc.