
Related Manuals for Zanussi ZWF 1231 W, ZWF 1431 W, ZWF 1431 S, ZWF 1631 W


Summary of Contents for Zanussi ZWF 1231 W, ZWF 1431 W, ZWF 1431 S, ZWF 1631 W
-
Page 1: Washing Machine
WASHING MACHINE ZWF 1231 W - ZWF 1431 W ZWF 1431 S - ZWF 1631 W Quick Installation Guide: visit our WEB SITE to view an install video www.video.uk.electrolux.com INSTRUCTION BOOKLET 132 983 870... -
Page 2: Important Safety Information
Important Safety Information It is most important that this instruction book should be retained with the appliance for future reference. Should the appliance be sold or transferred to another owner, or should you move house and leave the appliance, always ensure that the book is supplied with the appliance in order that the new owner can get to know the functioning of the appliance and the relevant warnings. -
Page 3: Table Of Contents
Contents For the User Important Safety Information Your New Washing Machine Description of the Appliance Detergent dispenser drawer Child safety feature The Control Panel Turning the acoustic signal off Operating Sequence Load the laundry Measure out the detergent Measure out the fabric softener Switch the machine on Select the required programme/fabric Select the temperature... -
Page 4: Your New Washing Machine
Your New Washing Machine Your new washing machine, which is fitted with the New Jet System, meets all modern requirements for effective treatment of laundry with low water, energy and detergent consumption. Even small loads are washed “economically” because the amount of water used is regulated automatically according to the load and type of fabric. -
Page 5: Description Of The Appliance
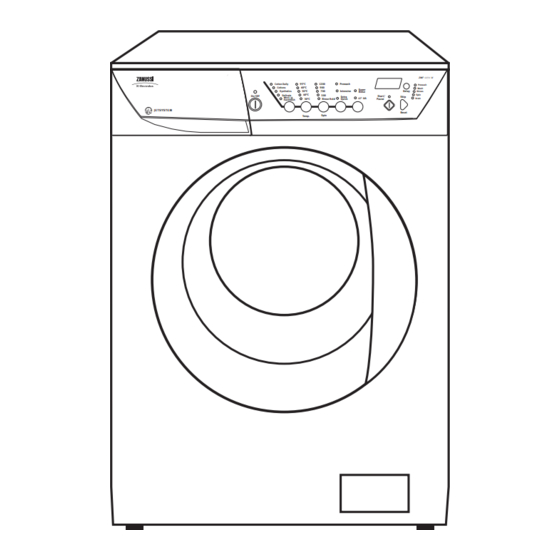
Description of the Appliance 1 Detergent dispenser drawer 2 Control panel 3 Door opening handle 4 Drain pump 5 Adjustable feet Detergent dispenser drawer Prewash Main wash Fabric softener Child safety feature This machine incorporates a special child safety feature to prevent small children from being trapped inside the machine. -
Page 6: The Control Panel
The Control Panel ZWF 1231 W 1 “On/Off” button Press this button to switch the washing machine on. The display (8) will show three flashing dashes or a flashing zero. You will find more detailed explanations on pages 7 & 8 (see “Display”). Press the On/Off button again to switch the machine off. -
Page 7: Options Button
• “Rinse Hold” position: when you choose this option, the machine will not drain the water of the last rinse, so as not to crease the laundry. At the end of the cycle, the door is locked, the light of the “Start/Pause”... - Page 8 • Duration of washing programme in hours and minutes, after you have selected a programme. While the programme is running (after you have pressed the “Start/Pause” button), the displayed time value decreases by one unit every minute. • The washing machine has stopped with water in the tub, at the end of a programme with the “Rinse Hold”...
-
Page 9: Skip/Reset" Button
9 “Start/Pause” button This button has two functions: • Start: after you have selected the desired programme and options, press this button to start the washing machine. The light above the button will stop flashing and remain lit. If you have selected a delay time by means of the “Delay”... - Page 10 To select Drain only, press the “Skip” button three times, the wash - rinses - spin LED,s go out. The drain LED only remains alight. 11 “Delay” button This button makes it possible to delay the starting of the programme selected from 30 min - 60 min - 90 min, 2 hours and then by 1 hour up to a maximum of 23 hours.
-
Page 11: Operating Sequence
Operating Sequence Before the first wash, we recommend that you run a cotton cycle at 95°C, without any laundry in the machine, to remove any manufacturing residue from the drum and tub. Pour 1/2 a measure of detergent into the main wash compartment of the dispenser drawer and start the machine. -
Page 12: Select The Spin Speed Or The Rinse Hold Option
The relevant light will light up. 7. Select the spin speed or the Rinse Hold option Press the “Spin” button repeatedly, in order to select the desired spin speed or the Rinse Hold option. The relevant light will light up. If you select the Rinse Hold option, the machine will stop at the end of the programme with the water still in the tub. -
Page 13: Start The Programme
12. How to change an option or a programme during its cycle Before you make any change, you must pause the machine by pressing the “Start/Pause” button. It is possible to change the temperature or any option before the programme carries it out. Changing a running programme is possible only by cancelling it and selecting a new programme. -
Page 14: Washing Hints
Washing Hints Do NOT overload the machine. Weigh the laundry the first few times you use the appliance. The average weights of the most common items are listed below as a guide: 1000g = 1 kg Sheet Pillow case Tablecloth Serviette Tea towel Linen hand towel... -
Page 15: Which Detergent
Which detergent?... To ensure you obtain the best wash results from your appliance, it is important to use the right detergent in your everyday wash, and only detergents recommended for use in automatic machines. To maintain the appearance of your clothes and household textiles and to make them last longer you should use different types of detergent for different washes, whether for whites, colours or delicates. -
Page 16: Wash Care Symbols
Wash Care Symbols Wash care labels inside garments recommend how to launder your clothes with the best results. The care labelling code is in line with care labelling used in the rest of Europe. The symbols used make it easy to select the correct programme on your washing machine. -
Page 17: Washing Programmes
Washing programmes ZWF 1231 W - ZWF 1431 W - ZWF 1431 S - ZWF 1631 W Type of laundry Programme/ Load and symbols on temperature labels 5 kg Cotton daily White cotton: 60° - 95°C e.g. sheets, tablecloths, household linen Cottons 5 kg 60°... -
Page 18: Maintenance And Cleaning
Maintenance and Cleaning Before any maintenance or cleaning is carried out you must DISCONNECT the appliance from the electricity supply. Descaling The water we use normally contains lime. It is a good idea to periodically use a water softening powder in the machine. -
Page 19: Cleaning The Water Inlet Filter
• When no more water comes out, unscrew the pump cover and remove it. Always keep a rag nearby to dry up spillage of water when removing the cover. Remove any objects from the pump impeller by • rotating it. •... -
Page 20: Something Not Working
Something Not Working Certain problems are due to lack of simple maintenance or oversights, which can be solved easily without calling out an engineer. Before contacting your local Service Force Centre, please carry out the checks listed below. IMPORTANT: if you call out an engineer to a fault listed below, or to repair a fault caused by incorrect use or installation, a charge will be made even if the appliance is under guarantee. -
Page 21: Service And Spare Parts
Service Force, please visit the website at www.serviceforce.co.uk. For Customer Service in Ireland please contact us at the address below: Zanussi Electrolux - Electrolux Group (Irl) Ltd Long Mile Road Dublin 12 Republic of Ireland Tel: +353 (0)1 4090751 Email: service.eid@electrolux.ie... -
Page 22: Guarantee Conditions
Guarantee Conditions Standard guarantee conditions We, Zanussi Electrolux, undertake that if, within 12 months of the date of the purchase, this ZANUSSI ELECTROLUX appliance or any part thereof is proved to be defective by reason only of faulty workmanship or... -
Page 23: Installation Instructions
Installation Instructions It is dangerous to alter the specifications or attempt to modify this product in any way. Care must be taken to ensure that the appliance does not stand on the electrical supply cable. Technical Specifications DIMENSIONS POWER SUPPLY VOLTAGE TOTAL POWER ABSORBED WATER PRESSURE MAXIMUM RECOMMENDED LOAD... -
Page 24: Unpacking
Unpacking The transport safeguard must be removed before putting the appliance into operation. Important ! You are advised to keep all the packaging for re-use in case the machine is to be transported again. ● After removing all the packaging, with assistance carefully lay machine on it’s back to remove the polystyrene base from the bottom. -
Page 25: Water Inlet
Water inlet An inlet hose is supplied and can been found inside the machine drum. Do not use the hose from your previous machine to connect to the water supply. 1. Open the porthole and extract the inlet hose . 2. -
Page 26: Water Drainage
If your drain hose looks like this (see below) you do not require the “U” piece”. Just push the hose firmly into the standpipe. 2. Onto a sink outlet spigot. If the outlet spigot has not been used before, remove any blanking plug that may be in place. -
Page 27: Electrical Connection
If you require any further advice please contact your local water authority. Electrical connection Any electrical work required to install this appliance should be carried out by a qualified electrician or competent person. WARNING: THIS APPLIANCE MUST BE EARTHED. The manufacturer declines any liability should this safety measure not be observed. - Page 28 From the Electrolux Group. The world’s No. 1 choice The Electrolux Group is the world's largest producer of powered appliances for kitchen, cleaning and outdoor use. More than 55 million Electrolux Group products (such as refrigerators, cookers, washing machines, vacuum cleaners, chain saws and lawn mowers) are sold each year to a value of approx.