Table of Contents
Advertisement
Advertisement
Table of Contents

Related Manuals for Yamaha DG60FX-112


Summary of Contents for Yamaha DG60FX-112
- Page 1 Owner’s Manual...
- Page 2 Compli- ance with FCC regulations does not guarantee that * This applies only to products distributed by YAMAHA CORPORATION OF AMERICA. CANADA This Class B digital apparatus complies with Canadian ICES-003.
-
Page 3: Important Safety Instructions
Please make sure that benches are stable and any optional fixtures (where appli- cable) are well secured BEFORE using. Benches supplied by Yamaha are designed for seating only. No other uses are recom- mended. -
Page 4: Table Of Contents
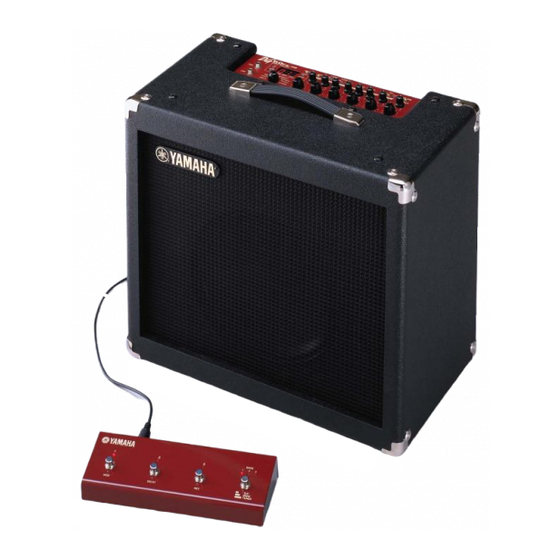
Thank you for purchasing the YAMAHA DG60FX-112 Guitar Amplifier. To fully understand the functions and to obtain maxi- mum life of this device, please read this Owner’s Manual carefully before using. Also, after reading this manual, please keep it and the warranty in a safe place for future reference. -
Page 5: Precautions
• Do not apply excessive force to the switches, knobs and controls. • The DG60FX-112 is a precision device. Handle it with care and avoid dropping or jarring it. • Operating temperatures will rise during use. Make sure the DG60FX-112 is used in a well-venti- lated are. -
Page 6: Nomenclature
Control Panel o !0 q Input Jacks (INPUT HIGH, LOW) These are the input jacks for the DG60FX-112. Con- nect the guitar here. Use the jack labeled LOW for high output guitars and the jack labeled HIGH for low output guitars. - Page 7 !2 Manual Button (MANUAL) Independent of the selected patch’s settings, this button changes the sound to the settings of the knob’s current position. The lamp will flash if the patch setting is changed. Press the [MANUAL] and [UTILITY] buttons simul- taneously to enter the External Control Setting Mode.
-
Page 8: Rear Panel
MIDI foot controller, that can be used to control the volume, or each of the effects and select patches in the DG60FX-112. ( Also, DG60FX-112 memory data saved to an exter- nal MIDI device can be returned to the DG60FX- 112 via this jack. (... -
Page 9: Foot Switch Unit
22) #6 EXP Pedal Jack (EXP. PEDAL) Connect a foot controller (expression pedal) (op- tional) such as the YAMAHA FC-7, etc. to this jack, and control DG60FX-112 parameters or use the de- vice as a wah pedal. ( pages 21, 25) -
Page 10: Connections
Connections Before making any connections to any of the DG60FX-112’s INPUT and/or OUTPUT jacks, make sure that the power on the DG60FX-112 and all other devices is turned OFF to pre- vent electrical shock or damage to the devices. Connecting the Foot Switch Unit Use the supplied special cable to connect the Foot Switch Unit to the main unit of the DG60FX-112. -
Page 11: Connecting Headphones
A foot controller (expression pedal), such as the YAMAHA FC-7, connected to the EXP. PEDAL jack on the Foot Switch Unit of the DG60FX-112 allows control of the DG60FX-112’s individual parameters or use as a wah pedal. (See pages 21, 25) -
Page 12: Using The Dg60Fx-112
Using the DG60FX-112 First, connect a guitar to the DG60FX-112 and try some sounds. Produce Sound 1. Before connecting, turn off the power on the DG60FX-112 and connect a guitar to either the LOW or HIGH INPUT jack. High output guitars should be connected to the jack labeled LOW while low output guitars should be connected to the jack labeled HIGH. -
Page 13: Try Changing The Settings
Try switching the each of the effect blocks ON/OFF or try changing the effect. Also, try using the knobs for each of the effects to change the character of the effect. The DG60FX-112’s effects section is divided into the following 4 blocks, • Compressor (COMP) • Modulation (CHORUS/FLANGER/PHASER/ ROTARY/TREMOLO) •... - Page 14 ON (the lamp will light). Press the button again to turn the Speaker Simulator OFF (light is off). Also, the DG60FX-112 is equipped with 16 types of speaker simulations. Try to find a simulation you like. 1. Simultaneously press the [SP. SIM] button and the [UTILITY] button.
-
Page 15: Try Selecting Another Patch
), it indicates that a patch in the USER AREA is selected. * When the DG60FX-112 is shipped from the factory, the same patch data as found in the PRESET AREA is used in the USER AREA. Refer to the [Patch List] on the separate “Patch List”... - Page 16 ” in the Utility 1. Use a MIDI cable to connect the MIDI IN jack on the DG60FX-112 to the MIDI OUT jack on an external MIDI device. * Make sure to use a MIDI cable that conforms to the MIDI standard.
-
Page 17: Create And Store A Patch
Using the DG60FX-112 Convenient Functions Here are some convenient functions that you can use with the DG60FX-112. Use Foot Switches 1-3 to Switch Ef- fects ON/OFF You can set Foot Switch 1 to act as an ON/OFF... - Page 18 Controlling the DG60FX-112 from an External MIDI Device Using a MIDI cable to connect the MIDI IN jack on the DG60FX-112 to the MIDI OUT jack on an exter- nal MIDI device lets you control DG60FX-112’s vol- ume, tone and effect parameters (setting values) and use the device as a Wah pedal.
-
Page 19: Effect Functions And Parameters
Effect Functions and Parameters Compressor Comp (Compressor) Controlling the input signal (peak) this effect keeps the maximum level constrained to the level set with the knob. • COMP knob Rotate the knob to the right to increase the depth of the compression. When set to “0.0”... - Page 20 Effect Functions and Parameters • SPEED knob + [TREMOLO] Sets the phase difference between the left and right sounds. From 0 degrees to 360 degrees (0.0-10.0). Set to “5” the knob works like a ste- reo pan pot. • DEPTH knob + [TREMOLO] Sets the wave shape of the tremolo.
-
Page 21: External Control Settings
External Control Settings Connecting an optional foot controller (expression pedal) such as the YAMAHA FC-7 to the EXP. PEDAL jack on the Foot Switch Unit lets you control the volume and tone of the DG60FX- 112 and effect parameters (value settings). It is also possible to control these parameters with MIDI control changes. -
Page 22: Tuner Mode
Tuner Mode This mode is used for tuning your guitar. In the Tuner Mode, the DG60FX-112 works as a chromatic tuner. How to Enter the Tuner Mode To enter the Tuner Mode, use any one of the meth- ods described below. -
Page 23: Utility Mode
Utility Mode The Utility Mode is used for settings that cover the overall system of the DG60FX-112 such as the foot switch, MIDI, external control, EXP. PEDAL jack, etc. About the Utility Mode Press the [UTILITY] button to enter the Utility Mode (the lamp lights). -
Page 24: Midi Functions
When a footswitch (1-3) is pressed to recall a patch a MIDI Program Change Number can be transmit- ted from the DG60FX-112’s MIDI OUT jack to a con- trol an external effector, etc. from the DG60FX-112. Assigns to the patch, a MIDI PRG No. that will be transmitted when the patch is recalled. -
Page 25: External Control Settings
When Bulk Out data is sent from the external de- vice, the DG60FX-112 will receive the bulk data. * Use the DG60FX-112’s Play Mode to receive MIDI Bulk In data. When the MIDI Bulk In is carried out, the con- tents of the patches in the USER AREA will be rewritten. -
Page 26: Exp Pedal Settings
Maximun Value. * If the value is set to “ be ineffective. * The YAMAHA FC-7 foot controller is equipped with a “fortissimo” function that allows the foot pedal to be de- pressed beyond its average position. When your foot releases the fully depressed pedal, the pedal will naturally return to its average position. -
Page 27: Wah Pedal Settings
Wah Pedal Settings These settings are available when the Wah Pedal function (“ ”) is selected as the controller in the External Control settings. Press the [UTILITY] button then set the amp select switch to CRUNCH1 (“ ” will appear on the dis- play). -
Page 28: Error Messages
Backup battery power is depleted. SOLUTION: Continued use of the device will result in the loss of data. Return the device to the music dealer where you purchased it or, the nearest Yamaha Service center and have the battery replaced. -
Page 29: Specifications
Specifications Digital Section • Full Digital Signal Processing • 8 Channel Preamp • Digital Effects • Compressor • Chorus, Flanger, Phaser, Rotary Speaker, Tremolo • Digital Delay, Tape Echo • Spring Reverb, Hall Reverb, Plate Reverb • Tap Tempo Function (Delay Time) •... -
Page 30: Midi Implementation Chart
MIDI Implementation Chart... - Page 31 MIDI Implementation Chart...
- Page 32 V611000 Printed in Taiwan...