Yamaha YAS-71CU Owner's Manual
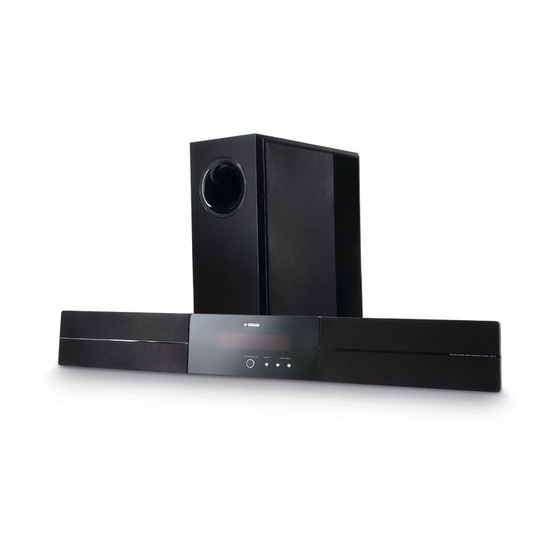
Front surround system: center system + subwoofer/system control
Hide thumbs
Also See for YAS-71CU:
- Owner's manual (47 pages) ,
- Owner's manual (44 pages) ,
- Owner's manual (44 pages)

Related Manuals for Yamaha YAS-71CU


Summary of Contents for Yamaha YAS-71CU
- Page 1 Front Surround System (CENTER SYSTEM + SUBWOOFER/SYSTEM CONTROL) YAS-71 (YAS-71CU + YAS-71SPX) OWNER’S MANUAL...
-
Page 2: Important Safety Instructions
IMPORTANT SAFETY INSTRUCTIONS CAUTION RISK OF ELECTRIC SHOCK DO NOT OPEN CAUTION: TO REDUCE THE RISK OF ELECTRIC SHOCK, DO NOT REMOVE COVER (OR BACK). NO USER-SERVICEABLE PARTS INSIDE. REFER SERVICING TO QUALIFIED SERVICE PERSONNEL. • Explanation of Graphical Symbols The lightning flash with arrowhead symbol, within an equilateral triangle, is intended to alert you to the presence of uninsulated “dangerous voltage”... - Page 3 This product, when installed as indicated in the instructions contained in this manual, meets FCC requirements. Modifications not expressly approved by Yamaha may void your authority, granted by the FCC, to use the product. 2 IMPORTANT: When connecting this product to accessories and/or another product use only high quality shielded cables.
- Page 4 Yamaha and the Electronic Industries Association’s Consumer Electronics Group want you to get the most out of your equipment by playing it at a safe level. One that lets the sound come through loud and clear without annoying blaring or distortion –...
-
Page 5: Table Of Contents
Setting compressed music enhancer ... 21 ■ Introduction YAS-71 consists of a center system (YAS-71CU) and subwoofer/system control (YAS-71SPX). This product provides excellent sound with simple operations, allowing you to enjoy various audio sources. We hope the “YAS-71” brings you great listening pleasure and satisfaction. -
Page 6: Introduction
Supplied parts This product consists of the following items. Before making connections, make sure you received all of the following items. ■ Units Subwoofer/system control Center system (YAS-71CU) (YAS-71SPX) ■ Accessories System control cable Speaker cable (4 m) Speaker cable (4 m) -
Page 7: Controls And Functions
Controls and functions ■ Front panel of the center system 1 Front panel display Shows information about the operational status of the system. (☞ P. 4) 2 Remote control sensor Receives infrared signals from the remote control. (☞ P. 5, 7) 3 Power indicator Lights up when the system is turned on. - Page 8 2 DOCK indicator • Lights up when the system is receiving a signal from an iPod stationed in the Yamaha iPod universal dock (such as YDS-10 or YDS-11, sold separately) connected to the DOCK terminal of the subwoofer/system control.
- Page 9 ■ Remote control Infrared signal transmitter 1 Input buttons Select an input source you want to listen to. (☞ P. 16) 2 STEREO • Turns extended stereo mode on and off alternately. (☞ P. 21) • Turns off surround mode. (☞ P. 18) 3 Cursors ( )/ENTER Position: Change the setting.
- Page 10 GETTING STARTED B POSITION Shifts the optimum listening area according to your listening position. (☞ P. 19) C TEST Outputs the test tone. (☞ P. 20) D ENHANCER Turns on and off compressed music enhancer mode alternately. (☞ P. 21) E NIGHT Turns night listening mode on or off.
-
Page 11: Installing The Batteries
■ Using the remote control Use the remote control within 6 m (20’) of the center system and point it toward the remote control sensor. Notes • Be careful not to spill liquid on the remote control. • Be careful not to drop the remote control. •... -
Page 12: Preparation
Main roles: Produces front channel (stereo) sounds. Also produces virtual center channel sounds (dialogue, etc.) and virtual surround channel sounds effectively using the Yamaha front surround system. Subwoofer/system control (YAS-71SPX) Place the subwoofer near the center system and turn it slightly toward the center of the room to reduce wall reflections. - Page 13 ■ Attaching the center system to a wall Installing the center system using the keyholes You can attach the center system to a wall using commercially available screws (#8, Diameter: 7.5 mm or more (5/16” or more)). When installing the center system on a wall, all installation work must be performed by a qualified contractor or dealer.
- Page 14 • When connecting the center system, fix the speaker cables in place where they will not become loose. If your foot or hand accidentally gets caught on a loose speaker cable, the center system may fall. • After attaching the center system, check that the center system is fixed securely. Yamaha will bear no responsibility for any accidents caused by improper installations.
-
Page 15: Connection
• Do not connect the power cable until all connections are completed. • Do not use excessive force when inserting the cable plug. Doing so may damage the cable plug and/or terminal. Connecting the center system and the subwoofer/system control Follow the procedure below to connect the center system and the subwoofer/system control. -
Page 16: Connecting External Components
CONNECTION Connecting external components The subwoofer/system control has 3 digital input jacks (optical digital × 2, coaxial digital × 1) and 1 analog input jack. Before connecting your external components, check the output jacks of the components and be sure to use correct connection cables. -
Page 17: Analog Connection
[INPUT 3] COAXIAL jack CD player ■ Analog connection [INPUT 4] ANALOG jacks Example1: TV Example 2: VCR or video camera VCR or video camera, etc., with no digital output. VCR, etc. Video camera Coaxial digital cable CONNECTION... -
Page 18: Connecting The Yamaha Ipod Universal Dock
Connecting the Yamaha iPod universal dock The system is equipped with the DOCK terminal, which allows you to connect the Yamaha iPod universal dock (such as YDS-10 or YDS-11, sold separately) where you can dock your iPod. Connect the Yamaha iPod universal dock to the DOCK terminal of the subwoofer/system control using its dedicated cable. -
Page 19: Connecting The Power Cable
CONNECTION Connecting the power cable After you have made all connections, connect the power cable of the subwoofer/system control. To AC wall outlet You can attach the cover after you have made all connections or detach according to your preference. Attach the cover to the rear panel of the subwoofer/system control using the 6 supplied screws as shown. -
Page 20: Basic Operation
BASIC OPERATION BASIC PLAYBACK OPERATION Once you have finished all cable connections (☞ P. 11 to 15) and remote control preparation (☞ P. 7), follow the procedure below to start basic playback operation. Press STANDBY/ON. This system is turned on and the power indicator lights up. -
Page 21: Air Surround Xtreme
AIR SURROUND XTREME What is AIR SURROUND XTREME ? Ordinarily, two front speakers, a center speaker, two surround speakers, and a subwoofer are necessary for enjoying 5.1 channel surround sound. ■ Virtual 7.1 channel The AIR SURROUND XTREME technology, using only the front left and right speakers of the center system and subwoofer, enables you to enjoy a realistic 7.1 channel sound by simulating sound from virtual speakers at center, surround, and surround backs. -
Page 22: Listening To Surround Mode Of Air Surround Xtreme
AIR SURROUND XTREME Listening to surround mode of AIR SURROUND XTREME Surround mode buttons Press one of the surround mode buttons. The names of the selected input source and the selected surround mode appear in the front panel display. Surround mode descriptions Movie This mode is useful when you enjoy movie contents on media such as DVD, etc. -
Page 23: Shifting The Optimum Listening Area From Side To Side
Shifting the optimum listening area from side to side This function shifts the optimum listening area from side to side according to your listening position for the best Virtual Surround effect. The optimum listening area AIR SURROUND XTREME Press POSITION to enter position mode. The current position appears in the front panel display. -
Page 24: Selecting The Optimum Listening Area
AIR SURROUND XTREME Selecting the optimum listening area You can select the optimum listening area from two modes. NORMAL Checking the virtual surround effect You can check the Virtual Surround effect using test tones produced from the speakers. TEST Press AREA. Each time you press AREA, NORMAL and WIDE modes change alternately. -
Page 25: Using Extended Stereo Mode
Using extended stereo mode An extended sound is achieved for a 2 channel source such as a CD player. Setting compressed music enhancer This function enhances your listening experience by regenerating the missing harmonics in a compression artifact. This is useful when you play back compressed music data stored on an iPod or a digital music player. Press STEREO to enter extended stereo mode. -
Page 26: Other Functions
OTHER FUNCTIONS LISTENING TO FM BROADCASTS Overview You can use two tuning modes to tune into the desired FM station: Frequency tuning mode You can search or specify the frequency of the desired FM station automatically or manually. (See “Basic tuning operation”... -
Page 27: Basic Tuning Operation
Basic tuning operation Press FM to set the input to FM. “FM” appears in the front panel display. Press AUTO/MAN’L to switch Auto/Manual. The AUTO indicator lights up when the system is set to automatic tuning mode. Lights up No colon (:) If a colon (:) appears, the system is set to preset tuning mode. -
Page 28: Using Station Preset Feature
LISTENING TO FM BROADCASTS Using station preset feature ■ Automatic station preset You can store up to 40 FM stations (A1 to E8: 8 preset numbers in each of the 5 preset groups). Press A E or A E to select a preset group, and then press +/– repeatedly to select a preset number to which the first station will be stored after you perform step 2. - Page 29 ■ Manual station preset Use this feature to preset your desired station manually. Tune into a station. See “Basic tuning operation” on page 23 for tuning instructions. Press MEMORY. The MEMORY indicator flashes in the front panel display for approximately 30 seconds. Press MEMORY again to cancel while the MEMORY indicator is flashing.
- Page 30 LISTENING TO FM BROADCASTS ■ Recalling the preset stations Press PRESET/TUNE to select preset tuning mode. Press A E or A E repeatedly to select the desired preset group (A to E). Press +/– repeatedly to select the desired preset number (1 to 8).
-
Page 31: Using Optional Equipment
Battery charge feature This system charges the battery of an iPod stationed in the Yamaha iPod universal dock connected to the DOCK terminal of the subwoofer/system control while this system is turned on. Stationing your iPod in the Yamaha iPod universal dock Once you station your iPod in the Yamaha iPod universal dock, “iPod connected”... - Page 32 ■ Controlling your iPod in simple remote mode Docking your iPod in the Yamaha iPod universal dock (such as YDS-10 or YDS-11, sold separately) enters simple remote mode. You can perform the basic operations of your iPod (play, stop, skip backward/forward, etc.) using the supplied remote control in this mode.
-
Page 33: Using Bluetooth™ Components
Using Bluetooth™ components You can connect the Yamaha Bluetooth audio receiver (such as YBA-10, sold separately) to the DOCK terminal of the subwoofer/system control and enjoy the music contents stored in your Bluetooth component (such as a portable music player or computer equipped with a Bluetooth transmitter, etc.) without wiring between the system and the Bluetooth component. - Page 34 Note The Yamaha Bluetooth audio receiver can be paired with up to eight Bluetooth components. When pairing is conducted successfully with a ninth component and the pairing data is registered, the pairing data for the least recently used another component is deleted.
-
Page 35: Useful Operation
USEFUL OPERATION ADJUSTING THE AUDIO DELAY FPD TV images sometimes lag behind the sound. You can use this function to delay the sound output to synchronize it with the video image. Press AUDIO DELAY to enter adjusting mode. Press to adjust the delay time. Options: 0 to 240 ms You can adjust the delay time by the 10 ms. -
Page 36: Listening At Low Volume (Night Listening Mode)
LISTENING AT LOW VOLUME (NIGHT LISTENING MODE) Night listening mode enables you to listen to dialog or vocals more clearly at lower volume by suppressing louder sound effects. This function is useful when you enjoy movies or music at night. ADJUSTING THE VOLUME BALANCE DURING PLAYBACK You can adjust the volume balance of the virtual speakers and subwoofer. -
Page 37: Changing The Brightness Of The Front Panel Display
CHANGING THE BRIGHTNESS OF THE FRONT PANEL DISPLAY You can change the brightness of the front panel display. You can also turn off the front panel display to view a movie in a darker environment. Press DISP. MODE repeatedly. Each time you press DISP. MODE, the brightness of the front panel changes. -
Page 38: Additional Information
If there is any problem with the system, check the following items. If you cannot solve a problem with the following remedies, or if the problem is not listed below, turn off and unplug the system, and then consult your nearest authorized Yamaha dealer or Service Center. Problem... - Page 39 Use the manual tuning method. Cause Only iPod (Click and Wheel), iPod nano, and iPod mini are supported. Station your iPod back in the Yamaha iPod universal dock (YDS-10 or YDS-11, sold separately) connected to the DOCK terminal of this system. ADDITIONAL INFORMATION...
- Page 40 The pairing is performed when the Yamaha Bluetooth audio receiver (such as YBA-10, sold separately) is connected to the Bluetooth component. Cause Perform the pairing when the Yamaha Bluetooth audio receiver (such as YBA-10, sold separately) is not connected to the Bluetooth component. Remedy page...
-
Page 41: Glossary
Glossary ■ AIR SURROUND XTREME New surround technology developed by Yamaha enables surround sound with fewer speakers. In comparison to traditional front surround technology, the AIR SURROUND XTREME provides a natural surround sound field. ■ Channel (ch) A channel is an audio type that has been divided based on range and other characteristics. -
Page 42: Specifications
ADDITIONAL INFORMATION Specifications YAS-71CU • Type...2 way acoustic suspension magnetic shielding type • Driver Woofer... 8 cm (3”) cone magnetic shielding type × 4 (L2, R2) Tweeter...2.5 cm (1”) balanced dome magnetic shielding type • Frequency Response... 120 Hz to 20 kHz (-10 dB) •... - Page 44 Printed in China WP54420-1...