Table of Contents
Advertisement
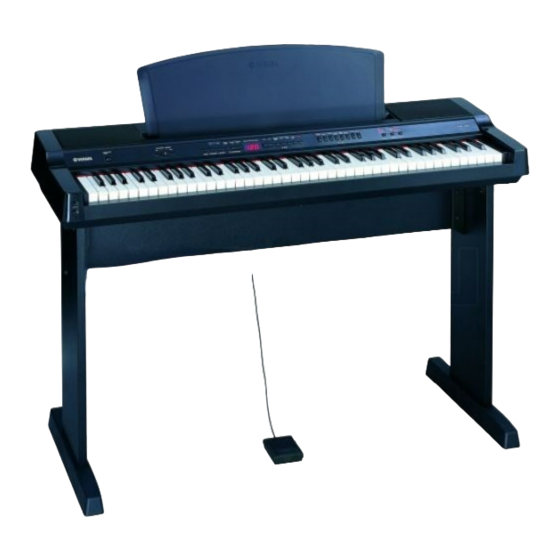
Quick Links
Advertisement
Table of Contents

Related Manuals for Yamaha YPP-100 Light Piano


Summary of Contents for Yamaha YPP-100 Light Piano
-
Page 2: Special Message Section
For longer extension cords, consult a local electrician. This product should be used only with the components supplied or; a cart, rack, or stand that is recommended by Yamaha. If a cart, etc., is used, please observe all safety markings and instructions that accom- pany the accessory product. - Page 3 Compliance with FCC This applies only to products distributed by YAMAHA CORPORATION OF AMERICA. OBSERVERA! Apparaten kopplas inte ur växelströmskällan (nätet) sá länge som den ar ansluten till vägguttaget, även om själva apparaten har...
- Page 4 • Use the specified adaptor (PA-5D, PA-5C or an equivalent recommended by Yamaha) only. Using the wrong adaptor can result in damage to the instrument or overheating. • Check the electric plug periodically and remove any dirt or dust which may have accumulated on it.
- Page 5 COPYRIGHT NOTICE This product incorporates and bundles computer programs and contents in which Yamaha owns copyrights or with respect to which it has license to use others' copyrights. Such copyrighted materials include, without limitation, all computer software, styles files, MIDI files, WAVE data and sound recordings.
-
Page 6: Included Accessories
Thank you for choosing a Yamaha Light Piano YPP-100. Your YPP-100 is a fine musical instrument that employs advanced Yamaha music technology. With the proper care, your YPP-100 will give you many years of musical pleasure. The YPP-100 utilizes Yamaha’s “AWM Stereo Sampling” tone generating Light Piano technology to produce musically rich voices of unmatched sonic realism. -
Page 7: Table Of Contents
Options ... 37 Voice Descriptions ... 38 Demo and Preset Song List ... 39 Factory Setting List ... 40 MIDI Data Format ... 41 MIDI Implementation Chart ... 45 Keyboard Stand Assembly ... 46 Specifications ... 49 ... 34 YPP-100... -
Page 8: The Control Panel
LED will light. 2 [MASTER VOLUME] Control The [MASTER VOLUME] control adjusts the volume (level) of sound produced by the YPP-100’s internal stereo sound system. The [MASTER VOLUME] control also adjusts headphone volume when a pair of headphones is plugged into the PHONES jack (page 11). - Page 9 [–/NO] and [+/YES] buttons to select from 20 songs. 0 TRACK [1] and [2] Buttons The YPP-100 has a 2-track recorder, and these buttons are used to select the track(s) to be recorded or played back. See page 23 for details.
-
Page 10: Setting Up
Power supply connections PA-5D CAUTION • Before connecting the YPP-100 to other electronic components, turn off the power for all compo- nents. Before turning the power on or off for all components, set all-volume levels to minimum. Stereo System YPP-100... -
Page 11: Music Rest
PHONES jacks. Music Rest The YPP-100 is supplied with a music rest that can be attached to the instrument by inserting it into the slot at the rear of the control panel. -
Page 12: Selecting & Playing Voices
• Even when the switch is in the "STANDBY" position, electricity is still flowing to the instrument at the minimum level. When you are not using the YPP-100 for a long time, make sure you unplug the AC power adaptor from the wall AC outlet. -
Page 13: Playing The Demonstration Tunes
Playing the Demonstration Tunes Demonstration tunes are provided that effectively demonstrate each of the YPP-100’s voices. There are also 20 preset songs that you can play individually, all in sequence, or in random order. Here’s how you can select and play the demo tunes. -
Page 14: Preset Song
Playing the Demonstration Tunes YPP-100 Preset Song Engage the Preset Song Mode Press the [PRESET SONG] button to engage the preset song mode — the [PRESET SONG], TRACK [1] and [2] indicators will light. Play a Preset Song To play any of the 20 preset songs provided, use the [–/NO], [+/YES] buttons to select the number of the tune you want to play (the number will appear on the LED display), then press the SONG [START/STOP] button. -
Page 15: Preset Song A-B Repeat
To cancel the A and B points press the [FUNCTION] button once. • The A and B points are automatically canceled when a new song is selected. • The A-B Repeat function cannot be used during “ ALL ” or “ rnd ” play- back. YPP-100... -
Page 16: Preset Song Part Cancel
Playing the Demonstration Tunes Preset Song Part Cancel YPP-100 The 20 preset songs have separate left- and right-hand parts that can be turned on and off as required so you can practice the corresponding part on the keyboard. The right-hand part is played by TRACK [1] track, and the left-hand part is played by TRACK [2] track. -
Page 17: The Dual Mode
[+/YES] buttons while holding the [REVERB] button — see page 18) will be applied to the 1st Voice only. Other Dual Mode Functions The YPP-100 Function mode provides access to a number of other dual-mode functions, listed below. See the corresponding pages for details. -
Page 18: Reverb
The [REVERB] button selects a number of digital reverb effects that you can use for extra depth and expressive power. YPP-100 To select a reverb type press the [REVERB] button a few times until the indicator corresponding to the desired type lights (the indicators light in sequence each time the [REVERB] button is pressed). -
Page 19: The Effect
“0” produces no effect, while a setting of “20” produces maximum effect depth. Press the [–/NO] and [+/YES] buttons simulta- neously while holding the [EFFECT] button to recall the default setting for the current voice (the default depth settings are different for each voice). YPP-100... -
Page 20: Touch Sensitivity
Four different types of keyboard touch sensitivity — HARD, MEDIUM, SOFT or FIXED — can be selected to match different playing styles and preferences. YPP-100 To select a touch sensitivity type press the [TOUCH] button a few times until the indicator corresponding to the desired type lights (the indicators light in sequence each time the [TOUCH] button is pressed). -
Page 21: Transposition
12 semitones (i.e. a maximum of one octave up or down). “Transposing” the pitch of the YPP-100 keyboard facilitates playing in difficult key signatures, and you can easily match the pitch of the keyboard to the range of a singer or other instrumentalist. -
Page 22: The Metronome & Tempo Control
The Metronome & Tempo Control The YPP-100 built-in metronome is a convenient feature for practice, and it can also provide a solid rhythmic guide when recording using the User Song Recorder feature, described in the next section. Beat indicator YPP-100... -
Page 23: Using The User Song Recorder
Using the User Song Recorder The ability to record and play back what you’ve played on the YPP-100 key- board can be an effective practice aid. You can, for example, record just the left- hand part, and then practice the right-hand part while playing back the recorded left-hand part. -
Page 24: Changing The Initial Settings
• You can record up to a maximum of about 10,000 notes on the YPP-100, depending on pedal usage and other factors. The record track indicator will begin to flash when recorder memory is almost full. -
Page 25: Playback
It is also possible to store it to an external MIDI storage device such as the Yamaha MIDI Data Filer MDF3 by using the Bulk Data Dump function described on page 32. -
Page 26: The Function Mode
The Function Mode The [FUNCTION] button provides access to a range of functions that give the YPP-100 extraordinary versatility. The functions are categorized in groups as follows: Tuning ... 27 Scale ... 27 Dual Mode Functions ... 28 Soft Pedal Mode... 29 Metronome Volume ... -
Page 27: F1 Tuning
F2.1: Scale In addition to the standard Equal Temperament tuning, the YPP-100 includes 6 classic tunings that you can select and use to play music of the corresponding period, or experiment with in a more modern context. The tunings are:... -
Page 28: F3 Dual Mode Functions
“1” to shift the pitch up one octave. Press the [–/NO] and [+/YES] buttons simul- taneously to recall the default setting (different for each voice combination). YPP-100 [FUNCTION] button while holding the two dual-mode voice selectors. key), and decreases toward the higher key range ( 5 cents at the G6 key). 100 cents = 1 semitone. -
Page 29: F3.5: 1St Voice Effect Depsth
Adjust the part volume to a comfortable level to use the “canceled” part as a guide to play along with. Set to “0” if you don’t want to hear the part. TION] button while holding the METRONOME [START/STOP] button. The Function Mode YPP-100... -
Page 30: F7 Midi Functions
Use the [–/NO] and [+/YES] buttons to select the desired transmit or receive channel. The transmit channel parameter can also be turned “OFF” if you don’t want the YPP-100 to transmit any MIDI data. To select the multi-timbre receive mode, set the receive channel to “ALL”. -
Page 31: F7.3: Local Control On/Off
“On” or “OFF”. Press the [–/NO] and [+/YES] buttons simultaneously to recall the default setting “On”. • For information on program change numbers for each of the YPP-100’s voices, refer to page 42 in the MIDI Data Format section. The Function Mode... -
Page 32: F7.5: Control Change On/Off
“OFF”. Press the [–/NO] and [+/YES] buttons simultaneously to recall the default setting “On”. • For information on control changes that can be used with the YPP-100, refer to the MIDI Data Format on page 41. F7.6: MIDI Transmit Transpose This function allows the MIDI note data transmitted by the YPP-100 to be transposed up or down in semitone increments by up to plus or minus 12 semitones. -
Page 33: F8 Backup Functions
Turns backup of the Soft Pedal Mode on or off. Use the [–/NO] and [+/YES] buttons to turn backup “On” or “OFF”. The default backup mode is “OFF”. • Local ON/OFF • Control Change ON/OFF • Tuning • Scale (including base note) The Function Mode YPP-100... -
Page 34: Using The Midi Functions
This section explains what MIDI is, and what it can do, as well as how you can use MIDI on your YPP-100. No doubt you have heard the terms “acoustic instrument” and "digital instrument." In the world today, these are the two main categories of instruments. - Page 35 MIDI messages can be divided into two groups: Channel messages and System messages. Below is an explanation of the various types of MIDI messages which the YPP-100 can receive/transmit.
-
Page 36: Connecting To A Personal Computer
Connect the MIDI terminals of the YPP-100 to the MIDI terminals of the per- sonal computer. • When connecting the YPP-100 to a personal computer, first turn the power to both the YPP-100 and When using a MIDI interface with a Macintosh series computer, connect the RS-422 terminal of the computer (modem or printer terminal) to the MIDI interface, as shown in the diagram below. -
Page 37: Factory Preset Recall
4. Intermittent Static Noise This is usually due to turning ON or OFF a house- hold appliance or other electronic equipment which is fed by the same AC mains line as your YPP-100. Options FC5, FC4 Footswitch Connects to the DAMPER or SOFT Jacks. -
Page 38: Voice Descriptions
STRINGS Stereo CHOIR Stereo YPP-100 Newly-recorded samples from a full concert grand piano. Perfect for classi- cal compositions as well as any other style that requires acoustic piano. A bright, expansive piano sound which is ideal for rock and popular genres. -
Page 39: Demo And Preset Song List
Brandenburgisches Konzert No.3 CHOIR Kantate Nr.140 • Some of the demonstration pieces listed above are short rearranged excerpts from the original compositions. Original songs are all rights reserved (© 2002 YAMAHA CORPORATION). Preset Song Titles Arabesque 1 Melody in F Prelude op.28-15 “Raindrop”... -
Page 40: Factory Setting List
F7.4 Program Change Send & Receive F7.5 Control Change Send & Receive F7.6 MIDI Transmit Transpose Backup YPP-100 PIANO 1 Preset for each voice Preset for each voice Preset for each voice Preset for each voice MEDIUM 0 (no accent) -
Page 41: Midi Data Format
MIDI Data Format If you’re already very familiar with MIDI, or are using a computer to control your music hardware with computer- generated MIDI messages, the data provided in this section can help you to control the YPP-100. 1. NOTE ON/OFF Data format: [9nH] ->... - Page 42 • Caution: If an error occurs during MIDI reception, the Damper, Sostenuto, and Soft effects for all channels are turned off and an All Note Off occurs. 6. SYSTEM EXCLUSIVE MESSAGES (Yamaha MIDI Format) Panel Data Transmit Data format: [F0H] -> [43H] -> [0nH] -> [7CH] -> ... ->...
- Page 43 Master Tuning (XG and last message priority) simultaneously changes the pitch of all channels. F0H = Exclusive Status 43H = Yamaha ID 1nH = Transmission from n=YPP-100 is always 0. 0-F is received. 27H = Model ID of TG100 30H = Sub ID 00H =...
- Page 44 ROOM HALL 1 HALL 2 STAGE EFFECT CHORUS PHASER TREMOLO DELAY YPP-100 Parameter Description -50 - +50[cent] 1st bit 3 - 0 2nd bit 3 - 0 3rd bit 3 - 0 4th bit 3 - 0 MASTER VOLUME 0 - 127 —...
-
Page 45: Midi Implementation Chart
YAMAHA [Light Piano] Model: YPP-100 Function... Basic Default Channel Changed Default Mode Messages Altered Note Number True voice Velocity Note ON Note OFF After Key’s Touch Ch’s Pitch Bender Control Change 0, 32 Program Change True # System Exclusive Song Position... -
Page 46: Keyboard Stand Assembly
1 6 x 70 mm round head screws (4 pcs.) 2 Joint connectors (4 pcs.) 3 3.5 x 16 mm tapping screws (12 pcs.) YPP-100 Keyboard Stand Assembly Have a phillips-head (+) screwdriver ready. The parts shown in the “Assembly Parts” illustration will be used. - Page 47 3.5 x 16 mm tapping screws 3. Attach the back board. Attach the back board, using the 6 x 30 mm round head screws 4. CAUTION • Be careful not to drop the back board or touch the sharp metal fittings. YPP-100...
- Page 48 YPP-100 bottom of the keyboard are properly aligned with the holes on the angle brackets. • Be careful not to drop the keyboard or to get your fingers caught between the keyboard and the stand parts. mm round head screws 5.
-
Page 49: Specifications
SUPPLIED ACCESSORIES OPTIONAL ACCESSORIES • Specifications and descriptions in this owner’s manual are for information purposes only. Yamaha Corp. reserves the right to change or modify products or specifications at any time without prior notice. Since specifications, equipment or options may not be the same in every locale, please check with your Yamaha dealer. -
Page 50: Limited Warranty
If during the first 90 days that immediately follows the purchase date, your new Yamaha product covered by this warranty is found to have a defect in material and/or workmanship, Yamaha and/or its authorized representative will repair such defect without charge for parts or labor. - Page 51 For details of products, please contact your nearest Yamaha or the authorized distributor listed below. Pour plus de détails sur les produits, veuillez-vous adresser à Yamaha ou au distributeur le plus proche de vous figurant dans la liste suivante. NORTH AMERICA CANADA Yamaha Canada Music Ltd.
- Page 52 Yamaha PK CLUB (Portable Keyboard Home Page, English only) http://www.yamahaPKclub.com/ Yamaha Manual Library http://www2.yamaha.co.jp/manual/english/ M.D.G., Pro Audio & Digital Musical Instrument Division, Yamaha Corporation © 2002 Yamaha Corporation V880950 ???PO???.?-???? Printed in China...