Table of Contents
Advertisement
Quick Links
Advertisement
Chapters
Table of Contents

Related Manuals for Yamaha PortaTone PSR-7000


Summary of Contents for Yamaha PortaTone PSR-7000
-
Page 2: Special Message Section
SPECIFICATIONS SUBJECT TO CHANGE: The infor- mation contained in this manual is believed to be correct at the time of printing. However, Yamaha reserves the right to change or modify any of the specifications without notice or obligation to update existing units. - Page 3 English Owner’s Manual Deutsch Bedienungsanleitung Français Mode d’emploi...
-
Page 4: Table Of Contents
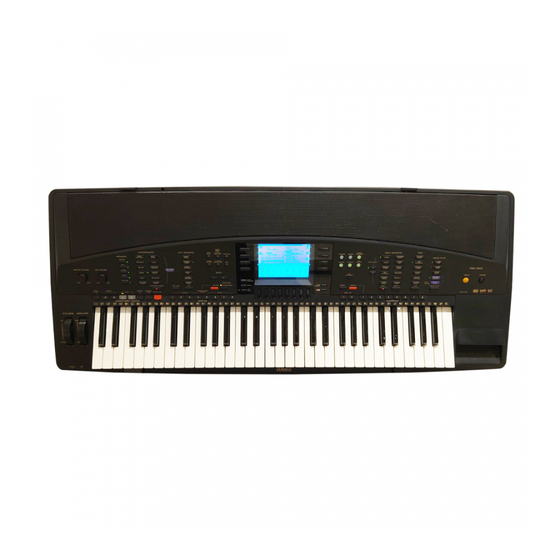
You are the proud owner of an extraordinary electronic keyboard. The Yamaha PSR-7000 PortaTone combines the most advanced AWM tone generation technol- ogy with state-of-the-art digital electronics and features to give you stunning sound quality with maximum musical enjoyment. The advanced Auto Accompaniment and One Touch Setting features, in particular, are brilliant examples of how Yamaha technology can significantly expand your musical horizons. - Page 5 DIRECTORY EDIT ... 104 RENAME ... 104 MAKE ... 104 DELETE ... 105 HD FORMAT ... 105 CHECK ... 105 The PSR-7000 “Functions” General Function Selection & Editing Procedure ... 106 The [EXIT] Button ... 107 F1: Scale (Arabic)/Voice Part SCALE (ARABIC) ...
-
Page 6: Taking Care Of Your Portatone
OFF when backup batteries are installed as described above. If you do not intend to use the PSR-7000 for an extended period of time, it is a good idea to unplug the instrument... -
Page 7: Floppy Disks & The Disk Drive
To ensure the safety of your data (and of the disk drive itself) always use floppy disks from a well-known, reliable manufacturer. “No-brand” disks can cause trouble. YAMAHA is not responsible for damage caused by improper handling or operation. YAMAHA provides no guarantee against disk damage. Write protected Write enabled... -
Page 8: Panel Controls
Panel Controls PITCH BEND DOWN PHONES POWER Button ... page 8 DEMO Button ... page 8 MASTER VOLUME Control ... page 8 MIC VOLUME Control ... page 6 ARRANGER Buttons ... page 34 PHRASE, PAD, CHORD, BASS, RHYTHM ACCOMPANIMENT Buttons ... page 26 ONE TOUCH SETTING Button ... - Page 9 CHORUS Button ... page 39 LEAD ACCORDION/ TRUMPET/ WORLD BRASS ORGAN FLUTE SYNTH/ SAX/ COMBI WOODWIND SOUND STRINGS/ COMBI EFFECT CHOIR 7~12 PSR-7000 GUITAR/ COMBI PERCUSSIVE BASS 13~18 DEMO SYNTH/ ROTARY DRUM KIT PERCUSSIVE SPEAKER SLOW CUSTOM CUSTOM SPEED FAST...
-
Page 10: Connections & Music Stand
Connections & Music Stand Check the Voltage (Before you connect the AC cord) In some areas the PSR-7000 will have a voltage selector on the bottom panel. Make sure that the voltage selector is set for the AC mains voltage in your area. The voltage selector can be set (rotated) by using a screwdriver. -
Page 11: Foot Volume Jack
The rear-panel AUX IN L/L+R and R jacks accept input from an external instrument or audio souce. The signal received at the INPUT jack is mixed with PSR-7000 sound and delivered via the speaker system. When a plug is inserted into the L/L+R jack only, the signal is delivered via the both channels. -
Page 12: The Demonstration
The Demonstration To give you an idea of the PSR-7000’s sophisticated capabilities, it is programmed with 14 demonstration sequences which can be played in a number of ways. Switch ON Plug the AC power cord into a convenient AC outlet, then press the [POWER] button to turn the PSR-7000 ON. -
Page 13: The Random & Single Demo Play Modes
The Random & Single Demo Play Modes If you play the demo as described above, you’ll hear all 14 demo songs played in random order. By selecting an appropriate play mode you can also play back all the songs sequence, or play a single specified song. Select a Play Mode Use either of the LCD dials under display to select one of the available play modes. -
Page 14: The Psr-7000 Display & Display-Based Controls
The [MIXER] Button The lower section of the normal play mode display, shown above, provides individual volume controls for the PSR-7000’s song, multi pad, accom- paniment, left, right 1, right 2, lead, and organ sound. Pressing the button switches to the individual auto-accompani- ment part volume controls: rhythm 1, rhythm 2, bass, chord 1, chord 2, pad, phrase 1, and phrase 2. -
Page 15: The [List Hold] Button
The 5-language Help Function To make operation as smooth and easy as possi- ble, the PSR-7000 provides “on-line help” for most features and functions. Press the [HELP/LANGUAGE] button to see help text for the current display, or press any other panel button after pressing the [HELP/LANGUAGE] button to see help text for that button. -
Page 16: Playing The Psr-7000
The PSR-7000 allows you to individually select and play up to four “orchestra parts” at the same time in a number of ways. A range of voices can be assigned to each orchestra part. There’s also an “ORGAN FLUTE” part which simulates an extremely wide range of organ sounds —... - Page 17 LCD button for that part will appear RIGHT ORCHESTRA PIANO PART SELECT ORGAN STRINGS/ CHOIR SAX/ WOODWIND TRUMPET/ BRASS GUITAR/ BASS LEFT RIGHT 1 Playing the PSR-7000 MASTER VOLUME MIN • • MAX LEAD ACCORDION/ TRUMPET/ WORLD BRASS ORGAN FLUTE SYNTH/ SAX/ COMBI WOODWIND SOUND...
- Page 18 Playing the PSR-7000 If you press the before it disappears, the easy-setting display for that part will appear providing access to the split point parameters as well as the individual octave, pan, and tune parameters for that part. These same param-...
- Page 19 ORGAN SOUND STRINGS/ CHOIR EFFECT SAX/ PERCUSSIVE WOODWIND TRUMPET/ DRUM KIT BRASS GUITAR/ CUSTOM BASS VOICE RIGHT 1 RIGHT 2 Playing the PSR-7000 LEAD TRUMPET/ BRASS ORGAN FLUTE SAX/ COMBI WOODWIND STRINGS/ COMBI CHOIR 7~12 GUITAR/ COMBI BASS 13~18 SYNTH/...
-
Page 20: Using The Organ Flute Voices
Playing the PSR-7000 The PSR-7000 has 18 preset ORGAN FLUTE voices which can be selected in the same way as the RIGHT, LEAD and LEFT voices: press an ORGAN FLUTE voice group button — [COMBI 1-6], [COMBI 7-12], or [COMBI 13-18] —... -
Page 21: Volume & Attack
LCD dial to select the required character for each position. The LCD dial selects capital letters, the LCD dial selects lower-case letters, and the LCD dial selects numbers and special characters. control selects Playing the PSR-7000... -
Page 22: Using The Rotary Speaker Effect
Playing the PSR-7000 rotary speaker effect for the current ORGAN FLUTE voice. The control selected one of 5 different rotary speaker types. The speed of the rotary speaker effect when the FAST mode is selected: the greater the value the faster the speed. -
Page 23: Keyboard Percussion
• The pitch bend wheel can be used to bend the pitch of the keyboard percussion voices to create unique musical effects, but it has little effect on some percussion sounds. • See page 138 for a complete listing of the keyboard percussion drum instrument assignments. Keyboard Percussion Playing the PSR-7000... -
Page 24: Changing The "L" Split Point
Playing the PSR-7000 The PSR-7000 has two programmable split points — one which divides the LEFT and RIGHT/LEAD/ORGAN FLUTE orchestra parts, and one which divides the auto-accompaniment and manual sections of the keyboard when AUTO BASS CHORD accompaniment (page 31) is engaged. In the split point displays accessed by the LCD button described below, and the FUNCTION displays (page 110), the former is indicated by the “L”... -
Page 25: Transposition, Tuning, & Octave Change
CHANGE functions described below let you control the pitch of the PSR-7000 in a number of ways. These functions allow the overall pitch of the PSR-7000 to be transposed up or down in semitone steps, and fine- tuned in 0.2 Hertz steps. -
Page 26: Octave Change
Transposition, Tuning, & Octave Change This function allows the LEFT, RIGHT 1, RIGHT2, LEAD, and ORGAN FLUTE voices to be independently transposed up or down by one octave. , and directly set the octave of the corresponding voice. Press- ing one of these buttons changes the corresponding oc- tave setting to “... -
Page 27: Using The Accompaniment Section
• The PSR-7000 employs “last-note priority”, which means that when the number of notes played on the keyboard exceeds the total number that can be produced by the PSR-7000 at that time, the last notes played take priority. Select the Desired ABC Mode Press the... - Page 28 1 mode lets you finger your own chords on the ABC section of the keyboard (i.e. all keys to the left of and including the split-point key — normally F#2), while the PSR-7000 supplies appropriately orches- trated rhythm, bass, and chord accompaniment in the selected style.
- Page 29 If more than three notes are played on the ABC section of the keyboard in this mode, and if the chord played is not recognized by the PSR-7000, only the top three are used for chord recognition. All others are ignored. The bass part is determined by...
-
Page 30: Select A Style
Using the Accompaniment Section Select a Style The PSR-7000 has 120 preset styles organized in 11 groups (see the “Style List” on page 130). Use the ACCOMPANIMENT group buttons to select the group from which you want to select a style. - Page 31 • The four LED dots of the TEMPO display provide a visual indication of the selected tempo as shown to the left. • A Yamaha FC5 footswitch plugged into a rear panel FOOT SWITCH jack can also be used to start the accom-...
- Page 32 Using the Accompaniment Section Play On the ABC Section Of the Keyboard As soon as you play any chord that the PSR-7000 can “recognize” on the ABC section of the keyboard in one of the FINGERED modes or the AUTO MIDI...
- Page 33 NOTES • A Yamaha FC5 footswitch plugged into a rear panel FOOT SWITCH jack can also be used to activate the intro and fill-in functions if the appropriate function is assigned to the footswitch using the FOOT SWITCH functions described on page 112.
-
Page 34: Fade-Ins And Fade-Outs
FADE IN / OUT NOTES • A Yamaha FC5 footswitch plugged into a rear panel FOOT SWITCH jack can also be used to activate the fade-ins and fade- outs functions if the appropriate function is assigned to the footswitch using the FOOT SWITCH functions described on page 112. -
Page 35: Changing The "A" Split Point
The “ ” split point has already been described on page 16. The “ ” split point divides the auto-accompaniment and manual sections of the keyboard when AUTO BASS CHORD accompaniment (page 23) is engaged. Like the “ ” split point, the “ ” split point can be changed as required via the both by the split markers and the “splits”... -
Page 36: The Chord Assist Function
Using the Accompaniment Section The Chord Assist function is essentially an electronic “chord book” that will show you appropriate fingerings for chords you enter via the display. The fingerings are indicated by dots on the graphic keyboard in the display, and correspond to those recognized in the ABC FINGERED 1 mode. - Page 37 “played CHORD” in the upper half of the display. NOTES • Chords which are recognizable by the PSR-7000 CHORD ASSIST function can also be entered by playing them on the ABC section of the keyboard. The chord will appear in notation form on the musical staff under “played CHORD”...
-
Page 38: The Arranger Buttons
Using the Accompaniment Section The ARRANGER buttons make it possible to indi- vidually mute accompaniment parts to create the blend and accompaniment “size” you want. When an ARRANGER button is pressed so that its indica- tor goes out, the corresponding accompaniment part(s) are muted. -
Page 39: One Touch Setting
One Touch Setting The PSR-7000’s 120 internal styles each have 4 different preset “panel setups” that can be selected via the [ONE TOUCH SETTING] buttons to create different musical textures — e.g. different voices for the accompaniment parts. Engage the One Touch Setting Feature... -
Page 40: The Tempo Set Function
One Touch Setting Adjust The Settings If Necessary Any of the parameters set by the ONE TOUCH SETTING feature can be adjusted to create the desired sound after a ONE TOUCH SETTING setup has been selected. NOTES • See page 140 for a complete listing of the ONE TOUCH SETTING setup parameters •... -
Page 41: Expression & Effects
Expression & Effects Harmony Press the [HARMONY] button to turn the HARMONY effect on or off. When HARMONY is on (indicator lit), playing single notes or chords on the right-hand section of the keyboard produces automatic harmony matched to the accompaniment chords. -
Page 42: Touch Response
Expression & Effects Touch Response The touch response function turns the PSR-7000’s initial keyboard velocity and aftertouch response on or off. Normally, touch response should be turned on — the [TOUCH RESPONSE] button indicator should be lit — to allow normal dynamic control via the keyboard. With initial touch response the harder the keys are played, the louder the sound. -
Page 43: Chorus
Chorus Press the [CHORUS] button to apply the chorus effect at a depth specified by the CHORUS DEPTH function described on page 120. The [CHORUS] button alternately turns the chorus effect on (indicator lit) or off (indicator out). NOTES • Chorus depth settings are available via the CHORUS EASY SETTING display, or via the REVERB/CHORUS/DSP EFFECT function display. -
Page 44: Pitch Bend Wheel
Expression & Effects Pitch Bend Wheel The PITCH BEND wheel to the left of the keyboard lets you bend the pitch of notes played on the keyboard up or down. Normal pitch is restored when the PITCH BEND wheel is released. The maximum pitch bend range is preset for each voice, but can be set as required for custom voices by using the CUSTOM VOICE EDIT feature described on page 89. -
Page 45: Digital Equalizer
Digital Equalizer The PSR-7000 features a digital 5-band equal- izer that can be used to “shape” the overall fre- quency characteristics of the instrument to create a wide range of tonal variations. Press the [DIGITAL EQUALIZER] button to access the equalizer controls. 5 preset equalizer curves and one programmable “USER”... -
Page 46: The Multi Pads
The Multi Pads The PSR-7000 features 8 “MULTI PADs” above the keyboard that can be used in two ways: PHRASE/CHORD: When the PHRASE/CHORD mode is selected, the 4 pads marked “PHRASE” PERCUSSION: NOTES • MULTI PAD data can be saved to floppy disk. See page 98 for details. -
Page 47: Recording Phrases
Recording Phrases Select a PHRASE Pad For Recording Press the PHRASE pad you intend to record to while holding the [REC/STOP] button. The REC/ STOP indicator will flash, indicating that the se- lected pad is ready to record. Play a Phrase Recording begins automatically as soon as you play on the keyboard using the RIGHT 1, RIGHT 2, or LEAD voice (see “NOTES”, below), and the... -
Page 48: Phrase Playback
The Multi Pads Phrase Playback As long as the PHRASE/CHORD mode is selected, any recorded phrase can be played back simply by pressing the corresponding PHRASE pad. The phrase will play back whether the accompaniment is playing or not, but will always play at the currently set tempo. The PHRASE/CHORD PLAYING indicator will light while the phrase plays back, and playback will end automati- cally as soon as the end of the phrase is reached. -
Page 49: Chord Playback
Play the Required Chords Recording begins automatically as soon as you play a chord on the left-hand section of the keyboard, and the REC/STOP indicator will light continuously as long as recording continues. Stop Recording Press the [REC/STOP] button or the pad being recorded to stop recording when you’ve finished playing the chords. -
Page 50: The Repeat & Chord Match Settings46
The Multi Pads The Repeat & Chord Match Settings The repeat and chord match settings for PHRASE/ CHORD pad playback can be accessed by pressing LCD button that appears when the [PERCUSSION - PHRASE/CHORD] button is pressed. Once the easy setting display has been selected the repeat and chord match parameters can be accessed by pressing the LCD button. -
Page 51: The Percussion Mode
Use the LCD dials to turn the chord match function for the corresponding pads ON or OFF as required. NOTES • Phrases to be played back using the CHORD MATCH function must be recorded in the key of C major 7. •... -
Page 52: Playing The Percussion Pads
— as long as the PERCUSSION mode is selected. Depending on the assigned instrument, some pads will play continuously as long as they are held. NOTES • The PERCUSSION pad sounds are not affected by the PSR-7000 PITCH BEND wheel or MODULATION wheel. PHRASE PHRASE PHRASE PERCUSSION... -
Page 53: Registration Memory
NOTES • Registration data can be saved to and loaded from floppy disk as required (page 96). • The disk provided with the PSR-7000 contains a number of sample registration settings. Registering the Panel Settings Set Up the Controls as Required Make the desired control settings. -
Page 54: Entering A Registration Name
Registration Memory Entering a Registration Name You can enter descriptive names up to 16 characters in length for each registration setup via the NAME function accessible via the registration the FUNCTION display — page 122. Select the NAME Function Press the pears when a BANK button or the [MEMORY] button is pressed before it disappears. -
Page 55: Recalling The Registered Panel Settings
Recalling the Registered Panel Settings Simply select the appropriate bank using the BANK [–] or [+] button and press the desired REGISTRA- TION button at any time to recall the memorized settings. The memo- rized settings are actually recalled only when a REGISTRATION button is pressed —... -
Page 56: The Freeze Function
Registration Memory If you press the [FREEZE] button so that its LED lights, selecting a different registration setup will not change the settings specified in the display or the [FUNCTION] button (page 122). The Freeze Group Settings You can specify which settings are affected by the FREEZE function via the FREEZE GROUP SETTING function accessible via the registration FUNCTION display —... -
Page 57: Song Playback & Recording
Song Playback & Recording The PSR-7000 SONG PLAY mode allows song data to be played back from a floppy disk or the optional hard disk. The song file types which can be played by the PSR-7000 are: songs recorded on the PSR-7000, DOC (Disk Orchestra Collection), PianoSoft and GM song (SMF format). -
Page 58: Pause, Fast Forward & Reverse
Song Playback & Recording Select a Play Mode Use the LCD dials to select a play mode: SINGLE Plays the single song selected via the SONG SELECT controls. Plays all songs in the song list in order. CHAIN Plays the songs specified in the CHAIN LIST in the specified order. -
Page 59: Chain Playback
Chain Playback Chain playback allows any number of songs to be grouped together in any order for playback. To program a chain: Press the MAKE CHAIN LCD Button LCD button will take you to the chain programming display. Select and Insert the Required Songs Use the LCD dials to select a song, use the LCD dials to select a position in the... -
Page 60: Volume & Mute/Solo Settings
Song Playback & Recording Save the Chain List, If Necessary The completed chain list can be saved to disk by pressing the tion display will appear (“OK to save chain data?”): press to save the list or NOTES • Chain list data cannot be saved to a DOC or PianoSoft disk. - Page 61 16 tracks will be avail- able: through . Use the LCD dials to set the volume of the corresponding tracks. If a Yamaha DOC song is being played use the , and LCD dials to set the volume of the corresponding tracks (see the DOC or PianoSoft software manual for more details).
-
Page 62: Song Recording
Song Playback & Recording The PSR-7000 SONG RECORD mode allows anything you play to be recorded to floppy disk. A QUICK RECORD mode provides an easy way to record a melody with accompaniment, while a MULTITRACK record mode allows independent recording on up to 16 tracks. There’s also a CHORD SEQUENCE record mode available via the QUICK record mode. -
Page 63: Select A Song
Select a Song Use the LCD dials to select either an existing song for additional recording or a new song (“ ” on the SONG LIST) to record a new song. Enter a Song Name, If Necessary You can enter an original name for the song at this point. -
Page 64: Quick Record
Song Playback & Recording Quick Record The QUICK RECORD mode, as its name suggests, makes track selection and recording easy by grouping the accompaniment and manual tracks. Set the Track Modes Use the the select the mode for the track(s) to be recorded, the mode for the tracks to be played while recording, or the... -
Page 65: Start Recording
Turn the Metronome On If Required Use the LCD dials to turn the metronome ON if you want to record while monitor- ing the metronome sound (the metronome sound is not recorded). Start Recording If the SYNCHRO START mode is engaged (it is engaged automatically when the QUICK RECORD mode is selected) you can start recording by simply playing on the keyboard. -
Page 66: The Track Indicators
Song Playback & Recording THE TRACK INDICATORS The track indicators above the track mode selec- tors indicate which tracks contain data and which are muted. Tracks which do not contain data are indicated by a dotted circle outline while tracks which contain data have a solid outline. -
Page 67: Chord Step Recording
Chord Step Recording The CHORD STEP recording feature makes it possible to record accompaniment chord changes one at a time with precise timing. Since the changes don’t have to entered in real time, it is easy to create even complex accompaniments before recording the melody. -
Page 68: Deleting Events
Song Playback & Recording Enter the Specified Event(s) Once the event or events to be entered have been specified as described in the preceding step, press LCD button to actually enter the event at the current cursor position. A dot will appear on the CHORD STEP data line and the cursor will advance to the top of the next measure. -
Page 69: Quick Record Mode Edit Functions
Quick Record Mode Edit Functions The QUICK RECORD mode EDIT display includes only one function: SONG DELETE. Select the display via the [ SONG DELETE This function deletes the specified song file from the disk. NOTES • The song currently being recorded cannot be deleted. •... -
Page 70: Multitrack Record
Song Playback & Recording Multitrack Record The MULTITRACK record mode allows independent recording and playback on any of 16 tracks, so even complex songs can be built up track by track. Set the Track Modes Use the through select the mode for the track(s) to be recorded, the PLAY mode for the tracks to be played while recording, or the... - Page 71 Set Up For the Recording Select the required voice(s), select a style, turn AUTO BASS CHORD on if required. Set up all parameters as desired for recording. NOTES • If you turn the panel [AUTO BASS CHORD] button on, the accompaniment tracks will automatically be set to the REC mode.
-
Page 72: The Track Indicators
Song Playback & Recording THE TRACK INDICATORS The track indicators above the track mode selec- tors indicate which tracks contain data and which are muted. Tracks which do not contain data are indicated by a dotted circle outline while tracks which contain data have a solid outline. -
Page 73: Playback
PLAYBACK Recorded tracks are automatically set to the mode when recording is stopped, so you can simply press the LCD button or the [START] panel button to hear what you’ve recorded immedi- ately after recording. All other playback functions are the same as described on the “Song Playback” section (page 53). - Page 74 Song Playback & Recording Select a Start Trigger Type Use the LCD dials to select the start trigger. When is selected recording will begin when the first key is played on the keyboard. When lected recording will begin when the button or panel [START/STOP] button is pressed.
- Page 75 Start Playback Press the LCD button or panel [START/ STOP] button to start playback from the current PAUSE location. Start Recording at the Punch-in Point Start recording at the punch-in point by either pressing a START button, playing on the keyboard, or pressing the footswitch, according to the start trigger type selected in step 2, above.
-
Page 76: Track Volume Control
Song Playback & Recording Track Volume Control The MULTITRACK RECORD VOLUME dis- play provides independent volume parameters for each of the 16 tracks. Select the display via the [ LCD button to the right of the display, and use the through LCD dials to set the volume of the corresponding tracks. -
Page 77: Track Copy/Mix
Quantize the Track Press the button. “Executing” will appear on the display while the data is being quantized. After quantization the button changes to button which can be used to undo the quantize operation if the results are not satisfactory. TRACK COPY/MIX This function allows data to be copied from one track to another, or data from two tracks can be mixed and the results placed in a different track. -
Page 78: Initial Edit
Song Playback & Recording INITIAL EDIT Allows the initial REVERB DEPTH, CHORUS DEPTH, and DSP EFFECT depth settings for each track to be edited as required. Select a Track & Set the Depth Param- eters Use the LCD dials to select a track, and , and set the corresponding depth parameters as required. -
Page 79: Custom Accompaniment
Custom Accompaniment The CUSTOM ACCOMPANIMENT RECORD mode allows you to create original accompaniment styles that can be later recalled and played at any time, just like the presets. Up to 32 custom accompani- ment styles can be maintained in internal memory at the same time, and any number can be saved to disk for later reloading and use. - Page 80 Custom Accompaniment Copy the Data For the A or B Variation parameter makes it possible to copy the A or B variation to the selected section, depend- ing on the variation you want to program. The possibilities are listed below: SECTION COPY SOURCE MAIN A or B...
- Page 81 Parts can be cleared completely before recording if you want to record “from scratch”, or change the number of measures in the section, as described below. When the LCD button is pressed will appear for tracks which contain data. Select via the track LCD dials while hold- ing the button to delete all data in the corre-...
- Page 82 Custom Accompaniment < Record the Selected part You can now add new notes to the selected part by playing the keyboard at the appropriate timing. All parts must be entered in the key of C major 7. If both the metronome will sound to provide a timing guide (the metronome sound is not recorded).
-
Page 83: Effects
Go On to EFFECTS, EDIT, and STORE You can now stop the accompaniment by press- ing the [START/STOP] button (or leave it running, as required), and go on to the functions described below. When your custom ac- companiment is complete, be sure to use the function, also described below, to store the style to one of the CUSTOM memory locations. -
Page 84: Chorus Type & Depth
Custom Accompaniment CHORUS TYPE & DEPTH Use the buttons to the left of the display to select the To select a chorus type use the to select the dials to select the desired chorus type. To set the chorus depth parameters use the LCD button to select the (if it isn’t already selected). -
Page 85: Edit
Edit Select the display via the [ LCD button to access the LCD buttons to the left of the display to select the desired function. QUANTIZE The QUANTIZE function aligns recorded notes in a specified part to the specified beats to “tighten up”... -
Page 86: Remove Event
Custom Accompaniment Select the Top, Last, and Destination Measures Use the first and last measures in the region to be copied. Use the LCD dial to specify the top of the measure to which the data is to be copied. Copy the Data Press the button. -
Page 87: Store/Clear
STORE Stores the recorded custom accompaniment data for use with the PSR-7000 accompaniment feature. When this function is selected the size of the current style and the remaining memory capacity available for style storage are displayed to the right of the display. -
Page 88: Custom Voice Edit
RIGHT 1, RIGHT 2, LEFT, and LEAD voice [CUSTOM] buttons. * The wave data loaded automatically when the data disk supplied with the PSR-7000 is inserted (see page 96) is loaded into the CUSTOM VOICE memory. These custom voices can then be saved to a different disk using the SAVE TO DISK function (page 98), reloaded, and edited as required to create original voices. -
Page 89: The Easy Edit Parameters
The Easy Edit Parameters Use the [ ] and [ ] LCD buttons to the right of the display to select the pages. Use the buttons to the left of the display to select the various parameters within each page. LCD button can be used during editing to compare the sound of the original voice with the edited voice. -
Page 90: Tone
Custom Voice Edit TONE The timbre of the voice can be varied via the is the preset value for both parameters. “+” settings produce a brighter sound, while “+” settings produce a more “peaky” sound. ENVELOPE parameters affect the volume envelope of the voice. -
Page 91: Store/Clear
STORE/CLEAR STORE Stores the edited custom voice data in the specified custom voice memory location. When this function is selected the size of the current voice and the remaining memory capacity available for voice storage are displayed to the right of the display. -
Page 92: The Full Edit Parameters
Use the [ ] and [ display to select the various parameters within each page. Many PSR-7000 orchestra voices are actually made up of two sounds “layered” together. Each of these layers is called an “element”. selected for editing, and voice has been selected (drum kit voices are all single-element). -
Page 93: Tune (Except For The Drum Kits)
TUNE (except for the DRUM KITS) These parameters adjust the pitch of the voice. tunes in semitone steps and 1-cent steps (a cent is 1/100th of a semitone). The maximum range is from –24 to +24 semi- tones (plus or minus two octaves), and the maximum range is from –50 to +50 cents. -
Page 94: Modulation Wheel
Custom Voice Edit MODULATION WHEEL (phase modulation), tude modulation), and dials set the corresponding modulation parameter. “0” is the preset value. “+” settings increase the maximum modulation depth while “–” settings de- crease the maximum modulation depth achievable with the modulation wheel. In the case of AMD, moving the modulation wheel while a key is already pressed will produce no effect. -
Page 95: E3:Envelope
E3:ENVELOPE AMPLITUDE ENVELOPE used to set the amplitude envelope parameters. Use the select the corresponding group of parameters. RATE These parameters set the rate of output level variation. Higher values produce faster variation. : Sets the speed of variation from key-on to the maximum attack level. -
Page 96: Filter
Custom Voice Edit FILTER set the filter envelope eters. Use the the corresponding group of parameters. RATE Set the rate of cutoff frequency variation. Higher values produce faster variation. : Sets the speed of variation from key-on (BRILLIANCE LEVEL) to the level set by the ATTACK LEVEL parameter. -
Page 97: E4:Effects
E4:EFFECTS parameters set the LFO (Low Fre- quency Oscillator) to produce cyclic pitch and am- plitude modulation. : Sets the phase modulation depth. Higher values produce deeper modulation. : Sets the amplitude modulation depth. Higher values produce deeper modulation. : Sets the speed of LFO variation. : Sets the waveform of the LFO: gular) or (sawtooth). -
Page 98: Lead Effect
Custom Voice Edit LEAD EFFECT Use the LCD dials to select a DSP EF- FECT type for the LEAD voice, and the LCD dial to set the depth of the selected effect. The effect of these parameters can monitored while editing if the lead voice was initially selected in the display. -
Page 99: The Drum Kit Edit Mode
The Drum Kit Edit Mode When a drum kit voice is selected for editing the parameters and functions available are essentially the same as those for the orchestra voices in the mode. Many parameters of individual percussion voices within the DRUM KIT can be edited independently. -
Page 100: Disk Operations
“No disk! Please insert a disk.” error message will appear on the display. Loads the specified file from a floppy disk inserted into the PSR-7000 disk drive, or the optional hard disk. If the display shown to the right is... - Page 101 The LCD dials can now be used to select the type(s) of data to be loaded from the selected file. Data types which are turned are loaded. SETUP All setup data — see list on page 140. STYLE All STYLE REVOICE settings - page REVOICE 116.
-
Page 102: Save To Disk
Disk Operations Saves the data listed below to a floppy disk inserted into the PSR-7000 disk drive, or to the optional hard disk. NOTES • If an unformatted disk or a disk which has not been formatted for use with the PSR-7000 is inserted, the “Wrong disk type or format! Format disk?”... -
Page 103: Rename File/Song
Press the LCD button when you want to go back to the FILE LIST display. When the file and data types have been specified, press the LCD button to actually begin the save operation — the confirmation display shown to the right will appear. If you want to give the file to be saved an original file name, be sure to do so before pressing the LCD button. - Page 104 Disk Operations LCD button which appears when is selected can be used to listen to the currently selected song — press to stop playback when done. When the user or song file to be renamed has been selected, press the The following display will appear.
-
Page 105: Delete File/Song
Deletes the specified song or user file from the disk. Press the LCD button to if the is not showing in order to delete a song file, or LCD button if the is not showing in order to delete a user file. Use the LCD dials to select the file you want to delete. -
Page 106: Format Fd
This function can be used to copy songs recorded on the PSR-7000 to a different number/name on the same floppy disk, or from one floppy disk to another. If the optional hard disk is present songs can be copied to a different hard disk directory. - Page 107 LCD button (or press the button to cancel the operation). “Don’t remove disk” will appear while the data is being copied. If you’re copying to a different floppy disk the PSR-7000 will prompt when to insert the copy destination disk. Follow the on-screen instructions.
-
Page 108: Hd Utility
Other data must first be loaded from the hard disk and then saved to floppy disk. • YAMAHA provides no guarantee against disk damage. DIRECTORY EDIT Allows hard disk directories to be renamed, created, and deleted. -
Page 109: Delete
DELETE To delete a directory use the select the directory to be deleted. Press the button, then press the confirmation button to execute the delete operation. Please note that direc- tories which contains files cannot be deleted — all files in the directory must be deleted first. NOTES •... -
Page 110: The Psr-7000 "Functions
The PSR-7000 “Functions” The PSR-7000 [FUNCTION] button selects 8 groups of functions that access a number of related parameters. Here’s a list of the func- tions and the manual page numbers on which they are described in detail. [F1] SCALE (ARABIC)/VOICE PART ... 108 [F2] SPLIT POINT/ABC MODE/MULTI PAD ... -
Page 111: The [Exit] Button
The [EXIT] or [FUNCTION] button can be used at any time to exit from a function and return to the function menu. Pressing the [EXIT] or [FUNC- TION] button while the showing will return you to the normal play mode. The PSR-7000 “Functions” EXIT... -
Page 112: F1: Scale (Arabic)/Voice Part
F1: Scale (Arabic)/Voice Part The PSR-7000 has a range of advanced tuning and other voice- related functions which are all included in the F1 function group. SCALE (ARABIC) Selects either the normal equal temperament scale or an “arabic” scale in which each note can be tuned over a 127-cent range. -
Page 113: Part Tune
PART TUNE Individual tuning parameters are provided for the LEFT, RIGHT 1, RIGHT 2, LEAD, and OR- GAN voices, allowing each voice to be tuned over a 100-cent range. When the AUTO mode is selected, part tuning is automatic and the individual parts cannot be tuned manually. -
Page 114: F2: Split Point/Abc Mode/Multi Pad
F2: Split Point/ABC Mode/Multi Pad The F2 functions all pertain to the PSR-7000’s accompaniment fea- tures — i.e. the accompaniment split point, the ABC mode, and the multi-pad repeat and chord match modes. SPLIT POINT/ABC MODE SPLIT POINT The PSR-7000 has two programmable split points —... -
Page 115: Multi Pad
MULTI PAD The repeat and chord match settings for PHRASE/CHORD MULTI PAD playback can be accessed via this display. The repeat and chord match parameters can be accessed by pressing the LCD button. REPEAT When a check mark appears in a the MULTI PAD display, the corresponding pad —... -
Page 116: F3: Controller
F3: Controller The F3 function group includes a range of functions that affect how the PSR-7000 responds to control via the keyboard, a foot controller plugged into the rear-panel FOOT VOLUME jack, footswitches plugged into the rear-panel FOOT SW jacks, the [SUSTAIN] button, the PITCH BEND wheel, and the MODULATION wheel. - Page 117 While the accompaniment is stopped, or during the SYNCHRO START mode before the accompaniment is started, the footswitch can be used to set any desired tempo (within the PSR-7000’s 32 to 280 beats per minute range) by simply tapping on the switch at the re- quired tempo.
-
Page 118: Panel Controller
F3: Controller PANEL CONTROLLER SUSTAIN BUTTON Determines to which of the PSR-7000 voices the panel [SUSTAIN] button will apply. Use the LCD dials to turn [SUSTAIN] button control for the corresponding voices companiment part assignments are the same as those set for the footswitch. -
Page 119: Initial Touch
INITIAL TOUCH Sets the touch response OFF level and sensitivity curve of the keyboard initial touch response, and determines to which of the PSR-7000 voices touch response will apply. Use the LCD dial to set the level at which touch response is turned off. -
Page 120: F4: Style Revoice
F4: Style Revoice This function allows you to “revoice” the currently selected style: i.e. change the volume, voice, reverb depth, and chorus depth settings for each accompaniment part. Style Revoice settings are retained in memory as long as a good set of backup batteries is installed (see page 2). -
Page 121: Reverb Depth
REVERB DEPTH Use the , and LCD dials to set the reverb depth for the corresponding accompaniment parts. The reverb depth range is from “0” (no reverb) to “100” (maximum reverb), or “ preset reverb depth is selected a “ ” appears in the corresponding box to the right of the parameter in the upper section of the display. -
Page 122: F5: Reverb/Chorus/Dsp Effect
F5: Reverb/Chorus/DSP Effect The PSR-7000 has 16 reverb-based effects, a chorus effect, and 50 DSP (Digital Signal Processor) effects that can be selected via the REVERB/CHORUS/DSP EFFECT function display. The selected reverb, chorus, and DSP effect settings are applied to the sound when the [REVERB], [CHORUS], and [DSP EFFECT] buttons are used (see page38). -
Page 123: Reverb Parameter Edit
REVERB PARAMETER EDIT When the parameters are se- lected as described above, the LCD button will appear, pressing this button gives you access to the individual reverb parameters for the currently selected reverb type. Use the LCD dial below the number corresponding to the parameter you want to edit. -
Page 124: Chorus Depth
F5: Reverb/Chorus/DSP Effect CHORUS DEPTH Independently sets the depth of the chorus effect for the microphone, multi pads, accompaniment, left voice, right 1 voice, right 2 voice, and lead voice Use the LCD dials to set the depth of the chorus effect as required for the corresponding parts. -
Page 125: Dsp Effect Parameter Edit
DSP EFFECT PARAMETER EDIT When the parameters are selected as described above, the LCD button will appear, pressing this button gives you access to the individual DSP effect parameters for the currently selected DSP type. Use the LCD dial below the number corresponding to the param- eter you want to edit. -
Page 126: F6: Harmony/Registration
F6: Harmony/Registration HARMONY Selects the type of harmony to be applied when the [HARMONY] button is turned on (page 37), and the volume of the harmony sound. Use the LCD dials to select the desired harmony type. Use the volume of the harmony sound. The Harmony Types 1. -
Page 127: F7: Utility
NOTES • The data backed up (retained in memory even when the power is turned off) by the PSR-7000 are listed on page 140 in the MEMORY BACKUP column. When memory backup is turned OFF, the initial factory settings are automatically recalled whenever the power is turned on. -
Page 128: F8: Midi
This makes it possible to create “systems” of MIDI instruments and equipment that offer far greater versatility and control than is available with isolated instruments. The PSR-7000 offers a range of MIDI functions that allow it to be used in even sophisticated MIDI systems. -
Page 129: Clock & Transpose
PSR-7000 is being used alone. If you are using the PSR-7000 with an external sequencer, MIDI computer, or other MIDI device, and you want the PSR-7000 to be synchro- nized to the external device, set this function to . -
Page 130: Exclusive
This display page allows you to specify which PSR-7000 voices and parts will be transmitted via which MIDI channels (there are 16 MIDI channels), and to specify which types of data will be transmitted for each channel. -
Page 131: Note, Control Change, Pro
No data will be transmitted on the selected channel. RIGHT 1 RIGHT 2 LEAD Only data corresponding to the specified voice will be transmitted on the selected channel. LEFT ORGAN FLUTE HARMONY 1 The Harmony feature (page 37) produces a maximum of three harmony notes. These settings HARMONY 2 HARMONY 3 correspond to each of the harmony notes. -
Page 132: Receive
F8: MIDI This display page allows you to specify the MIDI receive mode for each PSR-7000 MIDI channels, and to specify which types of data will be received via each channel. RECEIVE MONITOR display indicates when data is being received on any of the 16 MIDI channels: The dots corresponding to each channel (1 …... -
Page 133: Panel Control
Turns reception of keyboard aftertouch data on or off. The parameters in this display page assign specific PSR-7000 panel controls to notes. The assigned notes then control the corresponding panel control operations when received via a MIDI channel which is set to the... - Page 134 F8: MIDI TYPE 1. OFF 2. SUSTAIN 3. SOSTENUTO 4. SOFT 5. TAP TEMPO 6. REGIST.+ 7. REGIST.– 8. SYNCHRO START 9. START/STOP 10. ROTARY SP 11. HARMONY 12. INTRO/FILLtoA 13. INTRO/FILLtoB 14. MAIN A 15. MAIN B 16. ENDING/rit. 17.
-
Page 135: Troubleshooting
ABC or HARMONY, be careful not to exceed the limit. This is normal, each voice or style has its own suitable preset values. This is normal and is a result of the PSR-7000’s sampling system. Some voice’s have a pitch limit which has been reached. This is normal. -
Page 136: Index
Index Accomp volume ... 30 Accompaniment ... 23 Accompaniment director ... 27 – 30 After touch ... 115 Arabic ... 108 Arranger ... 34 Attack ... 86, 91, 92 Auto bass chord (ABC) ... 23 Auto MIDI bass ... 25 Fingered 1/2 ... - Page 137 List hold ... 11 Listen ... 100 – 102 Load ... 96 Main A/B ... 28 Main volume ... 15 Manual (song) ... 60 Manual MIDI bass ... 25 Master volume ... 8 Measure ... 77 Memory ... 123 Metronome ... 60 Mic jack ...
-
Page 138: Voice List
Voice List • Stimmenverzeichnis • Liste des voix RIGHT Display BankSelect Program Change Voice Name MSB LSB PIANO GrandPiano 1 BrightPiano1 CP 70 Funky E.P. Hyper E.P. E.Piano 1 Harpsichord1 Clavi. GrandPiano 2 BrightPiano2 E.Piano 2 E.Piano 3 DX MIDI Grand Rock E.Piano Harpsichord2 Clavi Wah... - Page 139 Display BankSelect Program Change Voice Name MSB LSB Kalimba Shanai Shamisen Koto Sitar Dulcimer SYNTH/PAD Analog Lead Sub Aqua Power Lead Pulse Lead Waspy Synth Wire Lead Square Lead Saw. Lead Reso.Synth Phase IV 70’s Lead Dynamic Lead Fantasia Atmosphere New Age Pad Darkmoon Analog Pad...
- Page 140 Voice List • Stimmenverzeichnis • Liste des voix Display BankSelect Program Change Voice Name MSB LSB STRINGS/CHOIR Strings 1 Strings 2 Chamber Violin Str. Violin 1 Choir Synth Choir Xenon Pad Strings 3 Soft Strings Slow Strings Pizzicato Violin 2 Viola Cello Choir Aah...
- Page 141 LEAD Display BankSelect Program Change Voice Name MSB LSB TRUMPET/BRASS Solo Trumpet Mellow Trp. Mute Trumpet FlugelHorn 1 Trombone SoftTrombone Tight Brass Brass Lead Soft Trumpet FlugelHorn 2 French Horn Sfz.Brass Brass+Sax Brass+Tromb. Big Brass 1 Big Brass 2 SynthBrass 1 SynthBrass 2 Wah Brass Techno Brass...
-
Page 142: Percussion Kit List
Percussion Kit List • Verzeichnis der Schlagzeug- und Percussion-Sets Liste des kits de percussion Bank MSB# Program # Note# Note Standard Kit Room Kit SurdoMut <—— SurdoOpn <—— Hi Q <—— WhipSlap <—— ScraPush <—— ScraPull <—— FingSnap <—— Click <——... -
Page 143: Style List
Style List • Rhythmusverzeichnis • Liste des styles Display No. Style Name ROCK/ROCK’N’ROLL Rock&Roll 1* Twist Hard Rock Rock Shuffle Slow Rock* Org RkBallad* LiteRkBallad* Rock Pop Rock&Roll 2* BoogieWoogie Speed Metal Rock Ballad* 6/8 Heavy Rk Upbeat Pop* CowboyBoogie* Jive* POP/BEAT 16Beat Pop... -
Page 144: Setup Parameters
Setup Parameters • Setup-Parameter • Paramètres de réglage général O : YES X : NO REGISTRATION PANEL ORGAN FLUTE VOICE LEAD VOICE RIGHT1 VOICE RIGHT2 VOICE LEFT VOICE RIGHT ORCHESTRA PART SELECT ROTARY SP. ON/OFF ROTARY SP. SLOW/FAST ORGAN FLUTE ON/OFF LEAD ON/OFF RIGHT1 ON/OFF RIGHT2 ON/OFF... - Page 145 Setup Parameters • Setup-Parameter • Paramètres de réglage général REGISTRATION ACCOMPANIMENT PHRASE1 PHRASE2 CHORD1 CHORD2 BASS RHYTHM1 RHYTHM2 TRANSPOSE TUNE TYPE USER LOW GAIN USER LOW-MID GAIN USER MID GAIN USER MID-HI GAIN USER HI GAIN O.T.S. NUMBER for each style TEMPO SET ON/OFF LANGUAGE SCALE...
- Page 146 Setup Parameters • Setup-Parameter • Paramètres de réglage général REGISTRATION FOOT VOLUME TYPE FOOT VOLUME ASSIGN FOOT SW1 TYPE SUSTAIN ASSIGN for FOOT SW1/2, SUSTAIN BUTTON SOSTENUTO ASSIGN for FOOT SW1/2 SOFT ASSIGN for FOOT SW1/2 PERCUSSION for FOOT SW1 FOOT SW2 TYPE PERCUSSION for FOOT SW2...
- Page 147 Setup Parameters • Setup-Parameter • Paramètres de réglage général REGISTRATION LOCAL CONTROL (ORGAN FLUTE, LEAD, R1, R2, LEFT, ACMP, M.PAD) CLOCK TRANSPOSE TRANSMIT TRANSPOSE RECEIVE START/STOP TRANS. START/STOP RECEIVE EXCLUSIVE TRANS. EXCLUSIVE RECEIVE TRNS. CH1 PART,SWITCH TRNS. CH2 PART,SWITCH TRNS. CH3 PART,SWITCH TRNS.
-
Page 148: Fingering Chart
Fingering Chart • Akkordliste • Tablature • Notes in parentheses ( ) can be omitted. • Chord types marked with an asterisk (*) can be played in any inversion (i.e. the root does not have to be the lowest note in the chord). - Page 149 • Les notes entre parenthèses ( ) peuvent être omises. • Les accords marqués d’un astérisque (*) peuvent être joués dans n’importe qu’elle inversion (il n’est pas nécessaire que la note fondamentale de l’accord soit la note la plus basse). •...
- Page 150 Fingering Chart • Akkordliste • Tablature Suspended fourth Vorgehaltene Quarte Quarte sur sensible Csus C sus (D sus ) Dsus D sus (E sus ) Esus Fsus F sus (G sus ) Gsus G sus (A sus ) Asus A sus (B sus ) Bsus Augmented...
- Page 151 Seventh flatted fifth Dur-Septakkord mit Diminished seventh verminderter Quinte Verminderter Septakkord Quinte diminuée en Septième diminuée septième Cdim C dim (D dim ) Ddim D dim (E dim ) Edim Fdim F dim (G dim ) Gdim G dim (A dim ) Adim A dim (B dim )
- Page 152 Fingering Chart • Akkordliste • Tablature Seventh ninth* Dur-Septakkord mit None* Neuvième sur septième* (D m (E m (G m 7 (9) (A m (B m 7 (9) Minor added ninth* Minor seventh ninth* Moll-Septakkord mit Moll-Septakkord mit None* hinzugefügter None* Neuvième sur septième Neuvième sur mineure* mineure*...
- Page 153 Major seventh ninth* Dur-Akkord mit großer Added ninth* Septime und None* Hinzugefügte None* Neuvième sur septième Neuvième ajoutée* majeure* Cadd C add (D add ) (D M Dadd D add (E add ) (E M Eadd Fadd F add (G add ) (G M Gadd G add...
- Page 154 Fingering Chart • Akkordliste • Tablature Minor major seventh ninth* Moll-Akkord mit großer Septime und None* Neuvième sur septième majeure sur mineur* C mM (D mM D mM (E mM F mM (G mM G mM (A mM A mM (B mM Seventh sharp eleventh* Seventh added thirteenth*...
- Page 155 Seventh added flatted thir- teenth* Dur-Septakkord mit hinzugefügter verminderter Tredezime* Treizième diminuée ajoutée sur septième* Fingering Chart • Akkordliste • Tablature Major seventh augmented* Seventh sharp ninth* Dur-Akkord mit großer Dur-Septakkord mit Septime und übermäßiger übermäßiger None* Quinte* Neuvième dièse sur Quinte sur septième septième* majeure augmentée*...
- Page 156 Fingering Chart • Akkordliste • Tablature Major seventh flatted fifth* Dur-Akkord mit großer Septime und verminderter Quinte* Quinte diminuée sur majeure septième* (D M (E M (G M (A M (B M Minor major seventh flatted fifth* Flatted fifth* Moll-Akkord mit großer Septime Dur-Akkord mit und verminderter Quinte* verminderter Quinte*...
-
Page 157: The Dsp Effects & Parameters
The DSP Effects & Parameters • DSP-Effekte und -Parameter Effets et paramètres DSP 1. Hall 1 2. Hall 2 3. Hall 3 7. Room 3 8. Room 4 9. Stage 1 These are all reverberation (“reverb” for short) effects. Reverb is the warm musical “ambience” you experience when listening to music in a hall or other natural environment. - Page 158 The DSP Effects & Parameters • DSP-Effekte und -Parameter • Effets et paramètres DSP 3. FEEDBACK LEVELRange: –63 … 0 … +63 Determines the amount of effect-sound feedback returned to the input of the effect stage. Higher negative or positive values produce a more pronounced effect.
- Page 159 The DSP Effects & Parameters • DSP-Effekte und -Parameter • Effets et paramètres DSP 2. AM DEPTH Range: 0 … 127 Sets the depth of amplitude modulation. Higher values produce deeper modulation and therefore a more pronounced tremolo effect. 3. PM DEPTH Range: 0 …...
- Page 160 The DSP Effects & Parameters • DSP-Effekte und -Parameter • Effets et paramètres DSP 40. Echo Although similar to the DelayL,R effect, Echo features independent feedback level parameters for the left and right channels, plus a “high damp” parameter that simulates the high-frequency damping characteristics of most natural acoustic environments.
- Page 161 The DSP Effects & Parameters • DSP-Effekte und -Parameter • Effets et paramètres DSP 44. EQ DISCO 45. EQ TEL. Both of these effects are based on a two-band equalizer with independent high and low frequency and gain param- eters. 1.
- Page 162 The DSP Effects & Parameters • DSP-Effekte und -Parameter • Effets et paramètres DSP 51. Unison. 52. 5th Harmo Both of these effects produce a pitch-changed note in addition to the note played. With the default settings “Unison” produces a note one octave above the original note while “5th Harmony” produces a note one fifth above the original note.
-
Page 163: Midi Implementation Chart
MIDI Implementation Chart • Implementierungstabelle • Table d’implémentation [PortaTone] Model: PSR-7000 Function Basic Default 1~16 CH (*1) Channel Changed 1~16 CH (*1) Default Mode Messages Altered ***************** Note 0~127 Number : True voice ***************** O 9nH, v=1~127 Velocity Note on... - Page 164 MIDI Implementation Chart • Implementierungstabelle • Table d’implémentation *1 The RIGHT1, RIGHT2, LEAD, LEFT, ORGAN FLUTE, HARMONY, MULTI PAD, and ACCOMPANIMENT parts can be independently transmitted via the panel controls. *2 The tone generator normally functions as a 16-channel multi-timbre tone generator in response to MIDI input.
- Page 165 This value is not reset by a GM System ON or Reset All Con- trollers message. This value affects not only MIDI reception part but the entire system of the PSR-7000. <XG Native Parameter Change> F0H, 43H, 1nH, 4CH, aaH, bbH, ccH, ddH...F7H...
-
Page 166: Midi Data Format
MIDI Data Format • MIDI-Datenformat • Format des donées MIDI <Table 1-1> Parameter Base Address Model ID = 4C SYSTEM EFFECT 1 DRUM <Table 1-2> MIDI Parameter Change table ( SYSTEM ) Address Size Data 00 00 00 0000 - 07FF 00 - 7F 28 - 58 TOTAL SIZE... - Page 167 00-7F VARIATION PARAMETER 2 MSB 00-7F VARIATION PARAMETER 2 LSB 00-7F VARIATION PARAMETER 3 MSB 00-7F VARIATION PARAMETER 3 LSB 00-7F VARIATION PARAMETER 4 MSB 00-7F VARIATION PARAMETER 4 LSB 00-7F VARIATION PARAMETER 5 MSB 00-7F VARIATION PARAMETER 5 LSB 00-7F VARIATION PARAMETER 5 MSB 00-7F...
-
Page 168: Chorus Type
MIDI Data Format • MIDI-Datenformat • Format des donées MIDI Effect MIDI Map Reverb Type MSB (HEX) TYPE LSB (HEX) No Effect <—— [1]Hall 1 Hall 2 Room 1 Room 2 Stage 1 Stage 2 Plate <—— No Effect <—— <——... -
Page 169: Effect Parameter List
Effect Parameter List BASIC TYPE No. Parameter Display* CHORUS 1 LFO Frequency 0.00~39.7Hz CELESTE 2 LFO PM Depth 0~127 3 Feedback Level -63~+63 4 Delay Offset 0~127 6 EQ Low Frequency 50Hz~2.0kHz 7 EQ Low Gain -12~+12dB 8 EQ High Frequency 500Hz~16.0kHz 9 EQ High Gain -12~+12dB... - Page 170 MIDI Data Format • MIDI-Datenformat • Format des donées MIDI BASIC TYPE No. Parameter DELAY L,C,R 1 Lch Delay 2 Rch Delay 3 Cch Delay 4 Feedback Delay 5 Feedback Level 6 Cch Level 7 High Damp 10 Dry/Wet 11 HPF Cutoff 12 LPF Cutoff 13 EQ Low Frequency 14 EQ Low Gain...
-
Page 171: Sample Data Disks
Violins, Cello, Reeds, Gongs, Bells, Pads, Synth sounds, etc. (2 disks) SP-2705YE Gaudi / Super Effects Spoken German, Sci-Fi, Electric Atmospheres, etc. (2 disks) * Not all titles in the above list are available in all areas. Please consult your Yamaha dealer for details of availability. -
Page 172: Specifications
DISK: Load from Disk, Save to Disk, Rename File/Song, Delete File/Song, Format FD, Song Copy Hard Disk Interface * 3.5" FDD, Compatibility with DOC (Yamaha Disk Orchestra Collection) PianoSoft, General MIDI, and SFF software. FUNCTIONS: F1: Scale (Arabic)/Voice Part F2: Split Point/ABC Mode/Multi Pad... -
Page 173: Important Safety Instructions
Some of these items are de- signed to be dealer assembled or installed. Please make sure that benches are stable and any optional fixtures (where applicable) are well secured BEFORE using. Benches supplied by Yamaha are designed for seating only. No other uses are recommended. - Page 174 If these corrective measures do not produce satisfactory results, please contact the local retailer authorized to distrib- ute this type of product. If you can not locate the appropriate retailer, please contact Yamaha Corporation of America, Electronic Service Division, 6600 Orangethorpe Ave, Buena Park, CA90620 The above statements apply ONLY to those products distributed by Yamaha Corporation of America or its subsidiaries.