Table of Contents
Advertisement
Quick Links
Advertisement
Table of Contents

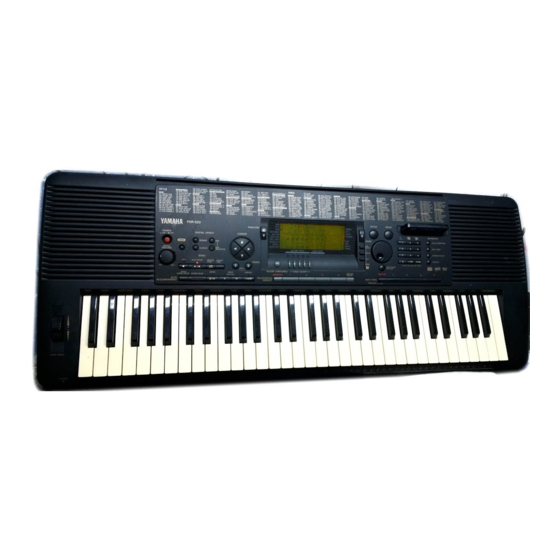
Related Manuals for Yamaha PortaTone PSR-620


Summary of Contents for Yamaha PortaTone PSR-620
-
Page 2: Special Message Section
Yamaha. This product should be used only with the components supplied or; a cart, rack, or stand that is recommended by Yamaha. If a cart, etc., is used, please observe all safety markings and instructions that accom- pany the accessory product. -
Page 3: Important Features
Internal 3.5” floppy disk drive provides extended memory capacity and quick play capability. MIDI compatibility and a range of MIDI functions make the PSR-620 useful in a range of advanced MIDI music systems. -
Page 4: Table Of Contents
Accompaniment Out ... 84 Local Control ... 84 External Clock ... 85 Initial Data Send ... 85 Appendix PSR-620 Function Tree ... 86 About Digital Effect ... 88 Troubleshooting ... 90 Data Backup & Initialization ... 91 Data Initialization ... 91 Index ... -
Page 5: Taking Care Of Your Portatone
The PSR-620 contains no user serviceable parts. Opening it or tampering with it in anyway can lead to irreparable damage and possibly electric shock. Refer all servicing to qualified YAMAHA person- nel. YAMAHA is not responsible for damage caused by improper handling or operation. -
Page 6: Panel Controls
Panel Controls Top Panel Controls POWER Switch ... page 8 MASTER VOLUME Control ... page 8 DEMO Button ... page 9 DIGITAL EFFECT Section • REVERB Button ... page 24 • CHORUS Button ... page 24 • DSP Button ... page 24 •... -
Page 7: The Music Stand
AUX OUT DC IN 10-12V SUSTAIN L+R/L The Music Stand The PSR-620 is supplied with a music stand that can be attached to the instrument by inserting it into the slot at the rear of the control panel. Panel Controls... -
Page 8: Setting Up
Be sure to go through this section carefully before using your PSR-620. Your PSR-620 will run either from batteries or an optional power adaptor. Follow the instructions below according to the power source you intend to use. -
Page 9: Connections
— press for sustain, release for normal sound. The AUX OUT R and L+R/L jacks deliver the output of the PSR-620 for connection to an external amplifier, mix- ing console, PA system, or recording equipment. If you will be connecting the PSR-620 to a monophonic sound sys- tem, use only the L+R/L jack. -
Page 10: The Demonstration
The Demonstration Once you’ve set up your PSR-620, try listening to the pre-programmed demonstration songs — they’ll give you a good idea of what the PSR-620 can do! A total of 25 demo songs are provided — songs 01 through 17 have been created to demonstrate several of the instrument’s voices,... - Page 11 Press the [DEMO] Button Press the [DEMO] button to start demo playback. The PSR-620 SONG function will automatically be selected and the number and name of the first demo song will appear on the top line of the display and the SONG [PLAY/ STOP] indicator will light.
-
Page 12: Basic Display Operation
Basic Display Operation The PSR-620 LCD panel is a large multi-function type that simultaneously displays and provides access to a number of important parameters. Basic operation of the display as well as the CURSOR, FUNCTION, MODE, JOB SELECT and NUMBER buttons, and the meaning of the icons which appear in the display, are summarized briefly below. - Page 13 Loads data from floppy disk (page 68). SAVE: Saves the specified data to floppy disk (page 66). DELETE: Deletes a specified data file from the floppy disk (page 72). FORMAT: Formats a disk for use with the PSR-620 (page 65).
-
Page 14: Playing The Psr-620
HARM/ECHO OVERALL DIGITAL EFFECT The PSR-620 has 141 outstanding “pitched” voices (voice numbers 01 through 141) and 8 percussion kits (numbers 142 through 149) that you can select and play on the keyboard. Select the NORMAL Mode If you want to play a single voice over the entire range of the PSR-620 keyboard, you’ll need to select the NORMAL mode. -
Page 15: Select A Voice
Select a Voice The PSR-620 has 149 voices that can be selected by using either the [–/ NO] and [+/YES] buttons, the number buttons or the data dial. The voices are listed in the VOICE list printed at the top of the instrument’s control panel. -
Page 16: Keyboard Percussion
This is undoubtedly the easiest way to select a voice. Simply rotate the dial clockwise to increment or counter-clockwise to decrement. Play & Adjust Volume You can now play the selected voice on the PSR-620 keyboard. Use the [MASTER VOLUME] control to adjust the overall volume level. Keyboard Percussion When one of the eight PERCUSSION KIT voices are selected —... -
Page 17: The Split Mode
SINGLE FINGERED LOAD SAVE DELETE FORMAT Playing the PSR-620 • The SPLIT mode and DUAL VOICE features (page 17) can be used at the same time. In this case the dual voice plays simul- taneously with the right-hand voice only. - Page 18 “36”, middle C (C3) is “60”, and the highest key (C6) is “96”. The split point can be set at any key number from 00 through 127, allowing the split point to be set outside the range of the PSR-620 keyboard for MIDI applications. The default split point is 59 (B2). Exit Press the [VOICE] button or select a different function to exit from the SPLIT VOICE function.
-
Page 19: Touch Response
Dual Voice KEYBOARD TOUCH RESPONSE DUAL VOICE HARMONY/ECHO SUSTAIN Playing the PSR-620 • Touch Response is turned ON whenever the power switch is turned ON. • The “TouchSns” function in the OVERALL function group can be quickly selected by pressing and holding the [TOUCH RE- SPONSE] button. -
Page 20: Changing The Dual Voice & Related Parameters
Playing the PSR-620 Changing the Dual Voice & Related Parameters Select the DUAL VOICE Function Press the [FUNCTION] button to the left of the display as many times as necessary until the arrowhead in the display appears next to “DUAL VOICE”... - Page 21 The dual voice can be changed as required while the number and name of the current dual voice appear on the top line of the display. The PSR-620 has 143 dual voices (voice numbers 01…141 and 150…151). Voice numbers 150…151 exclu- sively can be used as the dual voice.
-
Page 22: Harmony/Echo
Playing the PSR-620 The harmony effects (01…10) automatically add appropriate harmony notes to the melody line you play on the keyboard. The harmony is derived from the chords you play on the left hand parts. The echo effects (11…22) add delay-based effects to the right hand melody parts. - Page 23 13: Echo1/8 This type creates 8th-note delayed repeats. 14: Echo1/12 This type creates 8th-note triplet delayed repeats. Playing the PSR-620 • If the VOICE SET function is ON (page 79), the harmony/echo type will change automatically whenever a different voice is selected via the VOICE function.
-
Page 24: Sustain
Playing the PSR-620 Type Description 15: Tremolo1/8 This type creates 8th-note tremolos. 16: Tremolo1/12 This type creates 8th-note triplet tremolos. 17: Tremolo1/16 This type creates 16th-note tremolos. 18: Tremolo1/32 This type creates 32nd-note tremolos. 19: Trill1/12 This type creates 8th-note triplet trilled repeats. -
Page 25: Transposition
This functions allow the overall pitch of the PSR-620 to be transposed up or down by a maximum of one octave in semitone increments. Move the Cursor to the Transpose Value Use the CURSOR buttons to select the number to the right of the key- board icon labelled “TRANSPOSE”... -
Page 26: Digital Effects
Digital Effects The PSR-620 provides a variety of Digital Effects — 12 Reverb Effects, 9 Chorus Effects and 45 DSP Effects — which can add tremendous variety to your sound. REGIST MEMORY SPLIT VOICE HARM/ECHO DIGITAL EFFECT The digital effects can be turned ON or OFF by pressing the [RE- VERB] button, [CHORUS] button and [DSP] button respectively. -
Page 27: Setting The Reverb Return Level
Select the Reverb Type Use the cursor [>] button to enter the Reverb Type function and then select one of the 13 reverb types using the [–/NO] and [+/YES] buttons, the number buttons or the data dial. The name of the selected reverb type ap- pears on the top line of the display. -
Page 28: Changing The Chorus Effect
Digital Effects Selecting the Chorus Effect Type Select the Chorus Type Function Press the [FUNCTION] button to the left of the display as many times as necessary until the arrowhead in the display appears next to “DIGITAL EFFECT” in the function list to the left of the display, and use the cursor [ ] and [ ] buttons to select the Chorus Type function, “Chorus m”. -
Page 29: Setting The Chorus Return Level
Exit Press the [VOICE] button or select a different function to exit from the DIGITAL EFFECT function. Setting the Chorus Return Level The chorus return level determines the amount of “wet” (effect) signal output to the amplifier. Select the Chorus Return Level Function Press the [FUNCTION] button to the left of the display as many times as necessary until the arrowhead in the display appears next to “DIGITAL EFFECT”... -
Page 30: Changing The Dsp Effect
Digital Effects Selecting the DSP Effect Type Select the DSP Type Function Press the [FUNCTION] button to the left of the display as many times as necessary until the arrowhead in the display appears next to “DIGITAL EFFECT” in the function list to the left of the display, and use the cursor [ ] and [ ] buttons to select the DSP Type function, “Dsp m”. -
Page 31: Setting The Dsp Return Level
Each DSP effect has its own variation. Turn the [DSP VARIATION] button ON to activate each variation. You can also select the DSP Type function by pressing and holding the [DSP] button until the arrow jumps to the “DIGITAL EFFECT” position and the current DSP type name appears in the display. -
Page 32: Using Auto Accompaniment
• The maximum number of notes that can be played simultaneously on the PSR-620 keyboard is reduced when the Accompaniment is used. About the PSR-620 Styles and the Yamaha Style File Format The Style File Format is Yamaha’s original auto-accompaniment format which has... - Page 33 If the FINGERED Mode is Selected, Select the Desired Fingering Mode The PSR-620 has three fingering modes for fingered accompaniment — Normal, Bass and Full. The NORMAL mode is automatically selected whenever the power is initially turned ON. To select a different fingering...
- Page 34 (i.e. all keys to the left of and including the split-point key — normally 54) while the PSR-620 supplies appropriately orchestrated rhythm, bass, and chord accompaniment in the selected style.
- Page 35 This means you can play in just about any style any- where on the keyboard, and the PSR-620 will automatically produce appropriate accompaniment.
-
Page 36: Select A Style
Using Auto Accompaniment Select a Style The PSR-620 has 100 styles that can be selected by using either the [–/ NO] and [+/YES] buttons, the number buttons or the data dial (these con- trols function in the same way as for voice selection — see page 12). The styles are listed in the STYLE list printed at the top of the instrument’s con-... - Page 37 Start the Accompaniment There are several ways to start the accompaniment: Straight start: Press the [START/STOP] button. The rhythm will begin playing imme- diately without bass and chord accompaniment. The currently selected MAIN [A] or [B] section will play. SYNC- START/STOP START/STOP Start with an introduction followed by the MAIN A section:...
- Page 38 Play On the Auto-accompaniment Section Of the Keyboard As soon as you play any fingering that the PSR-620 can “recognize” on the left-hand section of the keyboard (or anywhere on the keyboard if the FULL fingering mode is selected), the PSR-620 will automatically begin to play the appropriate bass line and chord parts along with the selected style.
-
Page 39: The Stop Accompaniment Function
While the SINGLE or FINGERED mode is selected chords played in the Auto Accompaniment section of the keyboard are also detected and played by the PSR-620 Auto Accompaniment system when the ac- companiment is stopped (except when the FULL FINGERED mode is engaged). In this case the bass note and chord voices are selected automatically. -
Page 40: Accompaniment Track Control
Using Auto Accompaniment Accompaniment Track Control The PSR-620 has eight accompaniment tracks — RHYTHM 1/2, BASS, CHORD 1/2, PAD, and PHRASE 1/2 — that you can control to modify the “orchestration” and therefore the overall sound of the accompaniment. When the power switch is turned ON or an accompaniment style is selected, RHYTHM 1, CHORD 1 and PHRASE 1 tracks appear on the display. -
Page 41: Large/Small Accompaniment
ON / ACCOMP LARGE/SMALL Muting Individual Tracks The PSR-620 Auto Accompaniment system includes five Track buttons which allow you to control the accompaniment arrangement in real time. The accompaniment tracks can be turned OFF (muted) or ON by pressing the corresponding TRACK buttons. The track icon will disappear when a track is muted. -
Page 42: Changing Accompaniment Track Voices
PSR-620 panel voices. Refer to the GM Voice List (see page 97) for the GM voice numbers and names. Only the numbers from 1 through 8 can be selected for the RHYTHM tracks. -
Page 43: Changing The Accompaniment Split Point
(C6) is “96”. The split point can be set at any key number from 00 through 127, allowing the split point to be set outside the range of the PSR-620 keyboard for MIDI applications. 1 – –... -
Page 44: One Touch Setting
Using Auto Accompaniment One Touch Setting lets you instantly select the appropriate panel settings suitable for the current style. Each style (100 styles) contains four variations. This means that you can freely use 400 different panel settings. The One Touch Setting feature automatically sets the following parameters: One Touch Setting Parameter List •... -
Page 45: Registration Memory
Registration Memory The PSR-620 Registration Memory feature can be used to memorize 128 complete control-panel setups (32 banks, 4 setups each) that you can recall whenever needed. VOICE STYLE SONG REGIST MEMORY MULTI PAD DUAL VOICE SPLIT VOICE HARM/ECHO OVERALL... - Page 46 Registration Memory Register the Settings While holding the [MEMORIZE] button, press one of the REGISTRA- TION MEMORY buttons. Any data that was previously in the selected loca- tion is erased and replaced by the new settings. The corresponding Registra- tion Memory number will appear above “REGIST” in the display. MEMORIZE REGISTRATION MEMORY...
-
Page 47: Recall The Registered Panel Settings
Recall the Registered Panel Settings Simply select the appropriate bank as described above, then press the de- sired REGISTRATION MEMORY button at any time to recall the memorized settings. The corresponding Registration Memory number will appear above “REGIST” in the display, and the appropriate setting changes will appear in the display. -
Page 48: Song Recording
Song number 26 is available for recording your own songs (the “user” song). Only one song can be retained in the PSR-620 memory at a time, but your songs can be saved to floppy disk - up to 100 songs per disk (the actual number depends on the volume of the song data) - and then reloaded later whenever you want to play them (see pgae 66). - Page 49 Press the SONG [REC] button. The [REC] indicator will flash, and “REC” will appear in the MELODY 1 track position on the display indicat- ing that the PSR-620 is ready to record. Flashing square brackets in both the MELODY 1 and MELODY 2 track positions indicate that either track can be selected for recording at this point —...
-
Page 50: Stop Recording
Song Recording Record Recording will begin as soon as you play a note on the keyboard or press the SONG [PLAY/STOP] button, and the BEAT indicator dots will begin to indicate the current beat as in the Auto Accompaniment mode. The MEASURE parameter will also show the current measure number. -
Page 51: Recording Accompaniment With Or Without A Melody
Recording Accompaniment With or Without a Melody The SONG ACCOMP track records the following operations and data: • Section changes • Style number* • Accompaniment track changes* (track ON/OFF, voice number, volume) • Accompaniment volume* • Chord changes, timing • Reverb type •... - Page 52 Press the SONG [REC] button. The [REC] indicator will flash, and “REC” will appear in the ACCOMP and MELODY 1 track positions on the display indicating that the PSR-620 is ready to record. Flashing square brackets in both the MELODY 1 and MELODY 2 track positions indicate that either track can be selected for recording at this point —...
- Page 53 Play the required chords in the Auto Accompaniment section of the key- board. If you’ve also selected the MELODY track to be recorded, play the melody on the right-hand section of the keyboard. The MEASURE number on the display will increment as recording progresses. MEASURE Stop Recording Stop recording by pressing the SONG [PLAY/STOP] button, the AUTO...
-
Page 54: Accompaniment And Melody Playback
• User Song data can be loaded into the PSR-620’s user song memory location (Song number 26) and played. See page 68 for instructions on loading song data... -
Page 55: Play From A Specified Measure
Play from a Specified Measure You can start SONG playback from any specified measure, as long as the specified measure is within the range of measures that has already been re- corded: Select the MEASURE Parameter While no recording or playback is in progress, use the CURSOR buttons to select the MEASURE parameter in the display. -
Page 56: Voice & Volume Rewrite
Song Recording Voice & Volume Rewrite You can rewrite the last recorded voice change in any individual track during playback by using the cursor buttons to select the voice number of the target track (the voice number will flash), and then using the number buttons, the [–/NO] and [+/YES] buttons or the data dial to select the de- sired voice number. -
Page 57: The Multi Pads
DIGITAL EFFECT The PSR-620 has 21 multi pad kits, each containing a complete set of 4 MULTI PAD phrases — 84 phrases in all. Before using the MULTI PADS, select the MULTI PAD kit containing the phrases you want to... - Page 58 MULTI PAD plays a brass chord stab. When a “chord match” type MULTI PAD phrase is played, the phrase will be automatically transposed to match chords played using the PSR-620 Auto- accompaniment feature. MULTI PAD playback can be terminated by pressing the MULTI PADS [TERMINATE] button.
-
Page 59: Recording The Multi Pads
• Up to approximately 200 notes (for User Pad Kit) can be re- corded in the PSR-620. • The MULTI PAD function can be quickly selected by pressing and holding the [REC/END] button. - Page 60 The Multi Pads Select a Voice and Other Parameters Select a voice and related parameters you want to record on the MULTI PADS. You might also want to set a tempo that will be easy to record at. If you select a pitched voice to record, the data will automatically be transposed to match the chords played by the Auto Accompaniment feature (“chord match”).
- Page 61 Play the Multi Pads Tap any of the MULTI PADS. Your recorded data will be played in ex- actly the same way as the preset data. Enter a New Name for the Multi Pad Kit If you want to enter a descriptive name for the user pad kit (multi pad kit number “22”), enter your original multi pad kit name, this is recommended.
-
Page 62: Using Music Cartridges
Using Music Cartridges The PSR-620 features a cartridge slot which accepts pre-programmed Yamaha Music Cartridges containing style, song and/or registration data. One sample Music Cartridge is supplied with the PSR-620. Others are available from your Yamaha dealer. REGIST MEMORY MULTI PAD... -
Page 63: Cartridge Accompaniment Styles
Cartridge Accompaniment Styles The Music Cartridge supplied with the PSR-620 provides an extra 8 accompaniment styles that can be used in the same way as the internal accompaniment styles. Selecting Cartridge Styles Select the Style Function Press the [STYLE] button to directly select the STYLE function, or press the [FUNCTION] button to the left of the display as many times as necessary until the arrowhead in the display appears next to “STYLE”... -
Page 64: Cartridge Songs
Using Music Cartridges Using Yamaha Music Cartridges (the one supplied with the PSR-620 includes 8 songs, others are available from your Yamaha dealer), the PSR-620 will let you enjoy listening to automated performances, or function as your “private music tutor,” allowing you to practice various parts of a piece while the others are played automatically. -
Page 65: Cartridge Registration Presets
Cartridge Registration Presets The Music Cartridge supplied with the PSR-620 provides 8 banks of preset registration settings (8 banks x 4 registration memories = 32 total) that provide a number of useful registration setups (refer to page 43 for details on the registration memory). -
Page 66: Using Floppy Disks
User Songs, User Pad kits (that you have recorded yourself), User Styles (loaded from Style File Format Style Disks) and Registration Memory data. PSR-620 disk data can be selected in the same way as the internal data via the appropriate function display. -
Page 67: Formatting A New Floppy Disk
Formatting a New Floppy Disk The PSR-620 uses only 3.5” 2DD floppy disks. Before you can use a new disk for saving data, the disk must be “formatted” as described below. Insert the Disk to Be Formatted Make sure that the disk’s write protect tab is set to the “write” position (tab closed), and insert the new disk into the disk drive unit with the sliding shutter facing the drive slot and the label side of the disk facing upward. -
Page 68: Saving, Loading, & Deleting Disk Files
The currently selected registration bank data: registration memory settings [1] through [4] All registration bank data • The user style data is loaded from disk to the style memory area of the PSR-620 (style number 101). • Each file type corresponds to a PSR-620 function. - Page 69 When you save the registration memory data, select the desired Registration Memory Bank (01 through 32) by using the [–/NO] and [+/YES] buttons, the number buttons or the data dial. If you want to save all PSR-620 registration memory data at once, select “33: AllBank” in the REGIST MEMORY function.
-
Page 70: Loading From Disk
[EXECUTE] button (Press the [QUIT] button if you want to cancel). The PSR-620 will ask “Overwr ?” for confirmation. If you’re sure you want to write of the existing data, press the [+/ YES] button. - Page 71 • Selecting a file on the disk may not be possible, imme- diately after the floppy disk is inserted and while the PSR-620 is reading the disk data. • If the PSR-620 RAM memory becomes full or there is something wrong...
-
Page 72: The Referred File
Using Floppy Disks The Referred File Some song and registration files have “referred” file(s). If, for example, a loaded song file was recorded with a user style, the song file will not play correctly if the user style file has not also been loaded. Also, if a registration setup includes a user style and/or user pad data, the user style and/or user pad file must also be loaded if the registration setup is to function properly. -
Page 73: User Style Or Pad Files Referred To By A Registration File
User Style or User Pad Files Referred to by a Registration File When recalling a registration setup with referred user style and/or user pad file(s), the [EXECUTE] indicator will flash and “RefLoad?” will appear on the display if the inserted disk includes the user style and/or user pad file(s) and the file(s) have not been loaded. -
Page 74: Deleting A Disk File
Using Floppy Disks Select the DELETE Job Press the [JOB SELECT] button to the right of the display as many times as necessary until the arrowhead in the display appears next to “DE- LETE” in the disk job list to the right of the display. LOAD SAVE DELETE... -
Page 75: Quick Play: Disk Orchestra Collection & Standard Midi File Disks
Quick Play: Disk Orchestra Collection & Standard MIDI File Disks In addition to playing files recorded on the PSR-620, the PSR-620 can play back pre-recorded Yamaha Disk Orchestra Collection music disks, Yamaha Disklavier PianoSoft, ESEQ files and Standard MIDI File (file format 0) disks recorded on other equipment. -
Page 76: Practice Features
Practice Features The PSR-620 includes two features that can be a great aid in learning to play and practicing on the keyboard. REGIST MEMORY MULTI PAD DUAL VOICE SPLIT VOICE HARM/ECHO OVERALL DIGITAL EFFECT When the Minus One mode is engaged, the left-hand, right-hand, or both keyboard parts of a song —internal demo, Music Cartridge or Disk —... -
Page 77: Repeat Play
FUNCTION CURSOR REGIST MEMORY DUAL VOICE SPLIT VOICE HARM/ECHO DIGITAL EFFECT Mode Part Turned Off Right hand. Left hand. Left and right hands. This function allows you to specify any section of a song — cartridge, disk or internal — for continuous repeat playback. While the song is playing, press the [REPEAT PLAY] button once at the beginning of the section to be repeated (the “A”... -
Page 78: Overall Functions
Overall Functions Some of the functions in the OVERALL function group have already been described in appropriate sections of this manual. Others will be intro- duced for the first time in this section. Refer to the chart below for the page numbers on which each function is described. -
Page 79: General Functions
To access an OVERALL function press either of the [FUNCTION] buttons to the left of the display as many times as necessary until the arrowhead in the display appears next to “OVERALL” in the function list to the left of the display. Then use the cursor [ ] and [ ] buttons to select the desired function from within the OVERALL function list. -
Page 80: Reverb Level
Overall Functions Reverb Level Sets the reverb send level for the voice selected via the VOICE function. The reverb send level determines the amount of signal sent to the reverb effect. The range is from “00” to “127”. The reverb return level can be ad- justed via the “RevRtnLv”... -
Page 81: Voice Set
Voice Set The VOICE SET feature brings out the best in each individual voice by automatically setting a range of important voice-related parameters when- ever a voice is selected. The parameters that may be set by the VOICE SET feature are listed below. This function lets you turn VOICE SET ON or OFF, as required. -
Page 82: Minus-One Right/Left-Hand Channel
ON. Tuning Sets the pitch of the PSR-620 to match other instruments. Tuning can be accomplished over a 100 cent range (that’s 200 cents total, or a tone). The tuning range is from “–100” to “+100”. “00” is the “normal” tuning value. -
Page 83: Midi Functions
The MIDI Connectors The MIDI IN connector receives MIDI data from an external MIDI de- vice which can be used to control the PSR-620. The MIDI OUT connec- tor transmits MIDI data generated by the PSR-620 (e.g. note and velocity data produced by playing the keyboard). - Page 84 Overall Functions The PSR-620 is capable of receiving the same MIDI data, so a second MIDI keyboard connected to the PSR-620 MIDI IN connector can be used to remotely play the PSR-620 and select voices as required. PSR-620 MIDI Sequence Recording Although the PSR-620 features a built-in “sequencer”...
-
Page 85: Remote Channel
The remote keyboard must be set up to transmit on the specified remote channel, and the keyboard’s MIDI OUT connector must be con- nected to the PSR-620 MIDI IN connector via a standard MIDI cable. Refer to the “MIDI Implementation Chart” section (page 100) for technical de- tails. -
Page 86: Accompaniment Out
MIDI IN connector. This means that while an external MIDI sequencer, for example, plays the PSR-620 internal voices, an external tone generator can be played from the PSR-620 keyboard. The default Local Control setting is ON. -
Page 87: External Clock
External Clock Reception of an external MIDI clock signal can be enabled or disabled as required. When disabled (OFF), all of the time-based functions (Auto Ac- companiment, SONG recording and playback, etc.) are controlled by its own internal clock. When MIDI clock reception is enabled (ON), however, all timing is controlled by an external MIDI clock signal received via the MIDI IN terminal. -
Page 88: Appendix
VOICE STYLE SONG REGIST MEMORY MULTI PAD DUAL VOICE SPLIT VOICE HARMONY/ECHO OVERALL DIGITAL EFFECT PSR-620 Function Tree Display Description GrandPno Selecting Voices ... page 12 (Voice Name) 8BeatPop Selecting Accompaniment Styles ... page 33 (Style Name) SSax Selecting Songs ... page 47... - Page 89 Appendix: PSR-620 Function Tree Kybd Vol Changing Keyboard volume ... page 77 Octave Changing Octave (VOICE function voice and dual voice) ... page 77 RevLevel Changing Reverb Send Level (VOICE function voice) ... page 78 ChoLevel Changing Chorus Send Level (VOICE function voice) ... page 78 DspLevel Changing DSP Send Level (VOICE function voice) ...
-
Page 90: About Digital Effect
Appendix: About Digital Effect Digital Effect Configuration The PSR-620 features three types of digital effectors: Reverb, Chorus and DSP. Reverb and Chorus effectors are exclusively used for enhancing and varying their respective effect types. On the contrary the DSP effector can be used to select a variety of effect types such as Distortion, Equalizer, Reverb and Chorus. - Page 91 The Digital Effect List Effect Type REVERB 01~04 Hall1~4 System 05~08 Room1~4 System 09, 10 Stage1, 2 System 11, 12 Plate1, 2 System — CHORUS 01~05 Chorus1~5 System 06~09 Flanger1~4 System — 01~04 Hall1~4 System 05~08 Room1~4 System 09, 10 Stage1, 2 System 11, 12...
-
Page 92: Troubleshooting
SINGLE FINGER mode is not selected (page 31). Are you sure you’re playing in the Auto-Accompaniment section of the keyboard? Are you playing chords that the PSR-620 can recognize (see chord types on page 32)? Make sure that the Keyboard Volume, Split Voice Volume, and/or Dual Voice Vol- ume parameters are set at an appropriate level (pages 77, 15, and 18). -
Page 93: Data Backup & Initialization
Appendix: Data Backup & Initialization Except for the data listed below, all PSR-620 panel settings are reset to their initial settings whenever the power is turned ON. The data listed below are backed up — i.e. retained in memory — as long as an AC adaptor is connected or a set of batteries is installed. -
Page 94: Index
Polyphony The PSR-620 can play up to 32 individual notes at the same time (i.e. it has a maximum “polyphony” of 32). This number includes all voices used: dual, split, auto accompaniment, song, and multi pads. If the maximum po- lyphony of the PSR-620 is exceeded, the excess notes will be truncated (they will not sound). -
Page 95: Specifications
Panel Voice List MIDI Bank Select Voice Program Voice Name Number MSB Number Piano Grand Piano Bright Piano Honky-tonk Piano Funky Electric Piano DX Electric Piano Midi Grand Piano Hyper Electric Piano Dream Electric Piano Bell Electric Piano Ice Electric Piano Tremolo Electric Piano Harpsichord Harpsichord Coupled... -
Page 96: Voice List
Voice List MIDI Bank Select Voice Program Number MSB Number Brass Trumpet Flugel Horn Muted Trumpet Trombone Trombone Section French Horn Tuba Brass Section Brass+Sax Brass+Trombone Brass+Trumpet Synth Brass 1 Synth Brass 2 Reed Soprano Sax Alto Sax Breathy Alto Sax Tenor Sax Breathy Tenor Sax Baritone Sax... - Page 97 GM Voice List MIDI Number Voice Program Voice Name of Notes Number Number Used Piano Acoustic Grand Piano Bright Acoustic Piano Electric Grand Piano Honky-tonk Piano Electric Piano 1 Electric Piano 2 Harpsichord Clavi Chromatic Percussion Celesta Glockenspiel Music Box Vibraphone Marimba Xylophone...
-
Page 98: Percussion Kit List
Percussion Kit List * “<——” indicates the content is the same as that of Standard Kit. * The number in parentheses ( ) after the percussion kit name is the MIDI program number. * The corresponding MIDI note numbers for the notes listed in the chart below are actually one octave lower. - Page 99 Note# Note 146: Analog Kit (25) <—— <—— <—— <—— <—— <—— <—— <—— <—— <—— <—— <—— <—— <—— <—— Reverse Cymbal <—— Hi-Q Snare Analog L <—— Bass Drum Analog L <—— Bass Drum Analog M Bass Drum Analog H Closed Rim Shot Analog Snare Analog M <——...
- Page 100 MIDI Implementation Chart [Portable Keyboard] Model: PSR-620 Function Basic Default 1~16 CH Channel Changed 1~16 CH Default Mode 3 Mode Messages Altered ***************** Note 0~127 Number : True voice ***************** O 9nH, v=1~127 Velocity Note on X 9nH, v=0 Note off After key’s...
- Page 101 *8 129~141 voice numbers are selectable through an appropriate Bank Select setting (Refer to *2). *9 When the External Clock is turned ON by PSR-620 panel setting, Clock, Start/Stop message will be received. The start/stop of the song recording and playback will be controlled by the external device.
-
Page 102: Midi Implementation Chart
MIDI channels. The current standard recognized by the International MIDI Association is known as “GM System Level 1.” The PSR-620 voice allocation complies with the GM System Level 1 standard. -
Page 103: Midi Data Format
MIDI Data Format <Table-1> Parameter Change SYSTEM Address Size Data 00 00 00 0000 - 07FF 00 - 7F 28 - 58 00 - 01 EFFECT Address Size Data 02 01 00 00-7F 00-7F 00-7F 00-7F 00-7F 00-7F 00-7F 00-7F 00-7F 00-7F 00-7F... - Page 104 00-7F 00-7F 00-01 00-01 02 01 70 00-7F 00-7F 00-7F 00-7F 00-7F 00-7F * VARIATION means PSR-620 Dsp effect. MULTI PART Address Size Data 08 nn 07 00 - 05 nn 11 00 - 7F nn 41 00 - 7F...
-
Page 105: Midi Data Format
<Table-2> Effect map The following types in the boxes can be controlled by the PSR-620 settings. The numbers in the brackets are PSR-620 panel effect numbers. The blank indicates the content is the same as that of 00H. REVERB TYPE... - Page 106 MIDI Data Format <Table-3> Effect Parameter List Only the following parameter numbers are effective. Parameter values consists of 2-bytes. Enter 00H for MSB and appropriate value for LSB. * Parameter number 10 Dry/Wet is effective only when Variation connection is insertion. TYPE Type Parameter...
- Page 107 TYPE Type Parameter Parameter MSB(H) Number TREMOLO LFO Frequency AM Depth PM Depth EQ Low Frequency EQ Low Gain EQ High Frequency EQ High Gain LFO Phase Difference 4-124 Input Mode AUTO PAN LFO Frequency L/R Depth F/R Depth PAN Direction EQ Low Frequency EQ Low Gain EQ High Frequency...
- Page 108 Specifications Keyboards: 61 standard-size keys (C1~C6) with touch response. Display: Large multi-function LCD display Setup: Power: ON/OFF Master Volume: MIN-MAX Control & Ten Keys: < >, FUNCTION CURSOR , MODE , [0]~[9], [+/YES], [–/NO], Data dial Cartridge Slot Demo: Voice Demo:17 songs Style Demo:8 songs Mode: NORMAL, SPLIT,SINGLE,FINGERED...
-
Page 109: Gm System Level 1
Index AC power adaptor ... 6 Accomp large/small ... 39 Accomp out (MIDI transmission) ... 84 Accompaniment split point ... 41 Accompaniment track (song) ... 49 Accompaniment volume ... 79 Auto accompaniment ... 30 Auto fill ... 37 Aux out ... 7 Bass (accompaniment track) ... -
Page 110: Limited Warranty
PSR SERIES OF PORTATONE ELECTRONIC KEYBOARDS If during the first 90 days that immediately follows the purchase date, your new Yamaha product covered by this warranty is found to have a defect in material and/or workmanship, Yamaha and/or its authorized representative will repair such defect without charge for parts or labor. - Page 111 M.D.G., EMI Division © 1995 Yamaha Corporation VT49640 507POCP3.3-01A0 Printed in Japan...