Table of Contents
Advertisement
Advertisement
Table of Contents

Related Manuals for Yamaha PortaTone PSR-450


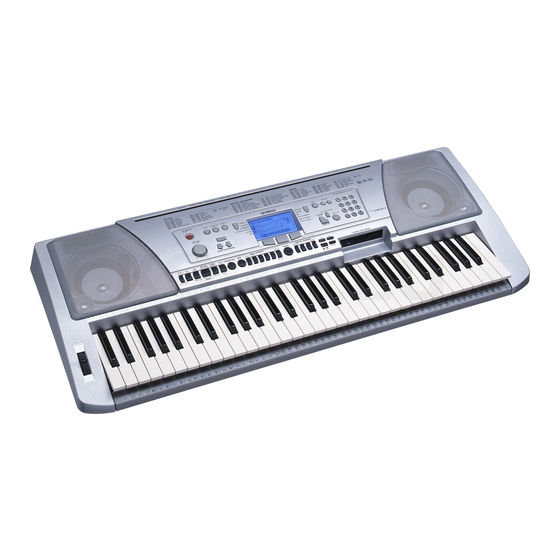
Summary of Contents for Yamaha PortaTone PSR-450
-
Page 2: Special Message Section
Yamaha. This product should be used only with the components supplied or; a cart, rack, or stand that is recommended by Yamaha. If a cart, etc., is used, please observe all safety markings and instructions that accompany the accessory product. - Page 3 1. IMPORTANT NOTICE: DO NOT MODIFY THIS UNIT! This product, when installed as indicated in the instructions contained in this manual, meets FCC requirements. Modifications not expressly approved by Yamaha may void your authority, granted by the FCC, to use the product. 2. IMPORTANT: When connecting this product to accessories and/or another product use only high quality shielded cables.
- Page 4 • Use the specified adaptor (PA-5D, PA-5C or an equivalent recommended by Yamaha) only. Using the wrong adaptor can result in damage to the instrument or overheating. • Check the electric plug periodically and remove any dirt or dust which may have accumulated on it.
- Page 5 Yamaha cannot be held responsible for damage caused by improper use or modifications to the instrument, or data that is lost or destroyed. Always turn the power off when the instrument is not in use.
- Page 6 ● To maintain the disk drive in optimum working order Yamaha recommends that you use a commercially-available dry-type head cleaning disk to clean the head about once a month.
-
Page 7: Gm System Level 1
The Panel Logos The PSR-450 is compatible with commercially available music software (floppy disk) that bears any of the logos shown below. CAUTION • Use of a power adaptor is recommended when performing floppy disk operations. If you use batteries and the batteries fail during an operation, the PSR-450 and/or floppy disk data can be corrupted or lost. - Page 8 ■ Floppy Disk Drive... page 54 Recordings of your own keyboard performances (user songs) and other data created on the PSR-450 can be saved to floppy disk (page 55). User songs can also be saved as GM-compatible SMF (Standard MIDI File) format files that will play back with the correct voice assignments on any GM-compatible instrument (page 57).
-
Page 9: Table Of Contents
• What Is MIDI? • Things You Can Do With MIDI ... 29 • Connecting to a Personal Computer • Local On/Off • PSR-450 Panel Setting Transmission (Initial Send) ... 30 • Clock Settings ... 30 Voice List ... 67 ... -
Page 10: Setting Up
Setting Up This section contains information about setting up your PSR-450 for playing. Make sure to read this section carefully before using the instrument. Power Requirements Although the PSR-450 will run either from an AC adaptor or batteries, Yamaha recommends use of an AC adaptor whenever possible. An AC adaptor is more environmentally friendly than batteries and does not deplete resources. -
Page 11: Turning On The Power
• Even when the switch is in the “STANDBY” position, electricity is still flowing to the instrument at the minimum level. When you are not using the PSR-450 for a long time, make sure you unplug the AC power adaptor from the wall AC outlet, and/or remove the batteries from the instrument. -
Page 12: Panel Controls And Terminals
@8 [PITCH BEND] wheel ...page 30 ■ Rear Panel @9 MIDI IN/OUT terminals...page 11 #0 FOOT SWITCH jack...page 11 #1 PHONES/OUTPUT jack...page 11 #2 DC IN 12V jack ...page 10 PSR-450 Owner’s Manual STYLE List !7 !8 !9 @0 @1 @2... - Page 13 Panel Controls and Terminals MUSIC DATABASE List VOICE List GrandPno GrandPno #0 #1 PSR-450 Owner’s Manual...
-
Page 14: Quick Guide
Song number R&B Press the [START/STOP] button or the [DEMO] button to stop playback. Select and Play One Song Press the [SONG] button. Song number R&B PSR-450 Owner’s Manual Song name Song icon Measure number Song name Song icon [Song List] Song No. - Page 15 REW] button ...Fast-reverses the song if pressed during playback (no sound is heard during fast reverse). Decrements the measure number if pressed while playback is stopped. R&B Quick Guide STEP 1 • Playing Songs Current measure number Current beat PSR-450 Owner’s Manual...
-
Page 16: Step
A Music Database name will appear in the display. Select a Music Database. Referring to the list on the PSR-450 panel or at the end of the manual, use the number buttons [0] ~ [9] or the [+] and [–] buttons to select a music database. -
Page 17: Settings Included In The Music Database
* Can only be set when style playback is stopped. Split point Split point Quick Guide STEP 2 • Play Using the Music Database NOTE • The left- and right-hand sec- tions of the keyboard are divided at the “split point” (page 28). PSR-450 Owner’s Manual... -
Page 18: Step
Style number Select a style. Referring to the style list on the PSR-450 panel or at the end of the manual (page 76), use the number buttons [0] ~ [9] or the [+] and [–] buttons to select a style. -
Page 19: Full Accompaniment With Left-Hand Chords
STEP 3 • Play Using a Style NOTE • The left-hand “accompaniment range” and the right-hand “mel- ody range” of the keyboard are divided at the split point. See page 28 for information on how to change the split point. PSR-450 Owner’s Manual... -
Page 20: Adding Variations To The Style (Sections)
Use the number buttons [0] ~ [9] or the [+] and [–] buttons to select a style. Turn the Accompaniment on. Press the [ACMP ON/OFF] button. Engage synchro start. Press the [SYNC START] button. PSR-450 Owner’s Manual Intro Main A / Main B Ending Fill In... - Page 21 MAIN A The name of the selected section — MAIN A or MAIN B — will be displayed above will begin playing after the INTRO MAIN A Quick Guide STEP 3 • Play Using a Style PSR-450 Owner’s Manual...
-
Page 22: Handy Style Playback Functions
Synchro start standby mode PSR-450 Owner’s Manual ● ● ● ● ● ● ● ● ● ● ● ● ● ● ● ● ● ● ● ● ● ● ● ● ● ● ● ● ● ● ●... -
Page 23: Ways To Stop Style Playback
STEP 3 • Play Using a Style NOTE • The default volume setting of “100” can be instantly reset by pressing the [+] and [–] buttons simultaneously. • The style volume can be set when a style is selected. PSR-450 Owner’s Manual... -
Page 24: Step
STEP Play the Grand Piano Voice The PSR-450 has a dazzling range of features and functions, but when you simply want to practice or play piano just press the [PORTABLE GRAND] button. When you press the [PORTABLE GRAND] button all of the PSR-450 settings are instantly optimized for playing the piano. -
Page 25: Setting The Metronome Time Signature
5 beats per measure 6 beats per measure 7 beats per measure • • • • 15 beats per measure NOTE • The default volume setting of “100” can be instantly reset by pressing the [+] and [–] buttons simultaneously. PSR-450 Owner’s Manual... -
Page 26: Select And Try Out A Variety Of Voices
Quick Guide STEP 4 • Try Out the Various Instrument Voices Select and Try Out a Variety Of Voices The PSR-450 employs advanced AWM (Advanced Wave memory) technology to deliver a range of 627 top-quality voices. ● 001 ~ 125...Original PSR-450 voices. -
Page 27: Use One-Touch Setting To Automatically Select Voices
STEP 4 • Try Out the Various Instrument Voices Cool!EP Brush Kit Symphonic Kit SFX Kit 1 SFX Kit 2 Quick Guide NOTE • Details on the instruments and key assignments of each drum kit can be found on page 74. PSR-450 Owner’s Manual... -
Page 28: Play Different Voices With The Left And Right Hands
PSR-450 Owner’s Manual ● ● ● ● ● ● ● ● ● ● ● ● ● ● ● ● ● ● ● ● ● ● ● ● ● ● ● ● ● ● ● ● ● ● ● ● ● ●... -
Page 29: Play Two Voices At The Same Time (Dual Voice)
Sets the main voice reverb level. Sets the octave of the dual voice. Allows selection of the dual voice by voice number. Adjusts the volume of the dual voice, and therefore the balance with the main voice. Quick Guide PSR-450 Owner’s Manual... -
Page 30: Step
Use the number buttons [0] ~ [9] or the [+] and [–] buttons to set the pitch bend range as required. PSR-450 Owner’s Manual ● ● ● ● ● ● ● ● ● ● ● ● ● ● ● ● ● ● ● ● ● ● ●... -
Page 31: Add Harmony To The Right-Hand Melody
STEP 5 • Play With a Variety Of Effects NOTE • Harmony will be turned off if the dictionary function is used. • The default harmony selection for the currently selected voice can be instantly recalled by simultaneously pressing the [+] and [–] buttons. PSR-450 Owner’s Manual... -
Page 32: Play With Harmony
Use the [RIGHT MENU] button to select REVERB. Currently selected reverb type Hall3 PSR-450 Owner’s Manual ACMP ON will appear in the display Accompaniment range... -
Page 33: Add Dsp Effects
Add DSP Effects In addition to the reverb effects described above, the PSR-450 has a range of DSP effects that you can add to your sound. A total of 39 DSP effect are provided, ranging from reverb-like ambience effects to distortion that can be very effective when added to guitar voices, for example. -
Page 34: Step
Step 1-1. Press the track button of the melody track you want to record (1 ~ 5) while holding the [REC] button. The number of the selected track will flash in the display. PSR-450 Owner’s Manual ◆ Style Track • Chord changes and timing •... -
Page 35: Start Recording
Be sure to save all data you want to keep to floppy disk to prevent loss due to accidental erasure. PSR-450 Owner’s Manual... -
Page 36: Clearing User Song Data
All data in the selected song will be cleared and “Clear” will appear in the dis- play. You can abort the clear operation by pressing the [–/NO] button. PSR-450 Owner’s Manual — will flash in the display. ClrUser2 NOTE •... -
Page 37: Track Clear
All data in the selected track will be cleared and “Clear” will appear in the dis- play. You can abort the clear operation by pressing the [–/NO] button. STEP 6 • Record Your Performance NOTE • Song numbers 001 ~ 005 can- not be cleared. User 2 ClrTr1 PSR-450 Owner’s Manual Quick Guide... -
Page 38: Basic Operation And Lcd Display
• PITCH BEND RANGE... page 30 • TUNING... page 43 • MIDI... page 62 PSR-450 Owner’s Manual Turn the [MASTER VOLUME] dial. Note that the menu bar ( , ) in the LCD indicates the menu category (TRANSEPOSE, STYLE/SONG VOL, etc.) - Page 39 [0] button is unnecessary. However, pressing the [0] button is necessary if “0” is part of the number (ex., 105). Basic Operation and LCD Display [VOICE] Using the number buttons sect voice number. Increases the number by one step. PSR-450 Owner’s Manual...
-
Page 40: Measure Display
Indicates that the Dual voice is turned on. SYNC STOP Indicates that the SYNC STOP is turned on. PSR-450 Owner’s Manual Indicates the current song or style mea- sure number, or the metronome beat. “F t” appears when a free-tempo song is selected. -
Page 41: Data Backup & Initialization
● ● ● ● ● ● ● ● ● ● ● ● ● ● ● ● ● ● ● ● ● ● ● ● ● ● ● ● ● ● ● ● ● ● Except for the data listed below, all PSR-450 panel settings are reset to their initial settings whenever the power is turned on. -
Page 42: Performance Features
Press and hold the [TOUCH] button for longer than a second until the touch response sensitivity setting display appears. Use the number buttons [1] ~ [3] or the [+] and [–] buttons to set the touch response sensitivity as required. PSR-450 Owner’s Manual Indicates that touch response is on Current sensitivity Medium... -
Page 43: Transpose Pitch Up Or Down In Semitone Increments
[+] and [–] but- tons simultaneously. • To enter negative values press the number buttons [0] ~ [9] while holding the [–] button. • Tuning cannot be applied to any of the drum kit voices (136 ~ 147). PSR-450 Owner’s Manual... -
Page 44: Playing Style (Accompaniment) Chords
CM aug ( #11) (13) * Notes enclosed in parentheses are optional; the chords will be recognized without them. PSR-450 Owner’s Manual • To play a seventh chord Press the root note together with the nearest white key to the left of it. - Page 45 • The auto accompaniment will sometimes not change when related chords are played in sequence (e.g. some minor chords followed by the minor seventh). • Two-note fingerings will pro- duce a chord based on the pre- viously played chord. PSR-450 Owner’s Manual...
-
Page 46: Looking Up Chords Using The Dictionary
+ chord type — will appear on both the score and the graphic keyboard in the display. Referring to the display, try fingering the chord on the keyboard. If you play the chord correctly the chord name in the display will flash. PSR-450 Owner’s Manual Dict. keys Dict. -
Page 47: About Chords
Flatted 5 Minor 7 chord Playing Style (Accompaniment) Chords Root ◆ Diminished chord Minor 3rd Minor 3rd Root note Chord type Major 7 Major 7 Major chord , suspended 4 7sus4 Flatted 7 Suspended 4 chord PSR-450 Owner’s Manual... -
Page 48: Song Playback Functions
Song Volume You can adjust the song playback volume to achieve the best balance with the key- board sound. Use the [LEFT MENU] button to select STYLE/SONG VOLUME. PSR-450 Owner’s Manual MELODY V Current song volume setting SONG VOL HnkyTonk... -
Page 49: Repeat Playback
• The repeat start and end points can be specified in one-mea- sure increments. • If you want to set the start point “A” at the very beginning of the song press the [A-B REPEAT] button before starting playback of the song. PSR-450 Owner’s Manual... -
Page 50: Easy Performer
The sound of the part you selected in step score and keyboard in the display, and play the indicated notes with the correct timing. If you play a wrong note the PSR-450 will play the correct note for you. PSR-450 Owner’s Manual , above, will be muted. - Page 51 R-PART NOTE — “Select the song you • This function works only with • Be sure to select the track PSR-450 Owner’s Manual Easy Performer SMF Format 0 song files (refer to page 57 for informa- tion about SMF files).
-
Page 52: Save The Panel Settings (Registration Memory)
Press the [BANK] button and then use the number buttons [1] ~ [8] or the [+] and [–] buttons to select the bank you want to save the settings to. PSR-450 Owner’s Manual 16 panel setups (8 banks x 2) can be saved... -
Page 53: Recall The Save Panel Settings
• All current panel settings will be overwritten when a regis- tration memory is recalled. If you want to keep the settings you will need to save them to a free registration memory location before recalling the saved settings. PSR-450 Owner’s Manual... -
Page 54: Floppy Disk Save And Load
Be sure to insert the disk all the way until it “clicks” into place. The PSR-450 will automatically switch to the song playback mode when a floppy disk containing playable songs is inserted. -
Page 55: Change The Playback Octave Of A Track
Change the Playback Octave Of a Track When playing disk songs, the range of some songs might exceed the range of the PSR-450 keyboard (C1 ~ C6). In such cases the out-of-range notes will not appear in the display score or keyboard, but the </>... - Page 56 You can abort the save operation by pressing the [–/NO] button. Exit from the save mode by pressing the [UTILITY] button. “Complete” will appear on the display when the save operation has been completed. PSR-450 Owner’s Manual FILENAME FILENAME Saving...
-
Page 57: Load
■ Saving SMF (Standard MIDI Format) Format 0 Files SMF format is a standard format for saving MIDI music data. To save PSR-450 song data in SMF Format 0, perform the following steps after performing step In step on page 55 of the above Save operation, after pressing the [SAVE] button, press the [SAVE] button again to call up the SMF Save mode. -
Page 58: Delete
floppy disk or turn the power off. NOTE • When data is loaded from a floppy disk to the PSR-450, the data already in the memory of the PSR-450 will be replaced by the data on the disk. Save important data into a disk file... -
Page 59: Format
Complete Format Standard floppy disks (3.5-inch 2HD or 2DD types) must be formatted by the PSR-450 before they can be used for saving PSR-450 data. ■ Formatting an Unformatted Floppy Disk q Insert a new unformatted floppy disk in the disk drive. - Page 60 This function is useful for quickly deleting unnecessary files from an already for- matted disk. q Insert the formatted floppy disk in the disk drive. w Press the [UTILITY] button. If the inserted floppy disk does not contain any files the PSR-450 will auto- matically proceed to step PSR-450 Owner’s Manual Sure?
- Page 61 “Protect” message appears, indicating that the Format func- tion is not possible. CAUTION • While the file is being For- matted (“Formatin” message appears on the display), never eject the floppy disk or turn the power off. PSR-450 Owner’s Manual...
-
Page 62: Midi Functions
So then what is the information from the keyboard that becomes the basis for note production? For example, let’s say you play a “C” quarter note using the grand piano sound on the PSR-450 keyboard. Unlike an acoustic instrument that puts out a resonated note, the electronic instrument puts out information from the keyboard such as “with what voice,”... -
Page 63: Things You Can Do With Midi
● Connect to a computer via a MIDI cable and send and receive performance data. ● Local on/off: Determine whether or not notes played on the PSR-450 are sounded by the PSR-450’s inter- ● nal tone generator. Initial send: When recording a PSR-450 performance to an external sequencer or similar equipment, this ●... -
Page 64: Connecting To A Personal Computer
This function can be used to turn local control on or off. Local control determines whether or not notes played on the PSR-450 are sounded by its internal tone gen- erator system: the internal tone generator is active when local control is on, and inactive when local control is off. -
Page 65: Panel Setting Transmission (Initial Send)
When recording a PSR-450 performance to an external sequencer or similar equip- ment, you can use this function to send the current PSR-450 panel settings so that when the sequence is played back the original panel settings are automatically restored. -
Page 66: Clock Settings
280. Press the [+] button one more time. When “ECL” appears on the display the PSR-450 is in the external clock mode. To go back to the internal clock mode press the [–] button to return to an internal tempo setting. -
Page 67: Voice List
• The Voice List includes MIDI program change numbers for each voice. Use these program change numbers when playing the PSR-450 via MIDI from an external device. • Program Numbers 001 to 128 directly relate to MIDI Pro- gram Change Numbers 000 to 127. - Page 68 Voice List Bank Select MIDI Voice Program Numbers SAXOPHONE TRUMPET BRASS FLUTE SYNTH LEAD PSR-450 Owner’s Manual Voice Voice Name Vocal Ensemble Vox Humana Air Choir Sweet! Tenor Sax Sweet! Alto Sax Sweet! Soprano Sax Sweet! Clarinet GrowlSax Baritone Sax...
-
Page 69: Xg Voice List
Rotary Organ Slow Rotary Fast Rotary Church Organ Church Organ 3 Church Organ 2 Notre Dame Organ Flute Tremolo Organ Flute Reed Organ Puff Organ Accordion Accord It Harmonica Harmonica 2 Tango Accordion Tango Accordion 2 PSR-450 Owner’s Manual Voice List... - Page 70 Voice List Bank Select MIDI Voice Program Numbers GUITAR BASS PSR-450 Owner’s Manual Voice Voice Name Nylon Guitar Nylon Guitar 2 Nylon Guitar 3 Velocity Guitar Harmonics Ukulele Steel Guitar Steel Guitar 2 12-string Guitar Nylon & Steel Guitar Steel Guitar with Body Sound...
- Page 71 Sawtooth Lead Sawtooth Lead 2 Thick Sawtooth Dynamic Sawtooth Digital Sawtooth Big Lead Heavy Synth Waspy Synth Pulse Sawtooth Dr. Lead Velocity Lead Sequenced Analog Calliope Lead Pure Pad Chiff Lead Rubby Charang Lead Distorted Lead PSR-450 Owner’s Manual Voice List...
- Page 72 Voice List Bank Select MIDI Voice Program Numbers SYNTH PAD SYNTH EFFECTS PSR-450 Owner’s Manual Voice Voice Name Wire Lead Voice Lead Synth Aahs Vox Lead Fifths Lead Big Five Bass & Lead Big & Low Fat & Perky Soft Whirl...
- Page 73 Wind Chime Telephone Ring 2 Car Engine Ignition Car Tires Squeal Car Passing Car Crash Siren Train Jet Plane Starship Burst Roller Coaster Submarine Laugh Scream Punch Heartbeat Footsteps Machine Gun Laser Gun Explosion Firework PSR-450 Owner’s Manual Voice List...
-
Page 74: Drum Kit List
Note# Note Note# Note C# -1 D# -1 G# -1 100 E 101 F 102 F# 103 G PSR-450 Owner’s Manual 127/000/001 127/000/002 127/000/009 Alternate Standard Kit 1 Standard Kit 2 Room Kit assign Surdo Mute Surdo Open Hi Q... - Page 75 Hand Cym. H Train Jet Plane Hand Cym.Short H Starship Burst Roller Coaster Submarine Shower Laugh Thunder Scream Wind Punch Stream Heartbeat Bubble FootSteps Feed Machine Gun Horse Laser Gun Bird Tweet 2 Explosion Firework Ghost Maou PSR-450 Owner’s Manual...
-
Page 76: Style List
HouseMusik SwingHouse TechnoPolis Clubdance ClubLatin Garage1 Garage2 TechnoParty UKPop HipHopGroove HipShuffle HipHopPop DISCO 70’sDisco1 70’sDisco2 DiscoPhilly SaturdayNight PSR-450 Owner’s Manual Serial No. Style Name LatinDisco DiscoChocolate DiscoHands DiscoFox SchlagerPop SWING & JAZZ BigBandFast BigBandMedium OrchestraSwing BigBandBallad BigBandShuffle JazzClub Swing1 Swing2... -
Page 77: Music Database List
BALLROOM BrazilBr CherryBr CherryOr DanubeWv MantoStr SandmnFx SundyNvr TangoPiz Tea4Two TulipWtz YesSirQk TRADITIONAL AlpenTri Balalaik Ceilidh CielPari Cl Polka Comrades DnceLord Funiculi HappyPlk Herzlin HornPipe JinglBel Kufstein LindoMex MexiHat MickyFlt NavyAway RlBarrel SnowWtz StarMrch WashPost WdCuttrs XmasWalz PSR-450 Owner’s Manual... -
Page 78: Effect Type List
Delay Left - Right Echo Cross Delay Karaoke Distortion Hard Distortion Soft Overdrive Amp Simulation EQ Disco EQ Telephone 3Band EQ 2Band EQ No Effect PSR-450 Owner’s Manual Display Name Hall1 Hall2 Hall3 Room1 Room2 Stage1 Stage2 Plate1 Plate2 Display Name Hall1... -
Page 79: Harmony Type List
Echo 1/24 note Echo 1/32 note Display Name Duet Trio Block Country Octave Tril1/4 Tril1/6 Tril1/8 Tril1/12 Tril1/16 Tril1/24 Tril1/32 Trem1/4 Trem1/6 Trem1/8 Trem1/12 Trem1/16 Trem1/24 Trem1/32 Echo1/4 Echo1/6 Echo1/8 Echo1/12 Echo1/16 Echo1/24 Echo1/32 Effect Type List PSR-450 Owner’s Manual... -
Page 80: Midi Implementation Chart
:All Notes OFF Mes- :Active Sense sages:Reset *1 Refer to #2 on page 81. Mode 1 : OMNI ON , POLY Mode 3 : OMNI OFF, POLY PSR-450 Owner’s Manual MIDI Implementation Chart Transmitted Recognized 1 - 16 1 - 16... -
Page 81: Midi Data Format
MIDI Data Format NOTE: By default (factory settings) the PSR-450 ordinarily functions as a 16-chan- nel multi-timbral tone generator, and incoming data does not affect the panel voices or panel settings. However, the MIDI messages listed below do affect the panel voices, styles, and songs. -
Page 82: Effect Map
* By using an external sequencer, which is capable of editing and transmitting the system exclusive messages and parameter changes, you can select the Reverb, Chorus and DSP effect types which are not accessible from the PSR-450 panel itself. When one of the effects is selected by the external sequencer, “ - ” will be shown on the display. -
Page 83: Troubleshooting
• Recorded song data is not played back properly. • The display disappears suddenly and the panel settings are reset. Noise is heard from the PSR-450. No sound from the PSR-450 speakers when the keyboard is played. • Some notes don’t sound when a number of keys are played simultaneously. -
Page 84: Specifications
: L-6, L-7 * Specifications and descriptions in this owner’s manual are for informa- tion purposes only. Yamaha Corp. reserves the right to change or modify products or specifications at any time without prior notice. Since specifications, equipment or options may not be the same in ev-... -
Page 85: Index
Track Assign R/L... 51 Track Clear ... 37 Track Octave... 55 Transpose... 43 Troubleshooting... 83 Tuning... 43 Turning On the Power ... 11 User ... 34 Using a Footswitch ... 11 Utility... 58 Voice ... 26 Voice List... 67 PSR-450 Owner’s Manual... -
Page 86: Limited Warranty
PSR SERIES OF PORTATONE ELECTRONIC KEYBOARDS If during the first 90 days that immediately follows the purchase date, your new Yamaha product covered by this warranty is found to have a defect in material and/or workmanship, Yamaha and/or its authorized representative will repair such defect without charge for parts or labor. - Page 87 For details of products, please contact your nearest Yamaha representative or the authorized distributor listed below. Pour plus de détails sur les produits, veuillez-vous adresser à Yamaha ou au distributeur le plus proche de vous figurant dans la liste suivante.
- Page 88 Yamaha PK CLUB (Portable Keyboard Home Page, English Only) http://www.yamahaPKclub.com/ Yamaha Manual Library http://www2.yamaha.co.jp/manual/english/ U.R.G., Pro Audio & Digital Musical Instrument Division, Yamaha Corporation © 2004 Yamaha Corporation WC24420 ???PO???.?-01A0 Printed in China...