Table of Contents
Advertisement
CD Synchronized Recording with a Compatible YAMAHA Tape Disk
Thank you for selecting this YAMAHA Compact Disc Player.
OWNER'S MANUAL
CONTENTS
Safety Instructions.................... 2
Connections ............................. 4
Identification of Components.... 6
Loading the Disc/Disc Play....... 8
Random-Sequence Play ........ 12
Repeat Play............................ 12
Program Play.......................... 13
Index Search .......................... 14
Track Programming for
Recording to Tape .................. 15
CD Synchronized Recording ...... 19
Notes about the Remote
Control Transmitter ................. 20
Notes about Handling
Compact Discs ....................... 20
Troubleshooting ...................... 21
Specifications ......................... 21
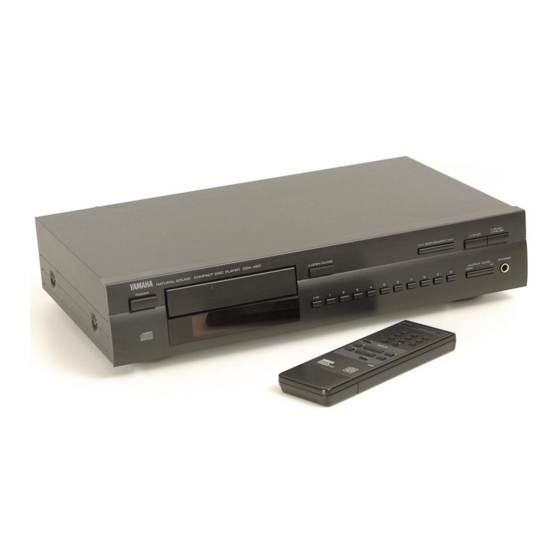
CDX-880/580/480
Natural Sound Compact Disc Player
Random Access Programmable Play
Single Track/Entire Disc Repeat Play
Automatic Peak Level Searching Capability
Display Brightness Changing Capability
IMPORTANT!
Please record the serial number of this
unit in the space below.
Model:
Serial No.:
The serial number is located on the rear
of the unit.
Retain this Owner's Manual in a safe
place for future reference.
WARNING
TO REDUCE THE RISK OF FIRE OR
ELECTRIC SHOCK, DO NOT EXPOSE
THIS UNIT TO RAIN OR MOISTURE.
Random-Sequence Play
Automatic Spacing Capability
Automatic Tape-Programming
Remote Control Capability
RISK OF ELECTRIC SHOCK
CAUTION: TO REDUCE THE RISK OF
ELECTRIC SHOCK, DO NOT REMOVE
COVER (OR BACK), NO USER-SERVICEABLE
PARTS INSIDE, REFER SERVICING TO
QUALIFIED SERVICE PERSONNEL.
• Explanation of Graphical Symbols
CAUTION
DO NOT OPEN
The lightning flash with arrowhead
symbol, within an equilateral triangle,
is intended to alert you to the
presence of uninsulated "dangerous
voltage" within the product's
enclosure that may be of sufficient
magnitude to constitute a risk of
electric shock to persons.
The exclamation point within an
equilateral triangle is intended to alert
you to the presence of important
operating and maintenance
(servicing) instructions in the
literature accompanying the
appliance.
Advertisement
Table of Contents

Related Manuals for Yamaha 480


Summary of Contents for Yamaha 480
- Page 1 CD Synchronized Recording with a Compatible YAMAHA Tape Disk Thank you for selecting this YAMAHA Compact Disc Player. OWNER’S MANUAL CONTENTS Safety Instructions... 2 Connections ... 4 Identification of Components... 6 Loading the Disc/Disc Play... 8 Random-Sequence Play ... 12 Repeat Play...
-
Page 2: Safety Instructions
– and, most importantly, without affecting your sensitive hearing. Since hearing damage from loud sounds is often undetectable until it is too late, YAMAHA and the Electronic Industries Association’s Consumer Electronics Group recommend you to avoid prolonged IMPORTANT! Please record the serial number of this unit in the space below. - Page 3 This product, when installed as indicated in the instructions contained in this manual, meets FCC requirements. Modifications not expressly approved by Yamaha may void your authority, granted by the FCC, to use the product. 2. IMPORTANT : When connecting this product to accessories and/or another product use only high quality shielded cables.
-
Page 4: Connections
• Before making any connections, switch OFF the power to the unit and the amplifier or other component. • Connections should be made to the correct input terminals of the amplifier or other component. CDX-880 LINE OUT VARIABLE FIXED Connection cord (included) CDX-580 LINE OUT... - Page 5 CDX-480 LINE OUT Connection cord (included) Choose one of the ways listed below to connect this unit to your amplifier. When the LINE OUT (analog) terminals of this unit are used ( • Be sure that the left (“L”) and right (“R”) LINE OUT terminals are connected to the corresponding (left and right) terminals of the amplifier or other component.
-
Page 6: Identification Of Components
POWER AUTO DISPLAY OFF Remote control sensor (p. 20) CDX-580, CDX-480 * The SKIP/SEARCH button on the main unit has both the functions of the SKIP buttons and the SEARCH buttons on the remote control transmitter. POWER switch (p. 8) AUTO DISPLAY OFF indicator (p. -
Page 7: Remote Control Transmitter
) indicates the page number on which the control part is best described. REMOTE CONTROL TRANSMITTER TAPE button (p. 15) OPEN/CLOSE button (p. 8) PROG button (p. 13) SPACE button (p. 10) REPEAT button (p. 10) SKIP buttons (p. 9) SEARCH buttons (p. -
Page 8: Basic Operation
Shows the track number selected or being played. Shows the time displays. (Refer to “Selecting time displays” on page 10.) CDX-580 and CDX-480 only Shows the level of signals output into an amplifier or the headphone level adjusted by using the OUTPUT LEVEL buttons. -
Page 9: Direct Play
If a button is pressed and held, the track number is continuously changed to higher numbers (or lower numbers). • CDX-580 and CDX-480 only When using the SKIP buttons on the remote control transmitter: If a button is pressed and held, the track number is continuously changed to higher numbers (or lower numbers). -
Page 10: To Advance Or Reverse Play Rapidly (Manual Search)
(Press and hold.) paused, though no sound will be heard. • CDX-580 and CDX-480 only When using the SKIP/SEARCH button on the front panel: Be careful not to release the button just after it is pressed, otherwise the play is skipped to the beginning of the next track or returned to the beginning of the track. -
Page 11: Changing Brightness Of The Display
* While the display illumination is off, the AUTO DISPLAY OFF indicator on the front panel is illuminated. CDX-480 If desired, you can change brightness of the display in three degrees by pressing the DIMMER button. When you listen with headphones Connect the headphones to the PHONES jack and adjust the volume by using the OUTPUT LEVEL buttons. -
Page 12: Random-Sequence Play
RANDOM-SEQUENCE PLAY You can have the unit play the tracks on a disc in a random sequence selected by the unit’s microcomputer. To perform random-sequence play To cancel random-sequence play RANDOM You can play any desired track or the entire disc repeatedly by pressing the REPEAT button. The repeat play mode will change whenever you press the REPEAT button. -
Page 13: Program Play
You can enjoy listening to your favorite tracks in any desired order using programmed play. As many as 25 tracks can be programmed. Stop the unit. STOP PROG Display information during program play PROGRAM TOTAL PROGRAM TOTAL 1 2 3 4 5 Shows the program number for the track to be set next. -
Page 14: Index Search
To stop program play Press the STOP button. The first programmed track number will be displayed. To resume play, press the PLAY button. Play will begin from the beginning of the program. To cancel a programmed setting There are several methods, as described below. •... -
Page 15: Track Programming For Recording To Tape
TRACK PROGRAMMING FOR RECORDING TO TAPE This convenient feature can be used to program tracks on a disc for recording to tape. By only memorizing the tape’s total possible recording time, the unit will automatically program tracks or help you to program tracks so they will fit onto the tape with the least amount of unrecorded space remaining at each end of the tape. -
Page 16: Manual Tape-Programming
Manual tape-programming This is for recording desired tracks in any desired order onto a tape. Follow steps 1 – 4 on page 15. PROG Select the track numbers (to be recorded on side A) in the desired order. * Programmed track numbers are illuminated on the display. -
Page 17: Random Sequential Tape-Programming
Random sequential tape-programming The unit will automatically program tracks in random sequential order for recording to tape. Follow steps 1 – 4 on page 15. RANDOM * The unit will automatically program tracks for side A and side B separately considering the tape’s total time. Begin recording on the tape deck and press the PLAY button on this unit at the same time. - Page 18 Automatic searching of the peak level on a disc This convenient feature automatically searches for the part on a disc where the source level peaks, and next plays the part repeatedly. For recording to tape, this feature is very helpful to adjust the recording level on the tape deck. Stop the unit.
-
Page 19: Cd Synchronized Recording
This unit can make a tape deck’s recording synchronized with CD play automatically. With this function, you can record a CD on tape very easily and more precisely. This recording method needs a YAMAHA tape deck compatible with this function. (Refer to the tape deck’s operation manual to know whether it is compatible or not.) * This unit and the tape deck must be placed close to each other so that both of them can receive the signals from this unit’s... -
Page 20: Notes About The Remote Control Transmitter
NOTES ABOUT THE REMOTE CONTROL TRANSMITTER Battery installation Battery replacement If you find that the remote control transmitter must be used closer to the main unit, the batteries are weak. Replace both batteries with new ones. Notes • Use only AA, R6, UM-3 batteries for replacement. •... -
Page 21: Troubleshooting
If the unit fails to operate normally, check the following points to determine whether the fault can be corrected by the simple measures suggested. If it cannot be corrected, or if the fault is not listed in the SYMPTOM column, disconnect the power cord and contact your authorized YAMAHA dealer or service center for help. SYMPTOM The player does not switch ON when the POWER switch is pressed. - Page 22 YAMAHA ELECTRONIQUE FRANCE S.A. RUE AMBROISE CROIZAT BP70 CROISSY-BEAUBOURG 77312 MARNE-LA-VALLEE CEDEX02, FRANCE YAMAHA ELECTRONICS (UK) LTD. YAMAHA HOUSE, 200 RICKMANSWORTH ROAD WATFORD, HERTS WD1 7JS, ENGLAND YAMAHA SCANDINAVIA A.B. J A WETTERGRENS GATA 1, BOX 30053, 400 43 VÄSTRA FRÖLUNDA, SWEDEN VR 10040...