Table of Contents
Advertisement
Available languages
Available languages
IMPORTANT:
Read Before Using
11263EVS
Call Toll Free
for Consumer Information
& Service Locations
1-877-BOSCH99 (1-877-267-2499) www.boschtools.com
For English
See page 2
IMPORTANT :
Lire avant usage
Operating/Safety Instructions
Consignes de fonctionnement/sécurité
Instrucciones de funcionamiento y seguridad
Pour renseignement des
consommateurs et centres
de service, appelez au
Parlez-vous français?
numéro gratuit :
Voir page 10
IMPORTANTE:
Leer antes de usar
Llame gratis para
obtener información
para el consumidor y
ubicaciones de servicio
¿Habla español?
Ver página 18
Advertisement
Table of Contents

Related Manuals for Bosch 11263EVS


Summary of Contents for Bosch 11263EVS
- Page 1 IMPORTANT: Read Before Using Operating/Safety Instructions Consignes de fonctionnement/sécurité Instrucciones de funcionamiento y seguridad 11263EVS Call Toll Free for Consumer Information & Service Locations 1-877-BOSCH99 (1-877-267-2499) www.boschtools.com For English See page 2 IMPORTANT : Lire avant usage Pour renseignement des...
-
Page 2: General Safety Rules
Read all instructions. Failure to follow all instructions listed below may WARNING result in electric shock, fire and/or serious injury. The term “power tool” in all of the warnings listed below refers to your mains-operated (corded) power tool or battery- operated (cordless) power tool. - Page 3 Contact with a "live" wire will make exposed metal parts of the tool "live" and shock the operator. Do not drill, fasten or break into existing walls or other blind areas where electrical wiring may exist. If this situation is unavoidable, disconnect all fuses or circuit breakers feeding this worksite.
- Page 4 Accessories may be hot after prolonged use. Do not run the tool while carrying it at your side. The spinning drill bit may become entangled with clothing and injury may result. grinding, drilling, and other construction...
-
Page 5: Symbols
Current Frequency (cycles per second) Power Weight Time Time Size of drill bits, grinding wheels, etc. Rotational speed, at no load orbits etc. per minute Zero speed, zero torque... Speed, torque or position settings. Higher number means greater speed Speed is increasing from 0 setting... -
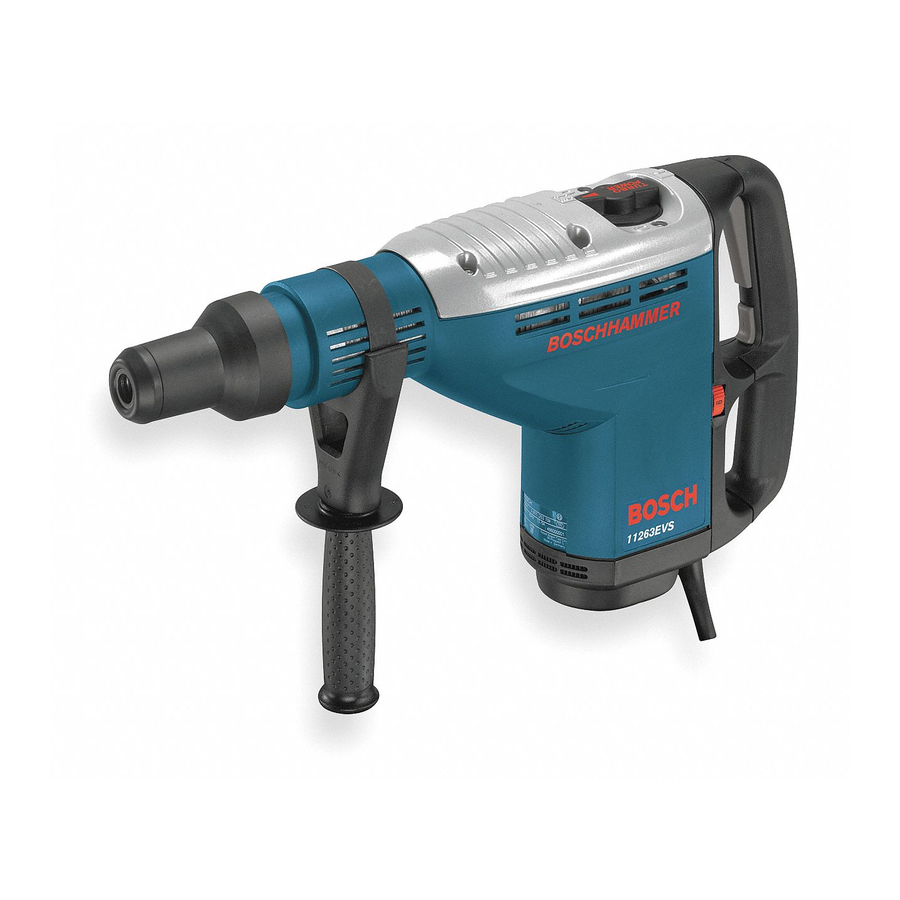
Page 6: Functional Description And Specifications
Thin wall core bits NOTE: For tool specifications refer to the nameplate on your tool. Rotary Hammer FIG. 1 SELECTOR LEVER VENTILATION OPENINGS HAND GRIP TRIGGER SWITCH TRIGGER RELEASE SWITCH VARIABLE SPEED DIAL SERVICE REMINDER LIGHT 11263EVS SDS Max 1-3/4” 5”... -
Page 7: Operating Instructions
DUAL FUNCTION TRIGGER SWITCH To turn the tool “ON” in the Drilling/ Hammering mode, squeeze and hold the trigger switch. To turn the tool “OFF”, release the trigger switch, which is spring loaded and will return to the “OFF” position automatically (Fig. - Page 8 To remove an accessory, pull and hold locking sleeve backward and pull bit forward (Fig. 2). All accessories should be wiped clean after removing. FIG. 2 DUST SHIELD LOCKING SLEEVE DUST SHIELD LOCKING SLEEVE SELECTOR LEVER The selector lever allows the tool to be set for various applications as listed in the following chart, (Fig.
-
Page 9: Maintenance
Service Preventive maintenance WARNING performed by unauth- orized personnel may result in misplacing of internal wires and components which could cause serious recommend that all tool service be performed by a Bosch Factory Service Center or Autho- rized Bosch Service Station. SERVICE REMINDER LIGHT When the service reminder light lights up or blinks, this will indicate that the cut-out... -
Page 10: Consignes Générales De Sécurité
Veuillez lire et comprendre toutes les consignes. Si on n'observe pas toutes les AVERTISSEMENT consignes décrites ci-dessous, il y a risque de choc électrique, d’incendie et/ou de blessures corporelles graves. Dans toutes les mises en garde ci-dessous, le terme « outil électroportatif » se rapporte à... - Page 11 Utilisation et entretien des outils électroportatifs Ne forcez pas sur l’outil électroportatif. Utilisez l’outil électroportatif qui convient à la tâche à effectuer. L’outil qui convient à la tâche fait un meilleur travail et est plus sûr à la vitesse pour lequel il a été conçu. Ne vous servez pas de l’outil électroportatif si son interrupteur ne parvient pas à...
- Page 12 Portez toujours des lunettes à coques latérales ou des lunettes de protection en utilisant cet outil. Utilisez un respirateur ou un masque antipoussières pour les applications qui produisent de la poussière. Les lunettes de sécurité ou la protection oculaire permettent de dévier les fragments de matériau qui pourraient être projetés vers votre visage et vos yeux.
- Page 13 IMPORTANT : Certains des symboles suivants peuvent être utilisés sur votre outil. Veuillez les étudier et apprendre leur signification. Une interprétation appropriée de ces symboles vous permettra d'utiliser l'outil de façon plus efficace et plus sûre. Symbole Volts Ampères Hertz Watt Kilogrammes Minutes...
-
Page 14: Description Fonctionnelle Et Spécifications
REMARQUE : Pour spécifications de l'outil, reportez-vous à la plaque signalétique de votre outil. Marteau rotatif FIG. 1 LEVIER SÉLECTEUR PRISES D’AIR POIGNÉE POIGNÉE (PRISE) -14- INDICATEUR D’ENTRETIEN PRISES D’AIR 11263EVS SDS Maxi. 45 mm 127 mm INTERRUPTEUR À GÂCHETTE INTERRUPTEUR DÉGAGEMENT DE GÂCHETTE VARIATEUR DE VITESSE... -
Page 15: Consignes De Fonctionnement
INTERRUPTEUR À GÂCHETTE À DOUBLE FONCTION Pour mettre l'outil en marche en mode de perçage/percussion, appuyez sur la gâchette et tenez- la. Pour mettre l'outil à l'arrêt, relâchez la gâchette qui est à ressort et reviendra automatiquement à la position d'arrêt (Fig 1). Votre outil est également équipé... - Page 16 Pour retirer un accessoire, tirez et tenez le manchon de verrouillage vers l’arrière, et tirez le foret vers l’avant (Fig. 2). Essuyez tous les accessoires pour les nettoyer après les avoir enlevés. FIG. 2 PARE-POUSSIÈRE MANCHON DE VERROUILLAGE PARE-POUSSIÈRE MANCHON DE VERROUILLAGE LEVIER SÉLECTEUR Le levier sélecteur permet de régler l’outil en fonction de diverses applications tel qu’il est indiqué...
-
Page 17: Entretien
Service Tout entretien préventif AVERTISSEMENT effectué personnels non autorisés peut résulter en mauvais placement de fils internes ou de pièces, ce qui peut présenter un danger grave. Nous vous conseillons de faire faire tout l’entretien par un centre de service d’usine Bosch ou une station service agréée Bosch. -
Page 18: Normas Generales De Seguridad
Lea todas las instrucciones. Si no se siguen todas las instrucciones que aparecen a ADVERTENCIA continuación, el resultado podría ser sacudidas eléctricas, incendio y/o lesiones graves. La expresión "herramienta mecánica" en todas las advertencias que aparecen a continuación se refiere a su herramienta mecánica alimentada por la red eléctrica (herramienta alámbrica) o su herramienta mecánica alimentada por baterías (herramienta inalámbrica). - Page 19 Uso y cuidado de las herramientas mecánicas No fuerce la herramienta mecánica. Use la herramienta mecánica correcta para la aplicación que desee realizar. La herramienta mecánica correcta hará el trabajo mejor y con más seguridad a la capacidad nominal para la que fue diseñada.
- Page 20 máscara antipolvo o un respirador para aplicaciones que generan polvo. Las gafas de seguridad o la protección de los ojos ayudarán a desviar los fragmentos del material que puedan salir despedidos hacia la cara y los ojos. El polvo generado o los gases liberados por los materiales que esté...
- Page 21 IMPORTANTE: Es posible que algunos de los símbolos siguientes se usen en su herramienta. Por favor, estúdielos y aprenda su significado. La interpretación adecuada de estos símbolos le permitirá utilizar la herramienta mejor y con más seguridad. Símbolo Nombre Volt Ampere Hertz Watt...
-
Page 22: Descripción Funcional Y Especificaciones
NOTA: Para obtener las especificaciones de la herramienta, consulte la placa del fabricante colocada en la herramienta. Martillo giratorio FIG. 1 PALANCA SELECTORA ABERTURAS DE VENTILACIÓN EMPUÑADURA -22- INTERRUPTOR GATILLO INTERRUPTOR DE LIBERACION DEL GATILLO DIAL DE VELOCIDAD VARIABLE RECORDATORIA DE SERVICIO 11263EVS SDS Max 45 mm 127 mm... -
Page 23: Instrucciones De Funcionamiento
INTERRUPTOR GATILLO DE DOBLE FUNCION Para encender la herramienta en el modo de taladrado/percusión, apriete el interruptor gatillo y manténgalo oprimido. Para apagar la herramienta, suelte el interruptor gatillo, que está accionado por resorte, y volverá a la posición de apagado automáticamente (Fig. - Page 24 Para quitar un accesorio, tire hacia atrás del mango de fijación, sujételo y tire de la broca hacia adelante (Fig. 2). Todos los accesorios deben limpiarse después de quitarlos. FIG. 2 PROTECTOR ANTIPOLVO MANGUITO DE FIJACIÓN PROTECTOR ANTIPOLVO MANGUITO DE FIJACIÓN PALANCA SELECTORA La palanca selectora permite ajustar la herramienta para las distintas aplicaciones según se muestra en el...
-
Page 25: Mantenimiento
Servicio El mantenimiento preventivo ADVERTENCIA realizado por personal no autorizado pude dar lugar a la colocación incorrecta de cables y componentes internos que podría constituir un peligro serio. Recomendamos que todo el servicio de las herramientas sea realizado por un Centro de servicio de fábrica Bosch o por una Estación de servicio Bosch autorizada. - Page 26 Notes: -26-...
- Page 27 Remarques : Notas: -27-...
- Page 28 BOSCH Factory Service Center or Authorized Service Station. For Authorized BOSCH Power Tool Service Stations, please refer to your phone directory. THIS LIMITED WARRANTY DOES NOT APPLY TO ACCESSORY ITEMS SUCH AS CIRCULAR SAW BLADES, DRILL BITS, ROUTER BITS, JIGSAW BLADES, SANDING BELTS, GRINDING WHEELS AND OTHER RELATED ITEMS.