Table of Contents
Advertisement
Advertisement
Table of Contents

Related Manuals for Whirlpool GGE350LWB


Summary of Contents for Whirlpool GGE350LWB
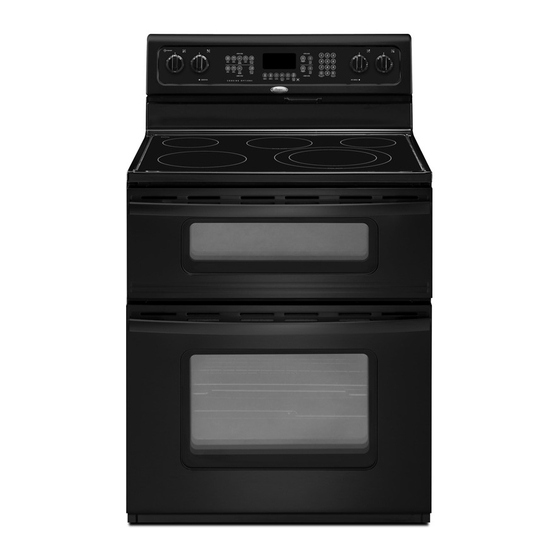
- Page 1 ® ELECTRIC DOUBLE OVEN RANGE Use & Care Guide For questions about features, operation/performance, parts, accessories or service, call: 1-800-253-1301. or visit our website at... www.whirlpool.com Table of Contents...2 Models GGE350 W10253434A...
-
Page 2: Table Of Contents
RANGE SAFETY ...3 The Anti-Tip Bracket ...4 COOKTOP USE ...6 Cooktop Controls...6 Dual Size Element ...7 Warm Zone...7 Ceramic Glass ...7 Home Canning ...8 Cookware ...8 ELECTRONIC OVEN CONTROLS...9 Display...9 Cancel ...9 Clock ...9 Range Lights ...9 Tones...9 Fahrenheit and Celsius...10 Timer...10 Oven Door and Control Lockout...10 12-Hour Shutoff...10... -
Page 3: Range Safety
Your safety and the safety of others are very important. We have provided many important safety messages in this manual and on your appliance. Always read and obey all safety messages. This is the safety alert symbol. This symbol alerts you to potential hazards that can kill or hurt you and others. All safety messages will follow the safety alert symbol and either the word “DANGER”... -
Page 4: The Anti-Tip Bracket
The range will not tip during normal use. However, the range can tip if you apply too much force or weight to the open door without the anti-tip bracket fastened down properly. A child or adult can tip the range and be killed. Connect anti-tip bracket to rear range foot. -
Page 5: Important Safety Instructions
IMPORTANT SAFETY INSTRUCTIONS WARNING: To reduce the risk of fire, electrical shock, injury to persons, or damage when using the range, follow basic precautions, including the following: WARNING: TO REDUCE THE RISK OF TIPPING OF THE RANGE, THE RANGE MUST BE SECURED BY PROPERLY INSTALLED ANTI-TIP DEVICES. -
Page 6: Cooktop Use
A. Left front control knob B. Surface cooking area locator C. Left rear control knob D. Upper oven settings E. Electronic oven control F. Upper oven cancel G. Upper oven light H. Number pads WARNING Fire Hazard Turn off all controls when done cooking. Failure to do so can result in death or fire. -
Page 7: Dual Size Element
Dual Size Element A. Single size B. Dual size The dual size elements offer flexibility to cook using different sizes of cookware. The single element can be used in the same way as a regular element. The dual element combines both the inner and outer elements and is recommended for larger cookware. -
Page 8: Home Canning
Use cookware about the same size as the surface cooking area. Cookware should not extend more than ½" (1.3 cm) outside the area. A. Surface cooking area B. Cookware/canner C. ½" (1.3 cm) maximum overhang Use flat-bottomed cookware for best heat conduction and energy efficiency. -
Page 9: Electronic Oven Controls
ELECTRONIC OVEN CONTROLS A. Upper oven settings B. Oven display C. Upper oven cancel D. Upper oven light E. Number pads Display When power is first supplied to the appliance, a flashing time will appear on the display. See “Clock” section to set time of day. If a flashing time appears at any other time, a power failure has occurred. -
Page 10: Fahrenheit And Celsius
Adjusting Sound Level The oven is factory set for medium (MEd) but can be changed to low (LO) or high (HI). 1. Press and hold DELAY and UPPER CANCEL for 3 seconds. A beep will sound. “bEEP” and the current sound level will be displayed. -
Page 11: Oven Use
To Adjust Oven Temperature Calibration: 1. Press the appropriate BAKE pad. 2. Enter 550 using the number pads. 3. Press and hold BAKE for several seconds or until 00° appears in the display. Odors and smoke are normal when the oven is used the first few times, or when it is heavily soiled. -
Page 12: Bakeware
Bakeware The bakeware material affects cooking results. Follow manufacturer’s recommendations and use the bakeware size recommended in the recipe. Use the following chart as a guide. BAKEWARE/ RECOMMENDATIONS RESULTS Light colored Use temperature and time aluminum recommended in recipe. Light golden crusts Even browning Dark aluminum and May need to reduce baking... -
Page 13: Broiling
Broiling uses direct radiant heat to cook food. The lower the temperature, the slower the cooking. Thicker cuts and unevenly shaped pieces of meat, fish and poultry may cook better at lower broiling temperatures. For best results, use a broiler pan and grid (provided on some models). -
Page 14: Toasting - Upper Oven Only
Toasting - Upper Oven Only For toasting bread and products that are toasted in a toaster or toaster oven. Lower oven cannot be operated while upper oven is toasting. If the lower oven is operating when the Toast pad is pressed, a beep will sound. -
Page 15: Automatic Shutoff/Sabbath Mode
To Set Cook & Hold: 1. Press COOK & HOLD once for the upper oven and twice for the lower oven. “HOLD,” “00:00,” and either “UPPER” or “LOWER” will flash in the display. 2. Press the appropriate number pads to select an amount of time to cook. -
Page 16: Favorites
WARNING Food Poisoning Hazard Do not let food sit in oven more than one hour before or after cooking. Doing so can result in food poisoning or sickness. The Favorites feature allows you to save the time and temperature from a Cook & Hold Bake function. To set a Favorites cycle, a Cook &... - Page 17 How the Cycle Works IMPORTANT: The heating and cooling of porcelain on steel in the oven may result in discoloring, loss of gloss, hairline cracks and popping sounds. Before self-cleaning, make sure the door is completely closed or the door will not lock and the self-cleaning cycle will not begin. Once the oven has completely cooled, remove ash with a damp cloth.
-
Page 18: General Cleaning
IMPORTANT: Before cleaning, make sure all controls are off and the oven and cooktop are cool. Always follow label instructions on cleaning products. Soap, water and a soft cloth or sponge are suggested first unless otherwise noted. EXTERIOR PORCELAIN ENAMEL SURFACES Food spills containing acids, such as vinegar and tomato, should be cleaned as soon as the entire range is cool. -
Page 19: Oven Lights
OVEN DOOR EXTERIOR Cleaning Method: Glass cleaner and paper towels or nonabrasive plastic scrubbing pad: Apply glass cleaner to soft cloth or sponge, not directly on panel. All-Purpose Appliance Cleaner Part Number 31682 (not included): See “Assistance or Service” section to order. OVEN CAVITY Do not use oven cleaners. -
Page 20: Troubleshooting
Try the solutions suggested here first in order to avoid the cost of an unnecessary service call. Nothing will operate Has a household fuse blown, or has a circuit breaker tripped? Replace the fuse or reset the circuit. Cooktop will not operate Is the control knob set correctly? Push in knob before turning to a setting. -
Page 21: Assistance Or Service
ASSISTANCE OR SERVICE Accessories U.S.A. To order accessories, call the Whirlpool Customer eXperience Center toll free at 1-800-442-9991 and follow the menu prompts. Or visit our website at www.whirlpool.com and click on “Parts & Accessories.” ® replacement parts will fit ®... -
Page 22: Warranty
Whirlpool Corporation or Whirlpool Canada LP (hereafter “Whirlpool”) will pay for Factory Specified Parts and repair labor to correct defects in materials or workmanship. Service must be provided by a Whirlpool designated service company. This limited warranty is valid only in the United States or Canada and applies only when the major appliance is used in the country in which it was purchased. - Page 23 Notes...
- Page 24 W10253434A © 2009 Whirlpool Corporation. 5/09 All rights reserved. ® Registered Trademark/TM Trademark of Whirlpool, U.S.A. Printed in U.S.A.