Table of Contents

Related Manuals for Vivitar DVR-410


Summary of Contents for Vivitar DVR-410
- Page 1 DVR 410 Digital Video Camera User’s Manual © 2009 Sakar International, Inc. All rights reserved. Windows and the Windows logo are registered trademarks of Microsoft Corporation. All other trademarks are the property of their respective companies.
-
Page 2: Table Of Contents
Camera Mode ... 14 Playback Mode ... 18 TV out function ... 20 Install the Vivitar Experience Image Manager Software ... 22 Connect your Camera to the Computer ... 23 Get photos and videos from your camera to your computer ... 23 Get started! ... -
Page 3: Introduction
SD memory card up to 16GB is needed in order to capture videos and photos Vivitar Experience Image Manager software for uploading and managing photos and videos to or from the most popular photo sharing and social network websites... -
Page 4: Camera Maintenance And Care
When not using the camera for extended periods of time, remove the batteries from the camera. What your Camera Includes Digital Video Camera TV cable Strap Built-in USB connector Vivitar Experience Image Manager software Installation CD User`s Manual... -
Page 5: Computer System Requirement For Windows Xp
Computer System Requirement for Windows XP To be able to download photos and videos to your PC, you will need the following minimum configuration: Pentium 4 processor or above with Windows XP service pack 2 512 MB RAM, with 100MB of free disk space ... -
Page 6: Computer System Requirements For Macintosh
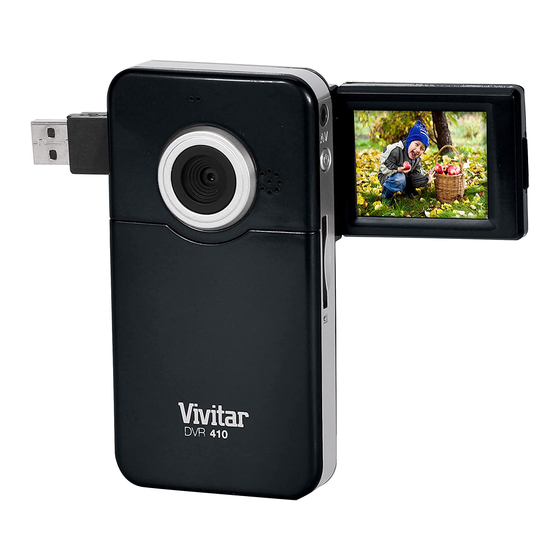
Computer System Requirements for Macintosh Macintosh with Intel processor running Mac OS X v10.4.6 or later 256 MB RAM, 100 MB free disk space Display: 1024 x 768 or higher-resolution monitor QuickTime 6 or higher Internet connection A Quick Look at Your Digital Video Camera... -
Page 8: Prepare Your Digital Video Camera For Use
Prepare Your Digital Video Camera for Use Battery Installation Your Digital Video Camera requires 3 AAA batteries (alkaline batteries are recommended). Insert the batteries into your Digital Video Camera as directed below: Slide the battery cover on the front of the camera in a downward direction to open the cover. Insert the batteries with the correct polarity (positive pole/negative pole) as appears in the battery compartment. -
Page 9: Insert Sd/Mmc Memory Card
Insert SD/MMC Memory Card Important: A compatible SD/MMC memory card up to 16GB needs to be inserted into the SD card slot on the side of the camera in order to capture videos and photos. After you insert the memory card, all the videos and photos you shoot will automatically be stored on the memory card. -
Page 10: Starting Your Digital Video Camera
Starting Your Digital Video Camera Power on Press the Power button on the side of the camera to power on the camera. The LCD will light up and the Video mode will appear by default indicating that you camera is ready to use to capture videos. - Page 11 Function Buttons on the camera Button Function Power Power on/off camera Menu Open menus Camera mode, Video mode and Playback mode OK/Shutter Take Photo/ Start or stop to record video clips. Play and pause videos in Playback mode Button Function Up and Down button photos/videos when in playback mode.
-
Page 12: Video Mode
Video Mode Shooting Videos Turn on your Digital Video Camera. The first mode to appear is the Video mode. The amount of recording time available for the resolution selected will appear on the LCD screen. Compose your object with the LCD screen. Press the OK/Shutter button to start shooting your video. - Page 13 Resolution settings Your Digital Video Camera supports 2 video resolutions – VGA and QVGA. Press the Menu button in the Video mode. Press the Up or Down button to select the RESOLUTION option Press the OK/Shutter button to open the submenu options. VGA (640x480), QVGA (320x240) Press the Up or Down button to select the option you wish to choose.
- Page 14 Speaker setting You can choose to turn the camera`s speaker on or off. Press the Menu button in the Video mode. Press the Up or Down button to select the SPEAKER option. Press the OK/Shutter button to open the submenu options. ON, OFF Press the Up or Down button to select the option you wish to choose.
-
Page 15: Camera Mode
Camera Mode Taking Photos: Turn on your digital video camera. Press the Mode button to select and enter the Camera mode. The camera icon will appear on the LCD. The amount of photos that can be captured with the available memory and as per the selected resolution will appear on the bottom right corner of the LCD screen. - Page 16 Capture settings Your Digital Video Camera has 3 photo capture options. Select the SINGLE option to capture single shots, CONT option to take 3 continuous shots, and SELF option to set the camera to the 10 second self-timer option to include yourself in the photo. In all instances, clicking the Shutter button will capture the photo(s).
- Page 17 Press the Up or Down button to select the RESOLUTION option Press the OK/Shutter button to open the submenu options. 1.3M, VGA Press the Up or Down button to select the option you wish to choose. Press the OK button to confirm and save the resolution. Note: Photos taken in 1.3M (1280 x 1024) are of a better quality than VGA (640 x 480) photos and therefore take up more of the memory on the SD memory card.
- Page 18 Speaker setting You can choose to turn the camera`s speaker on or off Press the Menu button in the Camera mode. Press the Up or Down button to select the SPEAKER option. Press the OK/Shutter button to open the submenu options. ON, OFF Press the Up or Down button to select the option you wish to choose.
-
Page 19: Playback Mode
Playback Mode In this mode you can view, playback, delete and/or format the images that you captured with your camera with the SD memory card inserted. Press the Mode button to set the camera to the Playback mode. The last picture taken or video captured will appear on the LCD screen. In this mode, you can view all the photos and play the video files taken with the camera and saved to the memory card. - Page 20 Playback Videos If the icon and the letters AVI appear together on the top left of the screen, this means you are viewing the image of a video file. Press on the OK/Shutter button to playback the current video file with sound. Press the OK/Shutter button again to pause the video.
-
Page 21: Tv Out Function
A Confirmation screen will appear with ‟Yes‟ or „No‟ options. Press the Up/Down button to select the option to wish to perform. Select „Yes‟, to either delete the photo(s) or format the card. Select „No‟ to cancel without deleting. Press the OK/Shutter button to execute the command. Note: The Format option will delete all data on your SD memory card. - Page 22 Please follow the below steps: Power on your Digital Video Camera. Turn on your TV. Ensure that your TV is set to NTSC mode. Connect your Digital Video Camera to the TV with the special TV cable supplied. Connect the White cable to the Audio slot and the Yellow cable to the Video slot. The LCD screen of your Digital Video Camera will now turn off and the image will now appear on the TV screen.
-
Page 23: Install The Vivitar Experience Image Manager Software
On PC and Macintosh: Click the “I accept the terms of this license agreement” and then click “Next” to continue. On PC only: Let the “Vivitar Experience Image Manager” installer create the folder to where the program will be installed, and then click “Install”. -
Page 24: Connect Your Camera To The Computer
Connect your Camera to the Computer Push the built-in USB connector out to connect your camera to the USB port of your computer. Turn the camera on. The first time you connect the device to the computer you will have to wait a few seconds until the computer recognizes the device. - Page 25 The “Get media from device” window opens. You can select to download photos, videos or both. Select your camera (removable disk) from the device window. If your camera is the only USB device connected then it will be selected automatically. Select a location on the computer where to place the new photo and video files.
-
Page 26: Get Started
Edit images using automatic and manual tools. Use automatic “Geotagging” with built in Google Maps. For more details on how to use the Vivitar Experience Image Manager open the Help file or click the “Take the Tour” button on the application`s Home page. -
Page 27: Transfer Media From My Camera To My Computer Manually (Using Windows)
Transfer media from my camera to my computer manually (Using Windows) Use the USB built-in connector on your camera to connect your camera to the USB port on your computer. “MSDC” will appear on the LCD, indicating that your camera is in Mass Storage Mode. A window appears with a list of options, select Open folder to view files and click OK. -
Page 28: Sakar Warranty Card
the Finder‟s Edit menu. Then select a folder and choose Paste from the Edit menu. We recommend that you copy the images into the Pictures folder and the videos into the Movies folder. Do not disconnect the cable during transfer. Doing so will cancel the transfer of any files on their way to your computer. -
Page 29: Technical Support
Edison, NJ 08817 Technical Support For technical support issues please visit our website at www.vivitar.com. You can find manuals, software and FAQ‟s at the website. Can‟t find what you are looking for? E-mail us at technical support team members will answer your questions. For phone support in the US please call 1-800-592-9541, in the UK call 0800 917 4831. -
Page 30: Technical Specifications
Technical Specifications Product type Digital Video resolution Digital Photo resolution Image Sensor LCD Display Color Shutter Speed Internal memory External memory Lens Frequency Self Timer Digital Zoom White Balance / Exposure Speaker File Format TV out Digital Video Camera 640*480 pixels ( 30fps) / 320*240 pixels( 30fps ) 1280*1024 pixels / 640*480 pixels CMOS Sensor 1.8”... -
Page 31: Troubleshooting
Power saving Battery Transmission interface Working temperature Computer system Troubleshooting The Camera does not Power on. 1. The Batteries are inserted in the wrong direction. 2. The Batteries have insufficient power to power on. The camera does not take pictures. 1. - Page 32 Image is blurry or out of focus. 1. The camera was moving when the image was captured. Images were deleted by mistake. Can I retrieve them 1. Images were deleted by mistake and have been removed from where they were located on the computer.